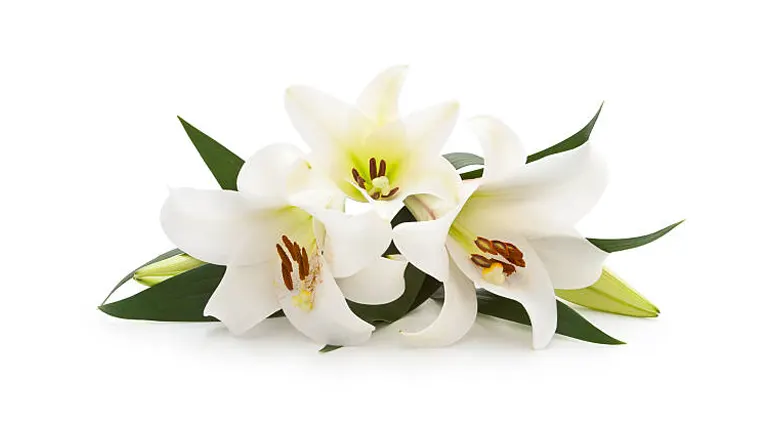
How to Grow and Care for an Easter Lily: Overcome Gardening Challenges
- May 29, 2024
- 0 comment
Learn how to grow and care for an Easter Lily. Overcome gardening challenges with expert tips for vibrant, lasting blooms. Unleash the full potential of your garden with the captivating charm of Easter Lilies! Our comprehensive guide is designed to tackle the common hurdles faced in gardening, ensuring that your lilies not only survive but thrive.
Prepare to elevate your landscape as we guide you from the basics to blossoming success, helping your Easter Lily shine with exceptional beauty.
Table of Contents
- Understanding the Easter Lily
- Selecting the Right Easter Lily
- Planting Your Easter Lily
- Essential Care Techniques
- Overcoming Common Gardening Challenges
- Encouraging Blooming
- Post-Bloom Care
- Preparing for the Next Growing Season
- Advanced Tips and Tricks
- Conclusion
- FAQs
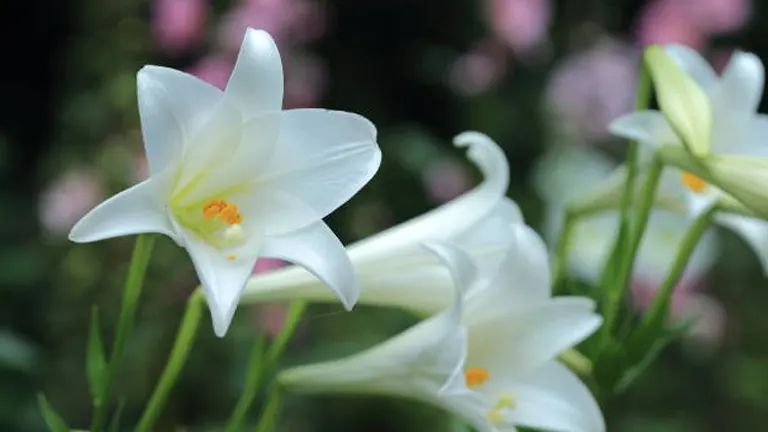
Understanding the Easter Lily
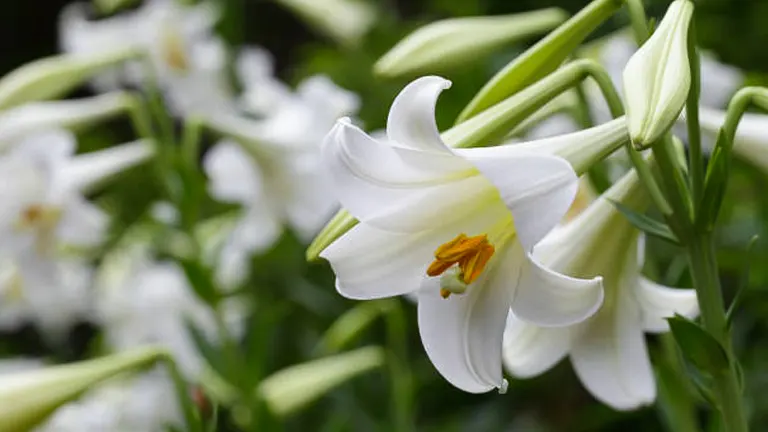
The Easter Lily (Lilium longiflorum) is native to the Ryukyu Islands of Japan and has been extensively cultivated in Taiwan and other parts of the world. It thrives in USDA Hardiness Zones 4 through 9, making it adaptable to a variety of moderate climates. This perennial bulb is renowned for its ability to grow up to three feet in height and produce multiple trumpet-shaped, intensely fragrant white flowers each season.
Detailed Characteristics:
- Flower Size: Typically 5-6 inches long
- Leaves: Dense, dark green, lance-shaped, around 5-8 inches long
- Stem: Sturdy, straight, capable of supporting multiple blooms
Growth Cycle:
The growth cycle of the Easter Lily is intricate and deeply influenced by environmental conditions. After blooming, usually around June, the plant enters a crucial dormancy period. During this time, the bulb recharges by metabolizing nutrients stored from the foliage. Proper post-bloom care is essential to ensure the bulb’s viability for the next growing season.
- Dormancy Period: Approximately 6-8 weeks post-bloom
- Energy Storage: Bulbs store carbohydrates and proteins which are critical for the next season’s growth.
Cultivation Techniques:
Commercial cultivation of Easter Lilies often involves precise control of temperature and light to manipulate blooming times, especially for the Easter market. Growers may use temperature treatments like vernalization (chilling of bulbs at 40°F for 6-8 weeks) to synchronize and ensure blooms for specific holiday seasons.
Table of Growth Parameters and Cultivation Techniques:
| Parameter | Description | Optimal Conditions |
|---|---|---|
| Soil pH | Preferably slightly acidic | pH 5.5 – 6.5 |
| Light Requirements | Requires indirect sunlight or partial shade | 6-8 hours of filtered sunlight per day |
| Watering Needs | Moderate, consistent moisture, well-drained soil | 1 inch per week, more in dry conditions |
| Fertilization | Balanced, slow-release during active growth | 10-10-10 NPK ratio monthly during growth |
| Temperature | Cool to moderate, not tolerant of extreme heat | 60-75°F during growth, 40°F during vernalization |
| Propagation | Primarily through bulb scaling and division | Best done in fall, post-dormancy |
Selecting the Right Easter Lily
Selecting a high-quality Easter Lily bulb is the first critical step towards cultivating a vibrant display of these emblematic flowers. The health of the bulb significantly influences the plant’s ability to withstand environmental stresses and produce bountiful blooms.
Key Characteristics of a Healthy Bulb:
- Size and Weight: Choose bulbs that are heavy for their size, which indicates a high moisture content and healthy storage tissues. A good size benchmark is at least 2 to 3 inches in diameter.
- Texture and Appearance: Bulbs should be firm and plump, not spongy or shriveled. The scales should be tightly closed with no signs of cracking or peeling, which can be entry points for disease.
- Color and Smell: Healthy bulbs typically have a light brown, dry outer scale without any green spots or mold. They should not emit any foul odor, as this can indicate rot or fungal infection.
Optimal Planting Time:
- Geographical Considerations: In cooler climates (USDA Zones 4-6), plant in early fall to allow roots to establish before the freeze. In warmer regions (USDA Zones 7-9), planting in early spring prevents the bulbs from overheating during unseasonably warm winters.
- Strategic Planting: Timing your planting can also be aligned with desired bloom times, especially if aiming for blooms by Easter.
Bulb Certification and Origin:
- Certification: Look for bulbs certified by reputable horticultural societies, which ensures they are free from diseases and pests and have been stored under optimal conditions.
- Origin: Knowing the bulb’s origin can help predict its performance. Bulbs sourced from established nurseries in similar climate zones are more likely to thrive.
Table of Bulb Selection Criteria
| Criteria | Description | Ideal Value |
|---|---|---|
| Diameter | Indicator of bulb maturity and health | ≥ 2 inches (5 cm) |
| Weight | Correlates with internal moisture content | Dense for size, not lightweight |
| Surface Integrity | Scale condition and overall texture | Smooth, firm, no peeling or soft spots |
| Disease Signs | Presence of mold or rot | No discoloration, mold, or foul smell |
| Certification Status | Assurance of quality and health | Certified disease-free by authorities |
Planting Your Easter Lily
Soil and Site Preparation

Ideal soil for Easter Lilies (Lilium longiflorum) should be well-drained and slightly acidic, with a pH between 5.5 and 6.5. To optimize soil structure and drainage, incorporate organic matter such as peat moss or well-rotted compost at a rate of 4-6 kg/m². Choose a planting spot that receives partial sunlight to protect the lilies from the potentially harmful effects of full afternoon sun, which can elevate soil temperatures excessively, impacting root development and moisture retention. Conversely, excessive shade can reduce photosynthetic activity, leading to poor bloom development.
Planting Depth and Spacing
Easter Lily bulbs should be planted 6 to 8 inches deep. This depth is crucial as it insulates the bulbs against temperature fluctuations and provides stability as the stalks grow. Maintain a spacing of about 12 inches between each bulb. This spacing is scientifically formulated to balance nutrient uptake and reduce competition, thereby promoting a healthier growth and a more vibrant floral display. For medium to high-density farming, strict adherence to these guidelines ensures optimal plant health and aesthetic value. A deeper planting depth may be considered in lighter soils.
Light and Environmental Needs
Choose for a location that offers filtered sunlight or partial shade. Easter Lilies thrive under light conditions of 5000 to 7000 lux—too much direct sunlight, particularly in the warmer part of the day, can lead to heat stress on the plants, manifesting as scorched leaves and diminished bloom quality. The ideal environment mimics their native habitat, offering protection from strong winds and extreme temperatures, which can both desiccate the plant and stunt growth.
Watering and Drainage
Water management is crucial; Easter Lilies require 1 inch of water per week, which should be adjusted depending on rainfall and temperature conditions. Ensure that the soil remains moist but not waterlogged. Enhance drainage by incorporating sand or gravel if the natural soil is too compact or clay-heavy, as poor drainage can lead to bulb rot and fungal infections.
Fertilization and Nutrient Management
Apply a balanced 10-10-10 NPK (Nitrogen-Phosphorus-Potassium) fertilizer at a rate of 1 pound per 100 square feet at planting and again as the shoots emerge. Easter Lilies benefit from a higher potassium content closer to the blooming period to support flower development and disease resistance.
| Parameter | Value/Description | Scientific Justification |
|---|---|---|
| Soil pH | 5.5 – 6.5 | Optimal range for nutrient availability and microbial activity in the soil. |
| Planting Depth | 6-8 inches | Provides optimal temperature insulation and root stability. |
| Spacing Between Bulbs | 12 inches | Prevents overcrowding, allowing adequate air circulation and nutrient access. |
| Light Requirement | 5000 – 7000 lux, filtered sunlight or partial shade | Matches light intensity under which natural growth and bloom development occur. |
| Watering | 1 inch per week, adjusted for local conditions | Balances moisture needs with prevention of waterlogging. |
| Fertilization | 10-10-10 NPK, 1 lb/100 sq. ft., at planting and shoot emergence | Supports balanced growth and flowering. |
Essential Care Techniques
Watering: Easter Lilies require consistent moisture to thrive, but it is crucial to avoid waterlogging, which can lead to bulb rot. To manage this balance:
- Deep Watering: Water the plants deeply once a week, ensuring that the soil is moist but not saturated. This encourages deep root growth and reduces surface evaporation.
- Climate Considerations: During active growth periods, especially in dry or hot climates, you may need to water twice a week. Always check the soil moisture by inserting your finger about an inch deep to ensure it is dry before watering again.
- Avoid Overwatering: Signs of overwatering include yellowing leaves and soft, mushy bulbs. To prevent this, use well-draining soil and ensure pots have adequate drainage holes if growing in containers.
Fertilizing: Easter Lilies benefit significantly from a balanced fertilization regimen to support their vigorous growth and vibrant blooms:
- Nutrient Needs: Apply a 10-10-10 (NPK) fertilizer monthly during the growing season, starting once new growth is visible. This balanced formula provides essential nutrients: nitrogen (N) for leaf growth, phosphorus (P) for root and flower development, and potassium (K) for overall plant health.
- Avoid Over-Fertilization: Over-fertilization can lead to nutrient imbalances and burn the roots. Signs of over-fertilization include leaf tip burn and unusually dark green leaves. Adjust the frequency or concentration if these symptoms appear.
Light Requirements: Proper lighting is vital for the optimal flowering of Easter Lilies:
- Sunlight Needs: Easter Lilies should receive about 6 hours of filtered sunlight daily. Too much direct sunlight can scorch the leaves, while too little light can result in weak growth and fewer blooms.
- Indoor Growing: If growing indoors, place the lilies near a window with sheer curtains to diffuse the direct sunlight. East-facing windows are often ideal as they provide gentle morning light.
- Seasonal Adjustments: Adjust the position of the lilies as the seasons change to ensure they continue to receive adequate light. During the darker winter months, consider using grow lights to supplement natural light.
Overcoming Common Gardening Challenges
Pest and Disease Management
Easter Lilies, while stunning, are vulnerable to several pests and diseases that can compromise their health and beauty:
- Common Pests: Lily beetles, aphids, and spider mites are prevalent. These pests can be identified by their distinct appearances or the damage they cause, such as chewed leaves and sticky honeydew.
- Disease Control: Fungal infections like botrytis (gray mold) and bulb rot are significant concerns. Symptoms include gray mold on flowers and leaves or soft, decayed bulbs.
- Preventative Measures: Implement integrated pest management (IPM) practices. Start with cultural methods such as rotating crops and removing plant debris to prevent disease. Use biological controls like introducing natural predators for aphids and mites. Chemical treatments should be a last resort, focusing on eco-friendly options like neem oil or sulfur-based fungicides.
Environmental Stressors
Optimal environmental conditions are crucial for preventing stress-related issues in Easter Lilies:
- Temperature and Humidity: Lilies thrive in temperatures between 60-75°F and relative humidity around 40-60%. Deviations can lead to stress, manifesting as poor growth or premature bloom drop.
- Adaptation Strategies: Use mulch to stabilize soil temperature and moisture levels. In regions with high summer heat, provide afternoon shade or use reflective mulches to reduce heat stress.
Handling Physiological Stress
Wilting and yellowing leaves can indicate several physiological stresses:
- Watering Issues: Over or under-watering can lead to wilting. Easter Lilies need moist, well-drained soil. Adjust irrigation based on weather conditions and soil moisture levels.
- Nutritional Deficiencies: Yellowing often points to nitrogen deficiency or other nutrient imbalances. Regularly apply a balanced fertilizer, but monitor plant response to avoid nutrient toxicity.
Encouraging Blooming
Optimizing Bloom Performance
To maximize the bloom potential of your Easter Lily, it’s essential to minimize environmental stress and provide optimal care:
- Balanced Environment: Ensure the plants receive consistent moisture, adequate nutrients, and appropriate light. Water deeply but infrequently, allowing the soil to dry slightly between waterings. Use a well-balanced, slow-release fertilizer to maintain steady nutrient availability.
- High-Potassium Fertilizer: As buds appear, switch to a high-potassium liquid fertilizer (e.g., 0-0-20) to enhance flower quality and longevity. Potassium plays a crucial role in strengthening cell walls, improving disease resistance, and promoting vibrant blooms.
Timing Fertilization:
- Phosphorus-Rich Fertilizer: Apply a phosphorus-rich fertilizer (e.g., 10-30-10) when the first buds form. Phosphorus is vital for root development and bloom production. Continue feeding the plant every two weeks until it starts to flower.
- Cease Fertilization: Once the lilies begin blooming, stop fertilizing to avoid overstimulation of foliage at the expense of flowers.
Staking Tall Plants:
- Support Structures: As the stalks grow and become top-heavy with blooms, provide support with stakes or plant cages. This prevents damage from wind or heavy rains and keeps the garden looking tidy.
- Proper Technique: Insert stakes at the time of planting to avoid disturbing the roots later. Use soft ties to gently secure the stems to the stakes, allowing for natural movement.
Table of Key Factors for Encouraging Blooming
| Factor | Optimal Condition | Scientific Insight |
|---|---|---|
| Watering | Deep watering, allow drying between | Avoids waterlogging, promotes deep root growth |
| Fertilization | High-potassium during bud formation | Enhances bloom quality, strengthens cell walls |
| Phosphorus Application | Begin at first bud appearance, bi-weekly | Critical for root and bloom development |
| Staking | Early installation, soft ties | Prevents stem damage, supports plant integrity |
Post-Bloom Care
After the Blooms: Once your Easter Lily has finished blooming, it’s important to continue caring for the plant. This phase is critical as the plant begins to store energy in the bulb for the next season. Remove the spent flower heads to redirect energy to the roots rather than seed production.
Maintaining Foliage: Keep the foliage as long as it remains green. The leaves will continue to photosynthesize and generate food, which is stored in the bulb. Resist the temptation to cut back the plant until the foliage has died back naturally.
Preparing for Dormancy: After the leaves yellow and die back, reduce watering to allow the bulb to enter a natural dormancy period. This is also an ideal time to apply a light layer of organic mulch to protect the bulb during the colder months and provide a steady supply of nutrients as it decomposes.
Preparing for the Next Growing Season
Bulb Care and Division: Easter Lily bulbs thrive when given periodic attention through bulb division, which alleviates overcrowding and promotes vigorous health:
- Optimal Timing for Division: Perform bulb division every 3-4 years. The best time is late autumn or early spring, depending on your climate zone.
- Procedure: On a cool, overcast day, which minimizes evaporation and stress to the plants, carefully dig around the bulbs to avoid damaging them. Gently separate the bulbs, keeping as much of the root intact as possible.
- Replanting: Replant the bulbs immediately to prevent drying. Place them at the same depth they were growing previously and space them about 12-18 inches apart to ensure adequate room for growth.
Health Check and Soil Refreshment: Regular bulb inspections and soil management are crucial for preventing disease and encouraging robust growth:
- Inspecting Bulbs: Check the bulbs for any signs of disease or decay, such as soft spots or discoloration. Healthy bulbs should feel firm and have a uniform color.
- Disease Management: Trim away any diseased or decayed portions with sterilized tools to prevent infection spread. If disease presence is significant, treat the bulbs with an approved fungicide.
- Soil Management: Enhance the planting site by incorporating new, rich soil or well-decomposed compost. This refreshment improves soil structure, boosts nutrient content, and enhances microbial activity, which is beneficial for plant health.
Table of Key Practices for Preparing for the Next Growing Season:
| Activity | Description | Details and Specifications |
|---|---|---|
| Bulb Division | Separating and replanting bulbs | Every 3-4 years, cool/overcast day, 12-18″ spacing |
| Bulb Health Check | Inspecting and treating bulbs | Check for firmness, uniform color, use fungicide if needed |
| Soil Refreshment | Enhancing soil conditions | Incorporate fresh, nutrient-rich soil or compost |
Advanced Tips and Tricks
Propagating Easter Lilies: For gardeners looking to expand their collection or share with friends, propagating Easter Lilies can be a rewarding endeavor. Propagation by scaling is one effective method. Gently remove a few scales from the main bulb and plant them in a mixture of peat and perlite. Keep the environment humid and at a constant temperature, and you should see sprouts within a few months.
Creating Optimal Microclimates: Understanding and manipulating microclimates within your garden can significantly boost your Easter Lilies’ performance. If your area experiences harsh sunlight, strategically place taller plants to provide natural shade. Conversely, in cooler climates, use reflective surfaces like white walls to increase sunlight exposure.
Long-term Soil Health: Maintaining soil health is crucial for perennial success. Annually test your soil’s pH and nutrient levels to ensure they remain optimal for Easter Lily growth. Adjustments might involve amending the soil with lime to reduce acidity or incorporating organic matter to boost nutrient content and improve drainage.
Related Post
- How to Build a Barn: A Step-by-Step Guide for Beginners
- How to Build a Sustainable Compost Bin: Easy and Eco-Friendly DIY
- How to Fertilize Bougainvillea: A Complete Guide for Stunning Blooms
- How to Fertilize Apple Trees: Essential Tips for a Bountiful Harvest
- How to Fertilize Lemon Trees: Secrets for Thriving Citrus
- How to Fertilize Avocado Tree: A Step-by-Step Guide for Lush Growth
- 10 Best Bow Saws to Buy in 2024: Top Picks for the Money
- Best Miter Saw For Beginners
- Top 10 Pruning Saws to Buy in 2024: Best for the Money
- 7 Best Pocket Chainsaw
Conclusion
Gardening is an art that thrives on continuous learning and adaptation. Each season provides new learning opportunities and challenges to refine your techniques. Experiment with different planting locations, soil mixtures, and care routines to discover what works best for your specific garden environment. Growing Easter Lilies is a gratifying journey that beautifies your garden and enhances your gardening skills. With patience and persistence, the challenges you face will transform into triumphs, and your lilies will flourish, bringing joy and beauty to your surroundings.
FAQs
- What is the best time of year to plant Easter Lily bulbs?
Plant Easter Lily bulbs in early fall if you’re in a cooler climate, as this allows them to establish roots before the winter. In warmer climates, planting in early spring is preferable to avoid the heat of summer. - Can Easter Lilies be grown indoors, and if so, how?
Yes, Easter Lilies can be successfully grown indoors. Place them in a well-lit area that receives indirect sunlight. Keep the soil consistently moist and provide good drainage. Move them outdoors once the danger of frost has passed. - How often should I water my Easter Lilies?
Water your Easter Lilies once a week to keep the soil moist, not soggy. During hot, dry periods, increase watering to twice a week, but always check the soil first to avoid overwatering. - What are the signs of overwatering in Easter Lilies?
Signs of overwatering include yellowing leaves, limp stems, and a rotting bulb. If the soil feels soggy or smells musty, reduce watering and improve drainage. - How do I protect my Easter Lilies from pests?
Keep an eye out for common pests like aphids and red spider mites. Treat infestations early with insecticidal soap or neem oil. Regularly inspecting your plants and maintaining proper care are key to preventing pest issues. - What should I do with my Easter Lily after it finishes blooming?
After blooming, continue to water and fertilize the plant as it stores energy in the bulb for the next season. Once the foliage dies back naturally, reduce watering and prepare the bulb for dormancy. - Can I get my Easter Lily to bloom again next season?
Yes, with proper care, your Easter Lily can bloom again. After the foliage has died back, store the bulb in a cool, dry place during winter. Replant in well-draining soil and follow regular care guidelines to encourage reblooming. - How do I know if my Easter Lily is receiving too much light?
If the leaves of your Easter Lily are scorching or turning brown at the edges, it may be receiving too much direct sunlight. Relocate your plant to an area with filtered light or provide some shade during the hottest part of the day.
With these tips and techniques, you’re now equipped to successfully grow and nurture Easter Lilies, overcoming any gardening hurdles along the way. Enjoy the beauty and satisfaction that comes from mastering the care of these stunning blooms. Happy gardening!

Emma Hudson
Forestry AuthorEmma's experience in farming shapes her detailed guides on gardening and farming tools, providing practical, actionable advice grounded in real-world experience. Her work targets both newcomers and experienced farmers, aiming to enhance their practices with a mix of traditional wisdom and modern techniques. By making complex agricultural concepts accessible, Emma's guides serve as valuable tools for those navigating the challenges of contemporary farming, offering strategies for sustainable success.


Leave your comment