5 Drill Features You Should Know
- June 13, 2024
- 0 comment
In a recent survey, a striking 86 percent of participants revealed they were not familiar with at least one of the five crucial features on their cordless drill. Let’s delve into these features to understand their importance and how they can enhance both the safety and effectiveness of your drilling projects.
Understanding these features can not only lead to more efficient project completion but also prolong the life of your drill. Moreover, mastering these features enables both DIY enthusiasts and professional builders to tackle a broader range of tasks with confidence and precision, ensuring optimal performance and safety in their work.
Feature 5: The Side Handle for Kickback Prevention
The side handle on many full-size drills is not merely an accessory; it’s an essential safety feature designed to mitigate kickback. Kickback occurs when the drill bit gets stuck in the material you are working on, causing the drill to spin or jerk abruptly. This can lead to severe injuries. To effectively handle this, it’s advisable to position the side handle at either the nine o’clock position for right-handed users or the three o’clock position for left-handed users.
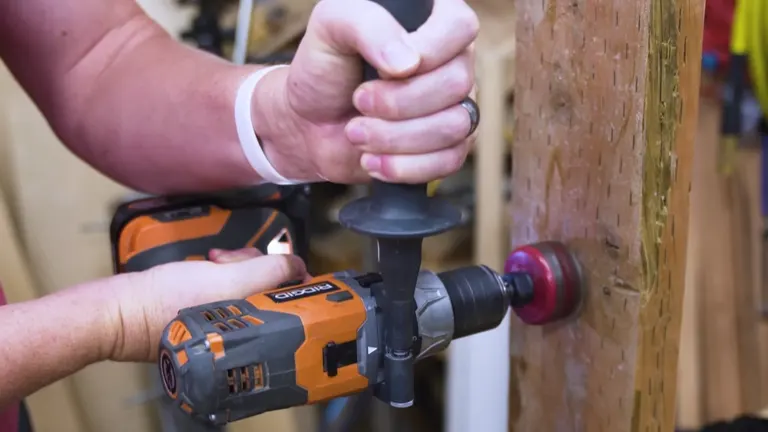
This strategic positioning enables you to maintain control, especially in high torque situations, by allowing you to drill sideways. This setup not only provides extra stability but also significantly enhances safety by ensuring the drill kicks towards your supporting hand, reducing the risk of losing grip and causing an accident. This knowledge can be a game-changer in preventing painful incidents and ensuring your drilling tasks are performed safely and efficiently.
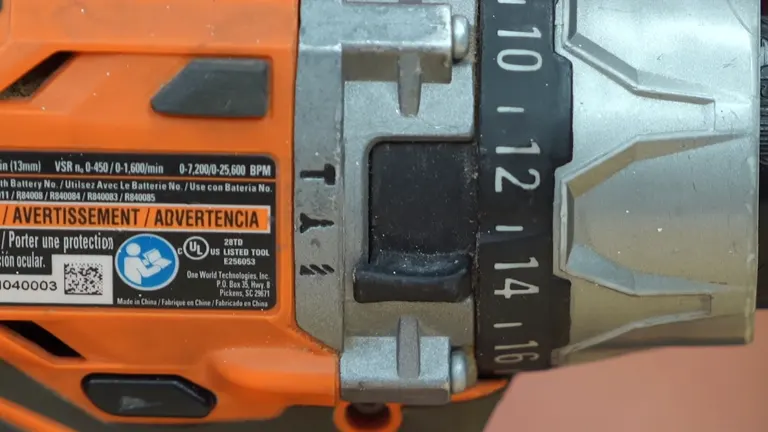
Feature 4: The Clutch
The clutch, a crucial yet often overlooked component of the cordless drill, plays a pivotal role in how much torque is applied before the drill stops spinning—a process referred to as ‘slip’. This feature is particularly beneficial when you need to drive screws without over-tightening them, thus avoiding damage to both the screw and the material.
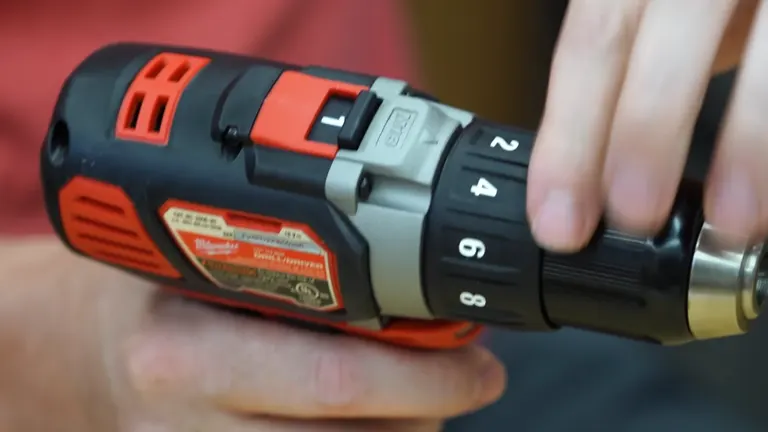
By setting the clutch to a lower number, you ensure that even if you continue to apply pressure on the trigger, the drill will cease spinning once the preset torque level is reached. This precision prevents the stripping of screws and damage to your work surface, making your tasks smoother and your results more professional. Understanding and utilizing the clutch settings effectively can transform a good drilling experience into a great one, especially for projects requiring delicate handling and specific torque applications.
Feature 3: Shifting Gears
Much like a manual transmission in a car, your drill comes equipped with a mechanism that allows you to shift gears. This is typically controlled by a top-mounted slider, enabling the switch between at least two speed settings—low for high torque and high for increased speed. This functionality is essential for tailoring the drill’s performance to the task at hand, whether it’s driving a fastener or drilling a hole.
It’s vital to ensure that the drill is completely stopped before you attempt to change gears; shifting while the drill is running can damage the internal gearing. Properly using this feature not only enhances the efficiency of your work but also prolongs the life of the drill by matching the correct speed to the job, thereby avoiding unnecessary strain on the motor.
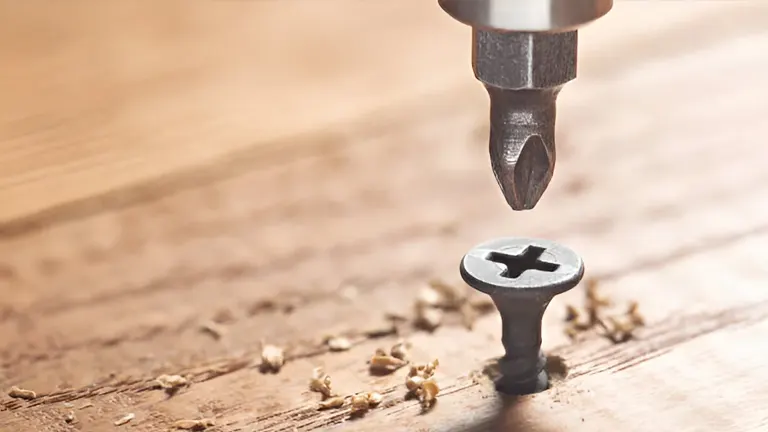
Feature 2: The Keyless Ratcheting Chuck
The keyless ratcheting chuck is a significant advancement in modern cordless drills, eliminating the need for the traditional chuck keys used in older models. This innovation allows for quick and easy changes of drill bits without any additional tools, enhancing efficiency and convenience. Additionally, many of these chucks incorporate a ratcheting mechanism that emits an audible click when the bit is securely tightened.
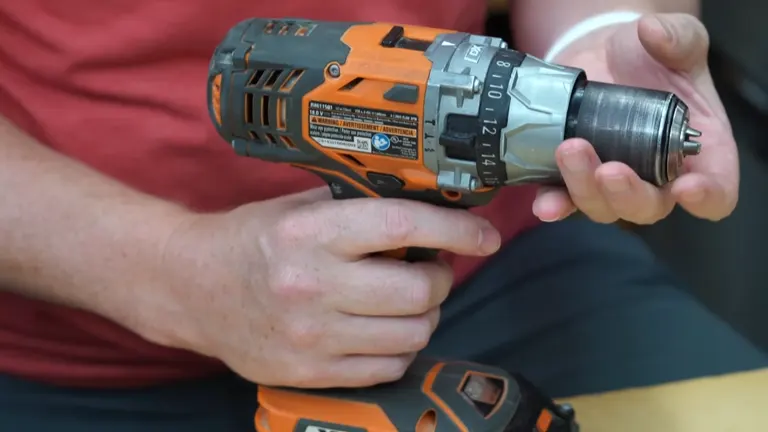
This feature ensures that the bit is firmly held in place during operation, preventing slippage that could potentially cause uneven drilling or injury. The keyless ratcheting chuck not only simplifies the process of changing bits but also contributes to safer and more reliable drill performance. This improvement in drill technology represents a leap forward in both usability and safety, making it a critical update from older drill designs where bit slippage and tool adjustments were common frustrations.
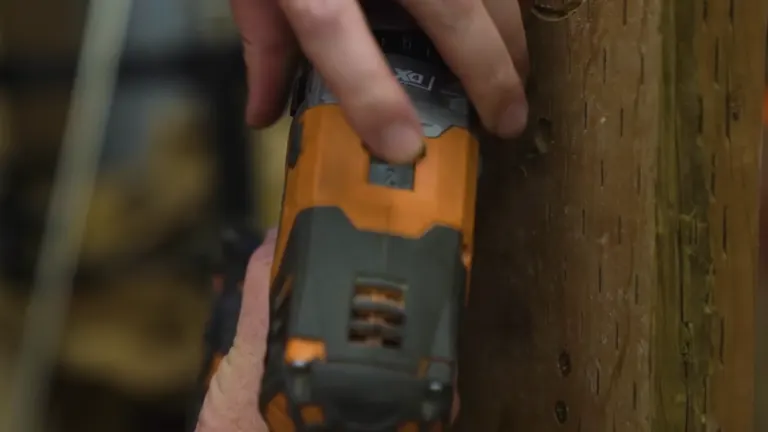
Feature 1: Drill Modes
Drill modes are essential yet often underestimated settings on a drill that significantly enhance its functionality. The standard drill mode bypasses the clutch settings, offering uninterrupted power which is ideal for basic drilling tasks. Drive mode, in contrast, engages the clutch to limit torque, ensuring precision when screwdriving, which is crucial for preventing damage to both the screws and the work surface.
For those equipped with hammer drills, a third mode called hammer mode provides a pounding action, akin to a hammer striking behind the drill. This mode is indispensable for drilling into tough materials like masonry, where it enhances the drill’s ability to penetrate hard surfaces efficiently. Understanding and utilizing these modes can transform your drilling approach, enabling more effective and appropriate use of the tool depending on the task at hand.
Comparative Analysis: Modern vs. Older Drill Models
| Feature | Older Models | Modern Models |
|---|---|---|
| Side Handle for Kickback Prevention | Often absent | Includes adjustable side handles for better control and safety |
| Clutch Adjustability | Limited settings | Offers multi-stage clutches with a wide range of settings for precise torque control |
| Gear Shifting | Single speed or limited options | Features multiple gears for optimal performance in various tasks (high torque for driving screws, high speed for drilling) |
| Chuck Design | Keyed chucks needing a physical key | Keyless chucks with ratcheting mechanisms for easy and secure bit changes |
| Drill Modes | Basic drilling only | Multiple modes including drilling, driving, and hammer drilling for versatility and enhanced utility |
Maintenance Tips
Proper maintenance is crucial for ensuring your cordless drill continues to perform at its best and lasts longer. Here are some detailed tips on how to maintain key features like the clutch and chuck:
Maintaining the Clutch
- Regular Checks: Periodically check the clutch settings to ensure they are functioning correctly. An indication that your clutch may need attention is if it slips too early or doesn’t disengage, potentially leading to stripped screws or damaged work surfaces.
- Clean Regularly: Dust and debris can accumulate in the clutch settings, especially if you frequently change between different levels. Use a dry, soft brush or compressed air to clean out the clutch area.
- Lubrication: While most modern drills are designed to not require much lubrication, check your manufacturer’s guide. Some might recommend a light application of lubricant to the clutch mechanism to keep it smooth.
Caring for the Chuck
- Regular Cleaning: Like the clutch, the chuck should be kept clean from dirt and debris, which can affect its performance. After each use, open the chuck fully and blow out any dust or debris using compressed air.
- Check for Wear: Over time, the chuck’s jaws can wear down, leading to less grip on your drill bits. If you notice your bits slipping or the chuck not tightening properly, it might be time for a replacement.
- Lubrication: Apply a small amount of lubricant to the moving parts of the chuck periodically. This helps prevent rust and ensures that the chuck can be tightened and loosened smoothly.
General Maintenance Tips
- Battery Care: For cordless drills, battery maintenance is also critical. Always follow the manufacturer’s instructions for charging and storing the batteries. Avoid leaving them in very hot or cold environments and try to keep them charged between uses.
- Regular Inspection: Before each use, inspect your drill for any signs of damage or wear. Check the housing, handle, and buttons to make sure everything is secure and functional.
- Storage: When not in use, store your drill in a clean, dry place. If possible, store it in a case to protect it from dust and damage. Keeping it away from excessive moisture and heat will also prolong its lifespan.
By following these maintenance tips, you can keep your drill in top working condition, ensuring it’s ready and reliable for any job you tackle. Regular care not only prolongs the life of your drill but also ensures it operates safely, helping you avoid potential accidents and achieve better results in your projects.
Conclusion
Understanding the intricate features of your cordless drill can greatly enhance your drilling experience, leading to safer operations and better results. Each feature has a specific purpose designed to optimize your drilling effectiveness. Knowing how to properly use the side handle, adjust the clutch, shift gears, operate the keyless chuck, and select the appropriate drill mode can transform your DIY or professional projects. With this knowledge, your tasks can be completed more smoothly and swiftly, ensuring that you work not only harder but smarter.
FAQs
- What is kickback, and how can I prevent it?
Kickback occurs when the drill bit binds in the material you’re drilling, causing the drill to jerk or spin uncontrollably. To prevent it, always use the side handle provided with your drill, positioning it correctly depending on whether you are right or left-handed. This gives you better control and balance, reducing the risk of injury. - How do I use the clutch on my drill?
The clutch controls the amount of torque applied when driving screws. Set it to a lower number to prevent overdriving and stripping screws, especially in softer materials. For tougher tasks, you might need to increase the number to ensure the screw is driven in adequately without the drill slipping. - When should I change the gears on my drill?
Change gears based on the task. Use a lower gear (high torque) for driving screws or when more control is required. Switch to a higher gear (high speed) for drilling holes or when working with less resistant materials. Always ensure the drill is stopped before changing gears to avoid damaging the drill. - What’s the purpose of the keyless ratcheting chuck?
A keyless chuck allows for easy changing of bits without the need for additional tools. The ratcheting feature provides an extra layer of security by ensuring the bit is tightly secured, which prevents the bit from slipping during high-torque applications. - How do I choose between drill modes?
Select the drill mode for simple drilling tasks where consistent power is needed. Use the drive mode to take advantage of the clutch settings when precision is crucial, such as when driving screws. If your drill has a hammer mode, use it for drilling into tough materials like concrete or masonry, where an impact mechanism helps drive the bit in more effectively. - Is it worth buying a drill with a hammer mode?
If you frequently work with masonry or concrete, a hammer mode can be invaluable. It enhances the drill’s ability to bore through hard materials by delivering a hammering action while drilling, making the job faster and more efficient. - Can overuse the clutch damage my drill?
Proper use of the clutch should not damage your drill. However, consistently setting the clutch too low for heavy-duty tasks can lead to wear and tear over time. Always adjust the clutch according to the resistance of the material to balance efficiency with tool longevity.
We hope this guide has illuminated some of the less-known but crucial features of your cordless drill. Whether you’re a seasoned pro or just starting your DIY journey, understanding these tools can make all the difference in your projects. Have tips or experiences to share? Noticed a feature we didn’t cover? Drop a comment below—we love hearing from you! Your insights not only enrich our community’s knowledge but also help us all grow together. So don’t be shy, share your thoughts and let’s keep the DIY spirit thriving!

David Murray
Forestry AuthorI'm David Murry, a forestry equipment specialist with a focus on chainsaw operation. With over 13 years of experience, I've honed my skills in operating and maintaining a wide range of machinery, from chainsaws to log splitters. My passion for the outdoors and commitment to sustainable forestry drive my work, which emphasizes safety, efficiency, and staying updated with industry advancements. Additionally, I'm dedicated to sharing my expertise and promoting environmental awareness within the forestry community.


Leave your comment