Essential Hand Tools Every Beginner Woodworker Should Own
- May 17, 2024
- 0 comment
Beginning woodworking is an exciting adventure filled with the promise of creating beautiful, functional pieces from raw materials. However, it can also feel overwhelming, especially when faced with the vast array of tools available. To help you navigate this new terrain, we’ve compiled a list of the top five essential hand tools that every beginner should have.

These tools have been carefully selected to ensure they are user-friendly, versatile, and durable. With these recommendations, you’ll be able to make smart, effective choices for your workshop, ensuring you have the right tools to start creating with confidence.
5 Essential Hand Tools for Beginners:
- Tape Measure
- Square
- Clamps
- Chisels
- Mallets
- Bonus (Check Below)
1. Tape Measure
The tape measure is a fundamental tool for any woodworker. While the classic 25-foot Stanley tape is a reliable choice many start with, I recommend the FastCap 16-foot tape for its compact and durable design. Its rubber-coated body makes it less prone to damage if dropped, a common issue with metal tapes. Additionally, FastCap’s Lefty/Righty model is particularly beginner-friendly, offering clear and dual-sided markings that simplify measurements.
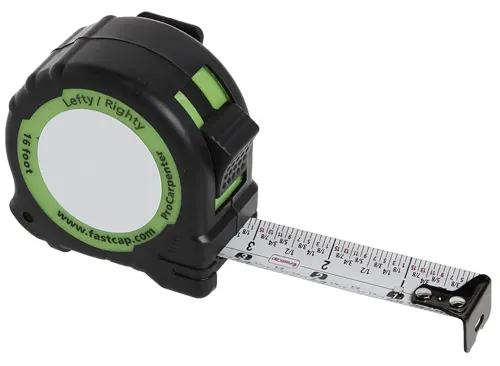
- Benefits: Accurate measurements are crucial in woodworking. The FastCap’s dual-sided markings make it easy to read measurements from any angle, ensuring precision in your cuts and assembly. Its compact size means it doesn’t take up much space, and it’s light enough to carry around easily.
- Usage Tip: Always use the same tape measure for a project to avoid discrepancies in measurements.
2. Square
When it comes to squares, the options can be overwhelming. A good starting point is the Swanson Speed Square. This aluminum tool is indispensable for marking angles and drawing straight cuts up to 90 degrees. Pair it with a framing square for larger projects. Both tools are affordable and provide great value, especially for those just starting their collection.
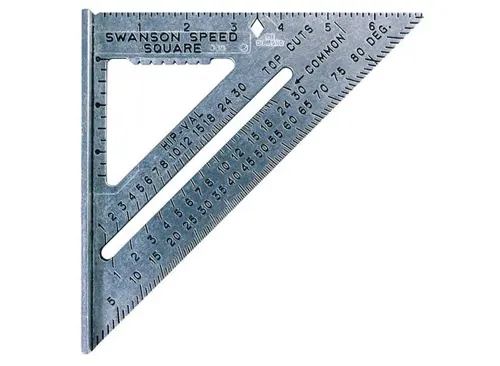
- Benefits: This tool simplifies tasks such as marking perpendicular lines, measuring angles, and checking for squareness. It’s indispensable for framing, roofing, and any project requiring precise angle measurements.
- Usage Tip: To check if your square is truly square, mark a line along one edge, flip the square, and see if the lines match. If they do, your square is accurate.
3. Clamps
Clamps are vital for holding projects securely in place. Begin with a few F-clamps; they are versatile and can replace many other types of clamps. For beginners, the Irwin or Jorgensen brands offer durable choices that will serve you well through many projects. Additionally, consider adding some pipe clamps to your arsenal, as they are inexpensive and ideal for panel projects like cutting boards.
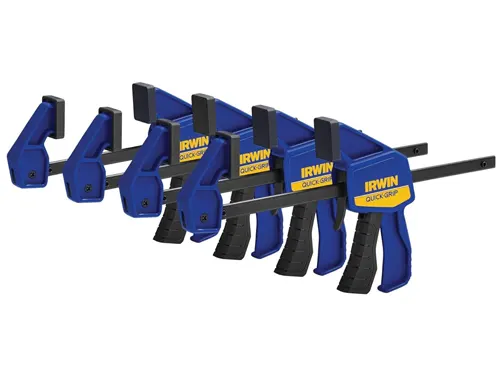
- Benefits: Clamps hold pieces together while the glue dries or while you make adjustments. This ensures accuracy and stability in your projects. F-clamps are versatile for various tasks, while pipe clamps are excellent for wide or irregularly shaped pieces.
- Usage Tip: Use pipe clamps for gluing panels, as they provide even pressure across a wide area
4. Chisels
Avoid the temptation to buy cheap chisels, as they quickly dull and perform poorly. Instead, invest in a quality three-quarter inch chisel as your primary tool. Narex offers excellent durability and performance at a reasonable price, making their chisels a favorite among both beginners and experienced woodworkers. If budget allows, acquiring a set of chisels can cover all your basic needs and beyond.
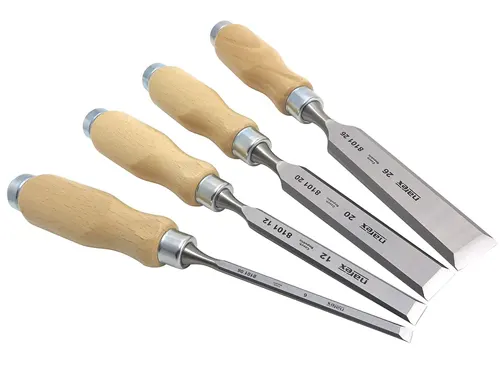
- Benefits: Chisels are used for fine detail work, such as mortises, tenons, and dovetail joints. A sharp, durable chisel ensures clean cuts and reduces the effort needed for precision work.
- Usage Tip: Regularly sharpen your chisels to maintain their cutting efficiency.
5. Mallets
A mallet is necessary for driving chisels and adjusting joints without damaging the wood. While a simple rubber mallet can suffice initially, crafting your own wooden mallet from hardwoods like walnut or maple can be a rewarding project that adds a personalized touch to your toolkit.
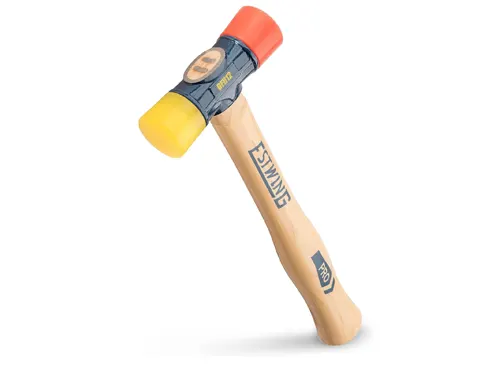
- Benefits: Mallets help to apply force without damaging the wood. They are essential for tasks like adjusting joints or driving chisels, ensuring precise and controlled impacts.
- Usage Tip: Use hardwoods for making your own mallet to ensure it lasts and doesn’t dent easily.
Bonus Tool: Flush Trim Saw
As an additional recommendation, consider a flush trim saw. This tool is incredibly useful for the precise cutting of small parts, dowels, and trim. Compact options like the Suizan dovetail saw, which features both fine and coarse teeth, are excellent for detailed work and easy storage.
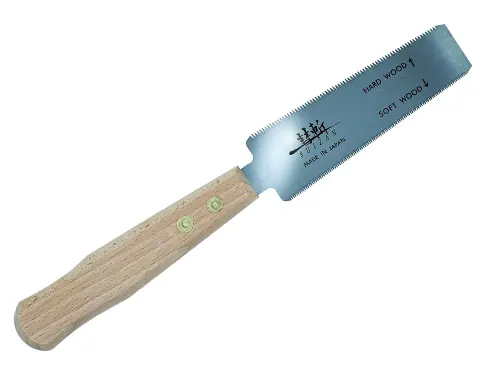
- Benefits: These saws are perfect for tasks that require detailed, close cuts. They are particularly useful for trimming dowels and tenons flush with the surface.
- Usage Tip: Use a flush trim saw for trimming dowels and tenons flush with the surface.
Safety Tips for Beginner Woodworkers
Safety is paramount in woodworking. Understanding and practicing safety measures can prevent accidents and ensure a productive and enjoyable woodworking experience. Here are essential safety tips for using each of the recommended tools:
- Tape Measure Safety: When using a tape measure, always retract the tape slowly to avoid the tape snapping back quickly, which can cause injury. Regularly inspect the tape for any damage or sharp edges that could cause cuts. A careful approach will help you avoid accidents and maintain the longevity of your tape measure.
- Square Safety: Handle squares with care as they can have sharp edges. Ensure that the piece you are measuring or marking is securely clamped or held in place to prevent it from moving. This not only provides more accurate measurements but also keeps your hands safe from potential slips and cuts.
- Clamps Safety: Before applying pressure with clamps, make sure they are stable and correctly positioned to avoid slipping, which could cause injury. Additionally, avoid over-tightening the clamps as this can damage both the workpiece and the clamp itself. Proper use ensures effective clamping and reduces the risk of accidents.
- Chisels Safety: A sharp chisel is safer than a dull one because it requires less force to cut. Regularly sharpen your chisels to maintain their edge. Always use a woodworking mallet to drive chisels for better control and reduced risk of slips. Ensure you are cutting away from your body and keep your hands behind the cutting edge to prevent accidents.
- Mallet Safety: Use a mallet gently and increase force as needed, avoiding excessive force that can cause loss of control. Regularly inspect the mallet for cracks or damage to ensure it is in good condition. Using an appropriate mallet will help you apply controlled force without damaging your tools or workpiece.
- General Safety Tips: Always wear protective gear, including safety glasses to protect your eyes from flying debris, hearing protection to safeguard against loud noises, and a dust mask to avoid inhaling sawdust. Maintain a clean workspace free of clutter to reduce the risk of tripping or knocking over tools. Follow the manufacturer’s instructions for each tool to ensure you are using them correctly and safely. Regularly inspect and maintain your tools, sharpening blades, oiling moving parts, and replacing worn-out components to keep them in safe working order. Only use tools for their designed purpose to avoid accidents and tool damage. Ensure good ventilation in your workspace to prevent the buildup of dust and fumes, creating a safer and healthier working environment.
Building Your Toolkit: Tips and Considerations
- Consistency is Key: Use the same tape measure for a project to avoid slight variations that can occur between different tapes.
- Quality Over Quantity: It’s better to invest in a few high-quality tools that will last, rather than cheaper versions that may fail when you need them most.
- Expand As You Go: Start with the basics and slowly build your collection as your skills and project needs grow.
Conclusion
Starting your woodworking journey with the right tools can make all the difference. By investing in these essential hand tools—tape measure, square, clamps, chisels, and a mallet—you lay a strong foundation for developing your skills and tackling a wide range of projects. Each tool has been carefully chosen to offer reliability, ease of use, and versatility, making your woodworking experience both enjoyable and successful.
Now it’s your turn to get started! Begin building your toolkit with these essential items and watch your projects come to life with greater precision and ease. If you have any questions, or if you’d like to share your experiences or additional tips, please leave a comment below. Your insights could help fellow beginners on their woodworking journey. Happy woodworking!
FAQs
- How do I choose the right tape measure for my woodworking projects?
Look for a tape measure that is durable, easy to read, and has a length suitable for your projects. The FastCap 16-foot tape measure is a great choice for its durability, clear markings, and compact size. - What is the difference between a speed square and a framing square?
A speed square is smaller and used for marking angles and straight lines on smaller pieces of wood, while a framing square is larger and ideal for checking the squareness of larger projects. Both are essential for accurate measurements. - How many clamps do I need to start with?
Start with a few versatile F-clamps and add pipe clamps for larger projects. The exact number depends on the size and scope of your projects, but having at least four F-clamps and two pipe clamps is a good starting point. - How do I maintain my chisels to keep them sharp?
Regularly hone your chisels using a sharpening stone or honing guide. Keep them clean and dry to prevent rust, and store them properly to protect the cutting edges. - What type of mallet should I use with chisels?
A wooden mallet is ideal for use with chisels as it provides a good balance of force and control without damaging the chisel handle. You can start with a rubber mallet, but crafting a hardwood mallet is a great project for beginners. - How do I ensure my square is accurate?
To check a square’s accuracy, place it against a straight edge, draw a line, flip the square, and draw another line along the same edge. If the lines match, your square is accurate. - Can I use a flush trim saw for cutting larger pieces of wood?
Flush trim saws are best for detailed, close cuts on small parts like dowels and trim. For larger pieces of wood, a handsaw or a circular saw is more appropriate. - What safety gear do I need when woodworking?
Always wear safety glasses to protect your eyes, hearing protection to safeguard your ears from loud noises, and a dust mask to avoid inhaling sawdust. Ensure your workspace is well-ventilated and keep your tools well-maintained.

David Murray
Forestry AuthorI'm David Murry, a forestry equipment specialist with a focus on chainsaw operation. With over 13 years of experience, I've honed my skills in operating and maintaining a wide range of machinery, from chainsaws to log splitters. My passion for the outdoors and commitment to sustainable forestry drive my work, which emphasizes safety, efficiency, and staying updated with industry advancements. Additionally, I'm dedicated to sharing my expertise and promoting environmental awareness within the forestry community.


Leave your comment