How to Grow and Care for Garlic: Expert Techniques for Thriving Plants
- May 6, 2024
- 0 comment
Learn how to grow and care for garlic with our expert techniques for thriving plants. Get the best tips for bountiful harvests. Dive into the essentials of how to grow and care for garlic with our expert techniques tailored for thriving plants. Whether you’re just starting out or you’re an experienced gardener, this guide is designed to help you navigate every aspect of garlic cultivation.
From choosing the right garlic variety to mastering the art of planting, maintenance, and harvesting, our step-by-step tips will ensure your garlic plants are healthy and yield a bountiful harvest. Let’s get started on your journey to successful garlic gardening!
Table of Contents
- Understanding Garlic Varieties
- Pre-Planting Considerations
- Planting Your Garlic
- Maintenance and Care
- Harvesting and Storing Garlic
- Common Mistakes to Avoid
- Advanced Tips for Bigger Yields
- Conclusion
- FAQs
Understanding Garlic Varieties
Types of Garlic
Garlic is categorized mainly into two types: Hardneck (Allium sativum var. ophioscorodon) and Softneck (Allium sativum var. sativum). Each type presents unique characteristics suited to different growing conditions and culinary uses:
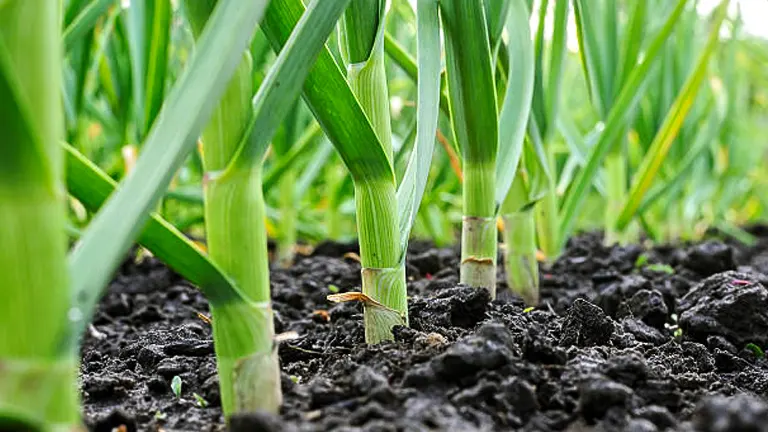
- Hardneck Garlic: Known for its robust flavor and complex aroma, Hardneck garlic thrives in cooler climates. It is distinguished by the presence of a central stalk, known as a ‘scape,’ which can also be harvested and used in culinary dishes for its mild garlic flavor. Hardneck varieties typically produce fewer cloves per bulb, but the cloves are larger and easier to peel. This type of garlic is often considered superior for cooking due to its richer flavor.
- Softneck Garlic: More common in warmer climates, Softneck garlic lacks the central scape seen in Hardneck varieties. It generally produces more cloves per bulb, though they are smaller and can be more challenging to peel. Softneck garlic is favored for its longer shelf life and is commonly used for making garlic braids due to its flexible stalks.
- Black Garlic: A unique product made by fermenting Softneck garlic under controlled heat and humidity, Black Garlic is renowned for its sweet, syrupy flavor devoid of the sharp bite typical of fresh garlic. This type is growing in popularity due to its health benefits, including higher concentrations of antioxidants compared to raw garlic.
Choosing the Right Variety
Selecting the appropriate garlic variety for your garden involves considering your local climate, the intended use of the garlic, and your personal taste preferences. Here’s a detailed look at some popular varieties:
- For Colder Climates:
- A Hardneck variety known for its strong, spicy flavor and large, easy-to-peel cloves. It’s highly resistant to cold and boasts an excellent storage lifespan.
- Another Hardneck type, valued for its robust flavor and large cloves. It is particularly hardy, making it a favorite for northern gardeners.
- For Milder Climates:
- A Softneck variety that matures quickly and is known for its mild flavor, making it ideal for raw uses. It stores well, making it popular among commercial growers.
- A Softneck garlic that stands out for its silvery pink cloves and mild taste, along with its ability to remain firm and flavorful for months under proper storage conditions.
Table Comparison of Garlic Varieties:
| Variety | Clove Count | Climate | Flavor Profile | Storage Duration | Popular Cultivars |
|---|---|---|---|---|---|
| Hardneck | 4-12 | Cooler | Robust, strong | Moderate | ‘Music,’ ‘German White’ |
| Softneck | 10-40 | Warmer | Mild, sweet | Long | ‘California Early,’ ‘Silverskin’ |
| Black Garlic | Varies | N/A | Sweet, caramel-like, umami | N/A | Fermented Softneck |
Scientific Analysis and Unique Information:
- Sulfur Compounds: The distinct flavors of garlic come from sulfur compounds, primarily allicin, which forms when garlic is crushed or chopped. Hardneck garlic typically has a higher allicin content due to genetic differences.
- Storage Duration: Softneck garlic can remain viable for up to 9 months if stored in optimal conditions, while Hardneck garlic is best used within 4-6 months due to its higher moisture content.
- S-allyl-cysteine: A powerful antioxidant compound found in black garlic, which can reach concentrations of up to 8.3 mg/g, providing potential health benefits like reducing cholesterol and improving cardiovascular health.
Pre-Planting Considerations
Soil Preparation
Garlic thrives in well-drained, fertile soil with a neutral pH. Preparing your soil by incorporating organic matter like compost can improve soil structure, enhance nutrient content, and promote healthy growth. Testing soil pH and making adjustments using lime (to decrease acidity) or sulfur (to increase acidity) based on your specific garlic variety can optimize conditions for growth.
Climate and Seasonality
Garlic is typically planted in the fall before the ground freezes in colder climates and in late winter or early spring in warmer areas. This timing allows the garlic to establish roots and, in some cases, begin top growth before the onset of winter.
Necessary Tools and Supplies
The right tools enhance the efficiency and effectiveness of garlic planting:
- Tools for Soil Preparation: A rototiller for turning the soil, a garden fork for breaking up large clumps, and a rake for smoothing the soil surface are essential.
- Planting Tools: A dibber for precise clove placement and a standard garden spade or trowel for creating planting rows.
- Watering and Mulching: A soaker hose or drip irrigation system is ideal for maintaining consistent soil moisture. Organic mulch like straw or shredded leaves is recommended to regulate soil temperature and retain moisture.
Table: Garlic Planting Specifications
| Parameter | Value | Notes |
|---|---|---|
| Soil pH Range | 6.5 – 7.0 | Adjust with lime or sulfur based on initial testing. |
| Organic Matter | 3-5% by soil volume | Compost or well-rotted manure recommended. |
| Planting Depth | 2 inches (5 cm) | Ensure clove tips are covered but not too deep. |
| Spacing Between Cloves | 6 inches (15 cm) | Adjust spacing for different planting densities. |
| Watering Needs | 1 inch per week (2.5 cm) | Adjust based on rainfall and soil type. |
| Mulch Thickness | 2-3 inches (5-7.5 cm) | Apply after planting to moderate soil temperature. |
Scientific Insights and Advanced Considerations
- Soil Temperature and Germination: Garlic germination optimal soil temperature is around 50°F (10°C). Planting when the soil is too warm or too cold can hinder root development.
- Micronutrients: Garlic is sensitive to micronutrient levels, especially boron and manganese. Deficiencies can lead to poor bulb formation.
- Soil Compaction: Avoid areas where soil compaction may limit root growth. Compacted soils restrict root expansion, negatively affecting nutrient uptake and overall plant vigor.
Comprehensive Guide to Planting Your Garlic
Step 1: Preparing to Plant
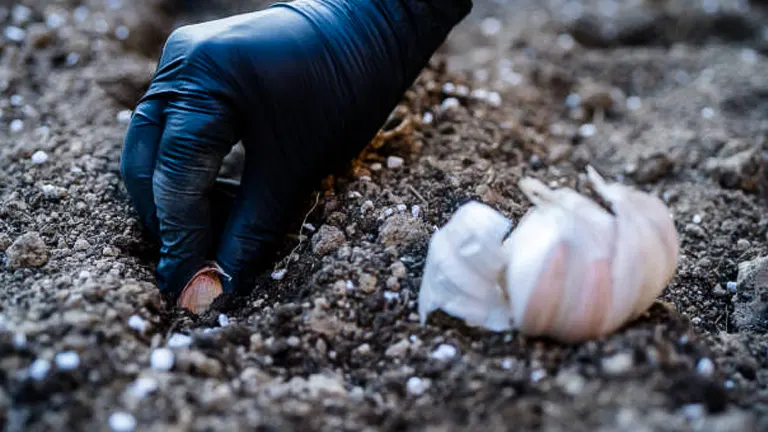
Start your garlic planting adventure by selecting the healthiest and largest cloves from your garlic bulb. These cloves generally provide the best yield and are more resilient against diseases. Before planting, ensure each clove still has its protective papery husk intact, which acts as a natural barrier against soil pathogens.
Step 2: Soil Preparation
Garlic thrives in fertile, well-drained soil. To prepare, till the soil to a depth of about 12 inches to facilitate root growth and enhance drainage. Incorporate a generous amount of well-rotted compost or aged manure to enrich the soil with essential nutrients and improve its structure. Ideally, the soil should have a neutral pH, around 6.5 to 7.0. Adjusting the soil pH with lime to decrease acidity or sulfur to increase it based on a soil test will optimize conditions for garlic growth.
Step 4: Planting the Cloves
When planting, position the garlic cloves pointy end up—the shoot emerges from this end. Plant the cloves about two inches deep to protect them from cold temperatures and potential disturbances. For medium-density planting, spacing the cloves about 6 inches apart with 8 inches between rows allows for adequate airflow and sunlight, promoting healthy growth. If you’re aiming for higher yields, particularly in commercial settings, you might opt for a high-density approach, spacing the cloves 4 inches apart with just 6 inches between rows. This closer spacing can lead to a higher overall yield per area, although individual bulb size may be smaller.
Step 5: Watering Your Garlic
Immediately after planting, water the cloves gently to settle the soil around them. Garlic requires consistent moisture throughout its growth cycle. Aim to provide about one inch of water per week, ensuring that the soil remains moist but not waterlogged. Using a soaker hose or drip irrigation system can be particularly effective as it delivers water directly to the roots and minimizes moisture on the foliage, reducing the risk of fungal diseases. Adjust your watering practices as the garlic matures and the foliage begins to brown, decreasing water to encourage the bulbs to firm up before harvest.
Step 6: Mulching
After planting, apply a 2-3 inch layer of organic mulch, such as straw or shredded leaves. Mulch helps retain soil moisture, stabilizes temperature fluctuations, and suppresses weeds. Make sure the mulch is loose enough to not compact around the garlic stems, which could retain excessive moisture and cause rot.
Step 7: Ongoing Care and Monitoring
Maintain your garlic by keeping the area free of weeds, which compete with the garlic for nutrients and light. Monitor the plants for signs of pests or diseases and address any issues promptly with appropriate organic interventions. As the plants grow, particularly in spring, consider a light application of a high-nitrogen fertilizer to support vigorous leaf development. Later in the season, as bulbs begin to form, switch to a phosphorus-rich fertilizer to encourage robust bulb growth.
Spacing for Different Farming Densities
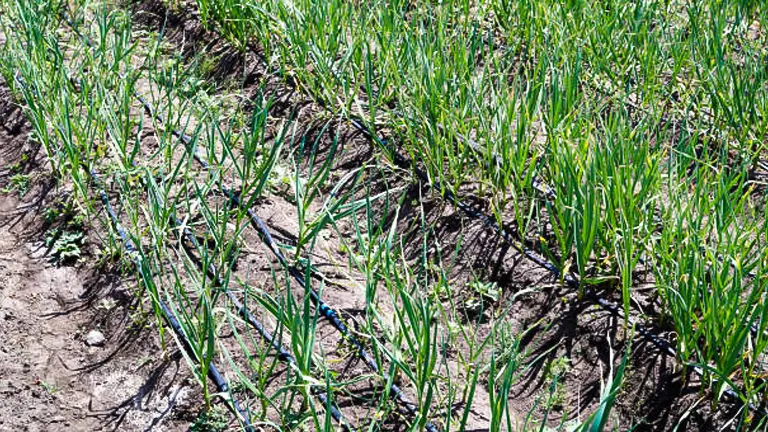
Proper spacing in garlic cultivation is essential to ensure each plant receives adequate resources like sunlight, water, and nutrients, while also allowing for efficient use of space. The spacing between garlic plants can significantly impact not only the health and yield of the plants but also the ease of cultivation and the intensity of maintenance required.
Medium Density Planting:
- This is the most common method used by small-scale farmers and home gardeners. It balances between yield and maintenance.
- Spacing: Plant cloves 6 inches apart, with about 8 inches between rows. This spacing allows for optimal air circulation and sunlight penetration, which are crucial for minimizing moisture-related diseases and ensuring robust growth.
- Advantages: This method facilitates easier weeding and harvesting. It also allows plants enough space to develop large, healthy bulbs with good air flow reducing the risk of fungal diseases.
- Yield Expectation: Adequate spacing at medium density helps in achieving well-sized bulbs, suitable for market and home use.
High Density Planting:
- Preferred in commercial agricultural setups where space maximization is key, high density planting allows for the highest possible yield per acre but requires more precise management.
- Spacing: Cloves are planted 4 inches apart with only 6 inches between rows. This closer planting strategy maximizes the number of plants per unit area.
- Advantages: Maximizes land usage and increases total yield per unit area, which can be particularly beneficial for growers with limited space.
- Drawbacks: Closer spacing may result in smaller bulb sizes and can increase the likelihood of disease spread due to reduced air circulation. It also makes individual plant care more challenging.
Table: Garlic Planting Density Analysis
| Planting Density | Clove Spacing | Row Spacing | Expected Bulb Size | Yield Per Acre | Maintenance Level |
|---|---|---|---|---|---|
| Medium Density | 6 inches | 8 inches | Large | Moderate | Moderate |
| High Density | 4 inches | 6 inches | Smaller | High | High |
Watering Requirements
Garlic requires careful water management to thrive. Ensure the plants receive about an inch of water weekly, more if your soil drains quickly or if conditions are particularly dry. Use a soaker hose or drip irrigation to deliver water directly to the roots, minimizing moisture on foliage which can encourage fungal diseases. Adjust your watering based on weather conditions—garlic’s watering needs decrease as the bulbs mature and the foliage begins to brown.
Optimal Watering Practices:
- Weekly Water Requirements: Generally, garlic should receive approximately 1 inch (2.5 cm) of water weekly. This can come from rainfall or manual watering. In regions where evaporation rates are high, or during particularly hot and dry periods, increase watering to maintain moist, not waterlogged, soil conditions.
- Soil Considerations: In sandy soils, which drain quickly, more frequent watering may be necessary. Conversely, in clay-rich soils that retain moisture, be cautious with watering frequency to avoid waterlogging which can lead to root rot.
- Growth Stage Adjustments: As garlic progresses from vegetative growth to bulb formation, its water needs can change. During the early growth stages, consistent moisture is crucial for establishing roots and promoting healthy leaf development. However, as the bulbs begin to mature and the foliage starts to naturally yellow and die back, it’s important to reduce watering gradually. This helps harden off the bulbs for harvest and storage.
Irrigation Methods:
- Soaker Hoses and Drip Irrigation: These systems are ideal for garlic as they deliver water directly to the soil, minimizing water contact with foliage and therefore reducing the risk of fungal diseases such as botrytis (gray mold). These methods also conserve water and allow for the most efficient use by targeting the plant roots directly.
- Timing of Watering: It’s best to water early in the morning to allow any moisture on the plant leaves to dry out over the course of the day, decreasing the likelihood of fungal infections.
Advanced Considerations for Watering Garlic:
- Water Use Efficiency (WUE): Measure how effectively the garlic plants use the available water. For garlic, this involves ensuring that each watering deeply penetrates the soil to encourage deep root growth, which is more drought-resistant.
- Evapotranspiration Rates: Monitor local evapotranspiration rates—how much water your plants are losing through evaporation from the soil and transpiration through the plant leaves. Adjust your watering schedule based on these rates to optimize moisture levels according to actual plant needs.
Table: Garlic Watering Guide
| Growth Stage | Water Depth/Week | Notes |
|---|---|---|
| Early Growth | 1 inch | Essential for root establishment and leaf growth |
| Mid-Season | 1-1.5 inches | Adjust based on temperature and rainfall |
| Pre-Harvest | Reduce gradually | Begin to reduce as leaves yellow |
Maintenance and Care for Garlic
Fertilization Techniques
Nutrient management is key to cultivating garlic with robust bulbs:
- Initial Planting: Incorporate a balanced, slow-release fertilizer into the soil at planting.
- Spring Feeding: As the plants resume growth, apply a nitrogen-focused fertilizer to boost leaf development, which is vital for photosynthesis and energy production.
- Bulb Formation: Switch to a phosphorus-heavy fertilizer to encourage robust bulb growth once the plants start forming bulbs.
Weed Management
Maintain a weed-free environment around your garlic, as weeds compete for essential nutrients and light. Mulch your garlic beds with organic materials like straw or grass clippings to suppress weed growth and retain soil moisture. Regularly inspect and gently remove any weeds by hand to avoid disturbing the garlic’s shallow root system.
Pruning Techniques
For Hardneck garlic varieties, pruning the scapes is critical:
- Scaping: When the scapes begin to curl, snip them off. This redirects the plant’s energy from flowering back to bulb enlargement, improving the size and quality of the harvest. These scapes are not only edible but are a delicious, milder alternative to garlic cloves.
Dealing with Pests and Diseases
Garlic is not immune to pest and disease issues. Implement strategies like crop rotation to prevent soil-borne diseases and maintain clean cultivation practices by removing old plant material from the garden. Monitor for pests such as aphids and use environmentally friendly treatments like neem oil as needed.
Harvesting and Storing Garlic
When and How to Harvest
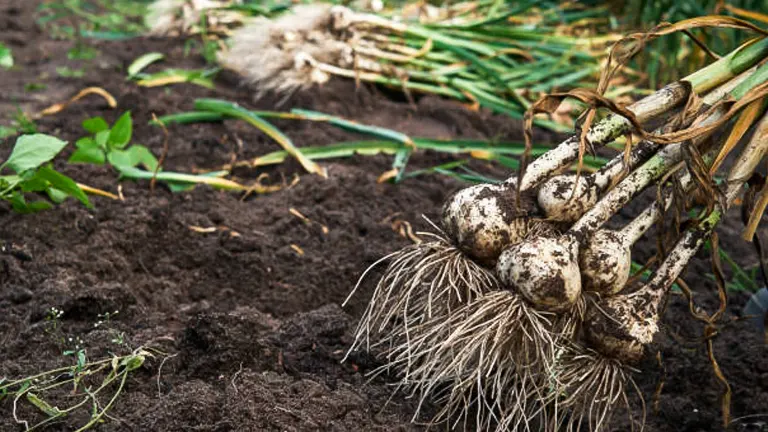
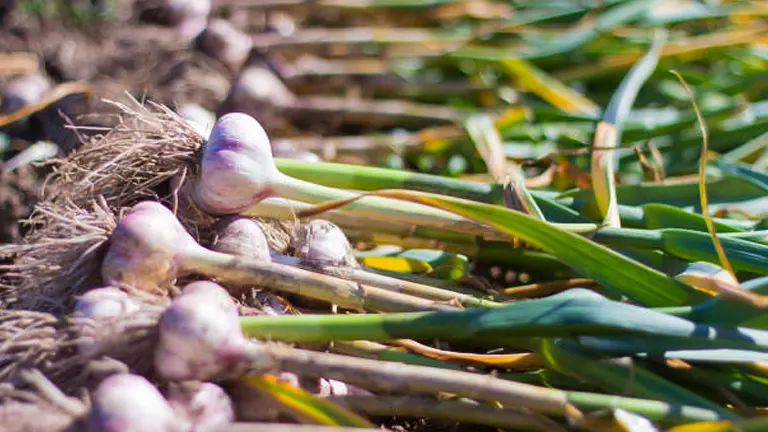
Garlic is ready to harvest when several of the lower leaves turn brown, but about five or six green leaves remain—these green leaves are crucial as they form the protective layers around the bulb, essential for good storage. Gently loosen the soil around the bulbs using a fork, being careful not to damage the bulbs. Lift the bulbs out of the soil and shake off any excess dirt.
Curing and Storage
Once harvested, curing the garlic is necessary to prepare it for storage:
- Curing Process: Lay the harvested garlic in a single layer in a dry, well-ventilated area away from direct sunlight. Allow the garlic to cure for about two to three weeks until the roots dry out and the skins become papery.
- Storage Conditions: Store cured garlic in a cool, dark place with moderate humidity to prevent drying out and to maximize longevity. Hang braided Softneck garlic or store Hardneck types in mesh bags or baskets to ensure good air circulation, which is key to preventing mold.
Common Mistakes to Avoid

Many beginners make avoidable errors when growing garlic. Here are a few common pitfalls and how to steer clear of them:
- Planting at the Wrong Time: Garlic planted too late in the season may not have adequate time to establish roots before freezing temperatures, while garlic planted too early can sprout too much foliage, which is vulnerable to winter kill.
- Improper Watering: Overwatering can lead to root rot, while underwatering during the bulb development stage can result in smaller bulbs. Consistency is key—aim for moist, not soggy or dry soil.
- Neglecting Soil Health: Ignoring soil pH and nutrient balance can inhibit garlic growth. Regularly amend your soil with compost and ensure it has proper drainage.
Advanced Tips for Bigger Yields
For those looking to maximize their garlic yield, consider the following advanced techniques:
- Crop Rotation: Rotate your garlic crop with other vegetables to prevent soil depletion and reduce the risk of disease buildup. Good rotation partners for garlic include legumes, which help fix nitrogen in the soil.
- Organic Growing Techniques: Employ organic practices such as using compost teas for fertilization and natural remedies like garlic sprays for pest control, which support sustainable gardening and improve soil structure over time.
Related Post
- How to Fertilize a Mango Tree Effectively: Tips and Tricks for Healthy Growth
- How to Fertilize Apple Trees: Essential Tips for a Bountiful Harvest
- How to Fertilize Lemon Trees: Secrets for Thriving Citrus
- How to Fertilize Avocado Tree: A Step-by-Step Guide for Lush Growth
- How to Fertilize Bougainvillea: A Complete Guide for Stunning Blooms
Conclusion
Successfully growing garlic requires attention to detail, from selecting the right variety to managing post-harvest procedures. By following the expert techniques outlined in this guide—covering everything from optimal planting methods to proper soil care and timely harvesting—you’re equipped to cultivate garlic that is both plentiful and of high quality. Remember, the key to a bountiful garlic harvest lies in meticulous care and proactive management throughout the growing season.
FAQs
- What are the signs that garlic is ready to move from vegetative growth to bulb formation?
Garlic transitions from leaf production to bulb growth when the days become longer in late spring to early summer. This shift is less visible but generally coincides with warmer weather and occurs after a significant portion of the leafy growth has matured. - Can garlic be grown in containers, and if so, what are the best practices?
Yes, garlic can be successfully grown in containers. Choose a deep pot with at least 8-10 inches of soil depth to accommodate the root system. Use high-quality potting mix and ensure the container has good drainage. Water regularly to maintain consistent soil moisture and place in a spot that receives at least 6 hours of sunlight daily. - How does mulching benefit garlic plants?
Mulching helps regulate soil temperature, retain soil moisture, and suppress weed growth. Organic mulches like straw or shredded leaves are ideal as they also gradually break down and enrich the soil. Apply a 2-3 inch layer after planting to optimize these benefits. - What are some effective companion plants for garlic and why?
Planting garlic with companions like tomatoes, peppers, and roses can deter pests. For instance, garlic repels aphids and some beetles, which are common pests for these plants. Avoid planting garlic near beans and peas, as it may inhibit their growth. - How can I tell if my garlic has become overfertilized, and what steps should I take?
Overfertilization often leads to excessive leaf growth at the expense of bulb development. If you notice lush, green growth with small bulbs, reduce the nitrogen level in your fertilization and increase phosphorus to encourage bulb growth. - What is the best method for curing garlic, and how does it affect flavor and storability?
Hang harvested garlic in a dry, shaded, and well-ventilated area for about 2-3 weeks. Proper curing dries down the roots and outer skins, which enhances flavor concentration and extends the shelf life by creating a protective barrier around the bulb. - Can I reuse garlic cloves from my garden for replanting next season, and what are the considerations?
Yes, you can replant cloves from your garden. Select the largest and healthiest cloves for replanting to maintain robust genetics. Ensure these cloves are disease-free to avoid carrying over any issues to the next growing season. - What are some common signs of pest or disease in garlic, and how can I organically manage these issues?
Yellowing leaves, stunted growth, and soft bulbs can indicate pests or disease. For organic management, use crop rotation to minimize soil-borne diseases, apply neem oil for pests, and remove affected plants to prevent spread. Regular inspection and early intervention are key.
With these expert techniques in hand, you’re now equipped to cultivate thriving garlic plants. Whether for culinary delights or health benefits, your garlic garden is set to flourish.

Kristine Moore
Forestry AuthorI'm Kristine Moore, a seasoned garden landscaping professional with over 30 years of experience. My extensive career has been dedicated to transforming outdoor spaces into stunning, sustainable landscapes. With a deep understanding of horticulture, design principles, and environmental stewardship, I have become a respected figure in the field, known for creating harmonious, visually appealing, and eco-friendly gardens. My commitment to excellence and continuous learning in landscaping trends and techniques has solidified my reputation as an expert in garden design and implementation.


Leave your comment