How To Grow Rubber Plant
- April 5, 2024
- 0 comment
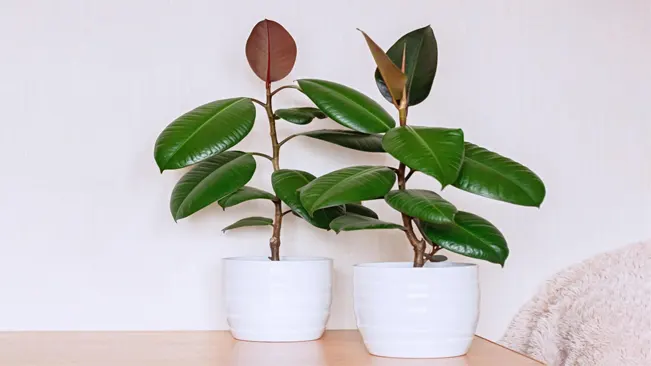
Ficus elastica, commonly known as the rubber plant, is a popular indoor foliage plant known for its glossy dark leaves and robust stature. Native to the Southeast Asian region, it has become a household favorite worldwide, thanks to its air-purifying qualities and low-maintenance nature. This article aims to guide you through the essential steps of growing and caring for a rubber plant at home.
| Benefit | Description |
|---|---|
| Air Purification | Rubber plants are known to remove air toxins and improve indoor air quality, filtering out airborne toxins like formaldehyde and benzene. |
| Low Maintenance | They are relatively easy to care for, requiring minimal watering and indirect light, making them ideal for busy or novice gardeners. |
| Aesthetic Appeal | With their glossy, dark green leaves, rubber plants add an elegant and vibrant touch to indoor spaces, enhancing the decor. |
| Humidity Regulation | They help in maintaining indoor humidity levels, which can be beneficial in dry environments or during winter months. |
| Stress Reduction | Being around plants, including rubber plants, can reduce stress and promote a sense of well-being. |
| Noise Reduction | Large rubber plants can act as a natural sound barrier, absorbing and reducing noise levels in indoor environments. |
| Adaptability | Rubber plants can adapt to a variety of indoor conditions, making them suitable for different home or office environments. |
| Promotes Responsibility | Caring for a plant like the rubber plant can encourage responsibility and routine, especially for young family members. |
| Non-Toxic to Pets | Unlike some other houseplants, rubber plants are generally considered non-toxic to cats and dogs. |
| Long-Lived | When cared for properly, rubber plants can live for many years, providing long-term companionship as a houseplant. |
List on How To Grow Rubber Plant
- Choosing the Right Plant
- Soil and Planting Rubber Plant
- Watering Your Rubber Plant
- Fertilization of Rubber Plants
- Pruning and Maintenance of a Rubber Plant
- Pest and Disease Management
- Propagation
Choosing the Right Plant
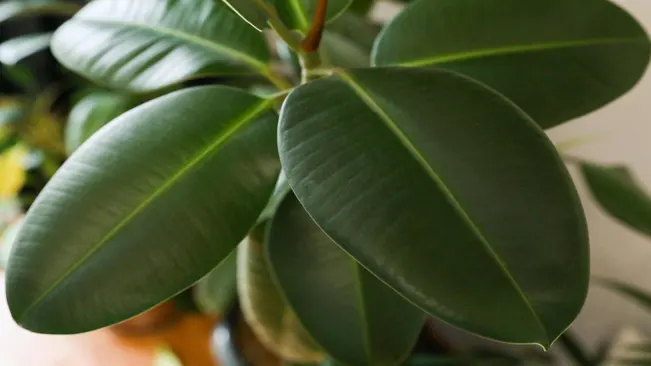
- Leaf Health: Opt for a rubber plant with vibrant, deep green leaves. The leaves should have a natural glossiness and firmness, indicating good health. If the leaves appear dull, it might suggest inadequate nutrition or improper care.
- Stem Strength: Check the sturdiness of the stem. A healthy rubber plant will have a robust and upright stem, suggesting a well-established root system and good overall plant health. Avoid plants with weak, thin, or leaning stems as this can be a sign of poor growing conditions or structural weakness.
- Uniform Growth: Observe the overall shape and growth pattern of the plant. A well-cared-for rubber plant should have symmetrical, evenly spaced leaves. Irregular or lopsided growth can indicate uneven light exposure or inconsistent care.
- Check for Pests: Inspect the underside of the leaves and the stem for signs of pests like spider mites, aphids, or mealybugs. Pests can stress the plant and spread to other indoor plants. Small webbing, sticky residue, or tiny bugs are red flags.
- No Signs of Disease: Look for any brown spots, holes, or decayed areas on the leaves and stem. These could be signs of fungal infections or bacterial diseases. Healthy plants should be free of these issues.
- Root Inspection (If Possible): If you can, gently check the roots without disturbing the plant too much. Healthy roots are firm and white or light tan. Avoid plants with dark or mushy roots, as this is a sign of root rot.
- Size and Space Consideration: Consider the size of the plant in relation to where you plan to place it. Rubber plants can grow quite large, so ensure you have adequate space for it to thrive.
Soil and Planting Rubber Plant
- Soil Type
- Well-Draining Potting Mix: This is crucial. Rubber plants do not like to sit in waterlogged soil, as it can lead to root rot. A well-draining mix ensures excess water drains out quickly.
- Indoor Plant Formula: Opt for a potting mix that’s specifically formulated for indoor plants. These mixes often contain a blend of peat, pine bark, and perlite or vermiculite, which provide the right balance of drainage and water retention for indoor conditions.
- Checking Soil Drainage
- To test if your potting mix drains well, water it and observe how quickly the water runs out. If it takes too long, consider adding more perlite or coarse sand to increase drainage.
- A good potting mix should be light and airy, not dense and clumpy.
- Pot Selection
- Drainage Holes: Ensure the pot has adequate drainage holes at the bottom. This is non-negotiable, as it is the primary way to prevent waterlogging.
- Size of Pot: The pot should be slightly larger than the root ball of your plant. This gives the plant enough room to grow but is not so large that the soil stays damp for too long.
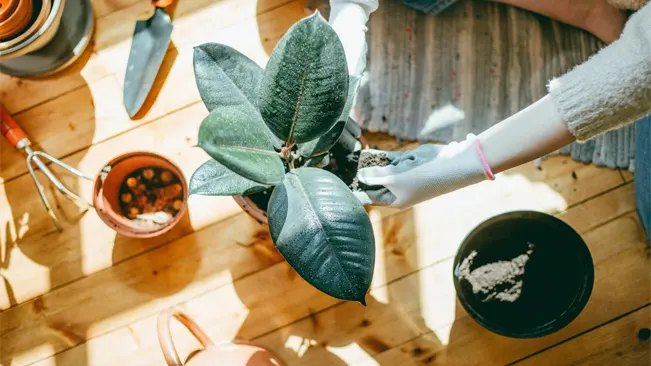
- Planting Process
- Potting: When potting your rubber plant, place a layer of gravel or broken terracotta pieces at the bottom of the pot to enhance drainage. Then, add your potting mix and plant the rubber plant so that it sits at the same depth it was in its previous container.
- Root Care: Be gentle with the roots during transplanting. If the roots are densely packed or circling the pot, gently tease them apart to encourage them to grow outward into the new soil.
- After Planting Care
- Watering After Planting: Water the plant thoroughly after planting, allowing excess water to drain out. This helps settle the soil around the roots.
- Positioning: Place the pot in a location where it receives bright, indirect light, which is ideal for rubber plants.
Watering Your Rubber Plant
- Check the Soil Moisture: Before watering, always check the top inch of the soil. If it’s dry to the touch, it’s time to water the plant. This method is more reliable than sticking to a strict watering schedule, as the plant’s water needs can vary with changes in the environment, like light levels and temperature.
- Water Thoroughly but Sparingly: When watering, do so thoroughly, ensuring that water reaches the entire root system. However, be cautious not to overdo it. The goal is to moisten the soil without making it waterlogged. A good sign of sufficient watering is when a little water starts to trickle from the drainage holes at the bottom of the pot.
- Avoid Water Accumulation: Ensure that your pot has adequate drainage and that excess water can escape. Stagnant water in the pot can lead to root rot, a common problem in rubber plants due to over-watering.
- Adjust Watering with Seasons: Rubber plants require less water during the winter months when their growth slows down. During this dormant period, allow the soil to dry out a bit more between waterings. This change in watering habit prevents the risk of over-watering when the plant is not actively growing.
- Use Room Temperature Water: It’s best to use water that is at room temperature. Cold water can shock the plant’s roots and cause stress.
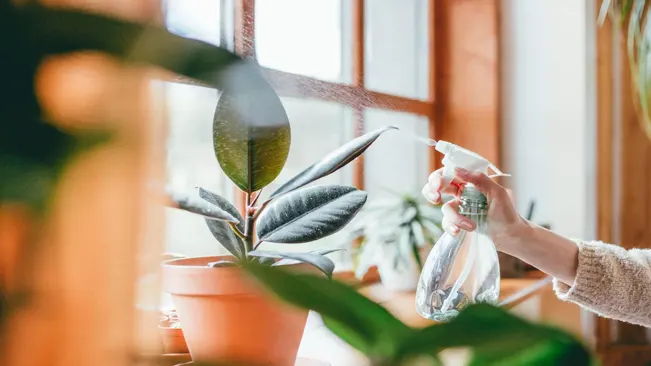
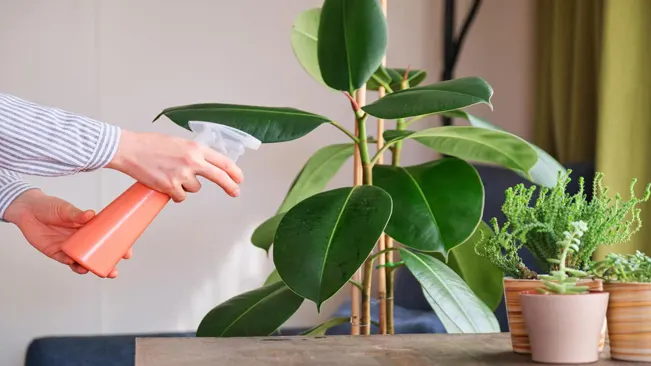
- Humidity Considerations: If your rubber plant is in a dry environment, consider occasional misting or using a humidifier. However, misting should not replace regular watering of the soil.
- Monitor Plant Responses: Pay attention to how your rubber plant responds after watering. Drooping or yellowing leaves can indicate both under-watering and over-watering. Adjust your routine accordingly.
Fertilization of Rubber Plants
- Type of Fertilizer: Select a balanced, water-soluble fertilizer for your rubber plant. A balanced fertilizer typically has an equal ratio of nitrogen (N), phosphorus (P), and potassium (K), often labeled as 10-10-10 or 20-20-20. These nutrients play vital roles: nitrogen promotes leaf growth, phosphorus is essential for healthy root development, and potassium aids in overall plant health.
- Fertilization Frequency: The rubber plant requires regular feeding during its active growing season, which is spring and summer. During these months, fertilize the plant once a month. This consistent feeding supports the plant’s growth when it’s most active in producing new leaves and height.
- Reduced Feeding in Dormant Periods: In fall and winter, the rubber plant’s growth rate decreases as it enters a dormant phase. During this time, reduce fertilization to prevent the buildup of excess nutrients, which can harm the plant. Feeding it once every two months or even suspending fertilizer during these colder months is often recommended.
- Application Process: Dilute the water-soluble fertilizer according to the instructions on the package. It’s crucial to follow the recommended dosage to avoid over-fertilization, which can lead to root burn. Water the plant with this solution, ensuring it reaches the root zone. It’s best to fertilize after watering the plant with plain water to prevent the concentrated fertilizer from damaging the roots.
- Monitoring Plant Response: Observe your rubber plant’s reaction after fertilization. Healthy growth is a good indicator that your fertilization routine is effective. Signs of over-fertilization include yellowing leaves, brown leaf tips, and wilting. If you notice these symptoms, reduce the fertilizer concentration or frequency.
- Seasonal Adjustments: Be mindful of the changes in light and temperature each season, as these can affect the plant’s nutrient needs. In bright, warm conditions, your rubber plant might benefit from regular feeding, while in darker, cooler environments, it may require less.
Pruning and Maintenance of a Rubber Plant
- Understanding When to Prune: The best time to prune your rubber plant is in the spring or early summer when the plant is in its active growth phase. This timing helps the plant recover quickly and use its energy for new growth.
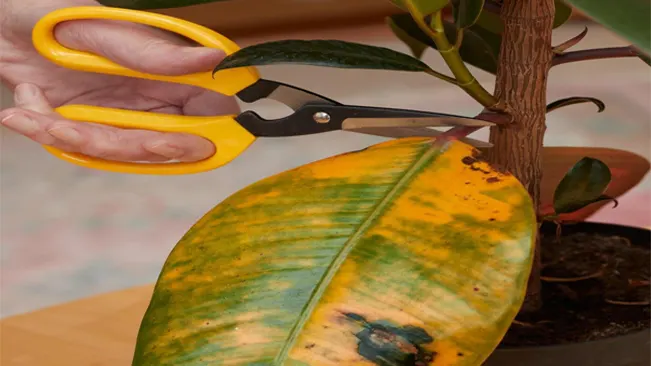
- Identifying What to Prune: Look for leaves that are yellow, brown, or damaged, as these are usually signs of stress or disease. Also, identify branches that are overly long or disrupt the plant’s natural shape. These are the parts you’ll want to prune.
- Tools for Pruning: Use a pair of sharp, clean pruning shears. Sterilize the blades with rubbing alcohol before and after use to prevent the spread of disease.
- Technique for Pruning: Make your cuts at a 45-degree angle about ¼ inch above a leaf node (the point where a leaf or branch joins the stem). This method encourages new growth. When removing entire branches, cut close to the main stem, being careful not to damage it.
- Managing Height and Shape: If your rubber plant is getting too tall, you can prune the main stem. This encourages the plant to grow more horizontally and become bushier. For shaping, evenly trim the branches to maintain a balanced look.
- Leaf Cleaning: Rubber plants have large leaves that accumulate dust. Clean them regularly with a damp cloth. This not only keeps the plant looking fresh but also enhances photosynthesis by unblocking the pores of the leaves.
- Avoiding Over Pruning: Don’t remove more than one-third of the foliage at once, as this can stress the plant. If you need to do extensive pruning, do it in stages over several months.
- Post-Pruning Care: After pruning, water the plant well and ensure it’s in a spot with indirect light. This helps the plant to heal and grow back healthier.
- Watching for Sap: Rubber plants ooze a milky sap when cut. This sap can be irritating to the skin and toxic if ingested, so wear gloves when pruning and clean any sap off surfaces promptly.
- Regular Inspection: Regularly inspect your plant for any signs of pests or diseases, especially after pruning. Early detection and treatment can save your plant from serious damage.
Pest and Disease Management
Pest Management
- Identifying Pests: The most common pests afflicting rubber plants are spider mites, mealybugs, and aphids.
- Spider Mites: These are tiny spiders, often red or brown, visible as small dots on the underside of leaves. They create fine webs and cause yellowing of leaves.
- Mealybugs: These appear as white, cottony masses in leaf axils, under leaves, and along stems. They suck sap from the plant, weakening it.
- Aphids: These small, soft-bodied insects are often green or black. They cluster on new growth and undersides of leaves, feeding on plant sap.
- Treatment:
- Insecticidal Soap: This is effective against most soft-bodied pests. Spray directly on the pests, making sure to reach under leaves and other hidden areas. Repeat every 4-7 days until the pests are gone.
- Neem Oil: A natural pesticide, neem oil is effective against various pests. It’s a systemic solution that not only kills pests but also prevents their return. Apply as per the instructions on the product, usually once a week until the issue is resolved.
Disease Management
- Identifying Diseases: The most common diseases in rubber plants are related to overwatering, leading to root rot and leaf spots.
- Root Rot: This occurs when the soil is consistently wet. Signs include yellowing leaves, stunted growth, and a mushy stem base.
- Leaf Spots: These are brown or black spots that usually appear on the leaves due to fungal or bacterial infections. Often, they’re accompanied by yellowing of surrounding leaf areas.
- Treatment and Prevention:
- Root Rot: Improve drainage in the pot and reduce watering. In severe cases, remove the plant from its pot, trim away the rotted roots, and repot in fresh soil.
- Leaf Spots: Isolate the affected plant to prevent the spread. Remove and dispose of affected leaves. For fungal leaf spots, apply a fungicide as per the instructions. Ensure good air circulation around the plant and avoid wetting the leaves when watering.
Propagation
- Selecting the Cutting: Choose a healthy stem from your rubber plant. Look for a stem that is robust and has a few leaves. A cutting of about 6 inches in length is ideal.
- Preparing the Cutting: Using a clean, sharp pair of scissors or pruning shears, make a cut just below a node (the point on the stem where leaves are attached). The node is where the new roots will sprout from.
- Preparing the Cutting for Rooting
- Option 1: Water Rooting:
- Remove the lower leaves near the cut end, leaving two or three leaves at the top.
- You may dip the cut end in rooting hormone powder or gel to encourage root growth, though this is optional for rubber plants.
- Place the cutting in a jar or glass of water, ensuring that the node is submerged while the remaining leaves are above water.
- Change the water every few days to keep it fresh.
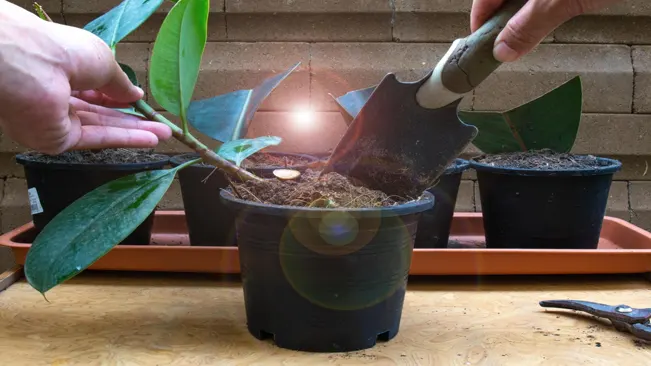
- Option 2: Soil Rooting
- After removing the lower leaves and optionally using rooting hormone, plant the cutting in a pot filled with moist, well-draining potting mix. Ensure the node is buried in the soil.
- You can cover the pot with a clear plastic bag or place it in a mini greenhouse to create a humid environment, which encourages rooting.
- Option 1: Water Rooting:
- Caring for the Cutting
- Place the cutting in a warm spot with bright, indirect light. Avoid direct sunlight as it can be too intense for the young plant.
- If you’re rooting in soil, keep the soil consistently moist but not soggy. Overwatering can cause the cutting to rot.
- If rooting in water, ensure the water level covers the node but doesn’t submerge too much of the stem.
- Transplanting
- For water-rooted cuttings, once you see a healthy network of roots (usually in a few weeks), you can transplant them into soil.
- For soil-rooted cuttings, once the plant shows signs of growth and the roots are established (you can gently tug on the plant to feel for resistance), it’s ready to continue growing in its pot or to be transplanted.
- Aftercare
- Once transplanted, care for your new rubber plant as you would the parent plant. It requires the same light, temperature, and watering conditions.
Conclusion
The rubber plant is a resilient and attractive addition to any indoor space. With the right care, it can grow into a striking indoor tree, bringing a touch of nature’s majesty into your home. Remember, patience and consistent care are key to nurturing a thriving rubber plant.
FAQs (Frequently Asked Questions)
- What type of soil is best for a rubber plant?
Rubber plants prefer well-draining soil. A mixture of potting soil, peat, and pine bark is often recommended. - How often should I water my rubber plant?
Water when the top inch of soil is dry, usually every 1-2 weeks. Avoid overwatering, and reduce frequency in winter. - What is the ideal lighting for a rubber plant?
Bright, indirect light is ideal. Direct sunlight can scorch the leaves, while too little light can cause leggy growth. - How do I know if my rubber plant is getting too much water?
Signs include yellowing leaves, a mushy stem base, and dropping leaves. Let the soil dry out more between waterings. - Can I put my rubber plant outside?
Yes, but avoid direct sunlight and harsh conditions. It’s best suited to a shaded porch or similar area in warm months. - How do I prune a rubber plant?
Use clean, sharp scissors to cut just above a leaf node. This encourages the plant to grow more bushy and full. - What temperature is best for a rubber plant?
They prefer temperatures between 60°F – 75°F (15°C – 24°C). Avoid placing them in drafts or near heating/cooling vents. - Do rubber plants need humidity?
Yes, they enjoy a humid environment. Mist the leaves regularly or use a humidifier to improve humidity, especially in dry conditions. - How do I repot a rubber plant?
Choose a pot 1-2 inches larger in diameter than the current one. Repot in the spring, using fresh potting soil. - Are rubber plants toxic to pets?
Rubber plants are generally considered non-toxic to cats and dogs, but it’s always best to keep an eye on pets around plants.

Emma Hudson
Forestry AuthorEmma's experience in farming shapes her detailed guides on gardening and farming tools, providing practical, actionable advice grounded in real-world experience. Her work targets both newcomers and experienced farmers, aiming to enhance their practices with a mix of traditional wisdom and modern techniques. By making complex agricultural concepts accessible, Emma's guides serve as valuable tools for those navigating the challenges of contemporary farming, offering strategies for sustainable success.


Leave your comment