How to Plant Pre-Sprouted Potatoes Successfully: Expert Guide
- May 28, 2024
- 0 comment
Learn how to plant pre-sprouted potatoes with this expert guide for a successful, abundant harvest. Ideal for all gardening levels. Ready to turn your green dreams into reality? This expert guide on planting pre-sprouted potatoes is your first step towards a bountiful harvest.
From selecting the right sprouts to the perfect planting technique, we cover everything you need to grow healthy, abundant potatoes. Let’s get our hands dirty and start planting.
Table of Contents
- Understanding Pre-Sprouted Potatoes
- Selecting Your Pre-Sprouted Potatoes
- Preparing Your Planting Site
- Planting Techniques
- Caring for Your Planted Potatoes
- Monitoring and Protecting
- Harvesting Your Potatoes
- Troubleshooting Common Issues
- Conclusion
- FAQs
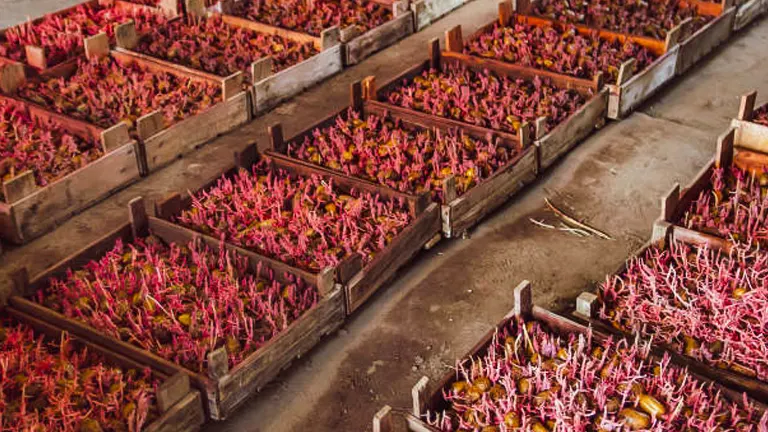
Understanding Pre-Sprouted Potatoes
Pre-sprouted potatoes, commonly referred to as “chitted” potatoes, undergo a process of initiating sprout development before being planted in the soil. This technique, known as chitting, strategically accelerates growth by exposing seed potatoes to a controlled light and temperature environment. This preparation not only extends the growing season but also enhances the robustness of the plants.
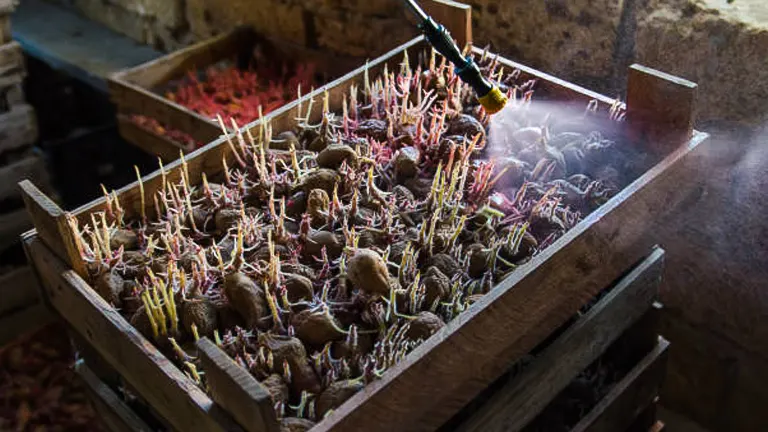
Scientific Basis of Chitting
The chitting process capitalizes on the natural dormancy break of potatoes. By placing them in a cool (approximately 50°F or 10°C), well-lit environment, you encourage the development of strong, stocky sprouts. These sprouts are biochemically prepared for rapid growth, containing higher levels of gibberellins (growth hormones) which promote cell elongation and division.
Benefits of Pre-Sprouting
- Earlier Harvest: Research indicates that pre-sprouted potatoes can be harvested up to two weeks earlier compared to their non-sprouted counterparts. This is particularly beneficial in regions with shorter growing seasons.
- Stronger Start: Pre-sprouting in a controlled environment allows for healthier initial growth. Sprouts are less susceptible to environmental stress when planted, leading to a decrease in crop failure rates.
- Increased Yield: Studies have shown that chitting can increase yields by up to 15%, due to more efficient use of the growing season and improved plant vitality.
Table of Comparative Growth Metrics
| Growth Factor | Non-Sprouted Potatoes | Pre-Sprouted Potatoes |
|---|---|---|
| Time to Emergence (days) | 18-25 | 12-17 |
| Yield Increase (%) | 0 | Up to 15 |
| Harvest Time (weeks earlier) | 0 | Up to 2 |
This table illustrates the tangible benefits of pre-sprouting, showcasing quicker emergence and a quantifiable increase in yield potential.
Selecting Your Pre-Sprouted Potatoes
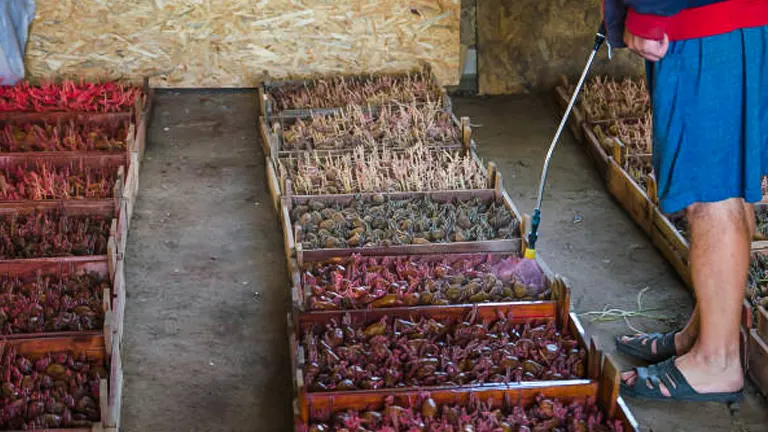
Choosing the right pre-sprouted potatoes is not just a step in planting; it’s a cornerstone of agricultural success. The quality of the seed potatoes determines the robustness of sprouting, resistance to disease, and ultimately, the yield of the crop. Here’s what to look for and why it matters scientifically:
Criteria for Selection
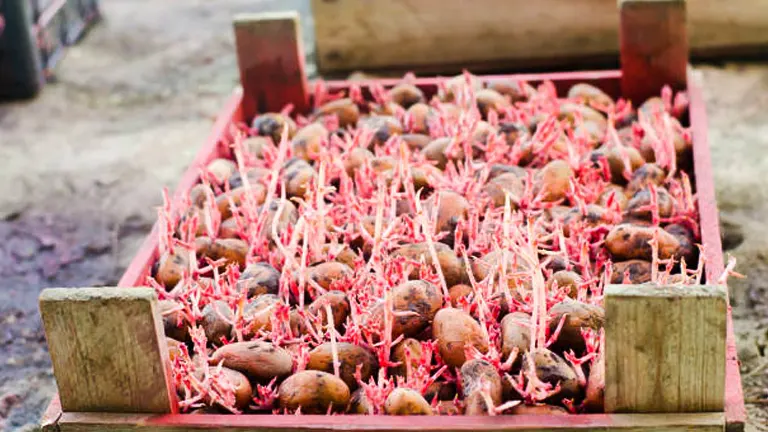
- Health of Sprouts: Opt for sprouts that are short (1-2 inches), sturdy, and vividly green. These characteristics are indicators of healthy chlorophyll production and optimal photosynthetic potential, which is crucial when they are transplanted outdoors.
- Texture of the Potato: Firmness in potatoes is not just about touch—it’s about the internal water content and structural integrity. Firm potatoes have better cell structure, indicating minimal microbial degradation and higher resilience in varying soil conditions.
- Eye Count: A higher eye count generally translates to more sprouts per potato, which can lead to more stems and thus a potentially higher yield. However, balance is key, as too many sprouts can lead the energy of the potato to be overly divided, affecting overall growth.
Scientific Insights on Sprout Vitality
The vitality of sprouts can be assessed through their respiration rates, which are indicative of their metabolic activity. Higher respiration rates often suggest a more vigorous sprout that can transition more effectively from dormancy to active growth once planted.
Table of Comparative Seed Quality Metrics
| Quality Factor | Ideal Characteristics | Impact on Growth |
|---|---|---|
| Sprout Length (inches) | 1-2 | Optimal for early growth efficiency |
| Firmness | High | Indicates lower decay, better storage |
| Eye Count | Moderate | Balances sprout vigor with resource competition |
Selecting Certified Seed Potatoes
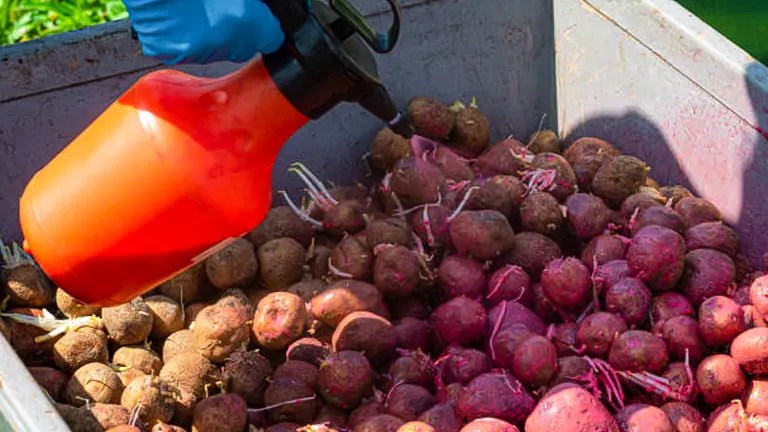
It’s advisable to choose certified seed potatoes from a reputable nursery or garden center. These potatoes are not only free from specific pathogens but are also bred for optimal characteristics like disease resistance and yield efficiency. The certification process involves rigorous testing for diseases such as potato virus Y (PVY) and potato leafroll virus (PLRV), ensuring that the seeds you plant have the best genetic start possible.
Preparing Your Planting Site
Creating an optimal environment for pre-sprouted potatoes begins long before planting. The quality of the site preparation can significantly influence plant health, growth rate, and the eventual yield of your crop. Here’s a deeper look into how to prepare your site scientifically and practically:
Optimizing Soil Conditions
Pre-sprouted potatoes require well-drained, loamy soil with specific characteristics for optimal growth. The ideal pH range for potatoes is slightly acidic, between 5.0 and 6.0, which helps in nutrient uptake and reduces the risk of certain soil-borne diseases.
- Soil Texture and Structure:
- Loamy soil is ideal because it holds nutrients well and drains excess water efficiently, preventing the roots from becoming waterlogged. Incorporate organic matter such as compost or aged manure to improve soil structure, enhance microbial life, and increase fertility.
- Soil pH Adjustment:
- Adjusting the pH of your soil is crucial for preventing disease and optimizing nutrient availability. Use sulfur to lower the pH or lime to increase it if outside the ideal range. This adjustment should be based on a soil test for accuracy.
- Nutrient Balance:
- Potatoes are particularly demanding in terms of potassium. Ensure the soil has a balanced N-P-K (Nitrogen-Phosphorus-Potassium) ratio tailored to support tuber development. Typically, a lower nitrogen content prevents overly lush foliage at the expense of tuber growth.
Site Selection Criteria
- Sunlight Exposure:
- Potatoes require at least six hours of direct sunlight daily. Sunlight is crucial for photosynthesis and energy production, directly influencing growth rates and yield.
- Drainage:
- Good drainage is non-negotiable for potato health. Waterlogged soil can lead to root rot and other fungal diseases. If drainage is a concern, consider raising your beds to improve water flow.
Table of Comparative Soil Amendments
| Amendment Type | Benefit | Recommended Application Rate |
|---|---|---|
| Organic Compost | Improves texture & fertility | 2-4 inches integrated into top 6-8 inches of soil |
| Aged Manure | Increases microbial activity | 20-30 lbs per 100 square feet |
| Lime (if needed) | Raises pH | 50 lbs per 1,000 square feet to increase pH by 1 unit |
| Sulfur (if needed) | Lowers pH | 10 lbs per 1,000 square feet to lower pH by 1 unit |
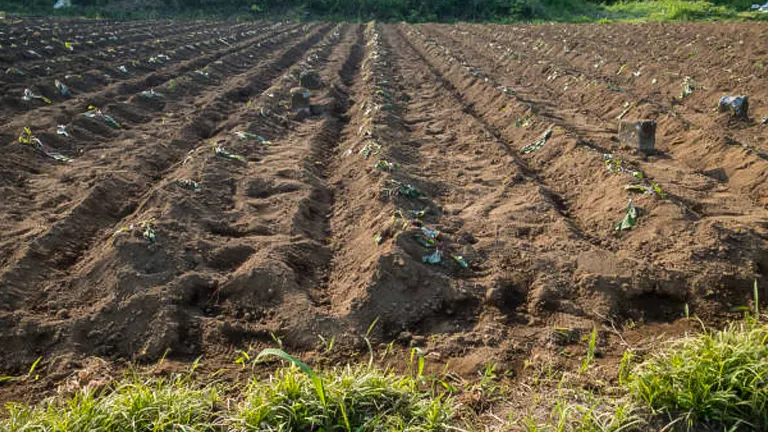
Planting Techniques
Proper planting is crucial for optimizing the growth and yield of pre-sprouted potatoes. Here we delve into the scientifically-backed techniques that ensure your potatoes get the best start possible in their growth cycle.
Step-by-Step Planting Guide
- Depth and Spacing:
- Plant your pre-sprouted potatoes approximately 4 to 6 inches deep. This depth is ideal for protecting the sprouts from temperature extremes while allowing easy emergence.
- Space the potatoes about 12 inches apart, with rows about 30 inches apart. This spacing maximizes air circulation and minimizes the spread of diseases, while also providing ample room for growth.
- Orientation:
- Position each potato with the sprouts pointing upwards. This orientation is critical as it aligns the natural growth direction of the sprouts with gravity, enhancing their strength and efficiency in breaking through the soil.
- Covering:
- Initially, cover the potatoes lightly with soil to avoid smothering the sprouts. As sprouts emerge and grow, progressively hill up around the plants with additional soil or compost. This hilling is essential not just for supporting the plant, but also for protecting the developing tubers from sunlight exposure, which can produce solanine, a toxic compound.
Scientific Insights on Planting
- Thermal Regulation: Planting at the recommended depth helps maintain a stable temperature around the developing tubers, crucial for their growth. This is supported by research indicating that temperature variations can affect tuber development rates.
- Growth Orientation: Studies have shown that correct sprout orientation significantly impacts the initial growth phase, potentially increasing the speed and health of sprout development.
Table of Planting Parameters and Their Effects
| Planting Parameter | Recommended Practice | Effect on Growth |
|---|---|---|
| Depth | 4-6 inches | Optimizes temperature regulation and sprout protection |
| Spacing | 12 inches between plants, 30 inches between rows | Ensures adequate air flow and resource allocation |
| Orientation | Sprouts pointing upwards | Aligns growth with gravitational pull, enhancing strength |
Caring for Your Planted Potatoes
Post-planting care is crucial for the health and productivity of your potato plants. This phase focuses on providing the plants with the right amount of water, nutrients, and protection.
Watering:
- Consistency is Key: Potatoes need a consistent amount of water, especially once the tubers start forming. Aim for at least 1 inch of water per week, adjusting for rainfall.
- Avoid Overwatering: While consistent moisture is vital, avoid waterlogging as this can lead to root rot and other diseases.
Fertilization:
- Initial Fertilization: Apply a balanced fertilizer at planting time to give your potatoes a good start.
- Ongoing Nutrition: Reapply a light fertilizer every four to six weeks, ensuring it is high in potassium to promote tuber growth.
Mulching:
- Benefits: Mulching helps maintain soil moisture, control weeds, and keep soil temperatures consistent.
- Materials: Use organic mulches like straw or leaves, which also add nutrients to the soil as they decompose.
Monitoring and Protecting
Vigilance in monitoring your potato crop can prevent or mitigate issues before they become severe. Here’s how to keep your potatoes healthy and thriving:
Common Pests and Diseases
- Colorado Potato Beetle:
- Identification: Look for yellow and black striped adults, red larvae, and yellow eggs on the undersides of leaves.
- Management: Regular inspections and manual removal of beetles and larvae can control minor infestations. For larger issues, consider applying a neem oil solution or Bacillus thuringiensis var. tenebrionis, a biopesticide effective against young larvae.
- Potato Blight:
- Identification: Watch for brown patches on leaves and stems, often followed by a white fungal growth under humid conditions.
- Prevention and Treatment: Improve air circulation by spacing plants adequately and watering at the base to avoid wetting the foliage. Copper-based fungicides can be applied as a preventive measure during damp weather or immediately at the first signs of infection.
Natural Remedies
- Neem Oil:
- Effectiveness: Neem oil acts as an antifeedant and growth regulator, deterring beetles and reducing larval development.
- Application: Mix 2 teaspoons of neem oil with 1 liter of water and a few drops of mild soap to emulsify. Spray every 7 days or after rainfall.
- Baking Soda Spray:
- Effectiveness: Baking soda alters the pH on leaf surfaces, making it less hospitable to fungal spores.
- Recipe: Dissolve 1 tablespoon of baking soda in 1 gallon of water. Add 1 teaspoon of mild liquid soap to help the mixture adhere to leaves. Spray preventively or at the first signs of disease.
Scientific Insights and Data
Monitoring and intervention strategies are underpinned by entomological and phytopathological research, which suggests that early detection and regular treatment significantly reduce crop losses.
Table of Integrated Pest Management Techniques
| Technique | Target | Frequency of Application | Effectiveness (%) |
|---|---|---|---|
| Neem Oil | Beetles, Larvae | Weekly or after rain | 70-90 |
| Baking Soda Spray | Fungal Diseases | At symptom onset or preventively | 50-70 |
| Manual Removal | Beetles, Eggs, Larvae | As needed | 95-100 |
| Copper Fungicides | Potato Blight | Preventively or at symptom onset | 80-90 |
Harvesting Your Potatoes
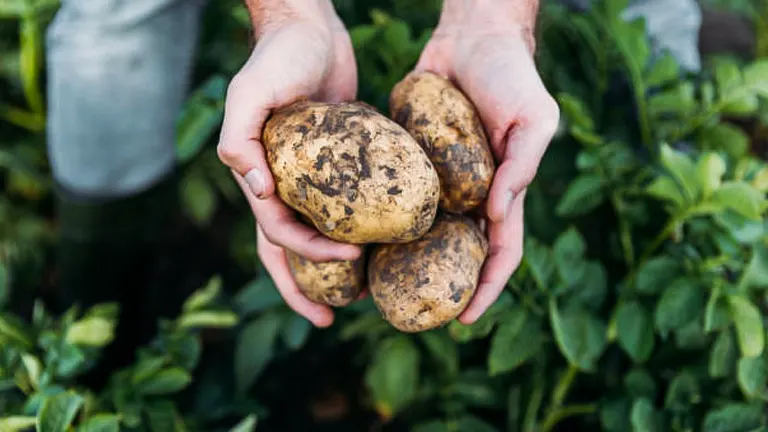
Knowing when and how to harvest potatoes will ensure you get the most out of your crop without damaging it.
Signs That Potatoes Are Ready for Harvest:
- Flower Bloom: The appearance of blooms often indicates that small, new potatoes are forming underground.
- Foliage Yellowing: Once the plant’s foliage begins to yellow and die back, it’s a sign that your potatoes have matured.
Harvesting Techniques:
- Choose the Right Time: For new potatoes, harvest before the plant dies completely, typically 2-3 weeks after the plant stops flowering. For mature potatoes, wait 2-3 weeks after the plant has died back.
- Be Gentle: Use a garden fork to loosen the soil around your plants and carefully lift the potatoes to avoid piercing them.
Storing Potatoes:
- Cure Potatoes: Allow them to sit in a dry, cool place for a few days to toughen up the skin.
- Storage Conditions: Store cured potatoes in a cool, dark, and dry place to maximize their shelf life.
Troubleshooting Common Issues
Growing potatoes can sometimes present challenges, but with the right knowledge, you can easily overcome them. Here’s how to address some of the most common problems:
Excessive Greening of Tubers:
- Cause: Potatoes turn green when exposed to sunlight.
- Prevention: Ensure that potatoes are well-covered with soil or mulch. Regularly hill the plants as they grow to keep tubers buried.
- Solution: Green potatoes contain solanine, a toxic compound. If greening occurs, cut away the green parts before cooking or discard heavily greened tubers.
Stunted Growth:
- Possible Causes: Poor soil nutrients, compacted soil, or insufficient watering.
- Solutions:
- Soil Test: Conduct a soil test to ensure it has the necessary nutrients. Amend soil based on test results.
- Aeration: Loosen compacted soil to improve water penetration and root growth.
- Regular Watering: Maintain consistent moisture levels, especially during dry spells.
Soft Rot and Blackleg:
- Identification: These bacterial diseases cause decay at the stem base and tubers.
- Prevention: Use certified disease-free seed potatoes and rotate your crops annually.
- Control: Improve soil drainage, avoid overwatering, and remove affected plants to prevent the spread of disease.
Related Post
- How to Build a Barn: A Step-by-Step Guide for Beginners
- How to Build a Sustainable Compost Bin: Easy and Eco-Friendly DIY
- How to Fertilize Bougainvillea: A Complete Guide for Stunning Blooms
- How to Fertilize Apple Trees: Essential Tips for a Bountiful Harvest
- How to Fertilize Lemon Trees: Secrets for Thriving Citrus
- How to Fertilize Avocado Tree: A Step-by-Step Guide for Lush Growth
- 10 Best Bow Saws to Buy in 2024: Top Picks for the Money
- Best Miter Saw For Beginners
- Top 10 Pruning Saws to Buy in 2024: Best for the Money
- 7 Best Pocket Chainsaw
Conclusion
Growing pre-sprouted potatoes is an enriching endeavor that can yield impressive results with the right care and techniques. By following this guide—from selecting the best sprouts to troubleshooting common issues—you are equipped to cultivate a healthy, productive potato garden. Remember, each growing season is an opportunity to refine your skills and grow an even better crop. Embrace the process and enjoy the fruits of your labor!
FAQs
- What is the best time of year to plant pre-sprouted potatoes?
Pre-sprouted potatoes should ideally be planted in early spring after the risk of frost has passed. In milder climates, you can also plant in late summer for a fall harvest. - Can I use potatoes from the grocery store for sprouting and planting?
While it’s possible, it’s not recommended as these potatoes may be treated with growth inhibitors. Instead, purchase seed potatoes from a garden center or use organic potatoes that haven’t been treated. - How long should the sprouts be before planting?
Sprouts should be about 1 to 2 inches long with a robust appearance. Sprouts longer than this may be too leggy and fragile, making them prone to damage when planting. - What is the best way to encourage strong sprout development before planting?
Place the seed potatoes in a light, cool place, like a windowsill, out of direct sunlight. This encourages sturdy, green sprouts ideal for planting. - How deep should I plant pre-sprouted potatoes?
Pre-sprouted potatoes should be planted about 4 to 6 inches deep, with sprouts pointing upwards, to allow easy growth through the soil. - What should I do if my potato plants flower?
Flowering is a normal part of the growth cycle, often indicating that tubers are developing. You can leave the flowers, as they do not affect tuber growth, or remove them to potentially direct more energy to the tubers. - How do I protect my potato plants from pests naturally?
Employ barriers like floating row covers to protect against insects. Introducing beneficial insects, such as ladybugs, can help manage aphid populations naturally. - Is it necessary to rotate the planting area for potatoes each year?
Yes, crop rotation is crucial to prevent the buildup of soil-borne diseases and pests. Avoid planting potatoes in the same area more than once every three years.
With this guide in hand, you’re now ready to plant and nurture your pre-sprouted potatoes. Happy gardening and enjoy your harvest!
Kristine Moore
Forestry AuthorI'm Kristine Moore, a seasoned garden landscaping professional with over 30 years of experience. My extensive career has been dedicated to transforming outdoor spaces into stunning, sustainable landscapes. With a deep understanding of horticulture, design principles, and environmental stewardship, I have become a respected figure in the field, known for creating harmonious, visually appealing, and eco-friendly gardens. My commitment to excellence and continuous learning in landscaping trends and techniques has solidified my reputation as an expert in garden design and implementation.


Leave your comment