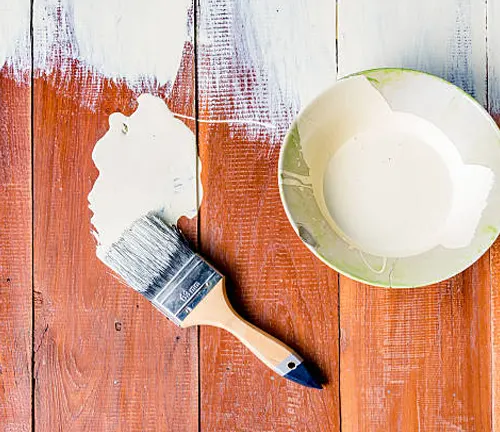
How to Remove Stains From Wood: A Practical Guide
- February 12, 2025
- 0 comment
If you’ve ever experienced the frustration of seeing a stain on your beautiful wooden surfaces, you’re not alone. Whether it’s the result of a forgotten coffee cup, a hot pan, or an accidental spill, wood stains can seem daunting to tackle. But don’t worry, stains don’t have to be permanent! With the right approach, tools, and a little patience, you can bring your wood back to life.

In this guide, we’ll cover everything you need to know about identifying stains, choosing the right tools, and using the best methods for removing them. Let’s get started!
Identify the Stain
Before diving into any stain removal method, the first step is to figure out what type of stain you’re dealing with. You don’t want to use the wrong approach and make things worse, so taking a moment to identify the stain can save you a lot of headaches.
Here are the most common types of wood stains:
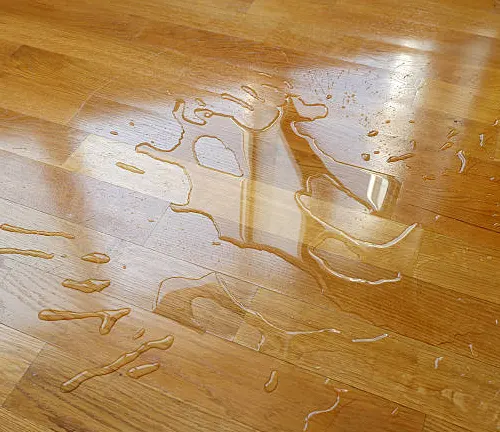
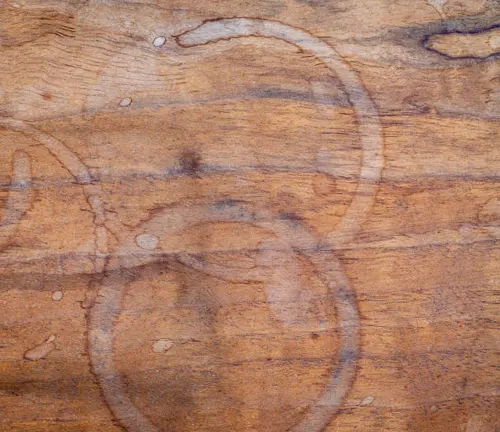
1. Water Stains
Often appear as white rings or cloudy spots, especially on finished wood. These are usually caused by moisture getting trapped under the finish—like when you forget to use a coaster under a glass.
2. Heat Stains
You’ve probably seen these white or cloudy marks if you’ve ever put a hot dish or mug directly on the wood. The heat causes the moisture in the finish to rise, leaving a white stain.
3. Dark Stains
These are more serious because they indicate that water has seeped past the finish and into the wood itself. They often come from prolonged water exposure, like a spill that wasn’t cleaned up right away.
4. Oil Stains

Greasy substances like cooking oils, hand creams, or even food spills can cause these dark marks. The oil soaks into the wood, making them trickier to remove.
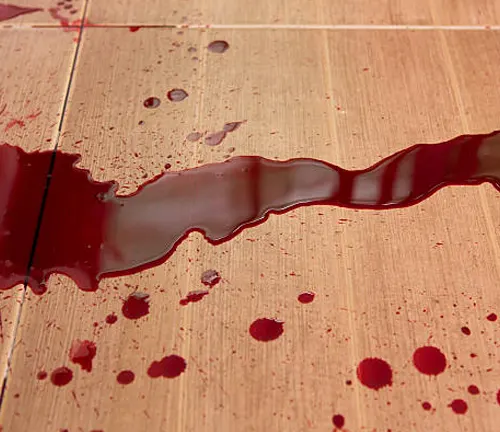
5. Ink or Dye Stains
Pen ink or spilled dye can leave dark, often permanent-looking marks, especially on unfinished or lightly finished wood.
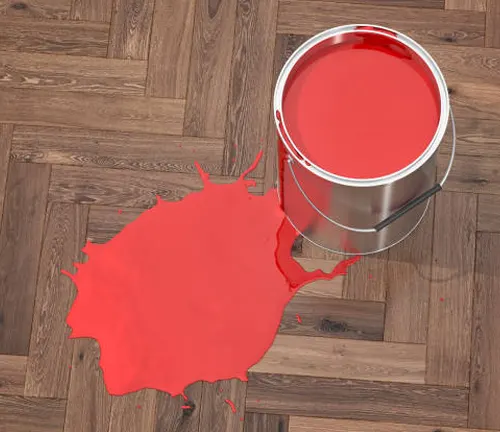
6. Paint Stains
If paint has dripped or splattered onto your wood, it can be either wet or dried. Wet paint can often be cleaned up easily, but dried paint will need more effort.
Tools and Materials You’ll Need In Removing Stains
Now that you know what type of stain you’re dealing with, let’s make sure you’ve got the right tools and materials. These will help you remove the stain efficiently without damaging the wood further:
- Soft Cloths: You’ll need these to apply and wipe off cleaning solutions.
- Steel Wool (0000 Grade): The super fine grade will gently scrub away stains without scratching the wood.
- Fine-Grit Sandpaper: Ideal for sanding away deeper stains like dark water spots or oil stains.
- Household Iron: Surprisingly, this is a great tool for lifting heat stains.
- Non-Gel Toothpaste or Baking Soda: These are mild abrasives that work wonders on water and heat stains.
- Wood Cleaner or Polish: You’ll want to polish the wood after removing the stain to restore its finish.
- Plastic Scraper or Putty Knife: Useful for lifting off dried paint or sticky residues without damaging the wood.
- Chemical Wood Stain Remover: For really stubborn or deep stains, a commercial wood stain remover can help dissolve the stain.
Once you’ve got your tools ready, you can move on to removing the stain itself. Let’s break down how to deal with each type of stain.
Here’s How to Remove Every Different Type of Stains
1. Water Stains (White Rings)
White rings from water are probably one of the most common stains on wood, but luckily, they’re also among the easiest to fix.
What You’ll Need: Soft cloth, non-gel toothpaste or baking soda, wood polish.
Step 1: Take a soft cloth and apply a small amount of non-gel toothpaste or a paste made from baking soda and water.
Step 2: Gently rub the mixture over the water stain in circular motions. Don’t apply too much pressure—let the mild abrasive do the work.
Step 3: Wipe the area clean with a damp cloth and then apply some wood polish to restore the wood’s shine.
Alternative Method: You can also mix equal parts white vinegar and olive oil, apply it to the stain, and rub it in with a cloth. This can help lift the stain while nourishing the wood.
2. Heat Stains
These stains look similar to water stains but are caused by placing hot objects directly on the wood. The good news? You can use an iron to fix it.
What You’ll Need: Dry cloth, household iron, wood polish.
Step 1: Place a dry cloth over the heat stain.
Step 2: Set your iron to a low heat setting (no steam) and gently press it on the cloth for a few seconds. The heat will help evaporate the trapped moisture under the finish.
Step 3: Lift the cloth and check the stain. If it’s not gone, repeat the process until the stain is gone.
Step 4: Once the stain is removed, apply some wood polish to restore the finish.
3. Dark Stains (Deep Water Stains)
Dark stains are more stubborn since the moisture has penetrated deeper into the wood. But with some fine-grit sandpaper, you can still restore the wood.
What You’ll Need: Fine-grit sandpaper, wood stain or finish, soft cloth.
Step 1: Lightly sand the stained area with fine-grit sandpaper until the dark spot fades. Be careful not to over-sand and damage the wood.
Step 2: Wipe away the dust with a damp cloth and let the area dry completely.
Step 3: Apply matching wood stain or finish to blend the sanded area with the rest of the wood.
Step 4: Once dry, apply a protective wood finish to seal the area and match the surrounding wood.
4. Oil Stains
Oil stains can be tricky because the grease tends to soak into the wood. Luckily, baking soda can help absorb the oil.
What You’ll Need: Baking soda, soft cloth, plastic scraper.
Step 1: Sprinkle baking soda directly onto the oil stain and let it sit for a few hours. This will help absorb the oil.
Step 2: After a few hours, gently rub the area with a soft cloth.
Step 3: If necessary, use a plastic scraper to remove any remaining residue.
Step 4: Wipe clean and polish the wood after the stain is removed.
5. Ink or Dye Stains
Ink or dye stains can often be removed by gently rubbing the affected area with a soft cloth and rubbing alcohol, followed by wiping the surface clean.
What You’ll Need: Rubbing alcohol, soft cloth, fine-grit sandpaper.
Step 1: Dampen a cloth with a small amount of rubbing alcohol and gently rub the ink stain.
Step 2: If the stain persists, lightly sand the area with fine-grit sandpaper.
Step 3: Wipe clean, and if needed, apply wood stain or finish to blend the area with the rest of the wood.
6. Paint Stains
For paint stains, wet paint is relatively easy to clean with a damp cloth, but for dried paint, you’ll need to use a plastic scraper or chemical paint remover to carefully lift or dissolve the stain without damaging the wood surface.
What You’ll Need: Plastic scraper, chemical paint remover, soft cloth.
Step 1: For fresh paint, wipe away as much as possible with a damp cloth.
Step 2: For dried paint, gently use a plastic scraper to lift the paint without scratching the wood.
Step 3: If necessary, apply a commercial paint remover to dissolve any remaining paint.
Step 4: Wipe clean and apply polish to restore the wood’s shine.
Finishing and Protecting the Wood
Once the stain is gone, it’s time to finish and protect the wood. Apply a layer of wood polish or wax to restore the wood’s luster and protect it from future damage. If you’ve had to sand the area, consider applying a wood sealant to help protect against future stains, especially in high-use areas like dining tables or countertops.
Common Mistakes to Avoid
- Using Harsh Chemicals: Bleach or ammonia-based cleaners can damage the wood’s finish, so avoid using these.
- Over-Sanding: Be careful not to sand too much, or you might remove too much wood and create an uneven surface.
- Skipping the Test Spot: Always test a cleaning method in a hidden area to make sure it won’t harm the finish.
Conclusion
Removing stains from wood can seem like a daunting task, but with the right tools and techniques, it’s completely doable. Whether you’re dealing with light water stains or more stubborn oil marks, the steps above will help you restore your wood’s natural beauty.
Take your time, be patient, and soon your wood will look as good as new!
Frequently Asked Questions (FAQ’s)
- How do I remove water rings from my wooden table?
You can use non-gel toothpaste or a baking soda paste to gently rub away the water ring, then wipe clean and apply wood polish. - What’s the best way to get rid of heat stains on wood?
Use a dry cloth and a household iron set on low heat to press the stained area, which helps lift the moisture trapped under the finish. - Can I remove dark water stains without damaging the wood?
Yes, gently sanding the area with fine-grit sandpaper can remove dark stains, followed by reapplying a matching wood finish. - How do I remove oil stains from wood?
Sprinkle baking soda over the stain to absorb the oil, let it sit, then wipe it away and use a plastic scraper for any remaining residue. - Is it safe to use rubbing alcohol on wood for ink stains?
Yes, but use it sparingly. Dampen a soft cloth with rubbing alcohol and gently rub the ink stain, then wipe clean. - How do I get rid of dried paint on wood?
Use a plastic scraper to gently lift the dried paint, or apply a chemical paint remover for stubborn spots. - Can I use vinegar to clean wood stains?
Yes, mixing vinegar and olive oil can help remove light stains like water rings while nourishing the wood surface. - Will sanding damage my wood?
If done carefully, sanding with fine-grit sandpaper can remove stains without damaging the wood, but avoid over-sanding. - Can I remove deep stains without professional help?
Yes, deep stains like dark water spots can often be removed at home with the right tools, such as sandpaper and matching wood stain. - How can I prevent future stains on my wood surfaces?
Use coasters, placemats, and wood polish regularly, and consider applying a wood sealant for added protection against spills.

Edward Smith
Forestry AuthorWoodworking is about more than crafting; it's a harmonious connection with nature, mastering tools, and preserving our environment. I'm here to share my knowledge and experiences with you, forging a future where we can embrace wood's beauty and utility while safeguarding our forests' health and diversity.


Leave your comment