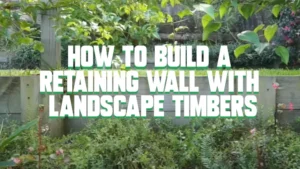
Constructing a Durable Retaining Wall with Railroad Ties
- February 2, 2024
- 0 comment
Retaining walls go beyond mere utility, offering a transformative touch to landscapes by reshaping sloping terrains into usable spaces. The incorporation of railroad ties into these structures introduces a unique blend of resilience and rustic aesthetic. These timbers, rich in history from their days on the tracks, lend their sturdy character and weathered charm to the walls, merging practicality with natural beauty.
By utilizing railroad ties, one can not only stabilize and sculpt the land but also infuse it with a piece of history, creating outdoor spaces that are as functional as they are visually captivating.
Understanding Railroad Ties
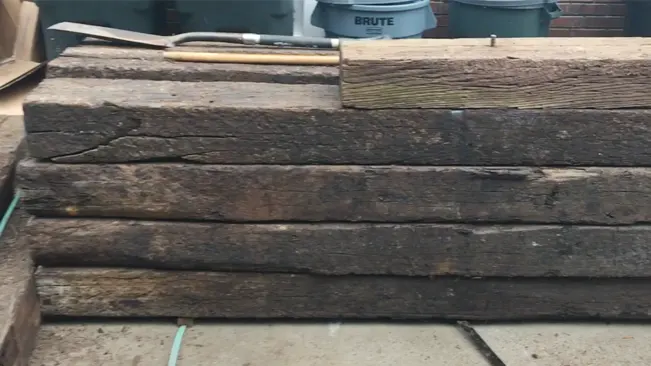
Railroad ties, with their robust and hefty appearance, serve as a testament to the enduring legacy of the railway era, embodying a piece of history in their rugged form. These substantial pieces of wood, once integral to the structural integrity of train tracks, are imbued with a resilience that comes from their treatment processes, designed to ward off decay and withstand the rigors of time and nature. Beyond their durability, railroad ties possess an inherent rustic charm, characterized by their weathered texture and earthy tones, which allows them to integrate effortlessly into a variety of natural landscapes.
This unique combination of strength, longevity, and aesthetic appeal makes railroad ties a sought-after material for a range of landscaping and architectural projects, where they contribute not only functional value but also a touch of historical and natural beauty.
Benefits of Using Railroad Ties
Using railroad ties in landscaping and construction projects offers several benefits:
- Durability
Railroad ties are known for their robustness and longevity. They are treated to resist decay, rot, and pest infestations, making them a durable choice for outdoor applications. - Aesthetic Appeal
The rustic and rugged look of railroad ties adds a distinctive charm to landscapes. Their weathered appearance can complement a variety of design aesthetics, from traditional to rustic, adding character and warmth to outdoor spaces. - Environmental Consideration
Repurposing railroad ties for landscaping projects is an environmentally friendly practice. By using these reclaimed materials, you reduce waste and minimize the demand for new lumber, contributing to sustainability. - Versatility
Railroad ties are incredibly versatile and can be used in a myriad of applications, from building retaining walls and garden borders to creating steps, walkways, and even furniture. Their strength makes them suitable for both structural and decorative uses. - Cost-Effectiveness
Compared to other landscaping materials like stone or manufactured pavers, railroad ties can be more affordable, especially if sourced from reclaimed materials. This cost advantage makes them an attractive option for large-scale projects or when working within a budget. - Ease of Installation
Despite their heavy weight, railroad ties can be relatively easy to work with. They can be cut to size, stacked, and secured with spikes or rebar, allowing for straightforward installation in a variety of settings.
Planning Your Retaining Wall
Building a retaining wall with railroad ties is a straightforward process that begins with evaluating the landscape for slope, soil, and drainage, followed by planning the wall’s size and shape. The area is cleared and marked, then a trench is dug, filled with gravel, and leveled to lay the foundation. Railroad ties are placed on this base, secured with metal spikes, and layered in a staggered fashion to strengthen the structure. Drainage is managed by adding landscape fabric and gravel behind the wall, and the project is finished by backfilling with soil and beautifying the space with landscaping. Regular upkeep is essential to maintain the wall’s durability and appearance.
Tools
- Level
- Shovel
- Sledgehammer or mallet
- Drill with appropriate bits
- Measuring tape
Materials
- Railroad ties
- Rebar or long spikes
- Gravel for base and drainage
- Landscape fabric
Step-by-Step Construction Guide
Step 1: Planning and Design
Before embarking on the construction of a retaining wall, it’s crucial to conduct a thorough assessment of the intended site, taking into account the terrain’s characteristics and the soil’s nature. The next phase involves determining the wall’s dimensions, including its length, height, and depth, tailored to suit the specific requirements of your landscape. Gathering all necessary materials is also key, which, for this project, includes railroad ties, rebar or long spikes for securing the ties, a gravel base to facilitate drainage, and potentially landscape fabric to prevent soil erosion.

Step 2: Preparing the Site
The initial groundwork involves clearing the designated area of any debris, vegetation, or obstacles that might impede construction. Establishing the wall’s layout is done by marking its perimeter with stakes and string, providing a visual guide and ensuring the alignment is consistent with your design plans.

Step 3: Laying the Foundation
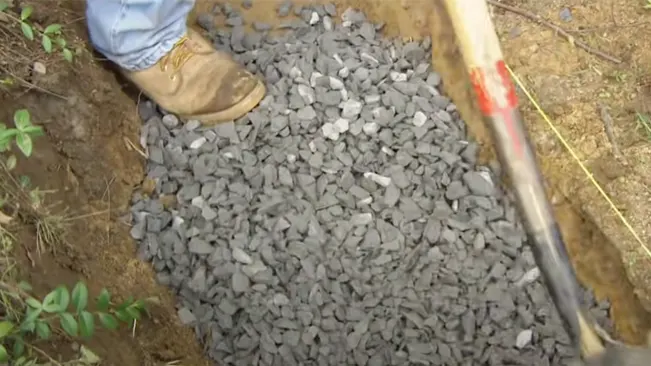
A solid foundation is critical for the stability of the retaining wall, beginning with the excavation of a trench approximately 4-6 inches deep and slightly wider than the width of the railroad ties. Filling this trench with a layer of gravel creates a stable and well-draining base, setting the stage for the installation of the first railroad tie.
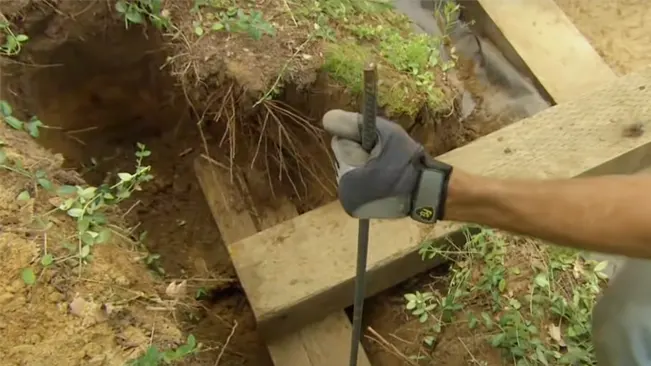
Step 4: Installing the First Layer of Ties
The installation of the first railroad tie is a pivotal step, as it sets the precedent for the levels of subsequent layers. It’s placed within the prepared trench, and meticulous attention is paid to ensure it is perfectly level, utilizing a level tool for precision. Stability is achieved by drilling vertical holes through the tie into the ground below and securing it with rebar or spikes, anchoring it firmly in place.
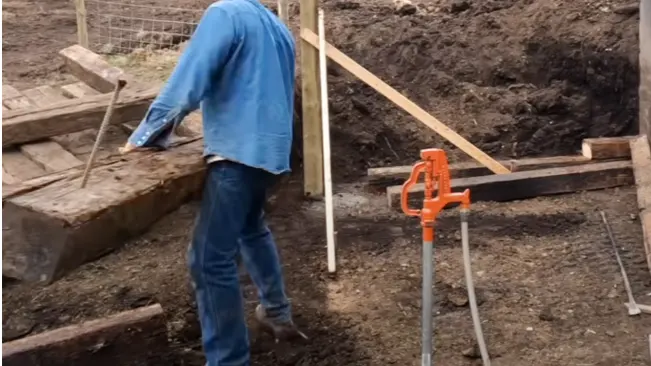
Step 5: Building the Wall
The construction of the wall progresses with the stacking of additional railroad ties, each layer meticulously checked to ensure it’s level. The joints between the ties are staggered in a brickwork pattern to enhance the wall’s structural integrity. Each tie is then firmly attached to the one below by drilling through and inserting rebar or spikes, effectively binding the layers together.

Step 6: Reinforcing the Wall
For walls exceeding two feet in height, reinforcement becomes necessary to counteract the lateral pressure exerted by the retained soil. This is typically achieved by integrating deadmen or tiebacks into the structure at intervals of 4 to 6 feet. These horizontal extensions burrow into the bank behind the wall, providing additional anchorage and stability to the structure.
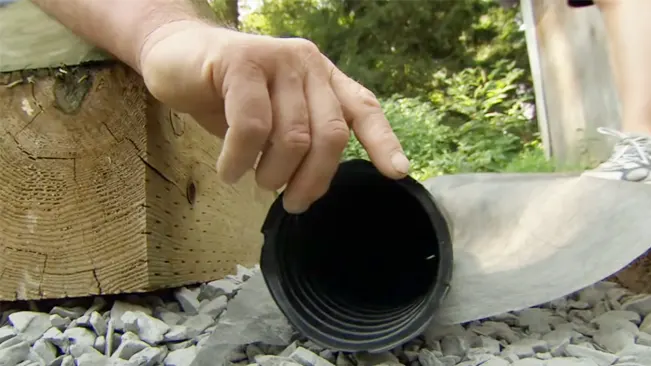
Step 7: Ensuring Proper Drainage
Adequate drainage is paramount to the longevity of a retaining wall, preventing water build-up that could otherwise exert undue pressure on the structure. This involves placing landscape fabric against the inner face of the wall, backfilling with gravel, and installing a perforated drain pipe at the base of the wall. The pipe must be oriented to slope away from the wall, ensuring efficient water drainage.
Step 8: Backfilling
With the wall structure complete, the area behind it is gradually filled in with soil. This backfilling process is done in stages, compacting the soil as it’s added to prevent future settling that could destabilize the wall. This step effectively secures the wall in place and prepares the retained area for landscaping or other intended uses.
Step 9: Finishing Touches
The final touches to the retaining wall project involve landscaping the surrounding area to enhance the aesthetic appeal of the newly constructed structure. This could include planting decorative shrubs or flowers along the wall’s edge or applying a layer of mulch for a neat, finished look. These elements not only improve the visual aspect but also contribute to the overall integration of the wall with the existing landscape.
Maintenance and Care
Maintaining a retaining wall built with railroad ties is essential for prolonging its lifespan and ensuring its stability. Here are some general maintenance and care tips:
- Periodically inspect the wall for signs of wear, decay, or damage. Look for cracks, rot, or shifting in the ties, which could indicate structural issues.
- Ensure the drainage system behind the wall is functioning correctly. Clear any blockages in the drainage pipes and ensure the gravel layer is free from debris that could impede water flow.
- Keep the area around the wall clear of unwanted vegetation. Roots can cause displacement or degradation of the ties, and weeds can contribute to moisture retention, which may accelerate decay.
- If any ties are damaged or deteriorating, replace them promptly to prevent further damage to the wall. Check the integrity of the rebar or spikes and reinforce any areas that appear to be weakening.
- Monitor the soil level behind the wall and add more backfill if settling occurs. This helps maintain the pressure balance and supports the structure of the wall.
- Depending on the condition of the wood and exposure to elements, applying a wood preservative or sealant to the railroad ties can help protect against moisture and pests. However, be mindful of the chemicals in the treatment, especially near edible plants or water sources.
- Keep the wall clean from accumulated dirt, leaves, and other debris. A buildup of organic material can retain moisture against the wood, promoting decay.
- Monitor the areas around the top and base of the wall for signs of erosion, which could undermine the wall’s foundation. Implement erosion control measures as needed, such as planting ground cover or installing erosion control mats.
By adhering to these maintenance practices, you can help ensure the longevity and stability of your retaining wall constructed with railroad ties, preserving its functional and aesthetic value in your landscape.
Related Topics
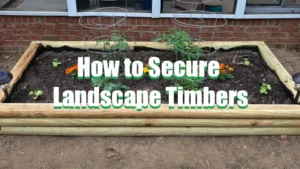
- Using Railroad Ties for Raised Garden Beds: Safety and Alternatives Explored
- Railroad Cross Ties
Conclusion
Building a retaining wall with railroad ties extends beyond a simple DIY task, merging sustainability with practical landscaping. It’s a rewarding endeavor that combines the challenge of construction with the satisfaction of creating a durable and visually appealing structure. By undertaking this project, you not only enhance the functionality of your outdoor space but also contribute to an aesthetic that celebrates the unique character and history of repurposed materials, resulting in a wall that stands as both a practical solution and a striking feature in your landscape.
FAQs
- What are the advantages of using railroad ties for a retaining wall?
Railroad ties are known for their durability, cost-effectiveness, and rustic aesthetic appeal. They are treated to resist rot and pests, making them a sturdy choice for outdoor structures like retaining walls. Additionally, using reclaimed railroad ties can be an environmentally friendly option. - How long do railroad tie retaining walls last?
The lifespan of a railroad tie retaining wall can vary based on factors such as the quality of the ties, exposure to elements, and construction technique. Generally, a well-constructed railroad tie retaining wall can last between 15 to 20 years, with proper maintenance potentially extending its life further. - Can I use railroad ties for a retaining wall in a vegetable garden?
Caution is advised when using railroad ties near edible plants due to the potential for chemical leachates from the wood treatment process. It’s best to use untreated, natural wood or other safe materials for retaining walls in vegetable gardens. - Do I need a permit to build a retaining wall with railroad ties?
Permit requirements can vary by location and the size of the wall. For small, low-impact walls, a permit might not be necessary, but for larger or more structurally significant walls, checking with local building codes and obtaining the necessary permits is recommended. - How do I ensure proper drainage behind my railroad tie retaining wall?
Proper drainage is crucial to prevent water pressure buildup behind the wall. This can be achieved by using a gravel base behind the wall, installing drainage pipes that divert water away from the wall, and ensuring there’s a layer of landscape fabric to prevent soil from clogging the drainage system. - What is the best way to cut railroad ties for a retaining wall?
Cutting railroad ties requires heavy-duty tools due to their thick and treated nature. A chainsaw, reciprocating saw with a long wood/metal blade, or a circular saw with a carbide-tipped blade are effective options. Always wear protective gear and follow safety precautions. - How do I prevent my railroad tie retaining wall from leaning or collapsing?
Preventing your wall from leaning or collapsing involves proper foundation preparation, ensuring each layer of ties is level, using sturdy spikes or rebar for securing the ties, and incorporating tie-backs or deadmen anchors for additional stability, especially in taller walls. - Can railroad ties be painted or stained to enhance their appearance?
Yes, railroad ties can be painted or stained, but it’s important to choose the right products that are suitable for treated wood and outdoor exposure. Applying a protective sealant can also help extend the aesthetics and lifespan of the ties. - How can I dispose of old or damaged railroad ties from my retaining wall?
Due to the chemicals used in treating railroad ties, they should not be burned or disposed of in regular trash. Contact local waste management or a specialized disposal service to understand the appropriate and environmentally responsible ways to dispose of railroad ties. - Are there eco-friendly alternatives to traditional railroad ties for building retaining walls?
For those seeking more sustainable options, alternatives to traditional railroad ties include recycled plastic lumber, untreated natural wood suitable for ground contact (like cedar or redwood), and interlocking concrete blocks designed for retaining walls. Each option has its benefits and considerations in terms of durability, cost, and environmental impact.
Charles Hayes
Forestry AuthorI'm Charles Hayes, I bring over 15 years of specialized expertise in landscaping and woodworking, blending artistic design with sustainable environmental stewardship. My career, fueled by a profound passion for the natural world, encompasses extensive education and hands-on experience in creating harmonious, eco-friendly outdoor spaces and responsibly managing forest resources. Recognized for my professional standing, I am committed to continuous learning and certification in cutting-edge practices. My expertise is not only reflected in my work but also in my contributions to community projects, educational workshops, and collaborations with industry leaders. As an authoritative voice in my field, I strive to share knowledge and promote environmentally conscious approaches, making me a trusted resource in landscaping and forestry.


Leave your comment