Cooking with a Wood Stove: Traditional and Modern Recipes
- October 26, 2023
- 1 comment
The scent of burning wood, the gentle crackle of flames, and the ambient warmth of a wood stove evoke a sense of nostalgia and comfort. Far beyond mere nostalgia, however, wood stoves are versatile and efficient cooking tools that offer unique flavors and methods of preparation. In this article, we’ll explore the nuances of cooking with a wood stove and share both traditional and modern recipes that will make your culinary experience truly memorable.
A Brief History of the Wood Stove
The humble wood stove has roots tracing back centuries. Before our kitchens were illuminated with the blue flames of gas or the red coils of electric stoves, there was the inviting warmth of a wood-burning stove. Its genesis can be pinpointed to the 18th century, a time when open fireplaces were the primary source of heat. However, as the need for a more efficient and contained heat source grew, the wood stove emerged as the solution.

The earliest wood stoves were rudimentary, crafted primarily from cast iron, and designed to serve a dual purpose: warmth and cooking. Benjamin Franklin, one of the U.S.’s founding fathers, had a hand in their evolution. In the mid-18th century, he developed what was known as the ‘Franklin stove’, an invention that aimed to enhance heat efficiency and reduce smoke, although it looked quite different from the wood stoves we recognize today.
Throughout the 19th century, as technology and manufacturing methods advanced, so did the design and functionality of wood stoves. They became more ornate, often becoming centerpieces of the family home. These stoves were not just tools but symbols of self-reliance and homesteading spirit.
However, with the 20th century came the rise of electric and gas stoves, which promised convenience and consistency. Wood stoves, with their need for manual fueling and ash cleaning, seemed archaic in comparison. Yet, they never truly faded into oblivion. Today, in a world increasingly conscious of sustainability and authenticity, there’s a resurgence in the appeal of wood stoves. Culinary enthusiasts and those seeking a more organic way of living find a unique charm in the primal dance of flames and the unparalleled flavor it imparts to food.
Thus, from its early days as a simple heat source to its modern avatar as a beacon of tradition and taste, the wood stove stands testament to humanity’s enduring relationship with fire.
The Benefits of Cooking with a Wood Stove
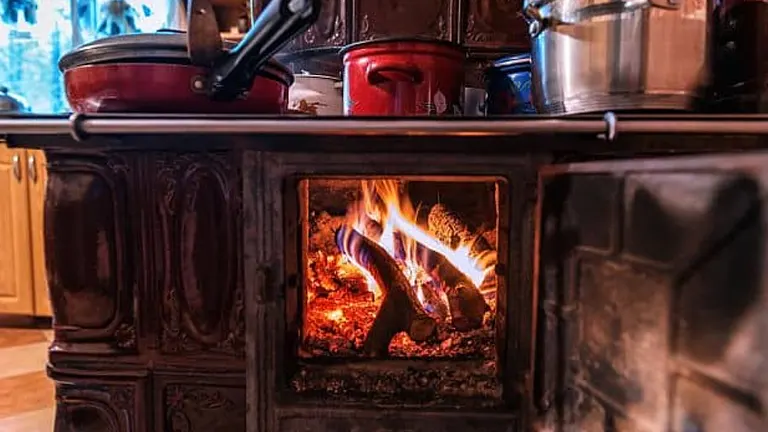
- Cooking on a wood stove takes you on a culinary journey back in time, offering a genuine rustic experience. The standout feature of this traditional method is the distinct smoky flavor it infuses into dishes. Whether it’s meats, pizzas, or bread, the taste is unparalleled, with nuances varying based on the type of wood used. This unique flavor profile, combined with the authenticity of the process, transforms even simple meals into gourmet delights.
- Cast iron and steel, commonly used materials for wood stoves, excel in heat retention and distribution. Once these materials are adequately heated, they maintain a uniform temperature across the surface, ensuring food is consistently cooked. This even distribution minimizes the hot spots often found in modern stoves, making it especially beneficial for dishes requiring steady heat, such as stews and slow roasts.
- Championing sustainability, wood stove cooking offers an environmentally-conscious alternative to contemporary cooking methods. Wood, a renewable resource when sustainably sourced, provides a green energy source. Furthermore, burning wood can be considered carbon-neutral, as it releases the carbon dioxide the tree absorbs during its lifespan. This stands in contrast to many modern stoves relying on non-renewable energy sources. Additionally, the independence of wood stoves from the electrical grid makes them perfect for reducing energy consumption and promoting self-reliance.
Tips for Cooking on a Wood Stove
- While traditional wood stoves don’t have temperature dials like modern ovens, you can manage the temperature by controlling the amount of wood and airflow. Ideally, for baking bread, you’d want your stove top to be around 375°F to 425°F. You can use a cast iron stove thermometer for more accuracy.
- Choose hardwoods like oak or maple for a longer, steady burn. They also impart a milder flavor. Softwoods burn hotter and faster, which might be too intense for certain recipes.
- Thick-walled cookware like cast iron is perfect for wood stoves due to its heat retention and distribution properties.
Traditional Recipe: Rustic Wood-Fired Bread
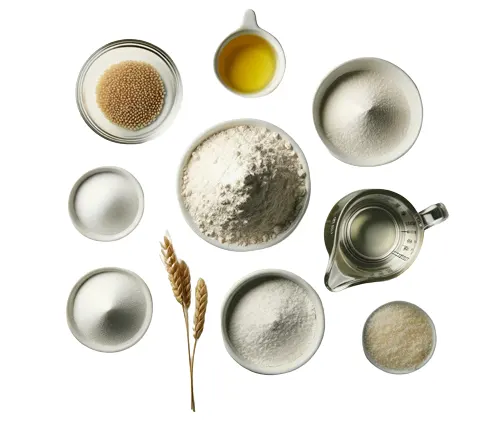
Ingredients
- 4 cups of bread flour
- 1 1/2 tsp salt
- 1 tsp sugar
- 2 tsp active dry yeast
- 1 1/4 cups warm water (approximately 110°F)
- Olive oil for brushing
Instructions
- Yeast Activation: In a bowl, combine the sugar and warm water, ensuring the water is at the correct temperature (too hot or cold water can inhibit the yeast). Sprinkle the active dry yeast over the top and stir gently. Let the mixture sit in a warm place for about 10 minutes or until it becomes frothy. This indicates that the yeast is active and ready.
- Preparing the Dough: In a large mixing bowl, combine the bread flour and salt. Make a well in the center and pour in the activated yeast mixture. Using a wooden spoon or your hands, mix until a dough forms. Turn the dough onto a floured surface and knead for about 10 minutes, or until the dough is smooth and elastic.
- First Rise: Place the kneaded dough in a large oiled bowl, ensuring the dough is also covered with a thin layer of oil to prevent drying. Cover the bowl with a damp cloth and let it rest in a warm place for approximately 1 hour, or until the dough has doubled in size.
- Preheat Your Wood Stove: Aim for a medium-hot temperature for baking the bread. If you have a cast iron stove thermometer, it should read around 400°F to 425°F. Remember that wood stoves vary, so it may take a few tries to get the ideal temperature and setup for baking bread.
- Shaping and Second Rise: Once the dough has risen, punch it down gently to release air bubbles. Shape it into a round loaf, ensuring the surface is taut. Place it on a lightly floured board or tray and let it rest for an additional 15 minutes.
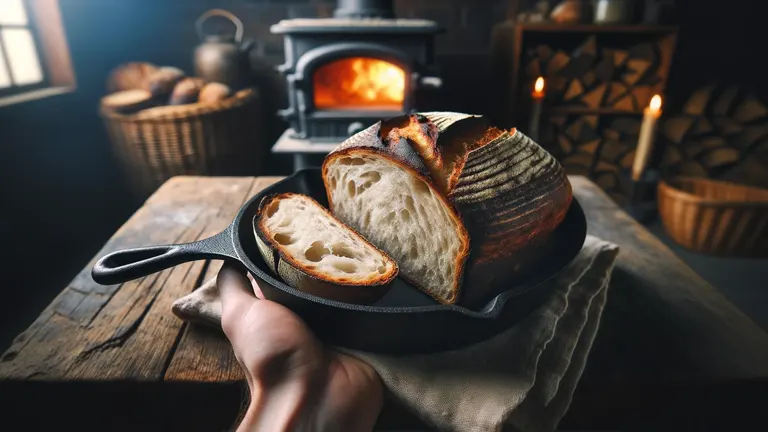
- Baking: Lightly brush the top of the loaf with olive oil. This gives the bread a beautiful golden color and slight crispness. Place the dough on a preheated cast iron skillet or baking stone if you have one. Bake on the wood stove for about 30-40 minutes. The bread is done when it has a golden-brown crust, and when tapped on the bottom, it emits a hollow sound. Rotate the bread every 10 minutes for even baking, if possible.
Troubleshooting Rustic Wood-Fired Bread
- Dense or Heavy Bread: This can result from inactive yeast, not allowing the dough to rise enough, or using cold water instead of warm.
- Too Thick or Hard Crust: This could be due to excessive heat or extended baking time. Adjust the stove’s temperature or reduce the baking time accordingly.
- Undercooked Center: If the bread’s crust is perfect but the center is still doughy, the stove might be too hot. Next time, aim for a slightly lower temperature for a longer baking time.
Safety Tips When Baking Wood-Fired Bread
- Hot Surface Handling: Always use oven mitts or fireproof gloves when handling hot cookware.
- Avoid Sudden Temperature Changes: Don’t place a cold skillet onto a very hot stove, as this can cause it to crack.
- Monitor the Stove: Wood stoves can vary in heat output as the wood burns down. Keep an eye on the fire and add wood as necessary to maintain a steady baking temperature.
There’s a profound satisfaction in baking your own bread, even more so when it’s done on a wood stove. The rustic flavors and textures are unparalleled. With practice, you’ll be able to consistently produce artisanal-quality loaves fit for any bakery!
Modern Recipe: Wood-Fired Skillet Pizza

Ingredients
- Pizza dough (store-bought or homemade)
- Tomato sauce, cheese, and your choice of toppings
- Olive oil

Instructions
- Preparing the Dough: If using homemade dough, let it come to room temperature for easier rolling. Roll out the pizza dough on a floured surface to match the size of your cast iron skillet. The thickness depends on your preference, but for most skillet pizzas, a medium-thin crust works best.
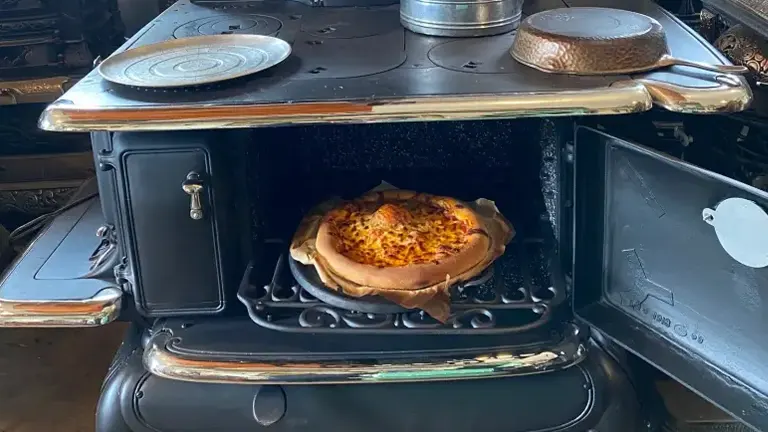
- Preheat the Skillet: Position your skillet on the wood stove, aiming for a medium-high temperature. You’d want the skillet to be hot but not scorching. A good test is to sprinkle a few drops of water on the skillet; they should dance and evaporate. This usually corresponds to a temperature of around 450°F if you were to use a stove thermometer.
- Assembling the Pizza: Drizzle olive oil in the skillet, ensuring it spreads evenly. Carefully lay your rolled-out dough in the skillet. Working quickly, spread a thin layer of tomato sauce, leaving a small border for the crust. Sprinkle your choice of cheese and toppings. Remember, less is more; overloading the pizza can lead to a soggy center.
- Cooking the Pizza: Cover the skillet with a tight-fitting lid or foil. This traps the heat and helps in melting the cheese and cooking the toppings. Cook for about 15-20 minutes. Rotate the skillet every few minutes for even cooking. Keep an eye on the crust by lifting it slightly using a spatula. Once the crust is golden and the cheese is bubbly and slightly browned, your pizza is ready.
Troubleshooting Wood-Fired Skillet Pizza
- Soggy Center: If the center of your pizza is soggy, it’s either overloaded with toppings or the skillet wasn’t hot enough. Reduce the toppings next time and ensure your skillet is adequately preheated.
- Burnt Crust: If the crust burns but the toppings aren’t done, your stove might be too hot. Next time, try reducing the heat by letting the fire die down slightly before placing the skillet.
- Cheese Not Melting: If the cheese isn’t melting quickly, but the crust is cooking, you can increase the heat slightly or ensure that the skillet lid or foil cover is tight to trap more heat.
Safety Tips When Making Wood-Fired Skillet Pizza
- Hot Skillet Handling: Always use oven mitts or fireproof gloves when handling the hot skillet.
- Avoid Water Near the Hot Skillet: If you spill water or any liquid on the hot skillet, it can lead to dangerous steam or splatters. Always ensure your ingredients, especially the sauce, are not overly watery.
- Let Pizza Cool Before Eating: Fresh out of the skillet, the toppings, especially the cheese, can be scalding. Let it cool for a couple of minutes before slicing and serving.
Creating a wood-fired pizza in a skillet brings the flavors of a traditional brick oven pizza right to your home. It may require a bit of practice, especially with managing the heat of the wood stove, but once mastered, you’ll be serving up delicious, smoky, crispy pizzas that everyone will love. Happy cooking!
Safety Tips When Cooking with a Wood Stove
- Keep the Stovetop Clean: Any food debris can catch fire. After cooking, clean off any spills from the stovetop once it’s cool.
- Avoid Overloading the Firebox: Overloading can lead to uncontrollable fires. Add wood gradually and make sure it’s well-dried to avoid excessive smoke and creosote buildup.
- Use Fireproof Gloves: Always use fireproof gloves when handling hot cookware or adjusting wood in the stove.
- Maintain a Safe Zone: Ensure there’s a clear space around the stove where kids and pets can’t wander into. This zone should be free of any flammable materials.
- Regular Maintenance: Regularly check your wood stove for any signs of wear and tear, cracks, or other issues. Ensure your chimney and flue are cleaned annually to prevent creosote buildup, which can lead to chimney fires.
Troubleshooting Wood Stove Cooking
- Too Much Heat: If the stove is too hot, open the damper slightly or let the fire die down a bit before adding more wood.
- Too Little Heat: If not hot enough, add more hardwood or decrease the airflow to allow the wood to burn more slowly and produce more heat.
- Preventing Burns: Rotate your cookware every few minutes to ensure even cooking, especially if your wood stove has hot spots.
- Dealing with Soot: Cooking on a wood stove can produce soot on the bottom of your pans. It’s essential to lift and check rather than slide your cookware to prevent scratching your stovetop.
Conclusion
Cooking with a wood stove not only reconnects us with our culinary roots but also introduces a distinct flavor profile that modern appliances can’t replicate. Whether you’re yearning for traditional dishes or willing to experiment with contemporary recipes, the wood stove is a timeless tool that guarantees delicious outcomes every time. So, gather some wood, ignite those flames, and embark on a culinary journey like no other!
We hope this article provides a spark of inspiration for your next wood stove cooking adventure. Your experiences, insights, and favorite recipes are invaluable to this passionate community. Please feel free to share your thoughts, tips, and comments below. Your feedback not only enriches the conversation but also guides others on their own wood-fired journeys. Happy cooking!
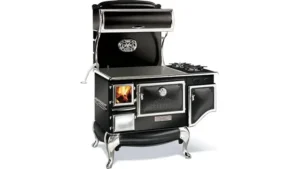
If you’re on the hunt for the perfect cook stove for your home, why not give this article a read? It’s got some great tips! Best Cast Iron Wood Burning Cookstoves & 9 Best Wood Burning Cookstoves
FAQs
- Do wood stoves get hot enough to cook on?
Yes, wood stoves can definitely get hot enough to cook on. The surface of a wood stove can reach temperatures of 400°F (204°C) or higher, depending on the fire’s intensity and the stove’s design. This makes it suitable for boiling, frying, simmering, and baking. Cooking directly on the stovetop is similar to using a burner on a conventional stove while cooking inside the firebox (in the case of large stoves or ovens) allows for baking and roasting. - How often should I put wood on my stove?
The frequency of adding wood to your stove depends on several factors: the type and size of the wood, the efficiency of your stove, and the heat intensity you desire. Hardwoods like oak or maple burn slower and provide longer-lasting heat, so you might need to add logs every 3-4 hours. Softer woods, like pine or spruce, burn faster and might require refueling every 1-2 hours. However, for maintaining a low, consistent heat, you might only need to add wood every 4-6 hours. - Can you cook on a regular wood stove?
Absolutely! While some wood stoves are specifically designed for cooking, most regular wood stoves can be used for this purpose. The flat surface on top of the stove can serve as a cooking area, suitable for placing pots, pans, or kettles. Some stoves even come with removable rings on the top to allow for more direct exposure to the flames for faster boiling or frying. If your stove has a large enough firebox, you can also bake inside it by placing a pot or Dutch oven directly on the coals. - How long can you use a wood burning stove?
The lifespan of a wood burning stove largely depends on its construction quality, the materials used, and how well it’s maintained. With proper care, a high-quality wood stove can last several decades. Regularly cleaning the stove, removing ash, inspecting for any wear or damage, and ensuring the flue is clear will all contribute to the stove’s longevity. On a day-to-day basis, a wood stove can be used continuously, as long as you monitor the heat and ensure safety precautions are observed. Some stoves, especially those designed for heating homes in colder climates, are built to be run 24/7 during the winter months. - Is it safe to leave a wood stove burning overnight?
Safety is a primary concern when using any heating device, including wood stoves. Many people do leave their wood stoves burning overnight, but there are precautions to take. Firstly, ensure the stove is in good condition, with no cracks or damage. Before bedtime, reduce the air intake to slow down the burn rate, ensuring a longer, more controlled burn. Using hardwoods can also help maintain a steady burn for longer periods. Ensure your home has working smoke and carbon monoxide detectors, and always ensure the area around the stove is clear of flammable materials. With these precautions in place, it can be safe, and many find the warmth of a wood stove during cold nights quite comforting. However, it’s essential to be aware of your stove’s specific guidelines and safety features.

David Murray
Forestry AuthorI'm David Murry, a forestry equipment specialist with a focus on chainsaw operation. With over 13 years of experience, I've honed my skills in operating and maintaining a wide range of machinery, from chainsaws to log splitters. My passion for the outdoors and commitment to sustainable forestry drive my work, which emphasizes safety, efficiency, and staying updated with industry advancements. Additionally, I'm dedicated to sharing my expertise and promoting environmental awareness within the forestry community.


I want to buy a cast iron iron wood stove. What is the cost?
Lilian wambua
November 2, 2023 7:21 am