How to Clean and Maintain Your Wood Stove 2025
- September 26, 2023
- 0 comment
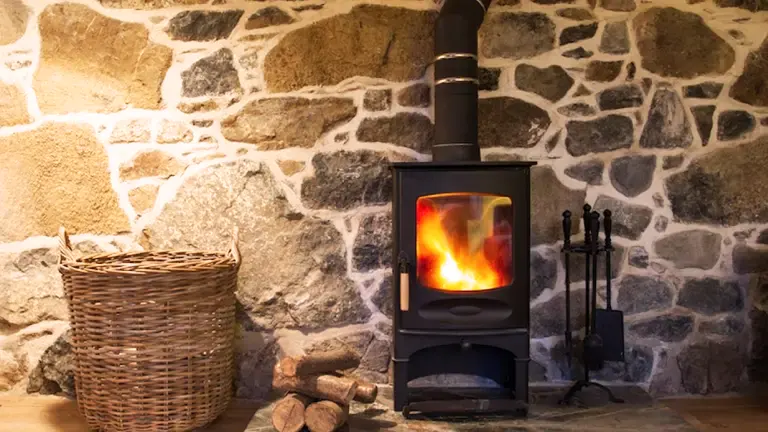
Maintaining the warm glow and comforting crackle of a wood stove requires regular care. This guide provides essential tips for cleaning and maintaining your wood stove, ensuring it operates safely and efficiently. Perfect for both newcomers and seasoned users, we’ll cover everything from routine cleaning to advanced maintenance techniques. Keep your stove in prime condition and enjoy the cozy warmth it brings to your home, season after season.
How to Clean Your Wood Stove:
- Understanding the Importance of Regular Maintenance
- Gather Your Cleaning Supplies
- Cleaning the Interior
- Inspect and Clean the Chimney
- Check Gaskets and Seals
- Regularly Empty the Ash Drawer
- Seasonal Maintenance
- Store Wood Properly
1. Understanding the Importance of Regular Maintenance
If the heart of a home during cold months is the warmth emanating from a wood stove, then regular maintenance is the rhythm that keeps it beating consistently. Let’s unpack the reasons why keeping your wood stove clean is paramount.
A. Ensures Efficient Burning and Maximum Heat
A wood stove is not just an appliance; it’s a delicate balance of airflow, fuel, and combustion. When your stove is clean, it allows for optimal airflow. This ensures that the wood burns at its best, releasing more heat. In turn, you use less wood and get more warmth, making it both cost-effective and energy-efficient.
B. Reduces the Risk of Chimney Fires from Creosote Build-up
Creosote is a silent threat to every wood stove. It’s the residue that accumulates from unburned wood particles. Over time, if not cleaned, it can become a thick, flammable layer inside the chimney, posing a significant fire hazard. Regular cleaning not only prevents this but also keeps your insurance policy valid, as many insurers require routine maintenance to cover wood stove-related claims.
C. Prolongs the Lifespan of the Stove and its Components
Think of your wood stove as an investment. With each cleaning, you’re not only ensuring its present efficiency but also securing its future. Ashes left for too long can corrode the metal components. The buildup can also cause undue strain on various parts, making them wear out faster. Regular maintenance means you’re clearing out potential problems, ensuring the stove lasts for years, even decades.
D. Minimizes Harmful Emissions, Being More Eco-friendly
The environment is a collective responsibility. An efficiently burning stove emits fewer pollutants than one clogged with residues. Clean stoves ensure that the majority of the wood is burned and transformed into heat, reducing the amount of smoke and unburned particles that are released into the atmosphere. This makes your home’s carbon footprint smaller, contributing positively to the environment.
2. Gather Your Cleaning Supplies
Venturing into the world of wood stove maintenance is akin to setting out on an expedition; it’s essential to have the right gear. A well-equipped cleaning kit ensures a thorough job, less mess, and the utmost safety.
A Drop Cloth or Newspaper
The heart of cleaning is to get rid of the mess, not spread it. Ash can be incredibly fine and easily spreads, creating a dusty haze around your cleaning area. By laying down a drop cloth or newspaper, you’re ensuring that all the ash, soot, and any cleaning solutions are contained. This not only protects your flooring or carpet but also makes the cleanup process far more straightforward.

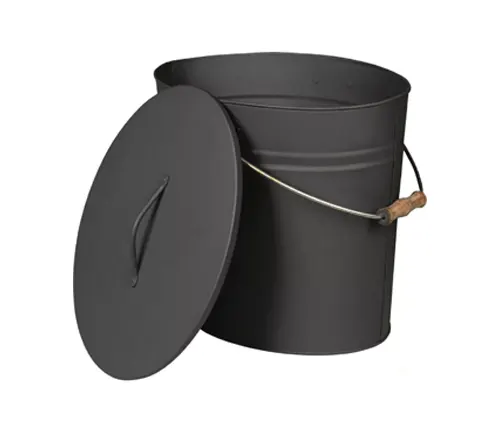
Metal Ash Can with a Lid
Safety First! Ash, even when it seems cold on the surface, can contain hot embers deep within. Storing them in a metal container prevents any accidental fires. The lid, meanwhile, traps any potential airborne ash particles and ensures no unintended spills.
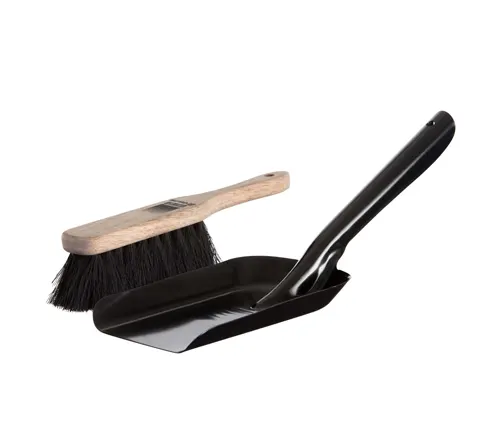
Small Shovel or Hand Broom and Brush
These are your frontline warriors. The shovel makes it easy to scoop out larger chunks of ash, while the broom and brush are perfect for sweeping finer particles. Their small size allows for precision cleaning, ensuring no nook or cranny is left untouched.
Gloves
Beyond just keeping your hands clean, gloves protect you from the unexpected – hot embers, sharp edges, or corrosive cleaners. They ensure that your hands are shielded, giving you the confidence to scrub, scrape, and sweep without hesitation.

Chimney Brush and Rods
The chimney is where the magic happens and, unfortunately, where the majority of the creosote builds up. A chimney brush, with its stiff bristles, is designed to scrub away this buildup, while the rods allow you to extend the brush, reaching the entire length of the chimney.

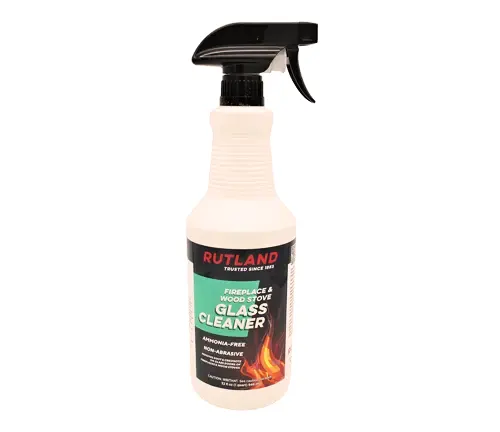
Glass Cleaner (for Wood Stove Doors)
The glass door provides a window to the mesmerizing flames, but it can get obscured with soot over time. A good glass cleaner ensures that you retain this visual treat by effectively removing any marks or buildup without damaging the glass.
Vacuum with a Hose Attachment (Optional)
While traditional tools do a fantastic job, if you’re looking for that extra level of cleanliness, a vacuum comes in handy. The hose attachment allows you to suck up even the finest ash particles, ensuring an immaculate stove and surrounding area.

Like any task, cleaning your wood stove becomes significantly simpler and more efficient with the right tools. By gathering these supplies, you’re not just preparing to clean; you’re gearing up for a safer, healthier, and more efficient wood-burning experience. So, roll up those sleeves, gather your tools, and let the cleaning begin!
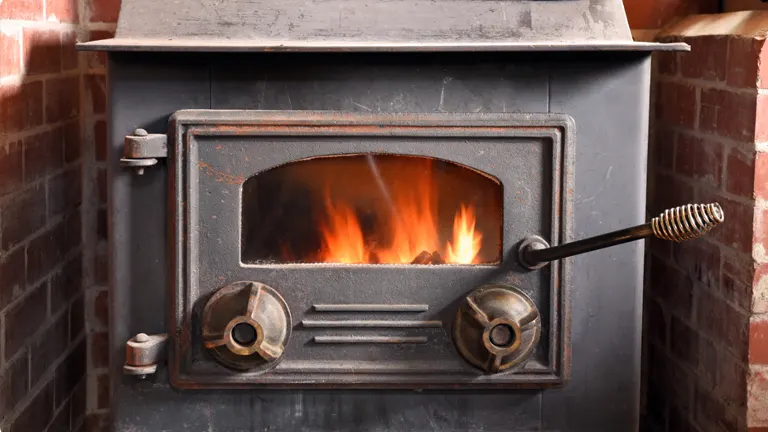
3. Cleaning the Interior
The heart of your wood stove lies in its interior. Ensuring this heart is clean means you’re not only optimizing the function of your stove but also guaranteeing the safety of your home.
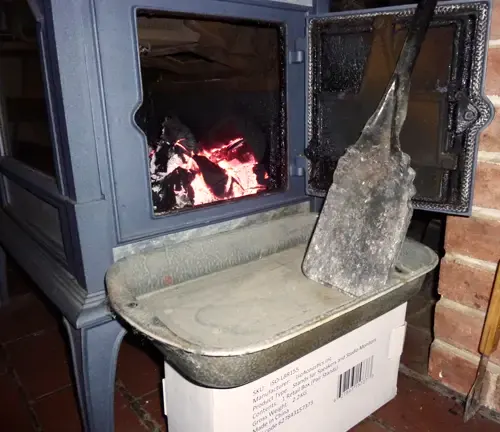
A. Ash Removal
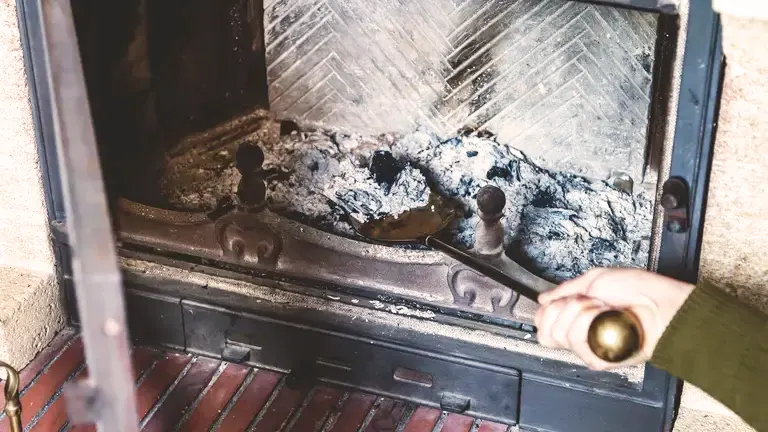
Ashes, remnants of your cozy fires, can range from fine powder to small chunks. Though they may seem benign, they can conceal hidden embers and act as insulators, reducing the efficiency of subsequent fires. Removing them is therefore essential.
Steps to Safely Remove Ashes
- Cooling Phase: Always ensure the ashes have completely cooled down. This typically takes several hours, so it’s often best to wait overnight after the last fire. Hot ashes pose not just a burn risk, but they can also ignite other materials.
- Preparation: Before starting the process, lay down your drop cloth or newspaper. This will catch any stray ash and protect your flooring or carpet from potential stains.
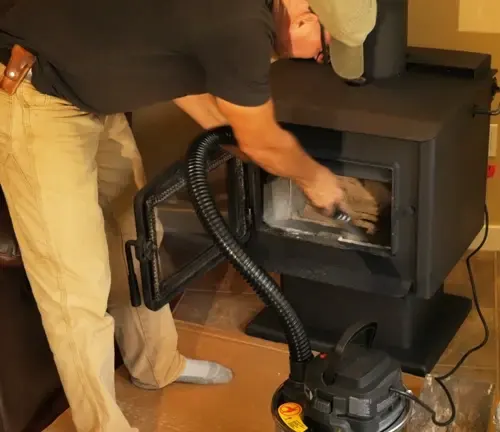
- Scooping and Storing: With gloves on, use your shovel or brush to carefully scoop out the ashes. It’s essential to be gentle to avoid raising a cloud of ash dust. Once scooped, place the ashes in your metal ash can. Remember, the can’s metal composition and the lid ensure safe containment, preventing any smoldering remnants from causing harm.
- The Finer Details: If you’re aiming for a spotless interior, a vacuum with a hose attachment can be your final step. This ensures that even the finest ash particles, often elusive to brushes, are effectively removed.
If you’re curious about other applications for wood stove ash, Click Here!
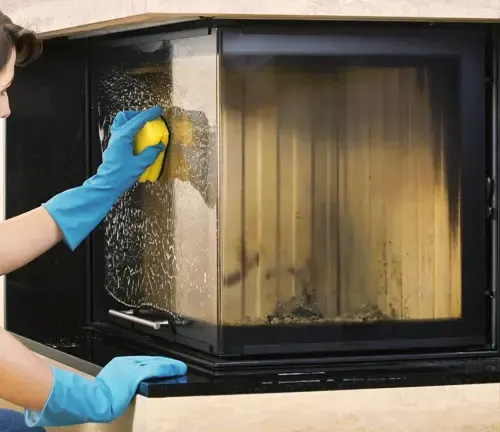
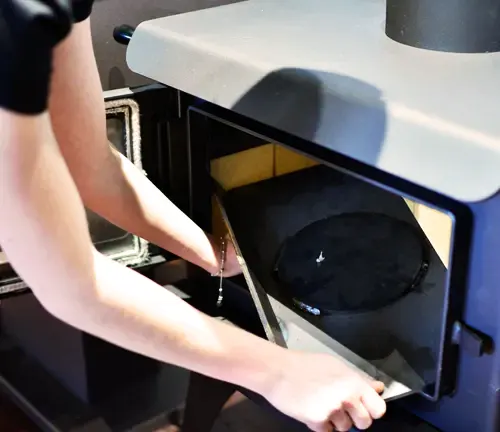
B. Cleaning the Glass Door
A clear glass door not only adds an aesthetic appeal, allowing you to watch the mesmerizing dance of the flames, but it also helps in gauging the fire’s intensity and needs.
Steps to Restore the Clarity
- Identify the Buildup: Over time, the glass door will invariably get a buildup of soot, and sometimes creosote, especially if the wood used is green or wet. This not only obscures your view but can also become a baked-on stain if not addressed.
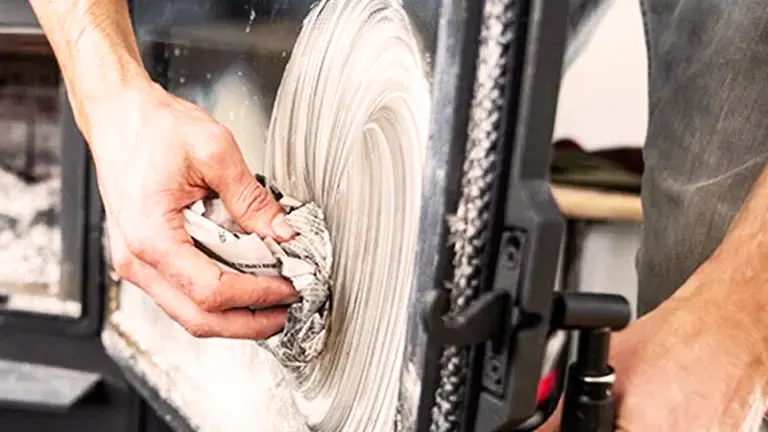
- The Cleaning Process: While specialized wood stove glass cleaners are available and effective, a home remedy is using a damp newspaper dipped in the cooled ashes from the stove itself. The mild abrasive nature of the ash, combined with the moisture, helps in breaking down the soot buildup. Gently rub in a circular motion. This ensures even pressure and avoids potential scratches.
- Finishing Touch: After removing the soot, it’s essential to wipe off any residues. Using a clean cloth, wipe down the glass to restore its shine and clarity.
The interior of your wood stove is more than just a combustion chamber; it’s the core that ensures warmth and safety. Regular cleaning and maintenance ensure that this core remains robust, efficient, and ready to bring warmth to many more chilly nights.
4. Inspect and Clean the Chimney
The chimney plays an indispensable role in the efficient operation of a wood stove. Acting as the exhaust system, it ensures that the smoke, ash, and other byproducts are safely vented outside. However, this pivotal component can become a risk factor if not regularly inspected and cleaned.
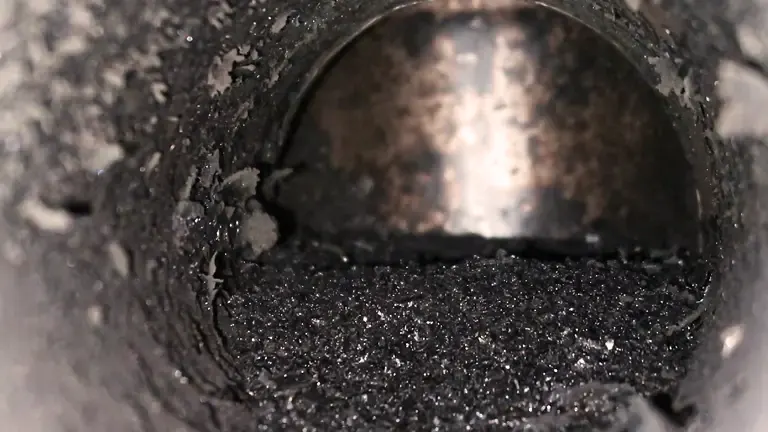
Understanding Creosote
Creosote is a dark, sticky substance that accumulates on the inner walls of the chimney. It’s formed when wood doesn’t burn completely. The smoke rises, cools, and condenses on the cooler chimney walls, leading to layers of creosote.
Types of Creosote
First Degree Creosote
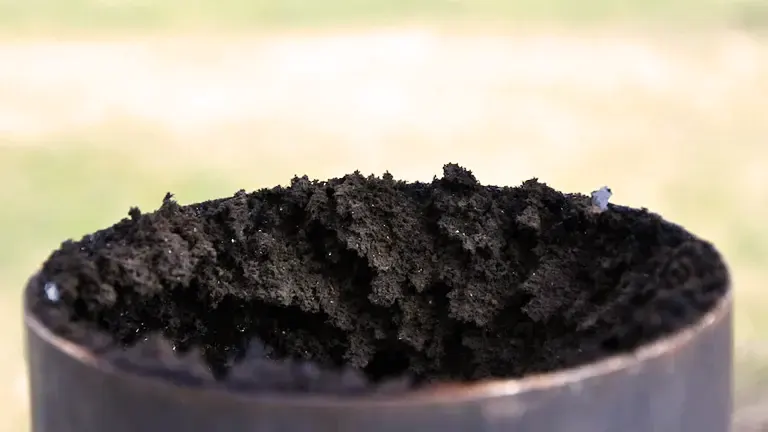
This is a light and powdery soot, representing the initial stage of buildup. It indicates good combustion and ventilation, making it the easiest to clean. This light powdery debris can be effortlessly brushed out of the flue.
Second Degree Creosote
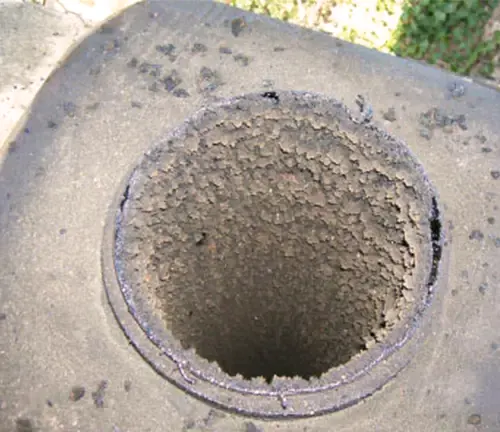
Recognizable by its chunky appearance, it often resembles burnt popcorn. This stage signals that there’s incomplete combustion occurring. It’s thicker than the first degree and requires more effort to remove.
Third Degree Creosote
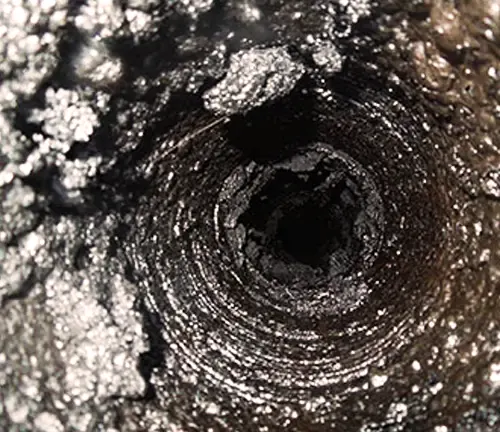
The most dangerous of all, this creosote is wet, slick, and has a shiny, tar-like consistency. It’s an indication of serious combustion issues and is highly flammable. Such deposits adhere stubbornly to the flue’s surface and can be extremely challenging to clean using wire brushes.
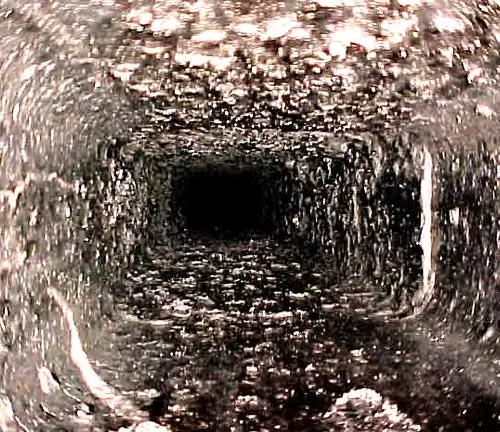
Regular Inspection
- During the heating season, when your wood stove is in frequent use, it’s advisable to inspect your chimney every couple of months. This ensures any build-up is caught and dealt with promptly.
- With a flashlight in hand, look up the flue from the bottom. What you’re checking for is any significant build-up, especially the dark, tar-like third-degree creosote. If you notice such a build-up or even second-degree layers, it’s a clear indication that cleaning is due.
The Cleaning Process
- Preparation: Before you begin, ensure your stove and chimney are cool. Lay down a drop cloth or plastic sheet to catch any falling soot or debris.
- Using the Chimney Brush and Rods: Attach your chimney brush to the first rod. Insert it from the bottom and start scrubbing in a circular motion. As you clean higher sections, attach additional rods. This bottom-up approach ensures you have more control, and it keeps most of the mess confined to the fireplace or stove area.
- Post-Cleaning: After cleaning, inspect the chimney again with your flashlight to ensure that you’ve effectively removed the creosote build-up.
When to Seek Professional Help
While the process might seem straightforward, cleaning a chimney does come with challenges. Tight angles, tough creosote build-up, or even bird nests can complicate the process. If you’re unsure about the cleaning process, or if you’ve identified third-degree creosote (which can be extremely tough to remove), it’s wise to hire a professional chimney sweep. They have the expertise and tools to ensure a thorough and safe cleaning.
A clean chimney doesn’t just improve the efficiency of your wood stove; it’s a crucial component in home safety, preventing potential chimney fires. Regular inspection and cleaning are small investments in ensuring the longevity of your stove and the security of your home.
5. Check Gaskets and Seals
In the symphony of a wood stove’s operation, while the roaring flames might take center stage, it’s the silent components like the gaskets and seals that truly hold the performance together. These tiny elements play a pivotal role in ensuring the stove’s efficiency and safety.
Understanding the Role of Gaskets and Seals
Gaskets and seals serve as barriers between the interior and exterior of the stove. They are typically made of a fibrous material that can withstand high temperatures.
Key Functions
- By ensuring a tight seal, gaskets control the amount of oxygen that enters the stove. This allows for a more regulated, efficient, and cleaner burn.
- They prevent the unintended escape of smoke and harmful gases like carbon monoxide into your living space.
- A tight seal ensures that the heat generated remains inside the stove, offering maximum warmth.
Inspecting the Gaskets and Seals
Frequency: Given their crucial role, gaskets and seals should be inspected at least once before the heating season begins and periodically during its course, especially if you notice the stove isn’t burning as efficiently as usual.
Technique
- Check for any visible signs of wear, fraying, or damage. Any sections that appear flattened or have lost their resilience need attention.
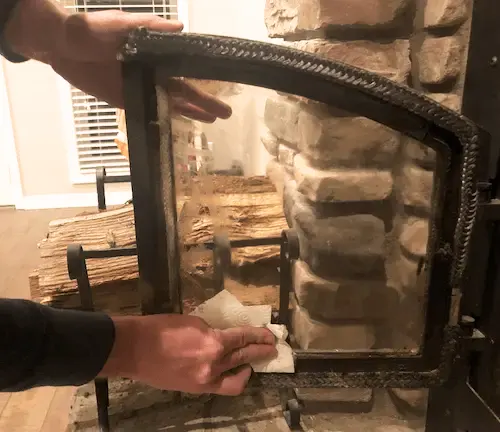
- A simple yet effective test is to close the wood stove door on a dollar bill (or any piece of paper). Try to pull the bill out. If it slides out easily without any resistance, the seal may not be tight enough. Perform this test at multiple points around the door to check the entire gasket’s integrity.
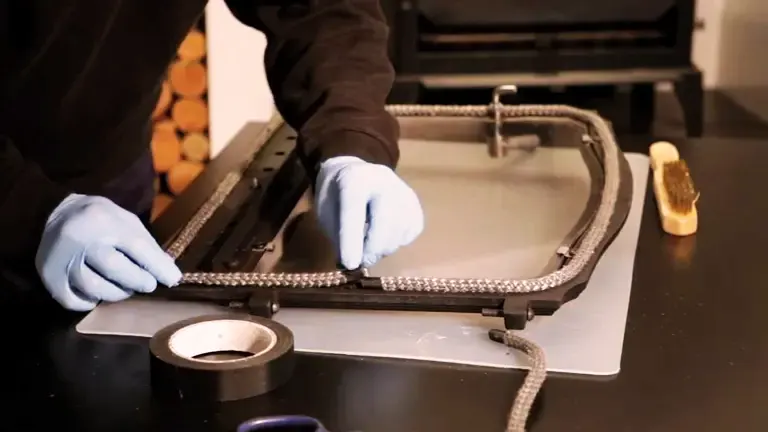
Replacing Worn-Out Gaskets
- Gaskets come in various sizes and types. It’s crucial to get a replacement that matches your stove’s specifications. Usually, the stove’s manual will provide details on the correct gasket size and type.
- Gently remove the old gasket. You may need a scraper or a wire brush to get rid of any adhesive residue.
- Apply a high-temperature gasket adhesive on the groove where the old gasket lay. Press the new gasket into the adhesive, ensuring it sits snugly.
- Allow the adhesive to dry for at least 24 hours before you use the stove again.
The efficiency and safety of a wood stove, to a considerable extent, lie in the details. By regularly inspecting and maintaining the gaskets and seals, you’re not only ensuring a warm, cozy environment but also peace of mind. It’s a small task with significant returns in the form of a safer, more efficient wood stove experience.
6. Regularly Empty the Ash Drawer
In the world of wood stoves, while some components are immediately visible and evident in their functions, others operate discreetly. The ash drawer is one such discreet yet invaluable component. A repository for the remnants of fires gone by, regular maintenance of this drawer is crucial for both safety and efficient operation of the stove.
The Significance of the Ash Drawer
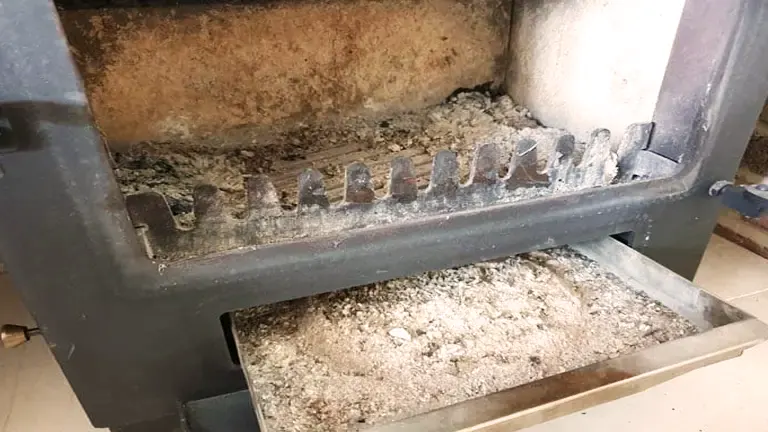
Situated beneath the primary burning chamber, the ash drawer serves as a convenient collection point for the ashes that fall through the grate. While it simplifies the cleaning process, its significance extends beyond mere convenience:
- Enhanced Airflow: A clean ash drawer promotes better airflow within the stove, facilitating efficient combustion.
- Protection of the Grate: The grate, which holds the wood and facilitates airflow, can be adversely affected by prolonged exposure to accumulated ashes. A clean drawer ensures the grate’s longevity.
Steps to Regularly Maintain the Ash Drawer
- Frequency of Cleaning: While the exact frequency depends on how often you use the stove, a good rule of thumb is to check the ash drawer after every couple of burns. If the ash level seems close to touching the grate’s underside, it’s time to empty it.
- Safety First: Before removing the ashes, ensure they’ve cooled down. Hot ashes can be a burn hazard and may ignite other combustibles.
- Emptying the Drawer: Wear gloves for protection. Pull out the ash drawer and carefully empty its contents into a metal ash can with a tight-sealing lid. This ensures that any lingering embers are safely contained.
- Inspect the Drawer: Before returning the ash drawer, take a moment to inspect it for signs of wear or damage. If the drawer has holes or seems weakened, consider replacing it to ensure efficient operation and safety.
- Cleaning Spills: In the process of emptying the drawer, if any ash spills around the area, promptly clean it up to maintain a clean space and prevent ash from being kicked up into the air.
- Return the Drawer: Once emptied and inspected, slide the ash drawer back into its designated slot, ensuring it sits snugly and securely.
Pro Tips
- While the ash drawer needs regular emptying, it’s wise to leave a thin layer of ash at the bottom of the stove during the burning season. This layer acts as an insulator, reflecting heat back into the fire and protecting the floor of the stove.
- Store the collected ashes in a safe location away from combustibles. Once fully cooled, they can be repurposed in gardens as they’re rich in minerals beneficial to plants.
The ash drawer, while often overlooked, plays a silent yet pivotal role in the efficient and safe operation of a wood stove. Regular maintenance doesn’t just ensure a cleaner burning environment but also extends the lifespan of the stove’s components. Like many things in life, it’s the attention to such details that elevates an experience, making your wood stove not just an appliance but a reliable companion in cold times.
7. Seasonal Maintenance
The heating season, with its warm, cozy fires and soothing ambiance, eventually gives way to warmer months when your faithful wood stove takes a well-deserved rest. However, as the season transitions, it’s crucial to ensure that the stove is properly prepped for its hiatus.
Comprehensive Cleaning

When your wood stove is consistently in operation, the cumulative effects of its usage manifest in the form of ash, soot, and in some cases, creosote. Over time, these residues can affect the stove’s efficiency, appearance, and safety.
A. Tackling the Inside
Ash Disposal
Begin by emptying the ash drawer. This is where most of the residual ash from your burned logs will settle.
Vacuuming
With a suitable vacuum, get rid of all traces of ash and soot from the stove’s interior. This not only cleans the stove but also preps it for a more efficient burn next time.
Glass Door Care
The wood stove’s glass door often becomes a canvas for soot, especially if the wood burned isn’t well-seasoned. Gently clean this using appropriate glass cleaners or natural alternatives to restore its transparent charm.
B. Sprucing Up the Outside
Dusting and Wiping
A simple damp cloth can work wonders. Gently wipe the stove’s exterior to free it from dust and soot. This not only makes the stove look better but can also help in efficient heat radiation.
Drying
It’s crucial to ensure that no moisture lingers on your stove. Any residual dampness can lead to rusting, affecting the stove’s longevity and appearance.
C. Inspect and Replace Worn-Out Components
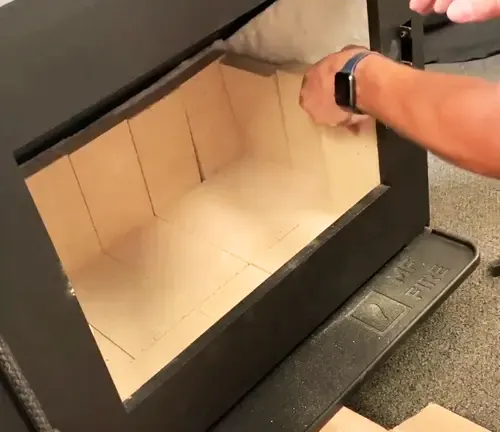
Fire Bricks
These bricks line the interior of the stove, protecting its metal parts from the direct heat of the fire. Over time, they can crack or deteriorate. Check for any bricks that seem excessively worn or damaged, and replace them.
Baffle Plates
These divert the route of smoke and gases, ensuring they spend more time inside the stove for a complete burn. Given their exposure to high temperatures, they can wear out over time. If your baffle plate appears warped or has holes, it’s time for a replacement.
Even as your stove goes unused during the off-season, it’s crucial to maintain some air circulation to prevent dampness and mold growth.
- Air Vents: Leave the air vents of the stove slightly open. This will allow for a continuous flow of air, ensuring the interior remains dry. However, ensure that the opening is not so wide as to let in pests or too much moisture.
- Chimney Cap Inspection: While focusing on the stove, don’t forget the chimney. Ensure that the chimney cap is intact to prevent rainwater from entering and causing dampness.
External Protection
If your wood stove is in an area where it might be exposed to increased humidity, consider using a dehumidifier in the room or placing moisture-absorbing products nearby.
Seasonal maintenance is more than just a routine; it’s a gesture of gratitude toward an appliance that has kept you warm through the cold months. Proper care ensures that your wood stove remains in optimal condition, prolonging its lifespan and ensuring efficient performance for many winters to come. So, as you bid adieu to the heating season, give your wood stove the attention it deserves, setting the stage for many more cozy fires in the future.
8. Store Wood Properly
The ritual of lighting a wood stove, watching the flames dance, and feeling the warmth permeate the room is a cherished experience for many. However, the success of this ritual isn’t just dependent on the stove itself, but also on the quality of the wood it consumes. Properly seasoned and stored wood can make the difference between a roaring, efficient fire and a smoky, inefficient one. called upon.
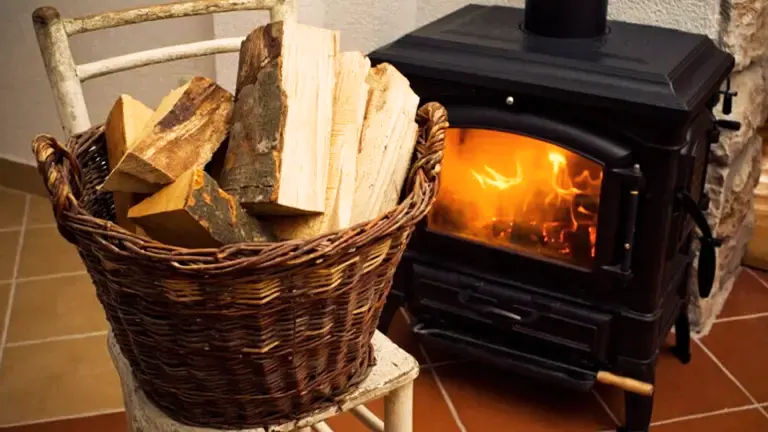
The Essence of Seasoned Wood
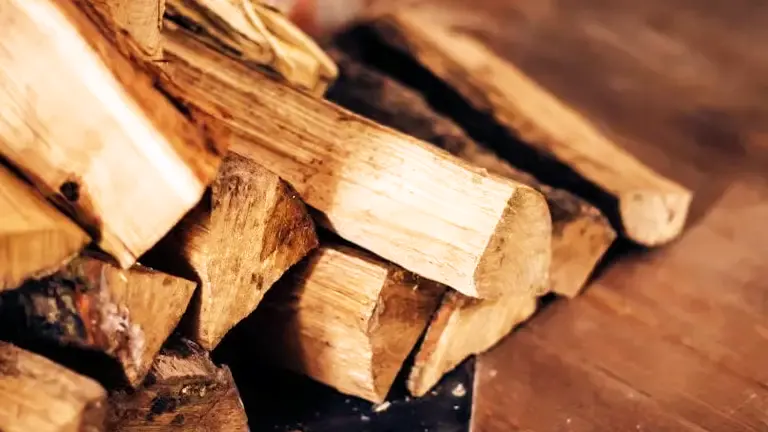
Wood that’s freshly cut, often referred to as “green” wood, contains a high amount of moisture. Burning it results in inefficient combustion, leading to more creosote buildup and less heat output.
- Seasoning Process: As the name suggests, seasoning is the process of allowing the wood to dry naturally over time. Ideally, wood should be seasoned for at least six months, though many experts recommend a year for optimal results. As the wood dries, its internal moisture content reduces, making it better suited for burning.
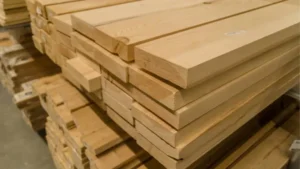
Steps to Proper Wood Storage
- Stacking the Wood: Once split, stack the firewood off the ground, using pallets or rails to keep it elevated. This prevents moisture from the ground from seeping into the wood. Ensure the stacks are stable to prevent accidental toppling.
- Location is Key: Choose a sunny and windy location for your woodpile. The sun’s heat and consistent airflow will expedite the drying process.
- Covering: While it’s important to protect the wood from rain and snow, covering it entirely can trap moisture. The best approach is to cover the top of the pile while leaving the sides exposed, allowing for adequate ventilation.
- Distance from the House: While it might be tempting to store wood right next to your home for easy access, it’s safer to keep it at least 30 feet away. This reduces the risk of pests like termites getting close to your home’s foundation.
- Organize by Age: If you’re continuously adding to your wood stock, organize the piles by the date they were cut. This ensures you always burn the oldest, most seasoned wood first.
- Check for Pests: Periodically inspect your woodpile for signs of pests like termites, ants, or rodents. A healthy woodpile should be relatively pest-free.
Conclusion
Maintaining your wood stove isn’t just about keeping it looking spick and span; it’s about ensuring safety, efficiency, and extending its service life. With these detailed steps, your wood stove will be ready to provide you with cozy warmth all winter long.
FAQs
- Why does my wood stove glass get blackened so quickly, and can I prevent it?
The blackening of the glass is often due to burning green or unseasoned wood, which creates more creosote and soot. Ensure you use well-seasoned wood and maintain a hot fire, especially during the initial stages, to reduce the buildup on the glass. - Can I use common household products to clean my wood stove?
Absolutely! In fact, damp newspaper dipped in ash is an old trick used to clean the glass door of a wood stove. Similarly, a mixture of vinegar and water can help in removing light soot from the exterior of the stove. - How often should I replace the gaskets on my wood stove doors?
While there’s no strict timeline, gaskets should be checked annually and replaced when they no longer create a tight seal or show visible signs of wear and tear. - Why do I hear a hissing sound when I burn wood on my stove?
Hissing indicates the presence of moisture in the wood, meaning it’s not properly seasoned. Burning such wood is inefficient and can lead to more creosote buildup. - Can I burn other materials like cardboard or magazines in my wood stove?
While it’s technically possible, it’s not advisable. Such materials can produce harmful emissions, contribute to creosote buildup, and may not burn at a consistent temperature like seasoned wood. - What’s the white stuff lining the interior walls of my wood stove?
That’s likely firebrick, designed to insulate the stove and reflect heat back into the fire. It protects the metal components and helps in maintaining a consistent temperature. - I noticed a metallic smell when I first lit my new wood stove. Is that normal?
Yes, it’s not uncommon for new stoves or recently repainted ones to emit a metallic or paint-like smell during the first few burns. Ensure good ventilation during these initial burns, and the smell should dissipate. - How do I know if there’s too much creosote in my chimney?
An inspection using a flashlight can help. If you see a thick, tar-like buildup inside, it’s time for a clean. A professional chimney sweep can also give a more accurate assessment. - Is it true ash from my wood stove can be beneficial for my garden?
Yes! Wood ash is rich in lime and potassium. When used in moderation, it can be a good soil amendment, helping to increase the pH of acidic soils. - I’ve seen stoves with catalytic combustors. What are they, and do they need special maintenance?
Catalytic combustors are devices used in some modern wood stoves to reduce emissions and increase combustion efficiency. They do require periodic cleaning and replacement after several years or after a specific number of burn hours. Always refer to the manufacturer’s guidelines for maintenance.
We hope this guide helps you keep your wood stove clean and in top condition! If you have any tips, questions, or stories about maintaining your wood stove, we’d love to hear them. Share your experiences in the comments below to help others and keep the warmth spreading. Happy stove cleaning!

David Murray
Forestry AuthorI'm David Murry, a forestry equipment specialist with a focus on chainsaw operation. With over 13 years of experience, I've honed my skills in operating and maintaining a wide range of machinery, from chainsaws to log splitters. My passion for the outdoors and commitment to sustainable forestry drive my work, which emphasizes safety, efficiency, and staying updated with industry advancements. Additionally, I'm dedicated to sharing my expertise and promoting environmental awareness within the forestry community.


Leave your comment