How To Clean Your Chimney
- October 27, 2023
- 2 comment
As the cold weather approaches, everyone loves the idea of sitting by a warm fire. But before immersing oneself in the comforting glow, it’s vital to consider the chimney. This towering feature of our homes is instrumental in ensuring the fire burns safely. The National Fire Protection Association (NFPA) advises an annual inspection of chimneys, fireplaces, and vents to guarantee they remain free of obstructions and are safeguarded against potential fire hazards. Especially for those who use their fireplace often, monitoring for creosote buildup is paramount. If you notice a 1/8 inch of sooty buildup, that’s a cue for a cleaning session. The presence of glazed or tar-like deposits signals a pressing need for cleaning because of their highly flammable nature.
As winter draws near, and the anticipation of Santa’s descent down the chimney heightens, remember the importance of its upkeep. Ensuring a clean chimney not only ensures its efficient operation but also underscores home safety. It’s a responsibility every homeowner should prioritize before lighting their fireplace.
Why is it Important to Clean Your Chimney?
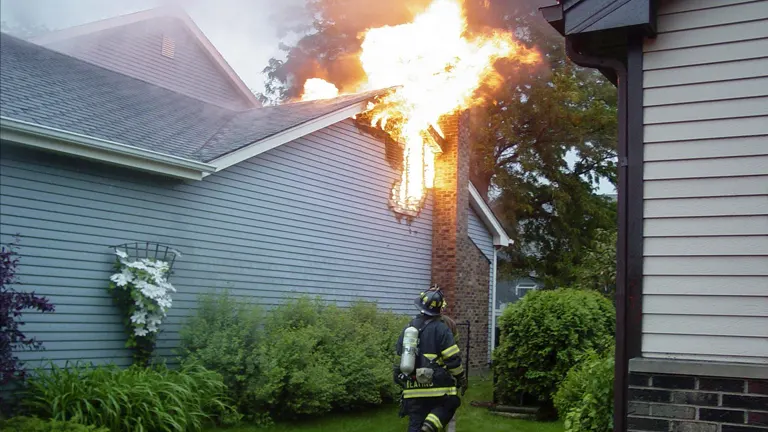
The atmosphere a fireplace provides isn’t just about ambiance. The act of burning wood in your fireplace produces creosote, a highly flammable tar-like substance. This substance accumulates on the inside of chimney walls. Over time, this buildup can ignite and produce temperatures of over 2,000 degrees Fahrenheit. Such fires are hard to put out and can spread rapidly, endangering your home.
To show how serious this is, every year, over 25,000 chimney fires damage homes, costing more than $125 million.
But that’s not all. A chimney’s job is to let out the smoke and harmful gases. If it’s blocked by things like birds, squirrels, or leaves, it won’t work right. This means the dangerous smoke stays in your home. Plus, a blocked chimney can’t help the fire burn well. So, it’s not just about keeping the chimney clean. It’s about making sure your home is safe and your fireplace works well.
How to Reduce Creosote Buildup
Want less of that sticky black stuff in your chimney? Here’s how to change your wood-burning ways:
- Use Dry Wood: Pick dry, hardwood. Wet wood doesn’t burn as hot, which means more sticky stuff in your chimney.
- Air is Important: Burning wood slowly with less air can cause more buildup. Fires that are hotter produce less of that black stuff.
- Morning Heat: After burning wood all night, in the morning, heat up to 500 to 600 degrees Fahrenheit (check with a flue pipe thermometer). Keep it at this heat for 20-30 minutes. For the rest of the day, aim for 300 to 400 degrees.
If the Creosote is so thick like Volcano Magma you can check our Article here! How to Remove Creosote from a Wood Stove 2023
The Anatomy of a Fireplace
The heart of many homes, particularly during the cold seasons, is the fireplace. This revered structure, more than just an ornamental or heat source, comprises intricate components that ensure its safe and efficient operation. As we embark on this exploration of a traditional fireplace’s anatomy, each component will be unveiled, shedding light on its vital role in the grand scheme of things.
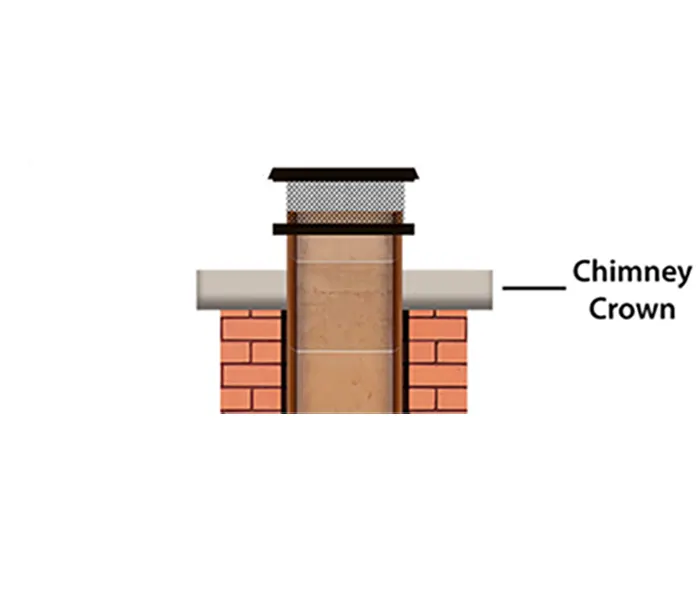
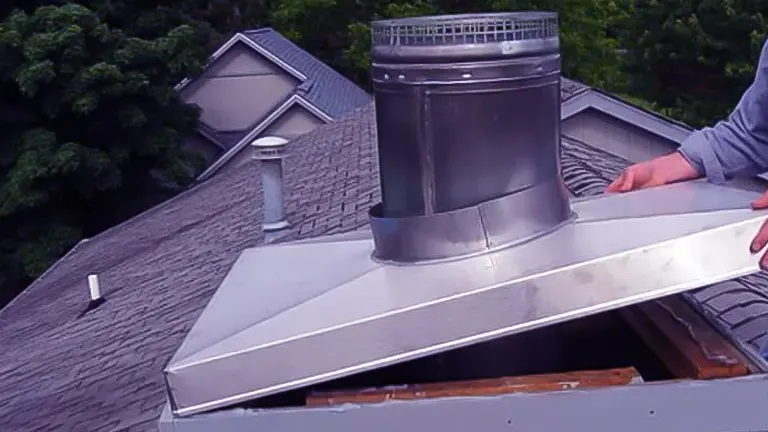
Crown
The pinnacle of our architectural journey is the chimney’s crown. This sentinel ensures the sanctity of the chimney, fending off the ingress of water. Its design, characterized by an overhanging contour, ensures that rainwater is deflected, preserving the masonry from erosion or potential damage. Cement stands as the primary craftsman behind the crown’s construction. For the chimney to maintain its structural integrity, it’s imperative that the crown remains free of any fissures, as even minor water infiltration can spell calamity for the chimney.
Chimney Flue or Liner
Ascending further, we arrive at the chimney flue or liner. This conduit stands as the primary escape route for the smoke and gases, ensuring they bid adieu to your dwelling. The flue ensures that these emissaries of warmth are insulated, preventing the chimney’s masonry from overheating and averting potential fire hazards. While clay tiles are the traditional artisans behind these liners, the modern fireplace also sees the inclusion of metal flue liners, especially aligned with wood-burning stoves and similar appliances.

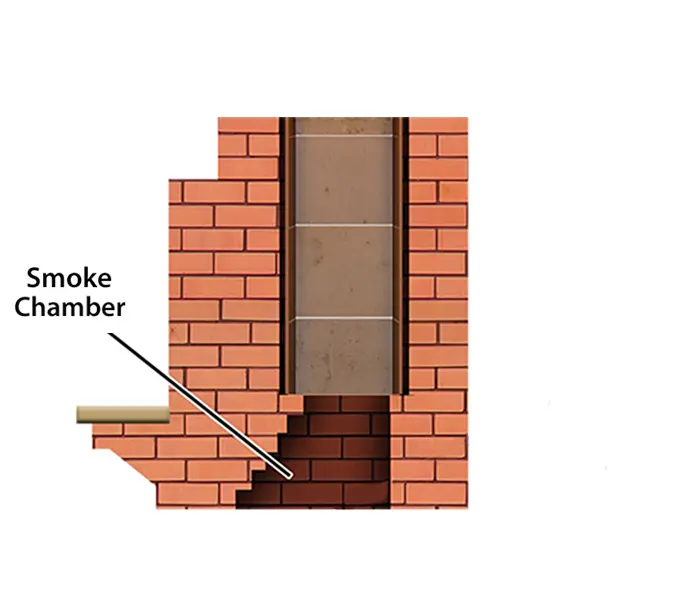
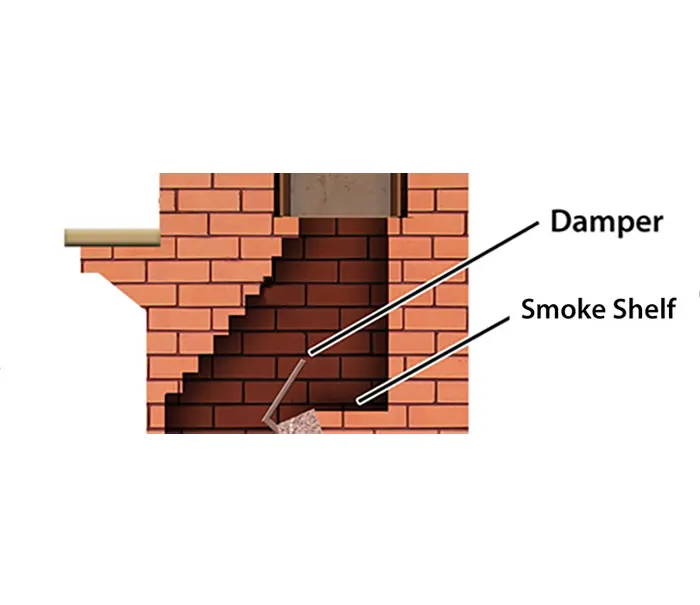
Smoke Shelf & Chamber
Venturing deeper into the fireplace’s architecture, behind the damper, lies the smoke shelf. This horizontal guardian intercepts falling debris and rain, ensuring the sanctity of the fireplace’s inner sanctum. Its role extends to facilitating the seamless transition of smoke and gases from the firebox to the smoke chamber, which then shepherds them up the chimney. The smoke chamber itself is the epitome of design precision. Its upward-tapering form is pivotal in channeling the smoke efficiently into the chimney flue. The chamber’s design, characterized by a smooth, insulated surface, is instrumental in optimizing smoke flow.
Damper
Elevate your gaze slightly above the firebox, and you encounter the fireplace’s gatekeeper: the damper. This ingenious mechanism, often likened to a “valve,” offers the flexibility of being opened or shut. Whenever the allure of a warm fire beckons, the damper is opened, granting passage to the ascending smoke and gases. However, in the fireplace’s dormant moments, a closed damper stands guard, preventing the chilly embrace of external air from infiltrating the home. Predominantly forged from metal, the damper, over its lifespan, faces the dual adversaries of heat and moisture. This constant exposure can lead to corrosion, signaling the need for its eventual replacement.
Firebox
At the very core of the fireplace lies the firebox. This is the realm where the enchanting dance of flames unfolds. As you gaze into the fireplace, the firebox’s chamber is what captivates your sight. Crafted to endure the rigors of intense heat, it stands as the main stage for combustion, encapsulating the flames. In terms of its construction, the firebox boasts a resilient design, typically sculpted from firebrick, ensuring it can weather high temperatures and resist wear over extended periods.
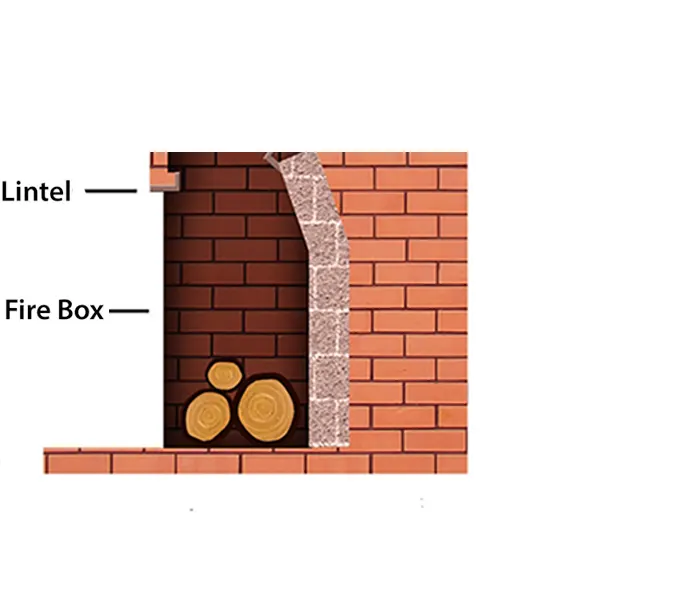
When you light a fire in the firebox, the generated heat causes smoke and gases to rise. This warm air travels up, pulling in cooler air from the room, and creating an “updraft.” As the smoke rises, it first moves through the damper, then gets streamlined in the smoke chamber, and eventually travels up the chimney flue, safely exiting your home. Proper maintenance and understanding of these components ensure a safer, more efficient burn, and a cozy atmosphere in your home.
Chimney Cleaning: Step-by-Step
Step 1: Preparation is Key
Before diving into chimney cleaning, here’s something really important:
Make sure your fireplace hasn’t been used for at least a full day. This wait is crucial to make sure everything is totally cool and safe to touch. If you’ve had a fire recently, even if it looks like it’s all out, some bits could still be hot enough to burn you or start a surprise fire. So, waiting 24 hours after your last fire is a good rule to follow.
Tip: While you’re waiting for the fireplace to cool, it’s a great time to gather your cleaning tools and maybe even read up on some chimney-cleaning tips. This way, you’re fully prepared and know what to expect when it’s time to start the cleaning job. Remember, taking it slow and being safe is better than rushing and having an accident!
Step 2: The Importance of Regular Cleaning
You might think of chimney cleaning as just another task on your long to-do list, but it’s a lot more crucial than you might imagine.
A clean chimney works better, plain and simple. Over time, a lot of gunk, known as creosote, collects inside. This not only makes your fires less efficient (meaning you get less warmth and burn more wood) but can also be a fire risk. And guess where a surprising amount of this gunk hides? The smoke shelf. It’s like a little shelf where soot and residue love to hang out. By cleaning this shelf, you’re ensuring your fires burn brighter and your home stays safer.
Tip: Make chimney cleaning a regular event, just like checking your smoke detectors or cleaning out your gutters. Mark it on your calendar so you don’t forget. It’s a small task with big benefits for your home’s safety and coziness!
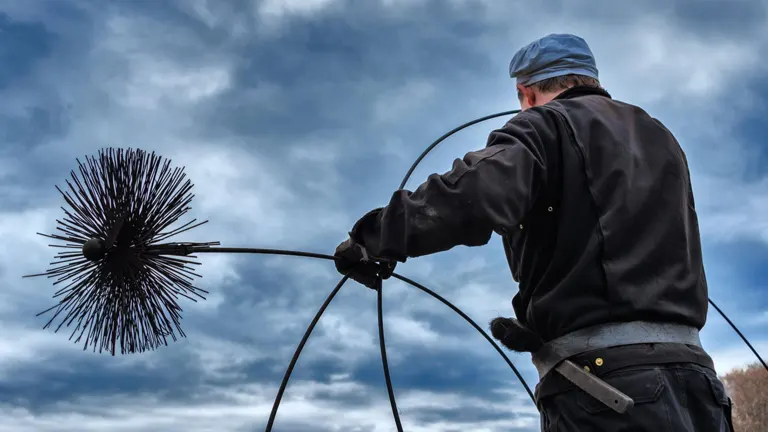
Step 3: Tool Gathering
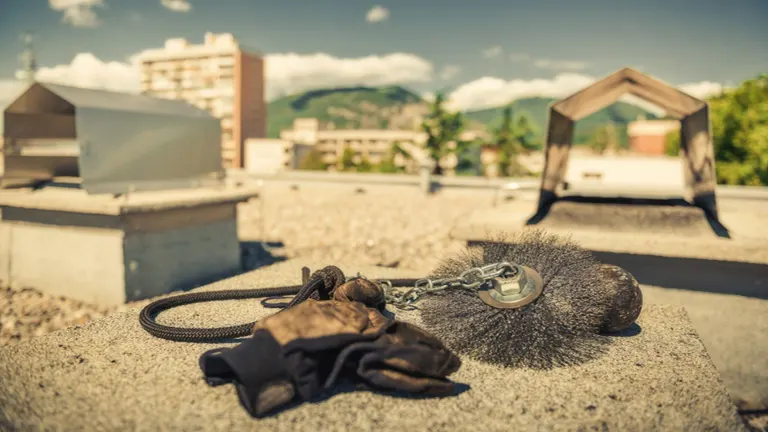
Before diving into the chimney cleaning process, it’s vital to have the right equipment at hand. Your main buddy in this venture will be a chimney sweeping brush. Why’s that important? It’s specially designed to scrub off all the grime and soot that builds up in your chimney.
Not all brushes are created equal, though. There’s a bunch to pick from, but the drill-attachable ones are the real MVPs. They make the job quicker and easier. And while you might see different price tags, there’s a solid one priced around $69. Check it out Here! It’s a bit of an investment, but when you think about the safety and efficiency it brings, it’s well worth it.
Tip: Always measure your chimney flue before buying a brush. A brush that’s too big or too small won’t do the job right. Get the size spot on for a cleaner chimney!
Step 4: Safety Measures are a Must
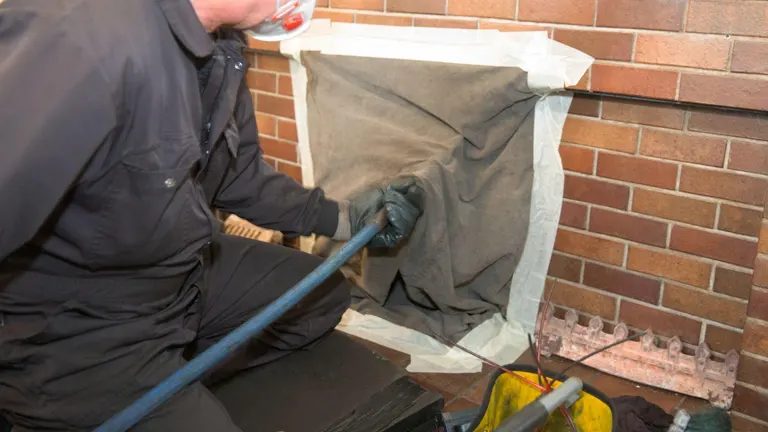
umping into chimney cleaning without the right safety precautions is a no-no. First off, you don’t want soot and debris all over your living space. A simple trick? Cover up the fireplace opening using a plastic sheet and tape it in place. This way, all the messy stuff stays where it should – inside the chimney.
Got a shop vacuum? Great! Keep it close by. As you clean, some soot might decide to go airborne. The vacuum will help you catch those rogue particles, keeping your room and your lungs cleaner.
Tip: Wear old clothes and safety goggles when cleaning. You’re bound to get a bit messy, and the goggles will protect your eyes from any floating debris. Better safe than sorry!
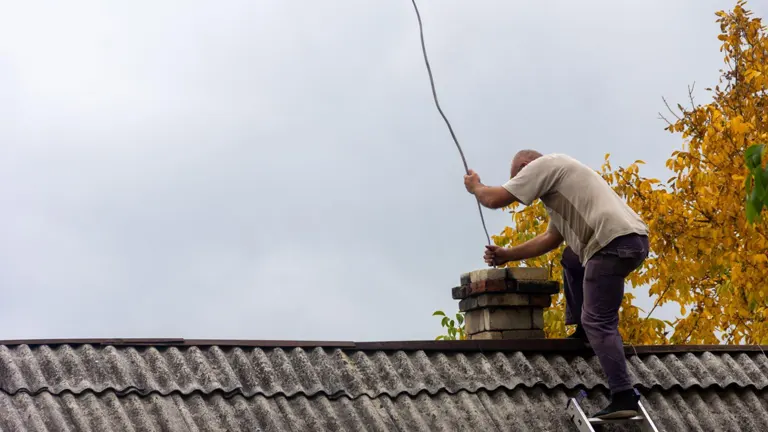
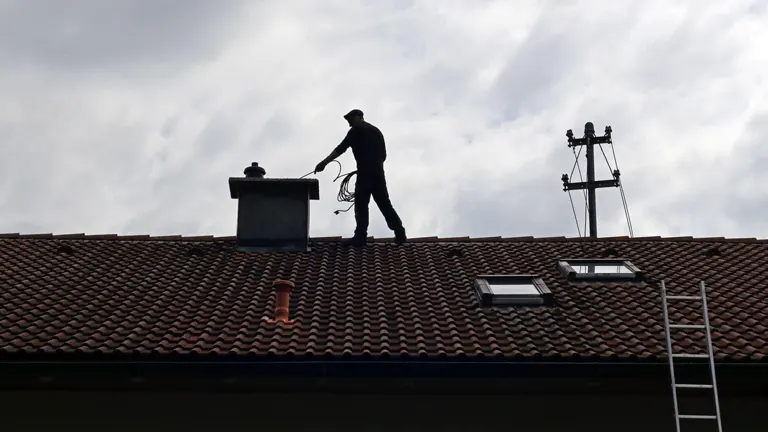
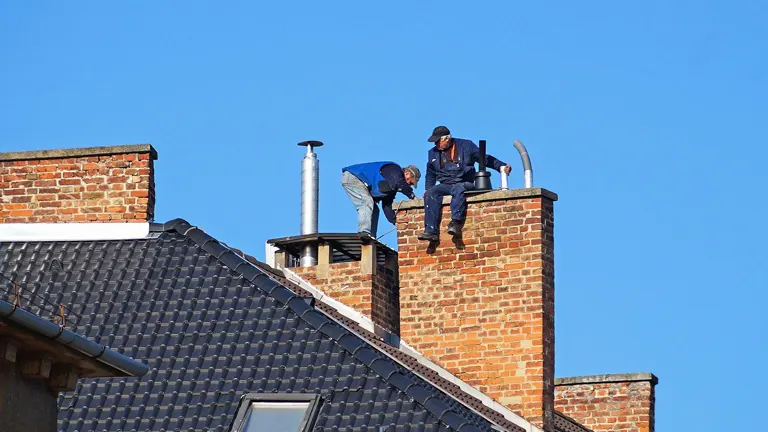
Step 5: Accessing the Rooftop
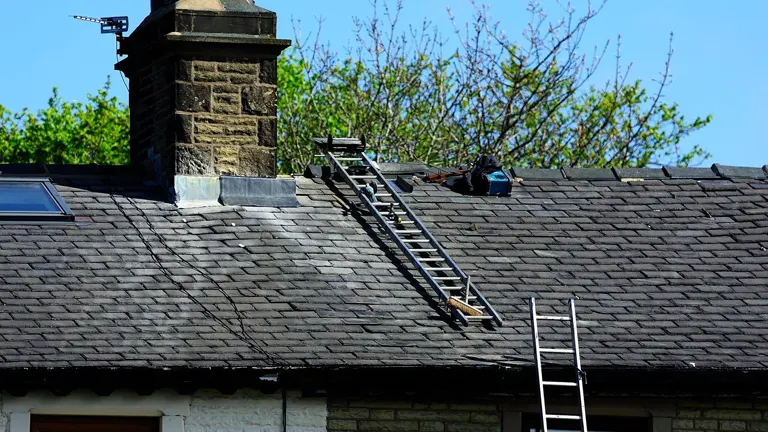
When it’s time to climb up and get to your chimney, you’ve got to be extra careful. Depending on how tall your chimney stands, you might need a good-sized ladder or even an extra step or two. Here’s the golden rule: always make sure your ladder sits on firm, even ground. A wobbly ladder is a disaster waiting to happen.
Tip: If possible, have a buddy or family member spot you from below while you’re up there. An extra pair of eyes can alert you to potential problems and offer a helping hand if needed. Remember, teamwork makes the dream work – and keeps you safe!
Step 6: A Thorough Chimney Inspection
Before you dive into cleaning, take a good, detailed look inside your chimney. By taking off the chimney cap and shining a light or even using a small camera, you’ll be able to spot anything unusual like blockages or cracks. Given the many parts and variations of chimneys – from the different cap types, to the diverse flue types, and the many stove designs – it’s essential to know what you’re dealing with. For instance, some chimneys come with a top damper connected by a long cable that runs down the flue; you’d want to remove that before starting.
Tip: Don’t rush this step. Taking your time during the inspection can save you from potential hazards later on. If you’re unsure about anything you see, it might be worth getting a professional opinion before proceeding. Safety first!
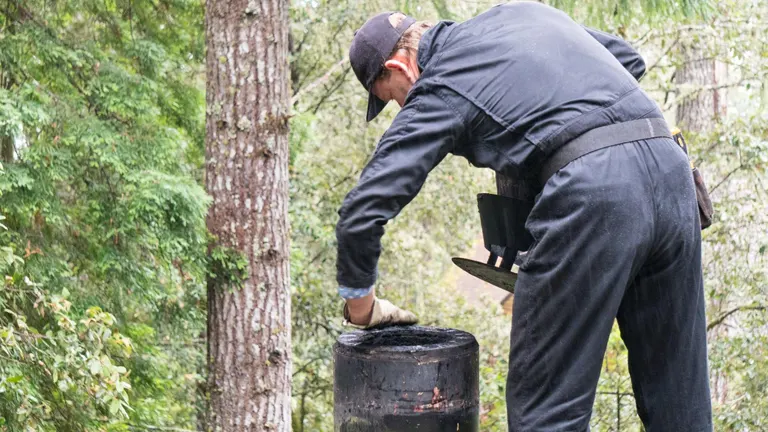
Step 7: The Cleaning Process
Now that you’re all set, it’s time to get your chimney sparkling clean. A method many swear by is starting at the bottom and gradually making your way to the top. If you’re using a drill-attachable brush, it makes the process even smoother. Go slow and make sure you cover every part of the chimney, leaving no spot untouched by the brush.
Tip: It’s natural for the cleaning process to be a bit messy. Regularly check the base to clear out the accumulated soot and debris, so it doesn’t pile up too much. This way, you’ll have less to clean up later on. Remember, patience is key, and thoroughness now can save you from another cleaning session too soon!
Step 8: Why Consider a Professional
Sure, cleaning your chimney on your own can be rewarding, but there’s a lot to be said about bringing in the pros. For one, they come with a ton of experience – meaning they’ll quickly notice things like damaged flue tiles that you might miss. Did you know they can help you save money? Yep, by providing a fire inspection form from a certified professional, you could massively cut down on your insurance. Usually, homes with anything that burns fire are seen as riskier, leading to higher insurance bills. But with that expert seal of approval, you could end up paying a lot less. What’s more, these experts keep detailed records, including video footage of your chimney, which could be a lifesaver if you ever need to make an insurance claim. Plus, they can give you all sorts of tips and tricks to make sure your fires burn brighter, safer, and with less gunky creosote. In the end, while doing it yourself is great, there’s something to be said about the peace of mind that comes with expert care.
Step 9: Post-Cleaning Rituals
Once you’ve given your chimney a thorough scrubbing, don’t rush straight into cleaning up. Start by putting the chimney cap back on to ensure it’s secure and everything’s in its right place. Then, give it some time—about half an hour should do the trick. This short wait lets all that loose soot and dust settle down, so you’re not just stirring it back up when you start cleaning. It’s a small step, but it can make the final clean-up a lot simpler and less messy. Patience now will save you extra work later!
Step 10: Tackling the Debris
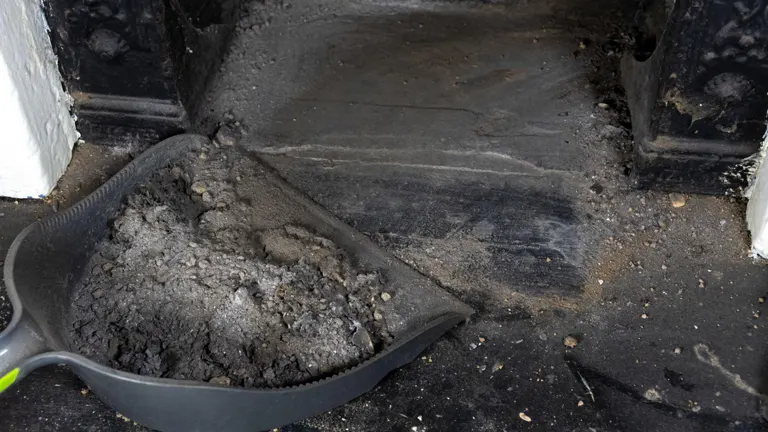
After focusing on the chimney’s upper sections, it’s time to tackle the base, a common spot for accumulated debris. Many chimneys feature a cleanout door designed for this very purpose. By accessing it, you’re introduced to the world of settled soot, ash, and other residues that might have dropped from the chimney’s heights.
Tip: Wear protective gloves and a mask when dealing with this area; it can be particularly dusty and might contain some sharp debris. Whether you opt for manual scooping or the efficiency of a shop vacuum, ensure all particles, even the minute ones, are addressed. A clean base ensures a smoother flow of smoke and optimizes your chimney’s overall performance.
Step 11: Concluding Steps
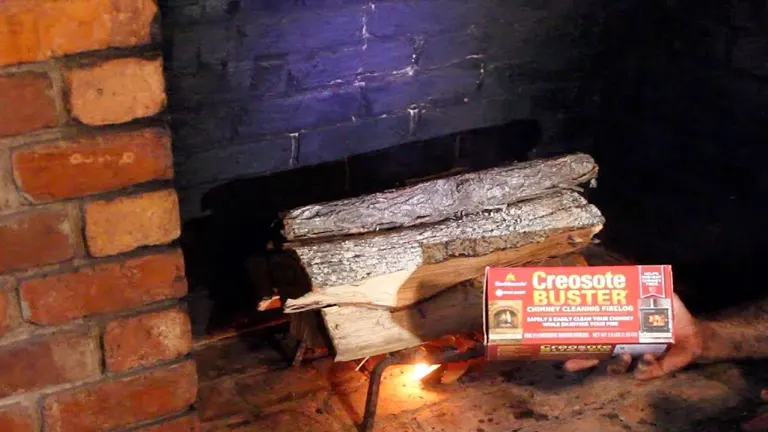
Wrapping up your chimney cleaning session involves a few key actions. Firstly, don’t forget to put back any protective screens or doors you might have removed. These elements not only provide safety but also add an aesthetic touch to your fireplace. If you’re looking to reduce the frequency of intensive cleaning in the future, consider lighting creosote-busting logs from time to time. They work wonders in minimizing creosote buildup.
Tip: Always keep track of all the components you remove and ensure they are put back in their rightful place.
In conclusion, whether you’re a hands-on homeowner taking the DIY route or someone who trusts the expertise of professionals, the overarching objective remains the same: ensuring a safe and efficient chimney. Regular upkeep doesn’t just optimize your fireplace’s performance; it’s a proactive step in safeguarding your home from potential fire risks. Here’s to cozy, safe, and clean firesides!
Alternative Fireplace Options
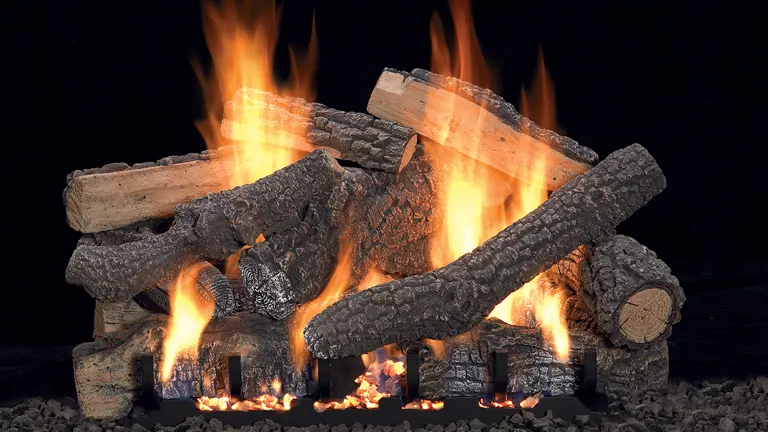
For those looking to avoid wood-burning hassles, gas inserts or log sets can be a great alternative. These clean-burning systems reduce ash and soot production. However, always ensure your smoke and carbon monoxide detectors are operational and properly maintained.
Remember, while fireplaces add warmth and charm to our homes, their maintenance is crucial for safety. Regular cleaning ensures a joyful and hazard-free winter season.
Understanding Chimney Cleaning Costs
While a wood-burning fireplace can indeed cut down on winter heating expenses, it’s essential to factor in the need for regular maintenance. With frequent use, soot and the oily substance known as creosote accumulate in the chimney. If this is neglected, it can lead to potential fire hazards and health concerns.
To ensure the safety and well-being of your household, it’s advisable to invest in regular inspections and professional chimney cleaning. On average, chimney sweeps charge between $120 to $390, with some charging around $65 per hour. While this might seem like an additional expense, it’s a small price to pay for the peace of mind and safety it brings to your home.
Factors That Determine Chimney Cleaning Costs
Having a fireplace is great, but it does come with some costs for cleaning and upkeep. Here’s what might affect the price:
- Basic Cleaning: Usually, the price you get includes cleaning and a simple look-over. If your chimney has special issues or is tricky to reach, the cost can go up.
- Chimney Check: Experts look at your chimney to find problems or pests. Basic checks come with cleaning, but detailed ones can cost more.
- Reaching Your Chimney: If your roof is high or has stuff like solar panels in the way, the cleaning might cost more because it’s harder to do.
- What’s Your Fireplace Type: Different fireplaces have different costs. For example, a gas fireplace might cost between $80-$140 to clean, but a wood stove could be $160-$310.
- How Often You Clean: If you use your fireplace a lot, clean it every year. If you wait too long, it’ll cost more because there’s more soot.
- How Often You Use It: If you light your fireplace many times a week, you might need extra cleaning in the winter.
- Where You Live: In cities, cleaning might cost more than in the countryside. If many people near you have fireplaces, the high demand might also raise prices.
- Fireplace Damper: This little flap helps direct smoke. If it’s broken, fixing it can cost $100-$225.
- Chimney Liners: These protect your chimney from heat. They can cost a lot to replace, but sometimes you can fix them for less.
- Chimney Caps: The cap sits on top and keeps stuff out. Fixing or replacing it costs between $115-$850.
- Chimney Flashing: This piece stops water leaks. It costs $215-$520 to fix or put in a new one.
- Animals: Sometimes animals get inside chimneys. If this happens, it can cost $180-$560 to get them out safely.
Understanding Chimney Inspection Costs
If you’re getting your chimney inspected, the cost will depend on how detailed the check is. There are three main levels:
- Level One: This is a simple look at the fireplace and outside of the chimney. It’s often included when you get your chimney cleaned if it’s in good shape. As a separate service, it’s priced between $85-$450.
- Level Two: This is more detailed and uses videos to look inside the chimney, as well as checks in the attic and on the roof. It’s recommended when you’re selling your home or making big changes. It’ll set you back between $145-$750.
- Level Three: This is the most detailed check. It’s done when there might be serious damage, like after a big storm or earthquake. The inspector might need to open up walls or take parts of the chimney apart. Because it’s so thorough, it costs between $750-$5,000.
FAQs
- Is it easy to clean a chimney from the inside?
Cleaning a chimney from the inside is doable but can be messy. By using the right tools, like a chimney brush that fits your chimney’s size and shape, you can scrub the interior walls to remove soot and creosote. However, ensure you protect your home’s interior by laying down tarps or old sheets. If you’re not comfortable doing it yourself, or if the buildup is substantial, hiring a professional might be the best option. - How often should you clean your chimney?
You should clean your chimney at least once a year. However, if you burn wood frequently, such as more than a cord in a season, you might need to clean it more often. An annual inspection is also recommended to check for any damages or obstructions. - Why does creosote form in chimneys?
Creosote forms from smoke, water vapor, gases, unburned wood particles, tar fog, and other residues produced during the burning process. When these substances exit the fireplace and flow into the cooler chimney, condensation occurs. Over time, this condensation forms a sticky residue on the chimney walls called creosote. It can be flammable and is a major reason why chimneys should be cleaned regularly. - Can I use regular logs to clean the chimney?
While burning regular logs can help in minor creosote reduction, there are special chimney cleaning logs available in the market. These logs release a mixture of chemicals when burned, which can help in breaking down some of the creosote buildup. However, they are not a replacement for a thorough manual cleaning. - What are signs that my chimney needs cleaning?
Several signs can indicate your chimney needs cleaning:- A strong, unpleasant odor coming from the fireplace or chimney.
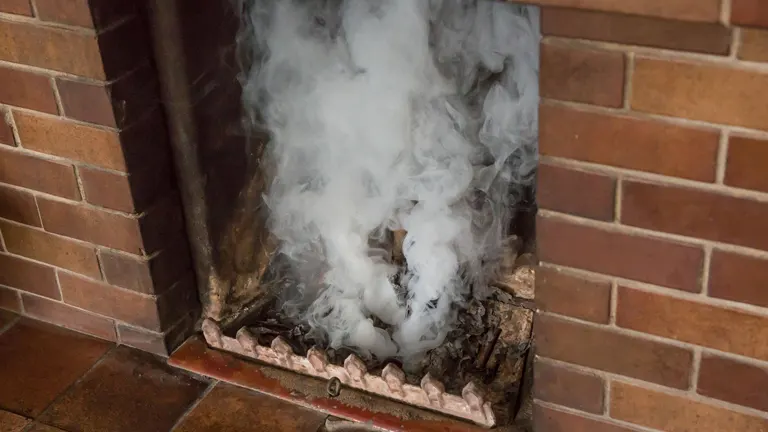
- Excessive smoke while using the fireplace.
- A buildup of soot at the base of the chimney or on the walls.
- A visible thick, black layer on the inside of the chimney.
- A decrease in the efficiency of your fireplace. Remember, even if you don’t notice these signs, it’s still crucial to get an annual inspection and cleaning for safety reasons.
Thank you for taking the time to read How to Clean Your Chimney. Your fireplace is not just a source of warmth but also a gathering place for friends and family. Taking care of it ensures many cozy nights ahead. We hope the information provided was helpful and sheds light on the importance of a clean chimney. If you have any insights, personal experiences, or thoughts on the subject, we’d love to hear from you. Please share your comments below. Your feedback not only helps us but also aids others in the community. Once again, thank you for reading, and here’s to many safe and warm moments by your fireplace!

David Murray
Forestry AuthorI'm David Murry, a forestry equipment specialist with a focus on chainsaw operation. With over 13 years of experience, I've honed my skills in operating and maintaining a wide range of machinery, from chainsaws to log splitters. My passion for the outdoors and commitment to sustainable forestry drive my work, which emphasizes safety, efficiency, and staying updated with industry advancements. Additionally, I'm dedicated to sharing my expertise and promoting environmental awareness within the forestry community.
2 comments
Very informative information...thanku!


Awesome post! Thanks for sharing the knowledge and keep up the good work.
john
December 26, 2023 6:16 am