How to Secure Landscape Timbers
- January 30, 2024
- 0 comment
Landscape timbers are favored for their aesthetic and versatility in garden projects like edging, raised beds, and retaining walls. Their rustic appeal enhances outdoor spaces, while their functionality addresses soil management and erosion control. However, the durability of these structures depends on proper securing to prevent shifting, especially in harsh weather.
Anchoring timbers to the ground and to each other is crucial, using methods such as rebar or landscape spikes, to ensure the stability and longevity of garden enhancements.
Importance of Proper Installation
By meticulously securing landscape timbers in place, they not only retain their structural form and aesthetic appeal, but also significantly enhance the overall appearance of your outdoor spaces. This careful installation serves a dual purpose: it not only embellishes your garden or yard with a well-maintained, cohesive look but also plays a crucial role in safety.

Proper anchoring of these timbers ensures that they remain steadfast, thereby eliminating risks of shifting or toppling over, which could lead to accidents or injuries. Thus, the thorough securing of landscape timbers is essential not just for their visual contribution to your outdoor areas but also for maintaining a secure and hazard-free environment within your landscaped spaces.
Materials for Securing Timbers
There are several materials available that can effectively anchor landscape timbers, each suited for different types of projects:
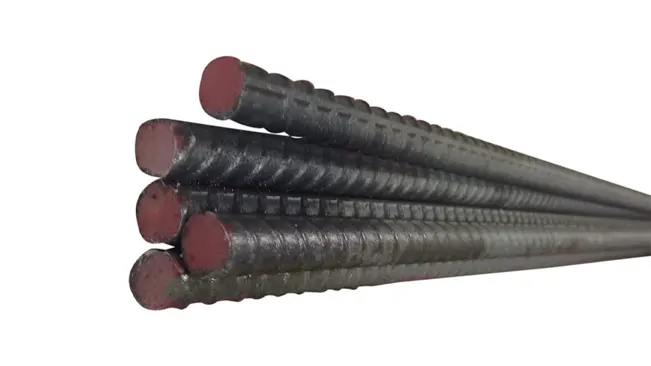
Rebar
This long, steel rod is ideal for constructing solid walls in raised garden beds. Its strength allows it to be driven deep into the ground, providing exceptional stability to the timber structure above. Rebar is particularly useful for taller timber constructions, where it can be inserted through multiple layers of wood, anchoring the entire structure firmly into the earth.
Landscape Spikes
These hefty nails are designed to secure individual landscape timbers to the ground, making them an excellent choice for outlining flower beds or garden paths. Their substantial length and thickness ensure that the timbers stay in place, even in soft soil, preventing them from rolling or shifting.

Brackets/Braces
When building smaller structures or stacks of landscape timbers, brackets and braces can offer crucial support. These metal supports are typically installed on the inside of timber connections, reinforcing joints and corners discreetly. This not only aids in maintaining the structural integrity of smaller timber assemblies but also keeps the aesthetic of the project clean and unobstructed by visible hardware.

Steel Pipe
For securing large landscape timbers, especially in challenging terrains like steep slopes, steel pipes are a reliable option. These durable pipes can be driven through pre-drilled holes in the timbers and deep into the ground, linking the timber layers together and providing a strong anchor against gravitational pull.

Galvanized Spike Nails
These are specially treated nails that resist corrosion, making them perfect for outdoor use where moisture is prevalent. Their design is ideal for fastening multiple rows of landscape timbers, such as in the construction of sand pits, raised garden beds, or play areas. The galvanization process ensures that these nails withstand the elements, keeping your timber structures secure and intact over time.

Using Rebar for Timbers
Using rebar to secure landscape timbers is a popular and effective method, particularly for structures like raised garden beds or retaining walls. Here’s a general guide to help you use rebar for your landscaping projects:
- Planning Your Layout
Begin by determining the design and dimensions of your landscape timber structure. Lay out your timbers on the ground in the desired configuration, whether it’s a simple rectangle for a raised bed or a more complex shape for a retaining wall. - Measuring and Marking
Once you have your layout, measure the height of your timber stack to determine the length of rebar you’ll need. As a rule of thumb, the rebar should be long enough to go through all the timbers in your structure plus an additional 1/3 to 1/2 of its length to be driven into the ground for stability. Mark the spots on the timbers where you plan to drill holes for the rebar, ensuring they align from one timber to the next. - Drilling Holes
Use a drill with a bit that is slightly larger in diameter than your rebar to drill holes at the marked spots. This allows the rebar to slide through the timbers with less resistance, making installation easier. - Cutting Rebar
If your rebar isn’t already the correct length, cut it using a metal cutting saw or an angle grinder with a metal cutting disc. Always wear appropriate safety gear, such as goggles and gloves, when cutting. - Installing the Rebar
Position your landscape timbers in their final location and stack them as per your design. Align the drilled holes from top to bottom. Starting at the top, insert the rebar into the holes and gently tap it with a sledgehammer or mallet, driving it through the timbers and into the ground. Continue until the rebar is flush with the top timber or slightly below the surface to avoid any tripping hazards or sharp edges. - Securing the Structure
Ensure that the rebar is driven deep enough into the ground to provide a sturdy anchor. For added stability, especially in softer soils, you may need to drive the rebar deeper than the standard 1/3 to 1/2 of its length. - Finishing Touches
Once all the rebar is in place, check the stability of your structure by applying slight pressure to various points. If any part feels unstable, you may need to add more rebar or adjust the existing pieces.
Using Spikes for Single Timbers
To ensure landscape timbers remain stable, start with site preparation by removing sod and digging a trench to fit the timbers snugly, minimizing shifting. Securing the timbers involves drilling holes and inserting landscape spikes or rebar, then hammering these deep into the ground.
This method not only anchors the timbers against environmental shifts but also bolsters the structure’s longevity and aesthetic appeal, maintaining its integrity over time.
Enhancing Support with Brackets/Braces
To increase the durability and structural integrity of raised garden beds, employing both internal support brackets and external rebar stakes is highly effective. Installing brackets on the inner sides provides essential reinforcement at key points, helping to resist the forces that could weaken the structure. Externally, rebar stakes positioned close to the timber’s outer walls anchor the beds firmly into the ground, offering a defense against the pressures of expanding or waterlogged soil.
This dual strategy not only secures the raised beds against the challenges posed by soil dynamics but also maintains their visual appeal by preventing any deformations such as bowing or warping over time.
Utilizing Steel Pipe for Large Timbers
To increase the durability and structural integrity of raised garden beds, employing both internal support brackets and external rebar stakes is highly effective. Installing brackets on the inner sides provides essential reinforcement at key points, helping to resist the forces that could weaken the structure.
Externally, rebar stakes positioned close to the timber’s outer walls anchor the beds firmly into the ground, offering a defense against the pressures of expanding or waterlogged soil. This dual strategy not only secures the raised beds against the challenges posed by soil dynamics but also maintains their visual appeal by preventing any deformations such as bowing or warping over time.
Reinforcing with Galvanized Spike Nails
Securing landscape timbers with spike
is an efficient and direct approach to construct durable, multi-layered wooden structures. Driving these substantial nails straight through the timbers, without pre-drilling, ensures a snug fit between layers, vital for the construction’s stability. The spikes’ length and durability allow deep penetration, anchoring each timber layer securely to the one beneath, effectively preventing any movement or separation over time.
This method is especially beneficial for building robust features like raised garden beds, steps, and terraced landscapes, where structural integrity is crucial. The deep-set nails maintain the timbers’ position, offering a long-lasting solution that withstands environmental stresses while preserving the wood’s natural beauty.
Tips for a Durable Landscape Timber Structure
- Opt for pressure-treated landscape timbers that are designed for ground contact to ensure resistance against rot, pests, and decay.
- Level the installation area and ensure proper drainage to prevent water pooling, which can lead to timber rot.
- Select galvanized or stainless steel spikes, screws, and rebar that won’t corrode over time, maintaining the structure’s integrity.
- Drive rebar or spikes deep into the ground and through the timbers for a stable foundation, especially in areas with high wind or on slopes.
- Ensure that each timber layer is level and securely attached to the layer below, staggering joints for increased strength.
- Apply a wood preservative or sealant to all exposed timber surfaces to extend their life by protecting against moisture and UV damage.
- Inspect the structure periodically for signs of wear or damage, tightening any loose fasteners and reapplying sealant as needed to address issues promptly.
Common Mistakes to Avoid
- Using untreated or poorly treated wood that is susceptible to rot, pests, and weather damage.
- Failing to level the installation site or provide proper drainage, leading to water accumulation and timber decay.
- Not using enough spikes, rebar, or other fasteners to secure the timbers firmly to the ground and to each other.
- Overlooking the impact of soil movement, frost heave, and erosion on the stability of the timber structure.
- Choosing non-galvanized or low-quality fasteners that can rust and weaken the structure over time.
- Not staggering the joints between layers of timbers, which can compromise the strength and aesthetic of the structure.
- Failing to regularly inspect and maintain the timber structure for signs of wear, loose fasteners, or wood decay.
Maintenance and Care
Regular inspections and tightening of the securing materials will keep your landscape timber structures safe and attractive for years to come.
- Schedule periodic inspections to identify any signs of wear, loosening of fasteners, or damage to the timbers.
- Check and retighten any spikes, screws, or rebar that may have become loose over time due to weather conditions or soil movement.
- Treat the timbers with a suitable wood preservative or sealant to protect against moisture, decay, and insect damage.
- Ensure proper drainage around timber structures to prevent water accumulation, which can lead to wood rot.
- Gently clean the timber surfaces to remove dirt, debris, or mildew, maintaining their appearance and preventing decay.
- Address any cracks, splits, or rotting sections immediately to prevent further deterioration.
- Reapply protective stains or paints as needed to preserve the wood’s condition and appearance.
Related Topics
Conclusion
Properly securing landscape timbers is crucial for building garden structures that are safe and enduring. Selecting durable materials like pressure-treated wood and rust-resistant fasteners ensures these outdoor features withstand environmental challenges. Following a systematic installation process, including site preparation and accurate fastening, leads to the creation of attractive and sturdy outdoor elements. These steps not only elevate the appearance of your home’s exterior but also guarantee that these structures remain an integral part of your garden’s landscape for years to come.
FAQs
- Can I use regular nails to secure landscape timbers?
Regular nails are not recommended as they may not provide sufficient hold and can rust over time, weakening the structure. - How often should I check the stability of my landscape timbers?
It’s a good idea to inspect your timber structures at least once a year and after severe weather conditions. - Can landscape timbers be used for retaining walls?
Yes, with proper securing methods like rebar or steel pipes, landscape timbers can be used to construct sturdy retaining walls. - Do I need to treat the wood before installation?
Using pre-treated wood is advisable for outdoor use, but additional wood preservative can be applied for extra protection. - How deep should rebar be driven into the ground?
As a general rule, rebar should be driven into the ground 1/3 to 1/2 the length of the exposed timber above ground. - What’s the best way to cut landscape timbers for custom projects?
For precise cuts, use a circular saw or a handsaw. Mark your cutting line with chalk or a pencil for accuracy. Remember to wear safety goggles and gloves to protect yourself during the cutting process. - Can I secure landscape timbers without using power tools?
Yes, you can secure landscape timbers without power tools, though it might require more effort. For example, you can manually hammer landscape spikes or rebar into pre-drilled holes. However, using a drill to create pilot holes can make the process easier and reduce the risk of splitting the wood. - How do I prevent my landscape timbers from rotting?
Choose pressure-treated timbers designed for ground contact to ensure longevity. Additionally, applying a wood preservative or sealant can provide extra protection against moisture and decay. - Is it necessary to use a weed barrier beneath a landscape timber project?
While not always necessary, a weed barrier can help prevent weed growth and provide a clean foundation for your project, especially for raised beds and garden edging. It can also improve drainage and extend the life of your landscape timbers by reducing direct soil contact. - What should I do if my landscape timbers start to shift or become loose?
Inspect the area to determine the cause of the shifting. It could be due to soil erosion, water runoff, or inadequate securing methods. Depending on the issue, you might need to reinforce the timbers with additional spikes, rebar, or braces, or possibly address drainage problems to prevent future shifting.

Charles Hayes
Forestry AuthorI'm Charles Hayes, I bring over 15 years of specialized expertise in landscaping and woodworking, blending artistic design with sustainable environmental stewardship. My career, fueled by a profound passion for the natural world, encompasses extensive education and hands-on experience in creating harmonious, eco-friendly outdoor spaces and responsibly managing forest resources. Recognized for my professional standing, I am committed to continuous learning and certification in cutting-edge practices. My expertise is not only reflected in my work but also in my contributions to community projects, educational workshops, and collaborations with industry leaders. As an authoritative voice in my field, I strive to share knowledge and promote environmentally conscious approaches, making me a trusted resource in landscaping and forestry.


Leave your comment