Houseplant Mastery: Essential Care Strategies
- February 15, 2024
- 0 comment
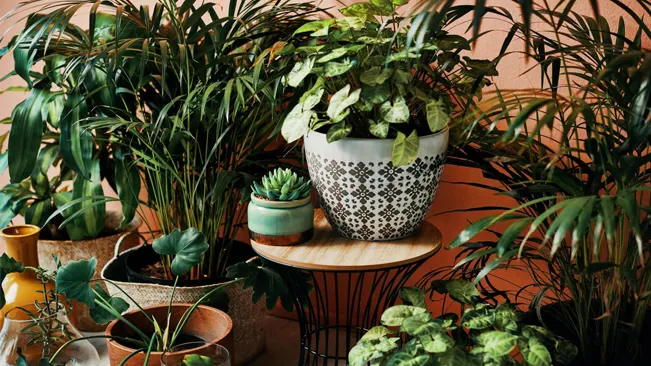
Houseplants have gained immense popularity as a means of bringing a piece of nature into our homes. They not only enhance the aesthetic appeal of our living spaces but also have benefits for mental health and air quality. However, mastering the art of houseplant care requires understanding their basic needs and creating a conducive environment for their growth. This article delves into essential care strategies to help you become a houseplant master.
Understanding Your Plant’s Needs
The first step in houseplant care is understanding the specific needs of each plant. Different plants require varying amounts of light, water, and temperature to thrive. For example, succulents prefer bright light and less water, while ferns thrive in moist conditions and indirect light. Research your plant’s specific requirements or consult a local nursery.
Proper Lighting
Light is crucial for photosynthesis, the process by which plants make their food. Most houseplants require bright, indirect light. Direct sunlight can scorch the leaves of sensitive plants. North or east-facing windows are usually ideal for most houseplants. If natural light is limited, consider using grow lights.
- Understanding Photosynthesis
Photosynthesis is the process by which plants convert light energy into chemical energy, using it to fuel their growth. Light is absorbed by chlorophyll, the green pigment in leaves, and is used to convert carbon dioxide and water into sugars and oxygen. Without adequate light, plants cannot perform photosynthesis effectively, leading to poor growth or even death. - Types of Light
Light can be categorized by its intensity and color temperature. Intensity refers to the brightness of light, while color temperature describes the light’s color on the spectrum, ranging from warm (reddish) to cool (bluish). - Light Requirements for Houseplants
Different plants have varying light needs. Some plants, like succulents and cacti, prefer bright light, while others, such as ferns and certain tropical plants, thrive in lower light conditions. Most houseplants are adapted to grow under the canopy of larger plants in their natural environment and thus prefer bright, indirect light. - Effects of Direct Sunlight
While some plants can handle direct sunlight, many houseplants can suffer from leaf burn if exposed to too much direct sunlight, especially during the hotter parts of the day. The intense light can scorch their leaves, causing them to turn yellow or brown. - Ideal Placement
North or east-facing windows are often recommended for houseplants as they provide bright, indirect light for most of the day without the intense direct sunlight of south or west-facing windows. If you only have south or west-facing windows, using sheer curtains or placing plants further away from the window can help diffuse the light. - Using Grow Lights
In situations where natural light is insufficient, grow lights can be a great alternative. These artificial lights are designed to provide a spectrum of light that mimics natural sunlight. LED grow lights are energy-efficient and produce less heat, making them ideal for indoor plants. When using grow lights, it’s important to consider the distance between the light and the plant, as well as the duration of exposure. - Monitoring and Adjusting
Observe your plants for signs that they are getting too much or too little light. Indicators of insufficient light include leggy stems, small leaves, and a lack of flowering or growth. On the other hand, leaves that are bleached or scorched, or that have dry, brown edges, may indicate too much light. Adjust your plant’s position or the lighting accordingly. - Seasonal Changes
Be aware of the changes in light intensity and duration with the seasons. Plants may need to be moved to different locations in your home throughout the year to ensure they receive the optimal amount of light.
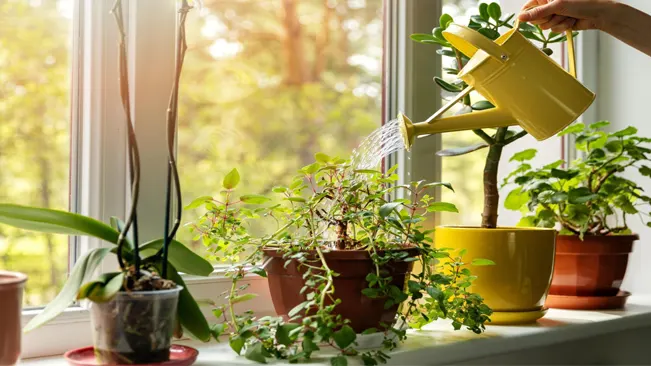
Watering Wisely
Over-watering is one of the most common mistakes in houseplant care. It’s essential to understand the watering needs of your plants and adjust accordingly. A general rule is to water when the top inch of the soil is dry. Ensure pots have drainage holes to prevent water logging, which can lead to root rot.
- Check Soil Moisture
Before watering, check the soil moisture. You can do this by simply sticking your finger into the soil up to the first knuckle. If the soil at that depth feels dry, it’s time to water. If it still feels moist, wait a few more days before checking again. - Understand Each Plant’s Needs
Different plants have different watering requirements. Some plants, like succulents and cacti, prefer drier conditions, while others, like ferns or tropical plants, need consistently moist soil. Research your specific plants to understand their needs. - Use the Right Amount of Water
When you water, do so until it begins to run out of the drainage holes at the bottom of the pot. This ensures that the water has reached the entire root system. After watering, allow the excess water to drain away completely. - Avoid Water Logging
Ensure that your pots have adequate drainage holes to prevent water from sitting at the bottom. This can lead to root rot, a common problem in houseplants caused by too much water. If you use a saucer under your pot to catch excess water, empty it after watering. - Consider the Environment
The amount and frequency of watering depend on several environmental factors like temperature, humidity, light levels, and air circulation. Plants generally need more water during their growing season (spring and summer) and less during the dormant season (fall and winter). - Water Quality Matters: If possible, use rainwater or distilled water for your plants. Tap water, especially if it is hard, can contain minerals that might build up in the soil and harm the plant over time. If you must use tap water, let it sit for a day before using it to allow some of the chemicals to evaporate.
- Be Mindful of Pot Size and Type: Larger pots hold more moisture than smaller ones, and different materials (like plastic, terra cotta, or ceramic) can affect how quickly the soil dries out. Terra cotta pots, for instance, allow more evaporation than plastic pots.
- Seasonal Adjustments: Plants typically require less water in the winter months when they are not actively growing and more in the spring and summer. Adjust your watering schedule with the changing seasons.
- Watch for Signs of Over or Under Watering: Over-watered plants might have leaves that turn yellow or brown and feel soft. Under-watered plants will have dry, crispy leaves and may droop.
- Use Tools If Needed: For those who find it challenging to gauge when to water, tools like soil moisture meters can be helpful. They provide a more objective measure of soil moisture levels.
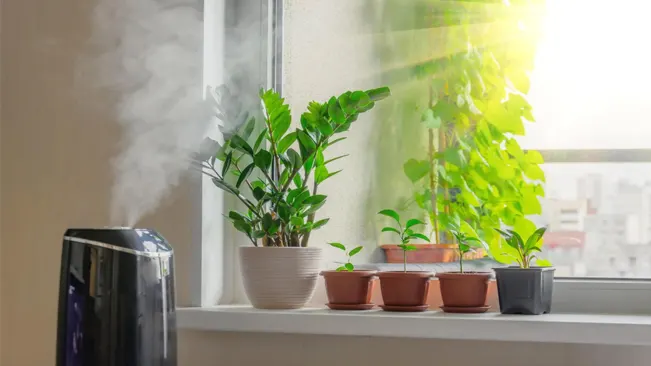
Humidity and Temperature
Most houseplants originate from tropical environments and prefer a humid atmosphere. In dry indoor environments, use a humidifier or place a water tray near your plants. Also, maintain a consistent temperature avoiding drastic temperature shifts which can stress plants.
Humidity
- Importance for Plants: Many houseplants come from humid, tropical environments where they are accustomed to consistent moisture in the air. This humidity helps in their transpiration process (evaporation of water from plant leaves), which is vital for nutrient uptake and maintaining plant health.
- Signs of Low Humidity: Plants in environments with low humidity may show signs like brown leaf tips, wilting, and dry leaf edges. Some plants, like ferns and orchids, are particularly sensitive to low humidity levels.
- Increasing Humidity:
- Humidifiers: Using a room humidifier is one of the most effective ways to increase the ambient humidity around your plants.
- Water Trays: Placing a tray of water near your plants can help increase local humidity as the water evaporates.
- Grouping Plants: Grouping plants together creates a micro-environment with higher humidity, as they release moisture through transpiration.
- Misting: Some plants benefit from occasional misting. However, this is not a substitute for adequate ambient humidity and can sometimes lead to leaf issues if done excessively or with hard water.
Temperature
- Ideal Range: Most houseplants thrive in temperatures between 60°F and 75°F (15°C to 24°C). It’s essential to keep them away from extreme temperatures and sudden temperature changes.
- Effects of Temperature Extremes:
- Cold Damage: Exposure to cold drafts or temperatures below their tolerance can lead to slowed growth, leaf drop, and even plant death.
- Heat Stress: Excessive heat, especially combined with direct sunlight, can cause wilting, sunburnt leaves, and dehydration.
- Consistency is Key: Plants generally prefer a consistent temperature. Avoid placing them near air conditioning vents, radiators, or drafty windows, as these can create fluctuating conditions.
- Night Time Temperatures: Be aware that many plants prefer a slight drop in temperature at night, similar to their natural environment. However, this drop should not be drastic.
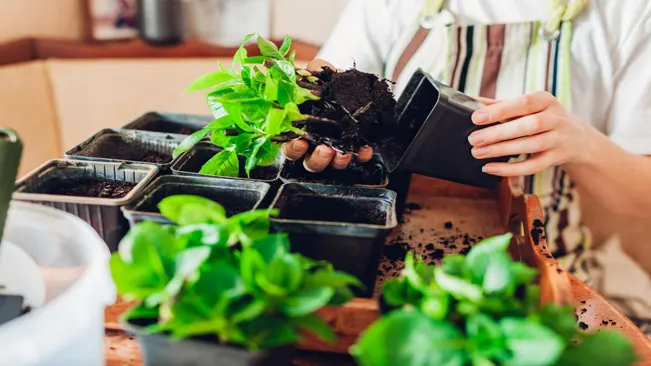
Soil and Repotting
Use the right type of soil for your plants, which usually means well-draining soil. Repot your plants every couple of years to replenish nutrients and provide room for growth. When repotting, be gentle with the roots and choose a pot that’s slightly larger than the previous one.
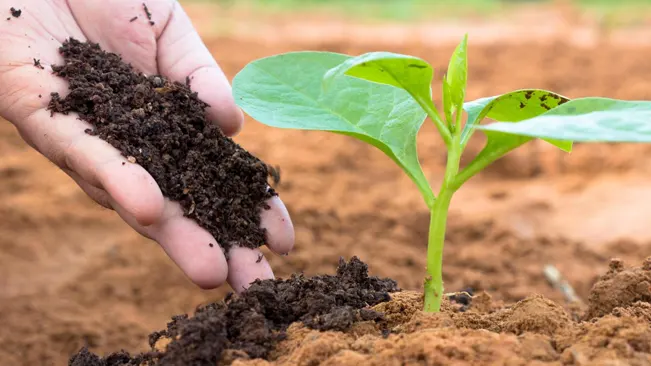
Soil Types and Their Importance
The right soil provides your plants with the necessary nutrients, aeration, and drainage. Different plants have different soil requirements:
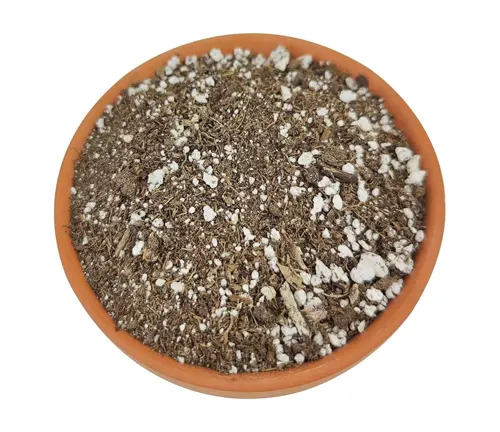
General Potting Mix
Most houseplants do well in a standard potting mix, which is designed to provide good drainage and aeration. These mixes usually contain peat moss, perlite, and vermiculite.
Specialized Mixes
Some plants, like orchids, cacti, and succulents, require a more specialized mix. For instance, cacti and succulents need a sandy, well-draining mix, while orchids thrive in a bark-based mix that allows for more air circulation around the roots.
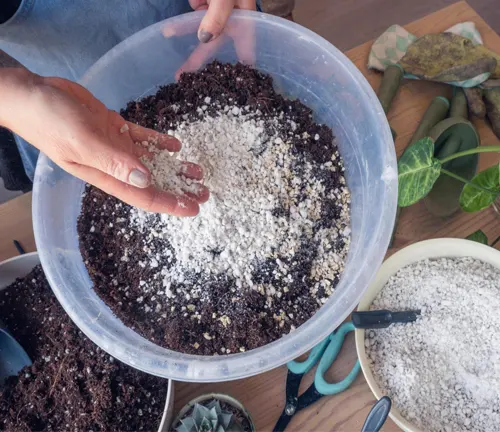
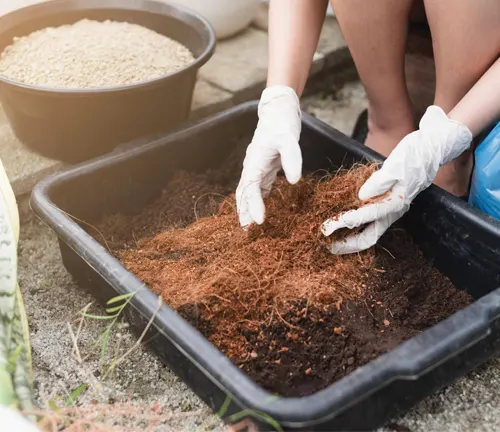
DIY Mixes
You can also create your own mix. A common recipe for a general houseplant mix is one part peat moss or coconut coir, one part perlite, and one part compost or potting soil.
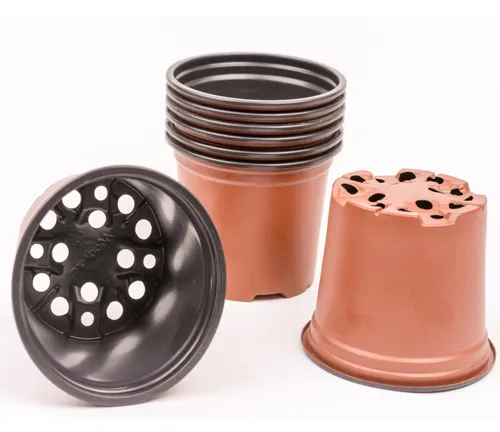
Drainage
Ensuring proper drainage is key. Excess water should easily drain out of the pot to prevent root rot. Always use pots with drainage holes and consider adding a layer of gravel or similar material at the bottom to aid drainage.
Repotting Essentials
Repotting is necessary for most plants every 1-2 years for several reasons:
- Nutrient Replenishment: Over time, plants deplete the nutrients in their soil. Fresh soil replenishes these essential nutrients.
- Space for Growth: Roots need room to grow. If a plant becomes root-bound (when roots grow tightly packed in the pot), it can stunt the plant’s growth and health.
- Health Check: Repotting is a chance to check the overall health of your plant, especially the roots. Look for signs of disease or decay.
Steps for Repotting
- Choose the Right Pot: Select a pot that is slightly larger (1-2 inches bigger in diameter) than the current one. This gives the plant room to grow without being overwhelming.
- Prepare the New Pot: Place a layer of gravel or pot shards at the bottom for drainage, then add a layer of fresh potting mix.
- Remove the Plant: Gently remove the plant from its current pot. Be careful not to damage the roots. Trim any dead or overly long roots.
- Reposition in New Pot: Place the plant in the center of the new pot and fill around it with potting mix. Ensure the plant is at the same depth it was in the old pot.
- Water Thoroughly: After repotting, water the plant well to help settle the soil and eliminate air pockets.
Post-Repotting Care
After repotting, keep the plant in a shaded area for a few days to recover. Avoid fertilizing immediately after repotting to prevent burning the roots.
Fertilizing
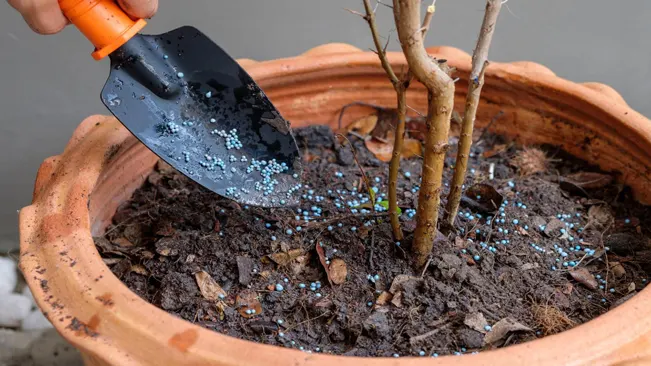
Houseplants need nutrients to grow, and these are often depleted from the soil over time. Use a balanced fertilizer during the growing season (spring and summer), following the recommended frequency and quantity. Avoid over-fertilizing, which can harm your plants.
Understanding Fertilizer Components
- NPK Ratio: Most fertilizers come with an NPK (Nitrogen, Phosphorus, Potassium) ratio on their labels. These are the primary nutrients that plants need:
- Nitrogen (N) helps in leaf and stem growth.
- Phosphorus (P) is crucial for root development and flower/fruit production.
- Potassium (K) aids in overall plant health and disease resistance.
- Micronutrients: In addition to NPK, plants also need micronutrients like magnesium, sulfur, calcium, iron, and others, usually present in good-quality commercial fertilizers.
Types of Fertilizers
Liquid Fertilizers: Easy to use and quickly absorbed. They are diluted in water and applied during regular watering.

Granular Fertilizers: Slow-release granules that break down over time and release nutrients gradually.
Organic Options: Such as fish emulsion, seaweed extracts, or compost, offer nutrients and improve soil health.
When and How to Fertilize
- Growing Season: Fertilize during the growing season (spring and summer), as this is when most plants experience active growth.
- Frequency: Follow the instructions on the fertilizer’s packaging. Over-fertilizing can harm plants, causing fertilizer burn or excessive growth.
- Dilution: Always dilute your fertilizer to the recommended strength. Concentrated solutions can be too harsh for houseplants.
- Application: Apply fertilizer to moist soil to avoid root burn. Avoid fertilizing dry soil.
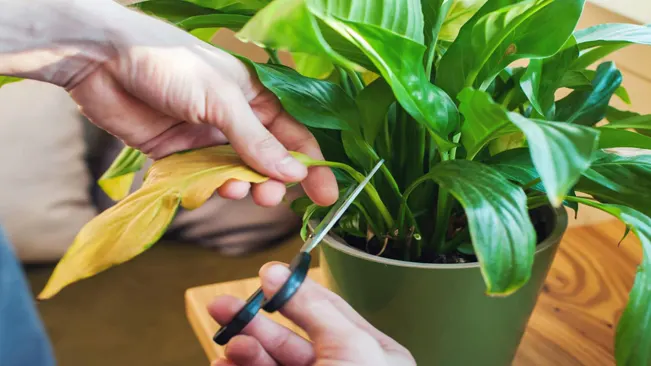
Pruning and Cleaning
Pruning helps to keep plants healthy by removing dead or overgrown branches or leaves. This encourages new growth and improves air circulation. Additionally, wipe the leaves of your plants regularly to remove dust and enhance their ability to photosynthesize.
Pruning
Pruning involves selectively removing parts of a plant, such as branches, stems, and leaves, to improve its health and appearance. Here’s why and how to do it effectively:
- Promotes Healthy Growth: By removing dead or diseased foliage, you prevent the spread of disease and allow the plant to focus its energy on producing new, healthy growth.
- Controls Plant Size and Shape: Regular pruning helps maintain a manageable size and an attractive shape. This is particularly important for plants in confined spaces like indoor environments.
- Encourages Bushier Growth: For many plants, pruning encourages them to grow more densely, rather than becoming leggy and sparse.
- Improves Light and Air Flow: Pruning can increase light penetration and air circulation throughout the plant, which is beneficial for the health and growth of all its parts.
How to Prune

- Use clean, sharp scissors or pruning shears.
- Prune away dead, damaged, or diseased foliage first.
- Cut back overgrown branches or stems to maintain the shape and size you desire.
- Be cautious not to over-prune; usually, it’s advised not to remove more than one-third of the plant at a time.
Cleaning
Cleaning your plants is about more than just keeping them looking good – it’s about maintaining their health. Here’s how and why:
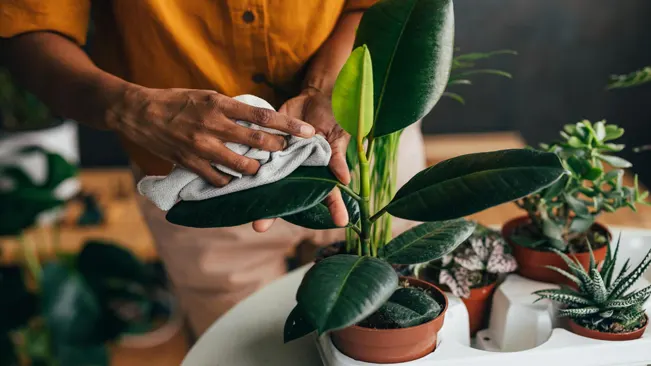
- Improves Photosynthesis: Dust and grime on leaves can block sunlight, hindering the plant’s ability to photosynthesize effectively. Clean leaves can absorb more light.
- Prevents Pest Infestations: Clean leaves are less likely to host pests. Many pests thrive in the dusty, grimy environment on neglected plant leaves.
- Promotes Efficient Transpiration: Clean leaves can transpire more effectively, which is vital for the plant’s ability to regulate water and nutrient movement.
How to Clean
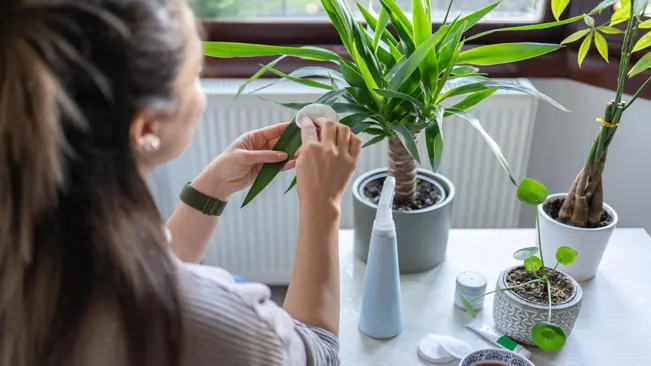
- Gently wipe leaves with a damp cloth. For plants with large leaves, support the leaf with one hand while you wipe.
- Use lukewarm water and avoid any harsh chemicals or detergents.
- For plants with delicate or small leaves, a soft brush or a spray of water can be more appropriate.
Pest and Disease Management
Regularly check your plants for signs of pests or diseases. Common pests include spider mites, aphids, and mealybugs. Use appropriate treatments like neem oil or insecticidal soap for pest control. Also, isolate affected plants to prevent the spread to other plants.
Identifying Common Pests
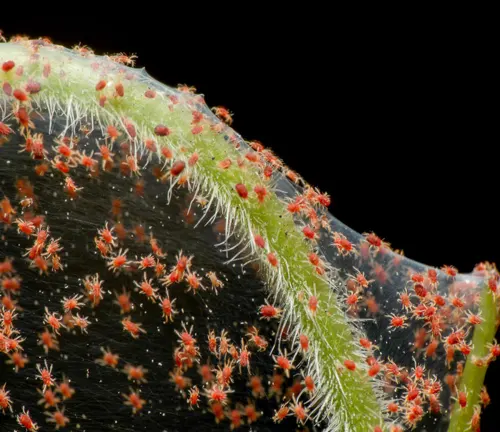
Spider Mites
These tiny pests are often too small to see with the naked eye but can be identified by the fine, silky webs they leave on the undersides of leaves. Affected leaves may also appear speckled or yellowed.
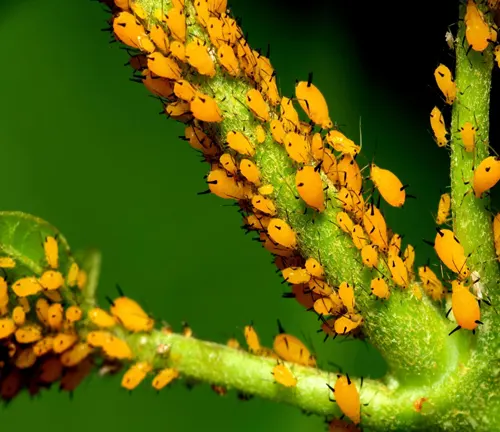
Aphids
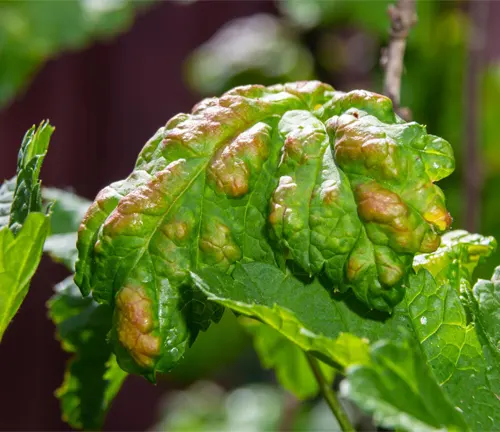
These small, pear-shaped insects can be green, yellow, black, brown, or red. They cluster on new growth and the undersides of leaves, sucking plant sap and causing leaves to curl, wilt, or yellow.
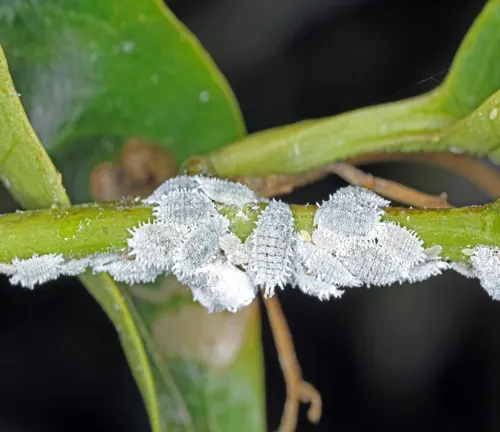
Mealybugs
These are small, white, cottony pests that cluster in leaf axils, on stems, and under leaves. They feed on plant sap, weakening the plant and causing stunted growth.
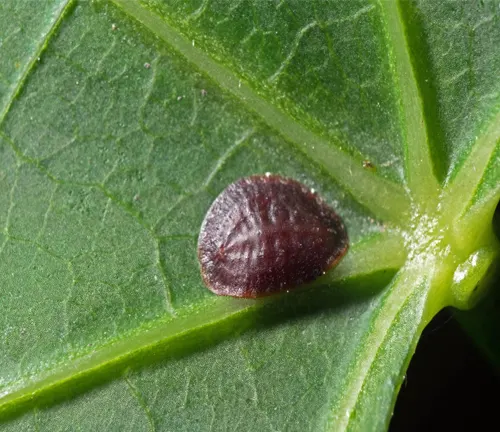
Scale
These pests look like small, brown, or tan bumps on plant stems and the undersides of leaves. They suck sap from the plants, causing yellowing or wilting of leaves.
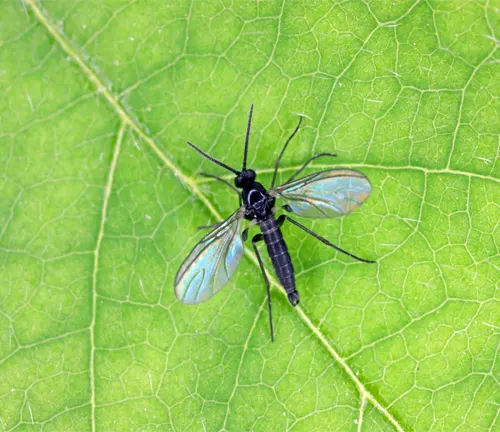
Fungus Gnats
These small, dark flies are more a nuisance than harmful, but their larvae can damage roots in severe infestations.
Treating Pests
Isolation
As soon as you detect pests, isolate the affected plant to prevent the spread to other plants.
Physical Removal
For small infestations, physically removing pests using a damp cloth or a gentle spray of water can be effective.
Neem Oil
This natural oil is effective against a wide range of pests. It acts as an insecticide, repellent, and fungicide. Apply it according to the product instructions.
Insecticidal Soap
These are specially formulated soaps that are safe for plants but effective in killing pests. They work by breaking down the pests’ outer coating, causing them to dehydrate and die.
Systemic Insecticides
For severe infestations, systemic insecticides, which are absorbed by the plant and then ingested by the pests, can be used. However, use these as a last resort and follow all safety instructions.
Managing Plant Diseases
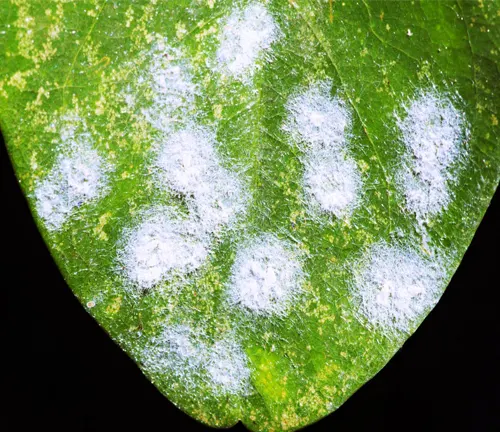
Fungal Diseases
These often appear as spots or powdery residues on leaves. Improve air circulation, reduce leaf wetness, and use a fungicide if necessary.
Bacterial Diseases
These can cause wilting, leaf spots, or stem rot. Remove affected parts of the plant, avoid overwatering, and improve air circulation.

Viral Diseases
These are less common but can cause stunted growth, distorted leaves, or unusual color patterns. There’s no cure for viral diseases; the best approach is to remove and destroy the affected plant.
Conclusion
Mastering houseplant care doesn’t happen overnight. It requires patience, observation, and a willingness to learn from mistakes. Each plant has its personality and preferences, and part of the joy of houseplant mastery is understanding and catering to these unique needs. With these essential care strategies, you can create a thriving indoor garden that brings life and beauty into your home.
FAQs (Frequently Asked Questions)
- How often should I water my houseplants?
The frequency of watering depends on the plant species, pot size, and environmental conditions. Generally, it’s best to water when the top inch of soil feels dry. Overwatering is a common mistake, so ensure good drainage. - What is the best light for houseplants?
Most houseplants thrive in bright, indirect light. However, some plants, like succulents, prefer direct sunlight, while others, such as ferns, favor low light conditions. Always research the specific light needs of your plant. - How do I know if my plant needs repotting?
Signs your plant needs repotting include roots growing through the drainage holes, water sitting on the surface or draining too quickly, and slowed growth. Most plants require repotting every 1-2 years. - What is the best way to deal with pests on houseplants?
Identify the pest first, then isolate the affected plant. For minor infestations, try wiping the pests off or using a water spray. For more severe cases, use neem oil, insecticidal soap, or systemic insecticides as appropriate. - How important is humidity for houseplants?
Humidity is crucial for many houseplants, especially tropical ones. If your indoor air is dry, use a humidifier, mist the plants regularly, or place a tray of water near them to increase humidity. - Can I use regular garden soil for my houseplants?
It’s better to use a potting mix designed for houseplants, as garden soil can be too dense, leading to poor drainage and root problems. - How do I know if my plant is getting too much light?
Signs of too much light include bleached or scorched leaves. If you notice these signs, move your plant to a location with less direct sunlight. - Why are my plant’s leaves turning yellow?
Yellow leaves can be a sign of overwatering, underwatering, a lack of nutrients, or insufficient light. The specific cause depends on the plant and its environment. - Should I fertilize my houseplants, and how often?
Yes, fertilizing is important for houseplant health. Do it during the growing season (spring and summer), typically once a month, using a balanced, water-soluble fertilizer. Follow the product’s instructions for the correct amount. - How can I increase my houseplant’s lifespan?
To maximize your houseplant’s lifespan, provide the right balance of light, water, and humidity, repot when necessary, keep an eye out for pests, and prune dead or yellowing leaves regularly. Understanding and catering to your plant’s specific needs is key.

Kristine Moore
Forestry AuthorI'm Kristine Moore, a seasoned garden landscaping professional with over 30 years of experience. My extensive career has been dedicated to transforming outdoor spaces into stunning, sustainable landscapes. With a deep understanding of horticulture, design principles, and environmental stewardship, I have become a respected figure in the field, known for creating harmonious, visually appealing, and eco-friendly gardens. My commitment to excellence and continuous learning in landscaping trends and techniques has solidified my reputation as an expert in garden design and implementation.


Leave your comment