Reviving a Used Wood Stove: A Step-by-Step Guide to Wood Stove Polishing
- November 7, 2023
- 0 comment
In this comprehensive guide, we’ll walk you through the process of restoring a weathered wood stove to its former glory, all without the use of spray paint. With a budget-friendly approach costing under $25, you can transform a beat-up wood stove into a shining centerpiece. Whether you’re dealing with a small model or a larger one, this guide covers all the steps necessary for wood stove polishing. We’ll share tips on safety, tools, and techniques to make your wood stove look like new again.
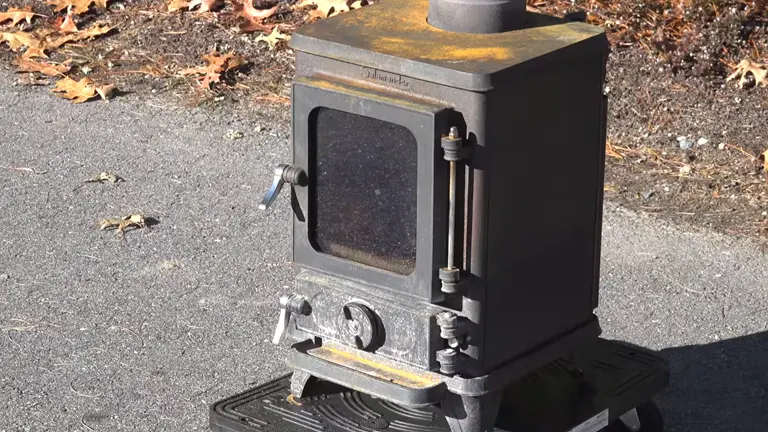
Before we dive into the step-by-step process, let’s establish the context. We understand the value of a wood stove, not just as a heating source, but as a piece of functional art. However, over time, these stoves can succumb to the elements, resulting in a rusted and faded appearance. That’s where our wood stove polishing guide comes in handy.
Benefits of Polishing Cast Iron Wood Stove
Reviving a used wood stove offers a range of advantages. These include:
- Extended Lifespan: Properly maintained and polished stoves are less likely to succumb to rust and corrosion, significantly extending their lifespan.
- Enhanced Efficiency: A clean and polished stove operates more efficiently, providing better heat output with less fuel consumption.
- Aesthetic Appeal: A gleaming wood stove adds a touch of rustic charm to any room, enhancing the overall décor and creating a cozy atmosphere.
- Environmental Considerations: Maintaining your wood stove can be an eco-friendly choice, as efficient stoves release fewer emissions into the environment.
Now Let’s Start Polishing Your Wood Stove
Step 1: Safety First

Rubber Gloves – MedPride Powder-Free

Dusk Mask – GVS Elipse P100 Dust Half Mask
Before diving into the restoration process, let’s ensure you have all the essential materials and the right safety gear. You’ll need a pair of sturdy rubber gloves to protect your hands, a quality dust mask or respirator to shield your lungs from dust and debris, and the necessary tools for rust removal.
Step 2: Rust Removal
The key to a successful restoration is effective surface preparation. You have two options for rust removal:
- Brass Bristle Brushes: These are highly effective for heavy rust and can be used with a power drill for added efficiency.
- Scotch-Brite Pads: These are suitable for less severe rust cases. They are gentler and allow for more control. Buy Here!
We recommend the latter if the rust is not extensive. Remember that a smooth, rust-free surface is crucial for achieving a pristine finish.
Step 3: Cleaning the Exterior
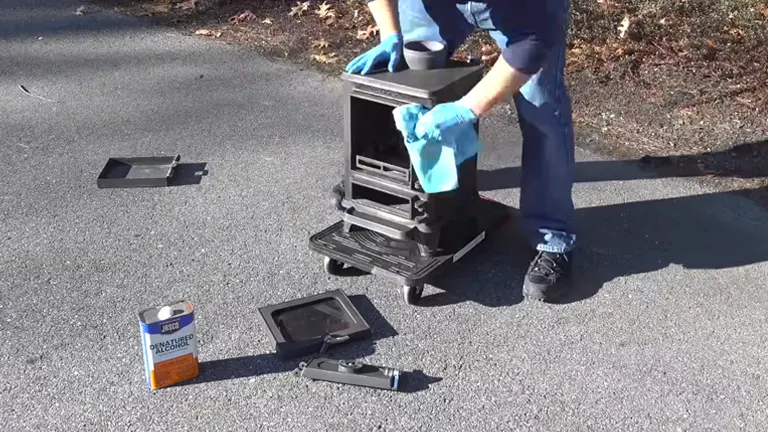
After tackling the rust, it’s time to thoroughly clean the stove’s exterior. We recommend using denatured alcohol or regular rubbing alcohol. Avoid substances like WD-40 or degreasers, as they can leave behind residues that may affect the final appearance. The goal here is to ensure that every surface of the stove is impeccably clean and free from any contaminants.
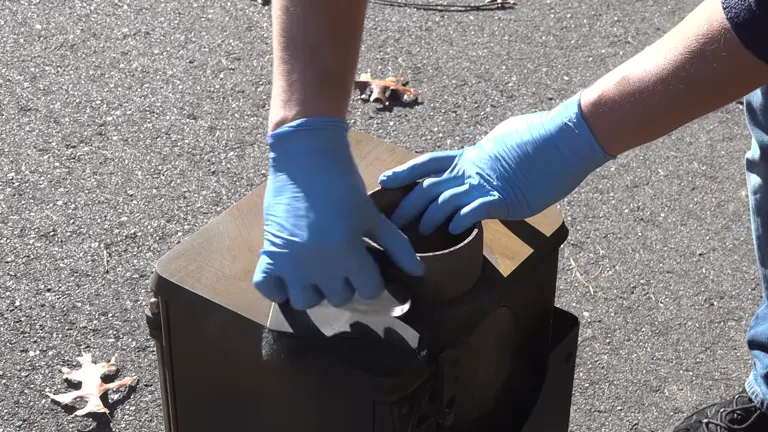
Step 3.1: Reassembly
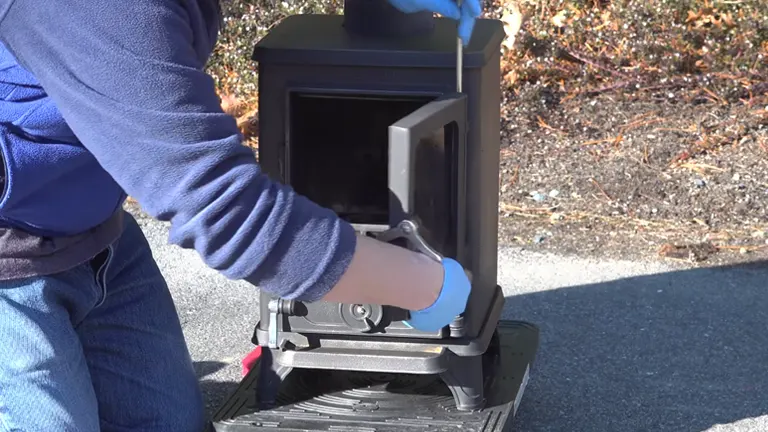
A critical step in this process is the careful reassembly of the stove. Pay close attention to details like gaskets and glass surfaces. Proper reassembly not only ensures that the stove looks great but also guarantees its functionality. This step is a pivotal part of the restoration process.
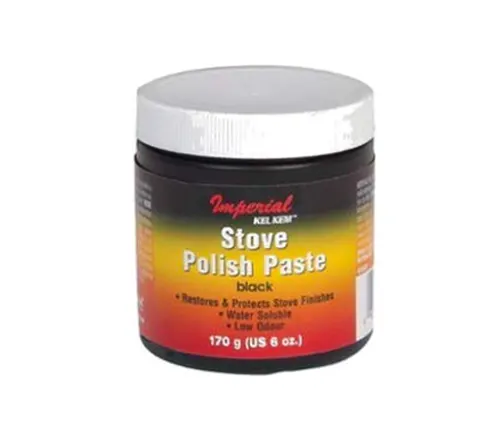
Step 4: Applying Stove Polish
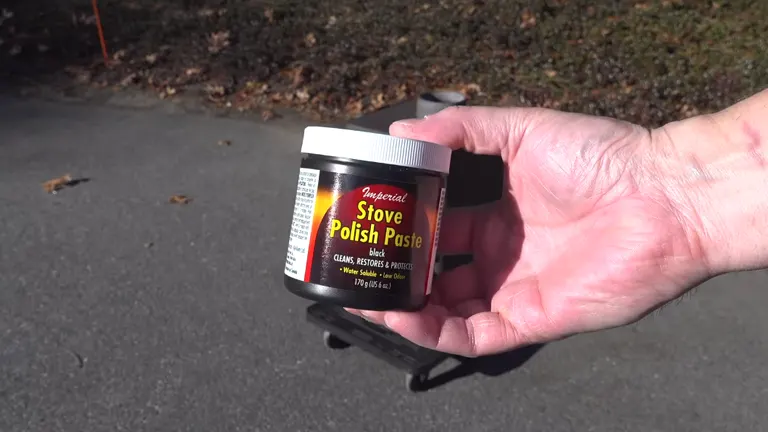
Now, it’s time to introduce the secret weapon in this restoration – stove polish. This cost-effective and highly effective product will significantly enhance the stove’s appearance. Applying it is a straightforward process:
- Dampen a Microfiber Cloth: Start by dampening a microfiber or similar cloth with a little water. This will help the polish spread evenly.
- Application: Apply the stove polish evenly to the stove’s exterior. The paste is forgiving, meaning you don’t have to worry about getting it on the glass or metal parts, as it can be easily wiped off later.
- Multiple Coats: For the best results, apply two coats. Allow each coat to dry for about 10 to 15 minutes.
The result? Your stove will already look like it’s brand new. The polish will not only restore the appearance but also provide a protective layer for the metal surface.
Interested in buying Stove Polish Paste? Buy Here!
Step 5: Cleaning the Glass
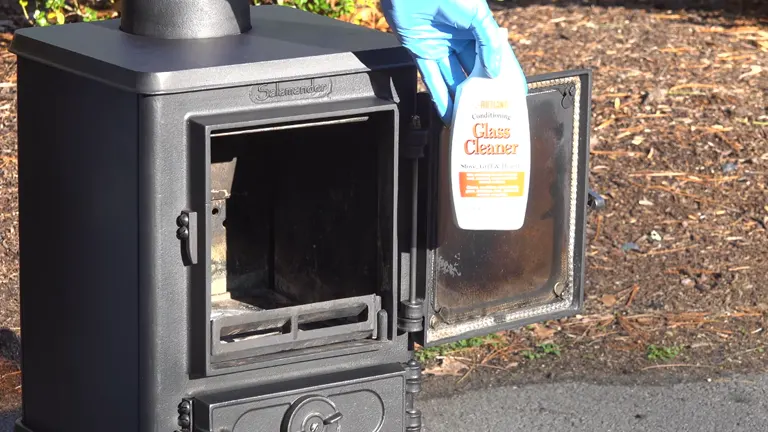
The glass of your wood stove requires special attention. Regular glass cleaners are not suitable for this job. We recommend using a product specifically designed for wood stove glass or fireplace doors. What sets this type of cleaner apart is that it contains a slightly abrasive quality. This characteristic effectively removes build-up on the glass without scratching it. This step might require some repetition, especially if your glass has accumulated years of grime and soot.
Interested in buying this Glass Cleaner? Buy Here!
If this solution doesn’t prove effective, you can refer to my article for more in-depth guidance on cleaning your wood stove glass. How to Keep Wood Stove Glass from Getting Black 2023
Step 6: Firing It Up
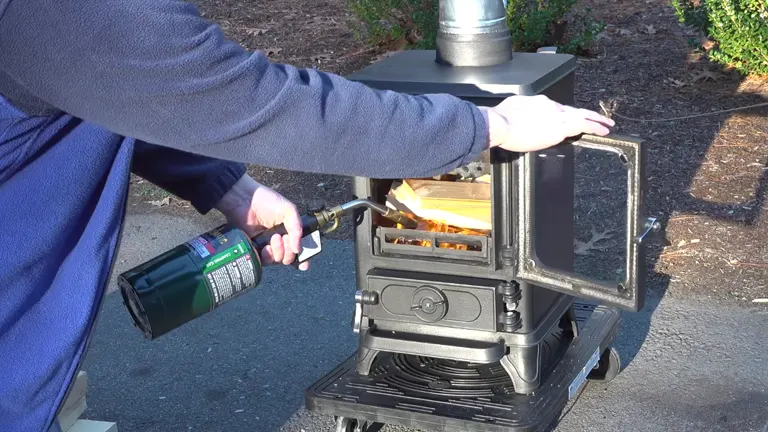
To enhance the durability of the polish, light a fire on the stove. This process allows the polish to meld into the metal for a longer-lasting finish. Please note that during the first ignition, the polish may emit fumes. Ensure proper ventilation by opening windows if the stove is indoors.
Do note: On the first burn after polishing, the stove might emit a smell. While the fumes are typically non-toxic, it’s a good practice to ventilate the room well.
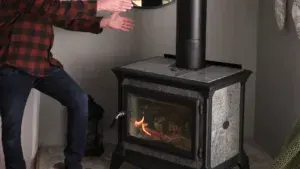
Step 7: The Result
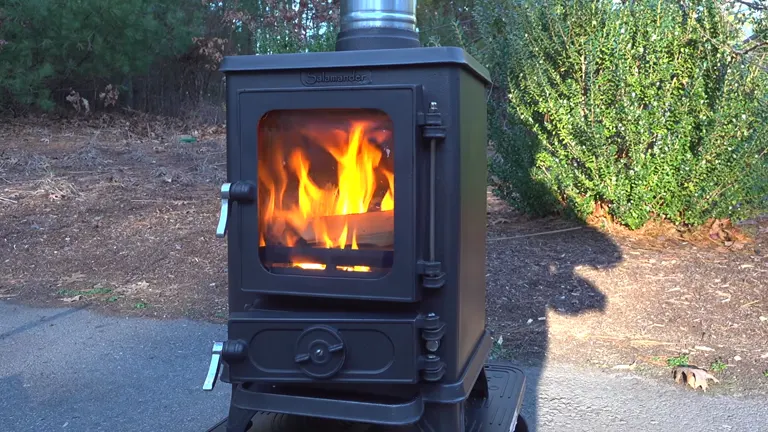
Your wood stove, even if it’s nearly two decades old, will emerge from this process looking like new. You’ve not only restored its functionality but also its aesthetic appeal.
Additional Tips
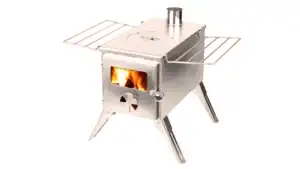
For those of you who own larger cast iron wood stoves, rest assured that the restoration technique we’ve covered can be just as effective on these more substantial models. However, in the world of wood stove restoration, there are alternative approaches worth considering. Let’s delve into some additional tips to ensure the best results for your unique situation:
- Restoration Technique Versatility: The beauty of cast iron stoves is their durability and adaptability to various restoration techniques. While we’ve emphasized the use of stove polish and Scotch-Brite pads in this guide, owners of larger stoves can certainly apply the same principles. The key is to scale up your efforts accordingly, using larger pads or brushes to tackle the surface area efficiently.
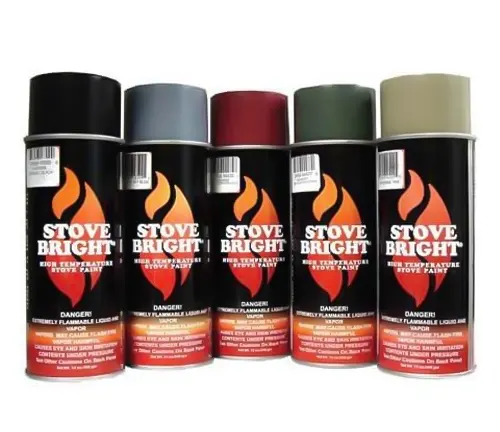
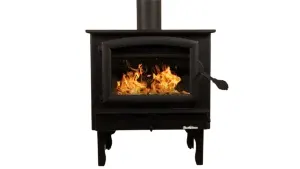
- High-Heat Paint Option: An alternative method chosen by some wood stove enthusiasts is to use high-heat paint. This specialized paint is designed to withstand the extreme temperatures that wood stoves generate. It can provide a durable finish and is especially practical for larger stoves. However, it’s essential to note that high-heat paint comes with its own set of considerations.
- Consider the Finish Quality: High-heat paint, while effective, can sometimes result in a slightly blotchy finish. This can be due to variations in application or the paint’s reaction to different parts of the stove. While it might not have the same uniform appearance as stove polish, this doesn’t necessarily diminish its effectiveness. It’s a trade-off between aesthetic perfection and longevity.
- Durability and Longevity: It’s crucial to consider the longevity of your chosen restoration method. High-heat paint tends to offer excellent durability and protection against corrosion. However, you may need to touch up the finish over time, especially if your stove experiences heavy use. On the other hand, stove polish is renowned for its long-lasting finish but might require reapplication after extended use.
- Personal Preferences: The method you choose should align with your personal preferences and priorities. If you value a flawless, uniform appearance, stove polish might be your preferred choice. If durability and protection against rust are your main concerns, high-heat paint might be the way to go. It’s a matter of finding the right balance for your specific stove and its intended use.
Remember, whether you’re restoring a small, compact stove or a larger cast iron model, the secret lies in the care and attention you invest. The joy of wood stove restoration is not just in the end result but in the process itself. Choose the technique that resonates most with your goals and enjoy the transformation.
Different Polishing Methods
While our primary focus has been on wood stove polishing using stove polish, it’s valuable to be aware of alternative methods. Wood stove enthusiasts often explore different approaches, and two common alternatives are stove polish and high-heat paint. Let’s explore these methods further and provide a brief comparison:
Stove Polish
Stove polish is a favored method due to its cost-effectiveness, ease of application, and ability to provide that traditional matte black finish. It’s an excellent choice for those who prefer the classic appearance of wood stoves. However, it’s important to be aware that stove polish may require more frequent touch-ups and reapplication over time. While it might not be as long-lasting as high-heat paint, it provides a beautiful, timeless aesthetic.
High-Heat Paint
High-heat paint is another popular option, especially for those seeking durability and customization. This paint comes in various colors, allowing for greater personalization of your wood stove’s appearance. It’s known for its resilience against extreme temperatures, making it a robust choice for wood stove owners. However, applying high-heat paint may require a bit more effort and meticulous preparation. While it offers longevity, it might not achieve the same traditional matte black finish that stove polish provides. It’s a trade-off between durability and aesthetic preferences.
Maintenance Tips
Beyond the initial polishing process, regular maintenance is crucial to ensure that your wood stove remains in top condition. Here are some essential maintenance tips to keep in mind:
- Regular Cleaning: Periodically wipe down the exterior of the stove and clean the glass to prevent the accumulation of soot and debris. Maintaining a clean stove not only keeps it looking great but also ensures it operates efficiently.
- Inspect Gaskets: The gaskets on the doors of your wood stove play a vital role in maintaining an airtight seal. Regularly check these gaskets to ensure they remain in good condition. If you notice any wear or damage, consider replacing them to maintain the stove’s efficiency.
- Rust Prevention: Address any rust spots promptly to prevent them from spreading and causing corrosion. Regular inspections can help identify rust issues early, allowing you to take preventative measures to protect your wood stove.
Troubleshooting
If you encounter challenges during the wood stove polishing process, don’t be discouraged. Common issues that may arise include uneven polish application, spots missed during cleaning, or problems with door gaskets. To address these issues, carefully follow the steps outlined in the guide and make any necessary touch-ups. Wood stove restoration is a skill that can be honed over time, and practice often leads to improved results.
Remember that each wood stove has its unique characteristics, and the restoration method you choose should align with your specific stove’s needs and your personal preferences. Whether you opt for stove polish, high-heat paint, or an alternative method, the goal is to keep your wood stove in top condition and enjoy its warmth and charm for years to come.
Conclusion
Your wood stove, no matter how old or rough, can be transformed into a stunning piece with some effort and the right techniques. By following this guide, you can restore your wood stove’s former glory, making it look new and ready to grace your shed, home, or any space. Don’t be discouraged by the initial condition of the stove; it’s an opportunity to score a bargain and create a beautiful, functional piece.
And there we have it, the end of our guide, Reviving a Used Wood Stove: A Step-by-Step Guide to Wood Stove Polishing. I hope you’ve enjoyed reading it as much as I enjoyed putting it together. Bringing an old wood stove back to life is not just about the warmth it provides, but also about the stories and memories it holds.
Now, I’m really excited to hear from you! Have you ever brought a used wood stove back to its former glory? Do you have any special tips or heartwarming stories from your experience? Or maybe you’re about to start your own wood stove revival and have some questions or ideas to share.
Please, feel free to drop your thoughts, experiences, and questions in the comments section below. This isn’t just about giving new life to old stoves; it’s about building a warm community of enthusiasts and sharers. Your contributions are what make this conversation special and valuable.
So, let’s keep the fire of conversation burning as warmly as a freshly polished wood stove. Can’t wait to read all about your adventures in wood stove reviving!
FAQs
- Why does rust form on wood stoves in the first place?
Rust forms due to the combination of oxygen, moisture, and iron (which the stove is made from). When the stove’s protective coating wears off or gets damaged, it becomes susceptible to rust. - Can I use regular sandpaper to remove rust from my wood stove?
While sandpaper can remove rust, it might scratch the surface if too coarse. It’s often recommended to use brass bristle brushes or Scotch-Brite pads for a gentler approach. - How often should I inspect my wood stove for rust or damage?
It’s a good practice to inspect your stove at the beginning and end of each heating season or at least once a year. - Is there a natural remedy for minor rust removal on wood stoves?
Some people have found success using a mixture of white vinegar and baking soda. However, this might not be as effective for heavy rust. - Will restoring and de-rusting my old wood stove improve its heating efficiency?
Removing rust and restoring the stove can improve heat distribution and overall appearance but may not significantly boost efficiency. Regular maintenance and ensuring the stove’s internals are in good shape are key to efficiency. - Can I paint over rusted areas to restore my wood stove’s appearance?
Painting over rust without removing it can lead to further corrosion beneath the paint. Always remove rust first and then use high-heat resistant paint suitable for wood stoves. - What’s the best way to prevent rust from reoccurring on my wood stove?
Regularly clean and dry your stove, especially if exposed to moisture. Applying a protective layer, like stove polish or high-heat resistant paint, can also deter rust. - Can I use oil to protect my wood stove from rusting?
While oil can create a barrier against moisture, it’s not recommended for surfaces that get as hot as wood stoves. It can produce smoke and unpleasant odors when the stove is in use. - Are there any safety concerns when removing rust indoors?
Yes, rust particles can pose respiratory risks. Always use a dust mask or respirator, and ensure proper ventilation or use a vacuum with a HEPA filter. - Is the rust from my wood stove harmful to my health?
Inhaling or ingesting large quantities of rust can be harmful. While the occasional exposure (like during cleaning) isn’t typically a concern, always use protection and clean up thoroughly.

David Murray
Forestry AuthorI'm David Murry, a forestry equipment specialist with a focus on chainsaw operation. With over 13 years of experience, I've honed my skills in operating and maintaining a wide range of machinery, from chainsaws to log splitters. My passion for the outdoors and commitment to sustainable forestry drive my work, which emphasizes safety, efficiency, and staying updated with industry advancements. Additionally, I'm dedicated to sharing my expertise and promoting environmental awareness within the forestry community.


Leave your comment