How to Plant Cauliflower Seeds: A Guide from Sowing to Harvesting
- February 22, 2024
- 0 comment
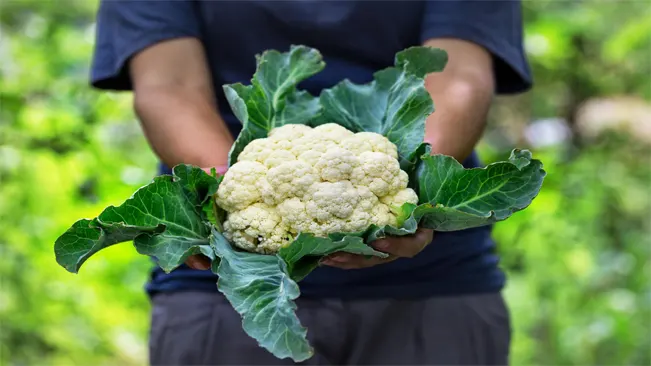
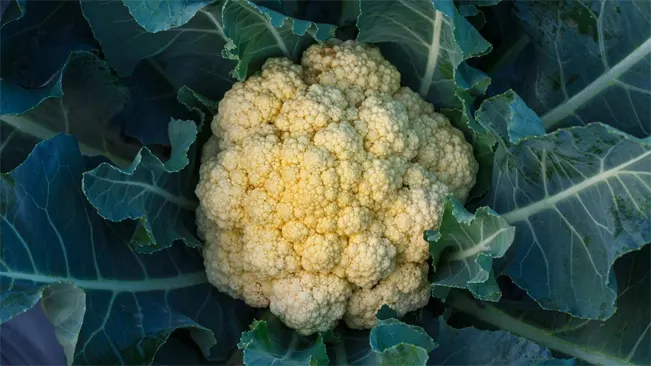
Cauliflower is a popular vegetable known for its nutritional benefits and versatility in cooking. Growing cauliflower from seeds can be a rewarding experience for any gardener. This guide will walk you through the process of planting cauliflower seeds, from preparation to harvest.
| Benefit | Description |
|---|---|
| Nutrient-Rich | Cauliflower is packed with vitamins and minerals, including vitamin C, vitamin K, and folate. |
| Low in Calories | It’s a low-calorie vegetable, making it ideal for weight management and low-calorie diets. |
| High in Fiber | High fiber content helps with digestion, and can aid in reducing the risk of several diseases. |
| Antioxidant Properties | Contains antioxidants like isothiocyanates and glucosinolates, which help protect against cancer. |
| Supports Heart Health | The fiber and antioxidant properties can aid in maintaining a healthy heart. |
| Anti-Inflammatory | Its high levels of antioxidants and other anti-inflammatory compounds can reduce inflammation. |
| Good for Brain Health | Choline and phosphorus in cauliflower are essential for brain health and cognitive function. |
| Detoxification Support | Glucosinolates in cauliflower help activate detoxification enzymes. |
| Versatile in Cooking | Can be used in a variety of dishes, including steamed, roasted, or as a substitute for grains. |
| Low in Carbohydrates | An excellent option for low-carb diets, often used as a substitute for rice and flour. |
Choosing the Right Seeds
Before planting, select high-quality cauliflower seeds suitable for your climate. There are various types of cauliflower, including white, purple, and green varieties, each with its own unique flavor and growth requirements.
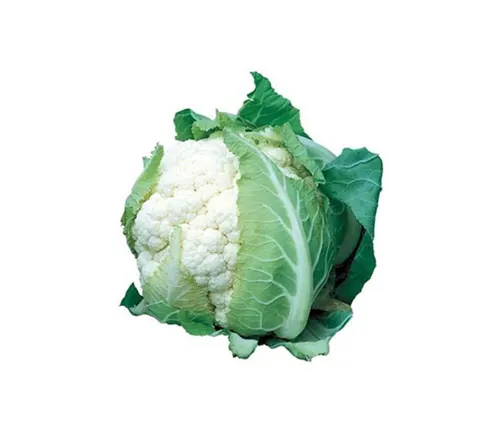
White Cauliflower
This is the most common type. It has a classic, clean taste and is widely used in cooking. Varieties like ‘Snowball’ and ‘Candid Charm’ are popular.
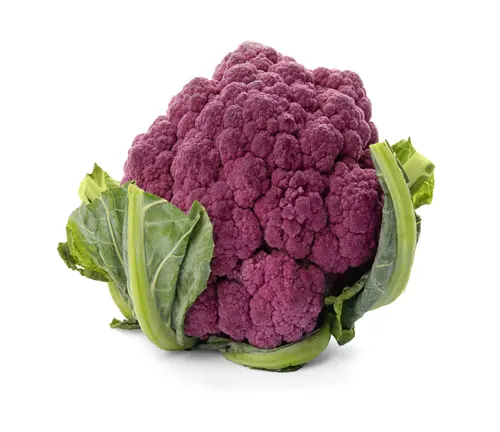
Purple Cauliflower
Known for its striking purple color, which is due to the presence of the antioxidant anthocyanin. Varieties like ‘Purple of Sicily’ and ‘Graffiti’ are well-known. This type can add a vibrant touch to dishes and has a slightly nuttier flavor than white cauliflower.
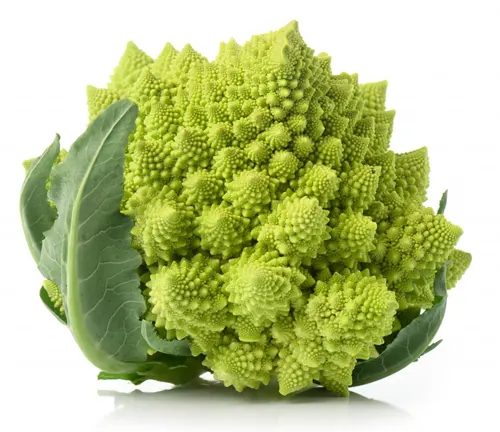
Green Cauliflower
Often labeled as ‘broccoflower’, it resembles a green version of cauliflower and sometimes has a spiky appearance. Varieties include ‘Romanesco’ and ‘Green Goddess’. These have a sweeter, more tender taste compared to the white variety.
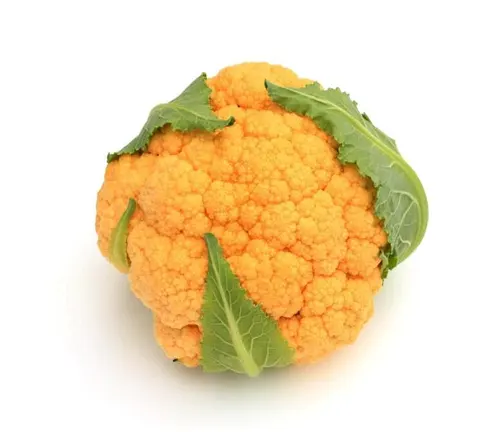
Orange Cauliflower
Rich in beta-carotene, orange cauliflower has a slightly sweeter and creamier texture. Varieties like ‘Cheddar’ and ‘Orange Bouquet’ are popular.
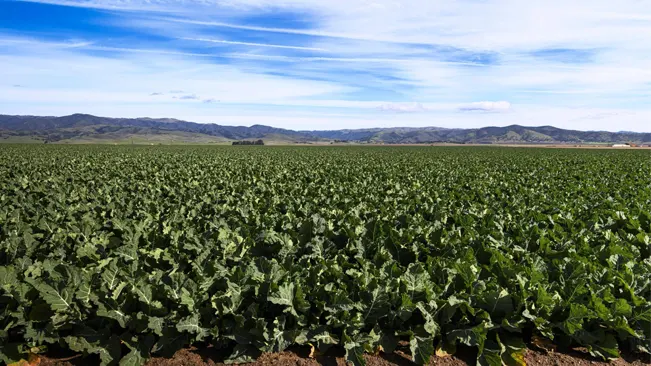
Climate Considerations
Cauliflower can be a bit more challenging to grow than other brassicas due to its sensitivity to temperature. Here are some tips:
- Cool Climates: Cauliflower thrives in cool weather. For regions with mild summers, it’s possible to grow cauliflower throughout much of the year. In cooler climates, look for varieties that can withstand lower temperatures and are less prone to bolting (going to seed prematurely).
- Warm Climates: In areas with hot summers, it’s best to grow cauliflower as a winter crop. Look for heat-tolerant varieties and consider using shade cloth to protect the plants during the hottest part of the day.
Seed Quality and Selection
- Organic vs. Conventional: You can choose between organic and conventionally grown seeds based on your gardening preferences and practices.
- Hybrid vs. Heirloom: Hybrid varieties are often bred for disease resistance and uniformity, while heirloom varieties offer traditional flavors and diverse shapes and colors.
- Disease Resistance: Check seed packets or descriptions for disease resistance, especially if you’re in an area prone to certain plant diseases.
- Germination Rate: High-quality seeds have a high germination rate. It’s worth investing in seeds from a reputable supplier to ensure a good start.
Preparing the Soil
Cauliflower thrives in well-draining, fertile soil with a pH between 6.0 and 7.0. Prepare your garden bed by loosening the soil and enriching it with compost or well-rotted manure. Ensure the planting area receives full sunlight for optimal growth.
Soil Characteristics for Cauliflower
- Well-Draining: Cauliflower does not fare well in waterlogged soil. Well-draining soil ensures that excess water can escape, preventing root rot and other water-related issues.
- Fertility: Cauliflower is a heavy feeder, meaning it requires nutrient-rich soil to grow well. Fertile soil provides the necessary nutrients for the plant to develop healthy heads.
- pH Levels: The ideal pH range for cauliflower is between 6.0 and 7.0. This slightly acidic to neutral pH helps the plant absorb nutrients efficiently. If necessary, you can test the soil’s pH and amend it with lime to raise the pH or sulfur to lower it.
Preparing the Garden Bed
- Loosening the Soil: Start by loosening the soil to a depth of about 12-15 inches. This process aerates the soil, allowing roots to penetrate more easily and access necessary nutrients and water.
- Adding Organic Matter: Incorporate compost or well-rotted manure into the soil. This organic matter improves soil fertility and structure, providing essential nutrients for cauliflower growth. Aim for a mix where the soil is rich and crumbly, not too sandy or too clay-heavy.
- Ensuring Good Drainage: If your garden has poor drainage, consider raising the beds or adding organic matter to improve the soil’s structure and drainage capability.
- Checking for Sunlight: Cauliflower requires full sunlight, which means the planting area should receive at least 6-8 hours of direct sunlight per day. The amount of sunlight can significantly impact the plant’s growth and the quality of the cauliflower heads.
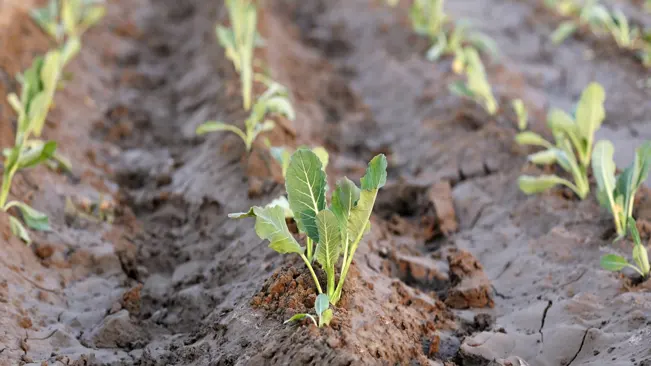
Sowing the Seeds
Indoor Sowing
- Timing: Starting seeds indoors is particularly beneficial as it extends the growing season. The ideal time to begin is about 4-6 weeks before the last expected frost date in your area. This early start is crucial for cauliflower as it needs time to mature before the hottest part of the summer.
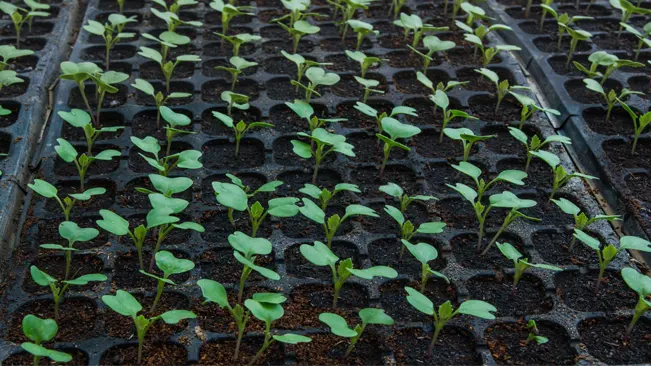
- Seedling Trays and Soil: Use seedling trays or small pots for planting. The soil used should be a high-quality seed starting mix, which is typically lighter and more sterile than regular garden soil, providing an ideal environment for young plants.
- Planting Depth and Spacing: Plant the cauliflower seeds about 1/4 inch deep. If you’re using a tray, you can plant a few seeds in each cell. The shallow depth ensures that the seeds have enough light and warmth to germinate effectively.
- Moisture and Temperature: After planting, the soil should be kept consistently moist but not waterlogged. Cauliflower seeds germinate best at temperatures between 65°F and 70°F (18°C – 21°C). A heat mat can be used to maintain a consistent temperature if your environment is cooler.
- Lighting: Once the seeds have germinated, they require plenty of light to grow strong. If natural light is limited, consider using grow lights placed a few inches above the seedlings for about 12-16 hours a day.
Outdoor Sowing
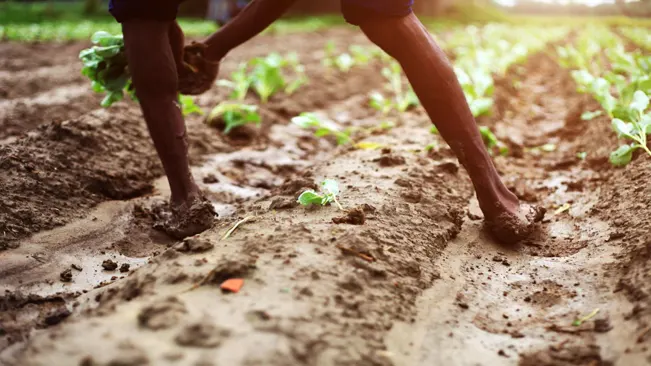
- Timing: Direct sowing into the garden should be done after the last frost when the soil has warmed up. This is typically in late spring or early summer, depending on your local climate.
- Soil Preparation: The garden bed should be well-prepared with loosened, fertile soil. Cauliflower prefers a slightly acidic to neutral pH (6.0 to 7.0). Enriching the soil with compost or aged manure can improve its quality.
- Planting Depth and Spacing: Sow the seeds about 1/2 inch deep. The slightly deeper planting outdoors helps protect the seeds from environmental elements. Space the seeds approximately 3 inches apart in rows, with rows about 30 inches apart. This spacing allows adequate room for growth and air circulation.
- Watering and Sunlight: Regular watering is crucial, especially during the germination and early growth stages. The plants should also be positioned in a location where they receive full sunlight for at least 6 hours a day.
- Thinning Seedlings: Once the seedlings have a few true leaves, thin them to about 18 inches apart. This ensures that each plant has enough space and resources to grow robustly.
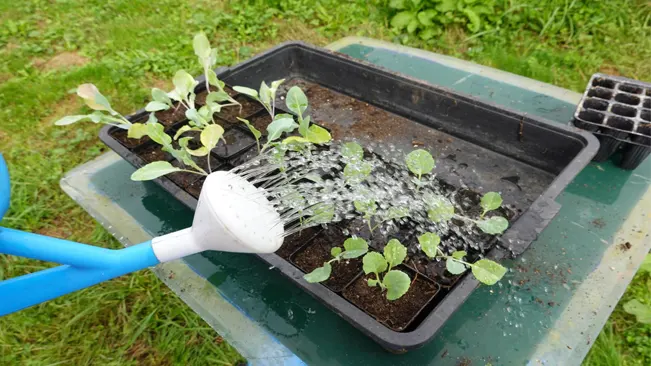
Watering and Feeding
Cauliflower requires consistent moisture to grow well. Water the plants regularly, keeping the soil evenly moist but not waterlogged. Apply a balanced fertilizer every few weeks to provide essential nutrients.
Watering Cauliflower
- Consistent Moisture is Key: Cauliflower plants need a steady supply of moisture to develop properly. Inconsistent watering can lead to poor head development or even cause the plant to bolt (flower prematurely), which reduces the quality of the edible parts.
- How Often to Water: This largely depends on your soil type and weather conditions. In general, cauliflower requires about 1 to 1.5 inches of water per week. During dry, hot spells, you may need to water more frequently to maintain even soil moisture.
- Best Time to Water: Early morning is the ideal time to water your cauliflower plants. This allows the water to soak deeply into the soil, while the leaves have time to dry out during the day, reducing the risk of fungal diseases.
- Watering Technique: Use a soaker hose or drip irrigation to deliver water directly to the base of the plant. This method helps to keep the leaves dry and minimizes water waste. Avoid overhead watering, which can promote disease.
- Monitoring Soil Moisture: Check the soil moisture regularly by feeling the soil near the base of the plant. The soil should be moist but not soggy. Overwatering can lead to root rot and other problems.
Feeding Cauliflower
- Fertilizer Requirements: Cauliflower is a heavy feeder, meaning it requires nutrient-rich soil to grow effectively. It particularly needs plenty of nitrogen for healthy leaf growth, which is vital for forming the cauliflower head.
- Type of Fertilizer: Use a balanced, all-purpose vegetable garden fertilizer. A fertilizer with an N-P-K (Nitrogen-Phosphorus-Potassium) ratio like 10-10-10 or 20-20-20 is suitable.
- Frequency of Application: Fertilize cauliflower plants every 2-4 weeks. Start applying fertilizer about 2-3 weeks after transplanting seedlings into the garden or when they’re about 4-6 inches tall.
- Method of Application: Apply the fertilizer around the base of the plant, avoiding direct contact with the stems and leaves. Water the soil after applying fertilizer to help distribute the nutrients into the soil.
- Organic Options: For organic gardening, you can use compost, well-rotted manure, or organic fertilizers. These not only provide nutrients but also improve soil structure and microbial activity.
Thinning and Transplanting
Thinning Seedlings
- Thinning is the process of removing some plants to ensure that the remaining ones have enough space and resources to grow optimally.
- This is crucial for plants like cauliflower, which need ample space for proper development.
How to Thin Cauliflower Seedlings
- Assess the Seedlings: Wait until the seedlings have grown their first few true leaves (these are the leaves that appear after the initial, simpler seed leaves).
- Select the Strongest: Choose the strongest and healthiest-looking seedlings to keep.
- Gentle Removal: Carefully pull out the weaker or overcrowded seedlings. You can use a pair of scissors or snips to cut them at the soil level to avoid disturbing the roots of the remaining plants.
- Spacing: Ensure that the remaining seedlings are about 18 inches apart. This spacing allows each plant ample room to grow and access to sunlight and nutrients.
Transplanting Seedlings
- Transplanting refers to moving a plant from one growing environment to another. For cauliflower, this often means moving seedlings started indoors to an outdoor garden.
How to Transplant Cauliflower Seedlings:
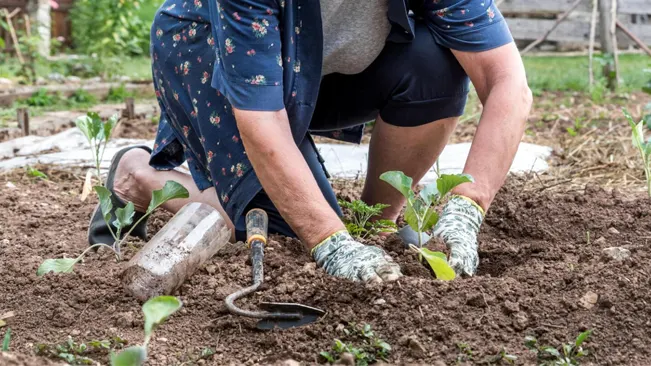
- Timing: The best time to transplant is when seedlings are about 4-6 weeks old and have 3-4 true leaves.
- Harden Off Seedlings: Gradually acclimate indoor-grown seedlings to outdoor conditions over a week. This process, known as hardening off, reduces shock from the sudden change in environment.
- Choose a Cloudy Day: Transplant on a cloudy day or in the late afternoon to minimize stress from the sun.
- Prepare the Site: Make sure the garden bed is ready with fertile, well-draining soil.
- Planting Depth: Dig holes in the garden bed large enough to accommodate the root ball of each seedling. Plant them at the same depth they were growing in their containers.
- Water Immediately: After transplanting, water the seedlings thoroughly to help settle the soil around the roots.
- Monitor and Care: Keep an eye on the transplants for the first few weeks. Ensure they have enough water and are protected from pests.
Pest and Disease Management
Common Pests
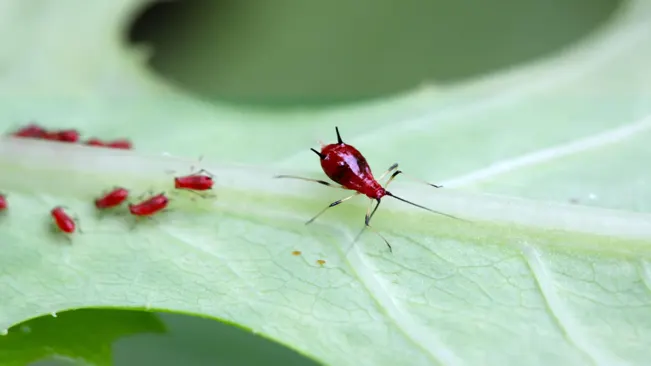
- Aphids:
- Description: Small, soft-bodied insects that can be green, yellow, black, or brown. They tend to cluster on the undersides of leaves and stems.
- Damage: They suck plant sap, causing leaves to curl, wilt, or yellow. Aphids also excrete a sticky substance known as honeydew, leading to sooty mold.
- Control: Use a strong water jet to knock them off plants, introduce beneficial insects like ladybugs, or apply organic insecticides like neem oil or insecticidal soap.
- Cabbage Worms:
- Description: These are the larvae of white butterflies with black spots (cabbage whites). The worms are velvety green caterpillars.
- Damage: They chew large, irregular holes in the leaves, reducing the plant’s vigor.
- Control: Regularly inspect plants and handpick the larvae. Biological control can be achieved using Bacillus thuringiensis (Bt), a natural bacterial toxin.
Common Diseases
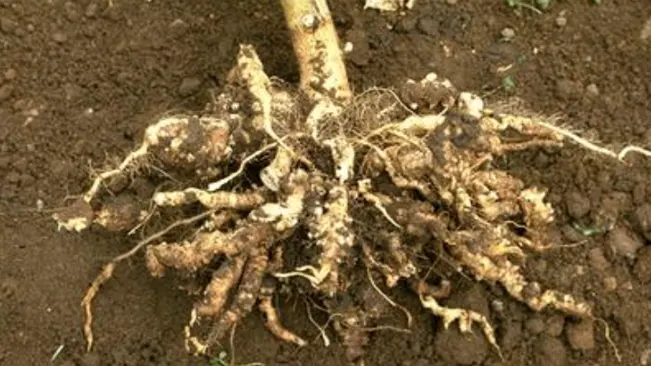
- Clubroot:
- Description: A soil-borne fungal disease causing swelling and distortion of roots.
- Symptoms: Stunted growth, wilting, yellowing of leaves, and the presence of large, irregular galls on roots.
- Control: Practice crop rotation, maintain a balanced soil pH through liming if necessary, and use resistant varieties. Ensure good sanitation by removing and destroying infected plants.
- Black Rot:
- Description: A bacterial disease that affects members of the cabbage family.
- Symptoms: Yellowing of leaf margins, black veins in leaves, and a foul smell from affected tissues.
- Control: Use disease-free seed or transplants, avoid working in wet fields, and practice crop rotation. Remove and destroy infected plants to prevent the spread.
Preventive Measures
- Crop Rotation: Avoid planting cauliflower or other members of the Brassica family in the same location year after year. This practice helps in breaking the life cycle of pests and diseases.
- Sanitation: Keep the garden free from debris and plant residues. This reduces the habitats for pests and the spores of diseases.
- Healthy Soil: Maintain a fertile, well-draining soil with proper pH balance. Healthy plants are less susceptible to pests and diseases.
- Water Management: Avoid overhead watering to reduce the spread of diseases. Use drip irrigation or water at the base of plants.
- Regular Monitoring: Inspect your cauliflower plants regularly for signs of pests and diseases. Early detection is key to effective control.
Blanching (Optional)
- For white cauliflower varieties, blanch the heads to keep them white and tender. Tie the outer leaves over the head when it’s about 2-3 inches in diameter to protect it from the sun.
Harvesting
Inspecting the Curd’s Color and Firmness
- For white cauliflower varieties, the curd should be a bright, creamy white. If you have blanched the cauliflower by tying the leaves over the head to protect it from sunlight, this should help maintain the desired color. Other varieties, like purple or green cauliflower, should have a deep, vibrant hue. The curd should be firm to the touch.
Choosing the Right Time of Day for Harvest
- Harvesting in the morning when temperatures are cooler can help ensure the best quality. Cauliflower can become stressed and degrade in quality in the heat.
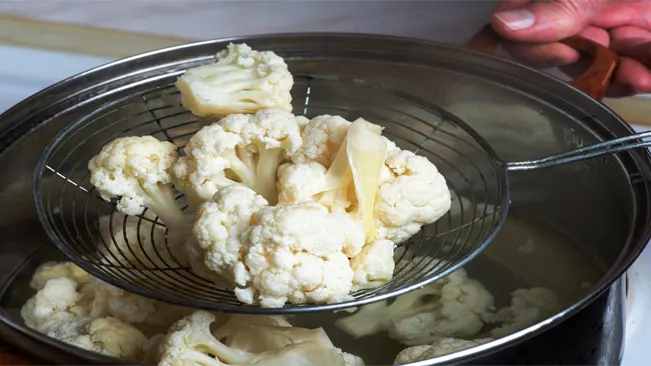
The Harvesting Process
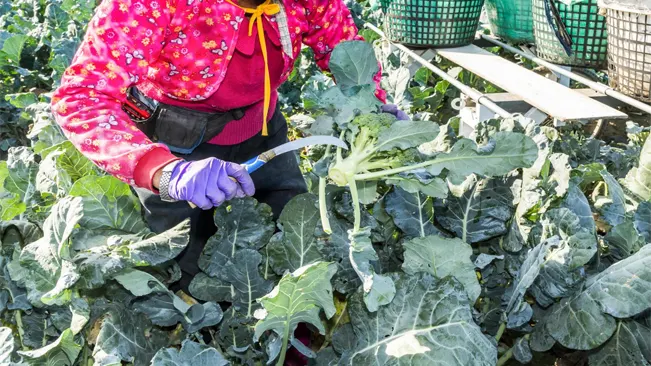
- Use a sharp knife to cut the cauliflower. Make a clean cut through the stem about an inch below the head. Retain a few of the surrounding leaves attached to the head. These leaves can help protect the cauliflower and maintain its freshness after harvest.
Post-Harvest Handling
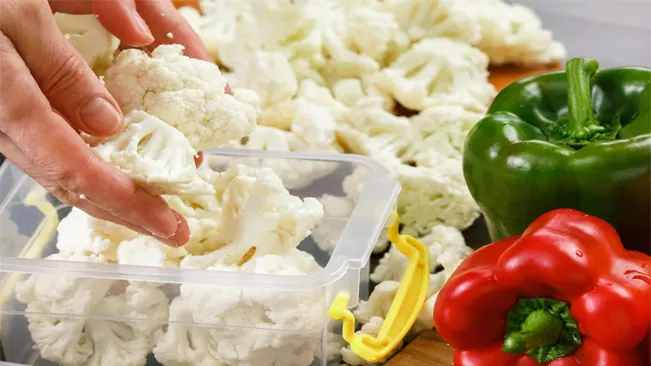
- After harvesting, it’s important to handle cauliflower gently to avoid bruising. If you’re not going to use the cauliflower immediately, it can be stored in a refrigerator. The ideal storage temperature is between 32°F and 40°F (0°C to 4°C) with high humidity. Properly stored, cauliflower can last for up to two weeks.
Signs of Over-Mature Cauliflower
- If the head becomes too mature, you might notice that the curds start to separate or become loose and grainy in texture. The flavor can also become more intense or unpleasant. If the cauliflower has small yellow flowers emerging, it’s a clear sign that it’s over-mature and should be harvested immediately.
Conclusion
Growing cauliflower from seeds can be a fulfilling process. With the right care and attention, you can enjoy a bountiful harvest of this nutritious and delicious vegetable. Remember, patience and consistent care are key to successful cauliflower gardening.
FAQs (Frequently Asked Questions)
- What is the best time to plant cauliflower seeds?
The best time to plant cauliflower seeds depends on your climate. Generally, it’s ideal to start seeds indoors 4-6 weeks before the last spring frost date. For a fall harvest, plant seeds in mid to late summer. - How deep should cauliflower seeds be planted?
Cauliflower seeds should be planted about 1/4 to 1/2 inch deep in the soil. - What type of soil is best for cauliflower?
Cauliflower prefers well-draining, fertile soil with a pH between 6.0 and 7.0. Enriching the soil with compost or well-rotted manure can improve growth. - How much sunlight does cauliflower need?
Cauliflower plants require full sunlight, which means at least 6 hours of direct sun daily. - How often should I water cauliflower plants?
Water cauliflower plants regularly to keep the soil consistently moist. Avoid overwatering which can lead to root rot. - Do I need to thin cauliflower seedlings?
Yes, if you’ve sown seeds directly in the garden or if your indoor seedlings are crowded, thin them so that each plant is about 18 inches apart. - When should I transplant indoor-started cauliflower seedlings outdoors?
Transplant seedlings outdoors when they have 3-4 true leaves and after hardening them off to acclimate to outdoor conditions. - How do I protect cauliflower from pests?
Monitor for common pests like aphids and cabbage worms. Use organic methods like neem oil or insecticidal soap for control. - How do I know when to harvest my cauliflower?
Harvest when the head is fully developed but still compact, usually about 6 to 12 inches in diameter, depending on the variety. - Can I grow cauliflower in containers?
Yes, cauliflower can be grown in containers. Ensure the container is large enough (at least 12 inches deep and wide) and has good drainage.

Kristine Moore
Forestry AuthorI'm Kristine Moore, a seasoned garden landscaping professional with over 30 years of experience. My extensive career has been dedicated to transforming outdoor spaces into stunning, sustainable landscapes. With a deep understanding of horticulture, design principles, and environmental stewardship, I have become a respected figure in the field, known for creating harmonious, visually appealing, and eco-friendly gardens. My commitment to excellence and continuous learning in landscaping trends and techniques has solidified my reputation as an expert in garden design and implementation.


Leave your comment