Wood Stove Guide 2024
- September 25, 2023
- 0 comment
As the chilly fingers of winter reach out, more homeowners are turning their gaze towards the comforting allure of wood stoves. Not just a means to ward off the cold, these stoves are a blend of tradition and efficiency, giving homes a rustic charm coupled with practical warmth. But installing and operating one isn’t as simple as lighting up logs in a metal box. From understanding the installation nuances to ensuring you’re using it safely, our Wood Stove Guide 2024 is here to make you a maestro in mastering flames. Dive in to explore:
Wood Stove Guide List:
- How to Install a Wood Burning Stove
- Wood Stove Installation Requirements
- How Far Should a Wood Stove Be from the Wall?
- What to Put Behind a Wood Burning Stove?
- What to Put Under a Wood Stove?
- How to Vent a Wood Stove Through a Wall?
- How Much to Install a Wood Stove?
- How to Use a Wood Stove
- How to Clean Wood Stove Glass
Whether you’re a novice looking to embrace the wood stove culture or a seasoned enthusiast wanting a refresher, this guide is your warm blanket of knowledge. Let’s stoke the fire of information!
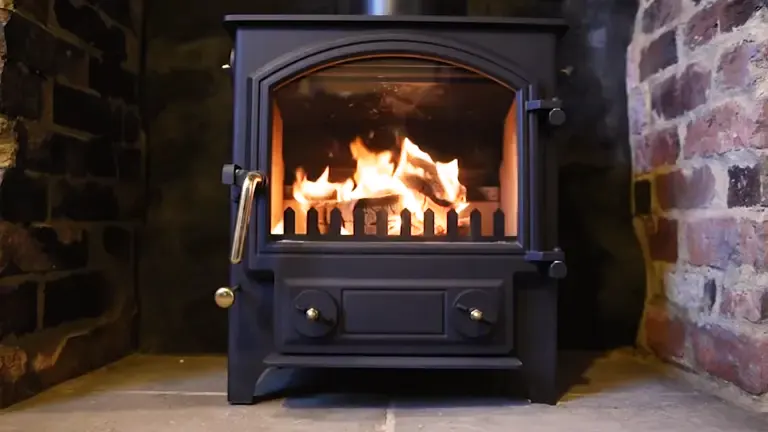
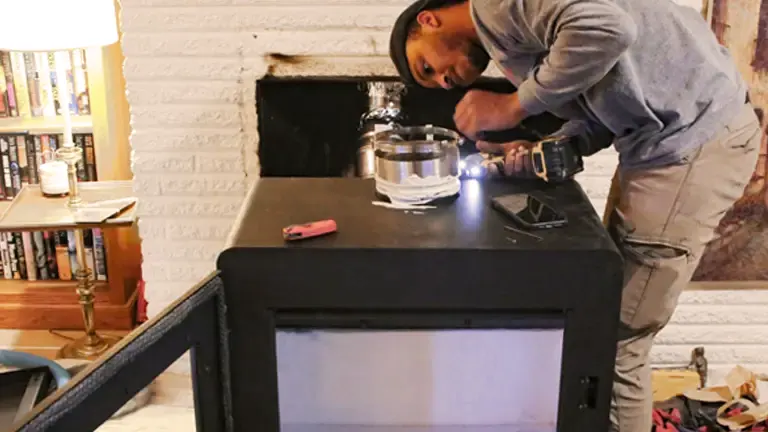
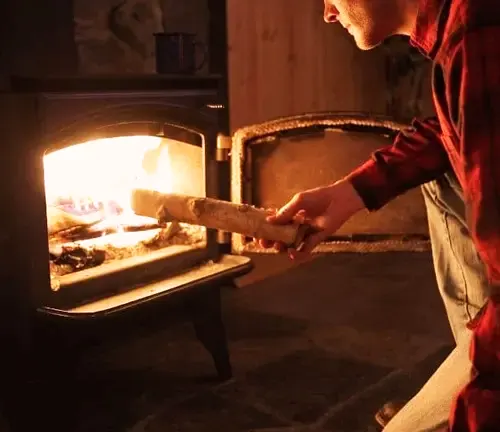
1. How to Install a Wood Burning Stove
Introducing a wood burning stove to your home isn’t just about adding a heating source; it’s about integrating a piece of tradition, ensuring it’s both safe and efficient. Here’s a deeper dive into the installation process:
Choose the Right Location

- Central Placement: A centrally located stove will distribute heat more evenly throughout the space. Think about which rooms you want to benefit most from the heat and place the stove accordingly.
- Safety First: It’s not just about where the stove looks best. Ensure you adhere to safety guidelines, primarily concerning its distance from walls and combustible materials like furniture and curtains.
Prepare the Hearth
- Material Matters: Your hearth is the protective barrier between the fiery heat of the stove and your home’s floor. It should be made of a non-combustible material such as brick, tile, or stone.
- Size is Essential: Make sure the hearth extends a good distance around the stove – not just under it. This is crucial to catch any stray embers or sparks that might jump from the stove, minimizing fire hazards.
Place the Stove on the Hearth
- Distance from Walls: Adhere strictly to manufacturer guidelines concerning how far the stove should be from the walls. This ensures enough heat is radiated without posing a threat.
- Level Ground: It’s important the stove sits level, so ensure the hearth surface is even.
Install the Stovepipe
- Direction and Gradient: The stovepipe, which channels smoke from the stove to the chimney, should rise at a gradient – at least 1/4 inch for every foot. This gradient ensures efficient smoke travel and reduces the risk of creosote build-up.
- Stovepipe Material: It’s advisable to use a single-walled, heavy-duty steel pipe for the section inside the room. It radiates more heat into the room than a double-walled stovepipe.
Seal the Connections
- Stovepipe Cement: This specialized cement is designed to withstand high temperatures and will ensure that no smoke, or potentially harmful gases, leak into the room. Ensure every joint where sections of the stovepipe connect, and where the stovepipe meets the stove, is sealed properly.
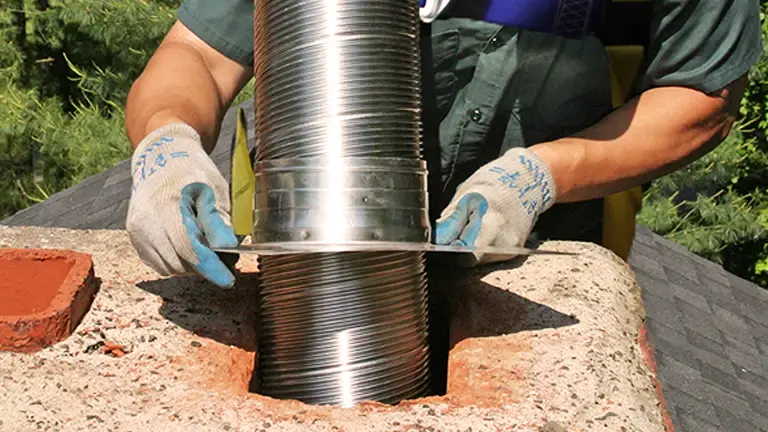
Connect to the Chimney
- Existing Chimney: If your home has an existing chimney, it needs to be inspected. Ensure it’s structurally sound and lined. A liner ensures a better draft and reduces the chances of a chimney fire due to creosote build-up.
- No Chimney: If you don’t have a chimney, you’ll need a class-A insulated chimney pipe. This can run through the house or be attached to the exterior. Remember, the entire path the smoke takes, from the stove to the open air, needs to be sealed and insulated to prevent heat loss and protect against potential fire hazards.
By following these steps and paying attention to detail, you ensure your wood burning stove isn’t just a source of warmth, but also a safe and delightful addition to your home. Always consider consulting with professionals for installation to ensure maximum safety and efficiency.
2. Wood Stove Installation Requirements
A wood stove is more than just a heating appliance; it’s a long-term investment in both warmth and safety. As such, there are several key requirements to ensure a seamless and safe installation.
a. Certifications

EPA Certification: The Environmental Protection Agency (EPA) sets performance standards for wood stoves to ensure they burn cleanly and efficiently. Before purchasing or installing a wood stove, check for the EPA-certified label. This not only signifies that the stove meets clean-air standards but also often indicates that it’s a modern, efficient appliance that can translate to less fuel consumption and more effective heating.
b. Ventilation
Chimney or Flue Liner: Central to the safe operation of a wood stove is the effective venting of smoke and gases. A quality chimney or flue liner serves this crucial role. It channels the smoke upwards and out of your home, reducing the risk of smoke inhalation or potential fire hazards. Additionally, the right chimney or liner can improve the stove’s efficiency by ensuring a steady draft, which in turn provides a consistent burn rate for the wood.
c. Floor Protection
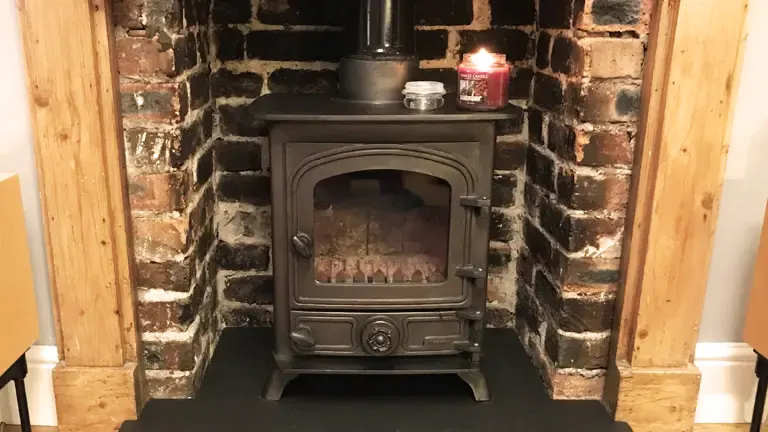
The Hearth: The floor directly beneath a wood stove is subjected to intense heat, stray embers, and occasional ash spillage. To safeguard against potential fire risks and damage, the stove should be positioned on a hearth—a protective layer made of non-combustible materials. Common materials include tile, brick, or stone.
Size Specifications: When considering the dimensions of your hearth for optimal safety, it’s essential to ensure that it extends at least 16 inches in front of the stove door, as this is the primary area vulnerable to escaping embers during loading or stoking. Furthermore, a recommended side extension of at least 8 inches on each side offers added protection against stray embers or ash. For stoves not positioned directly against non-combustible walls, a rear extension of a minimum of 8 inches should also be incorporated into the design.
By paying careful attention to these installation requirements, homeowners can ensure that their wood stoves operate safely, efficiently, and in compliance with established standards. Always consult with professionals during installation to ensure maximum safety and compliance.
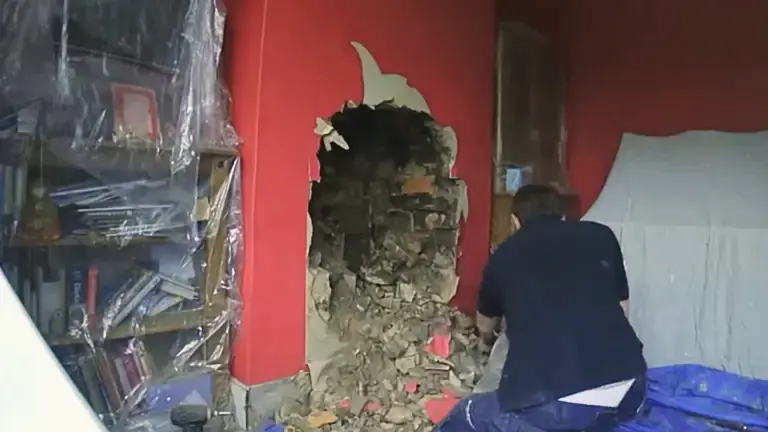
3. How Far Should a Wood Stove Be from the Wall?
Positioning your wood stove correctly in relation to the walls of your room is not just a matter of aesthetics or maximizing heat distribution; it’s a critical safety concern. The distance from the stove to the wall can dictate the risk of fires, especially given the intense heat wood stoves can produce.
Non-combustible Walls
These are walls made of materials that do not catch fire easily, such as brick, stone, or certain treated wallboards. For such walls, the general guideline suggests a minimum distance of 12 inches from the wood stove. However, the precise distance might vary based on the design and heat output of the stove. Some modern stoves, designed with better heat shields and efficiency in mind, might allow for closer placement.
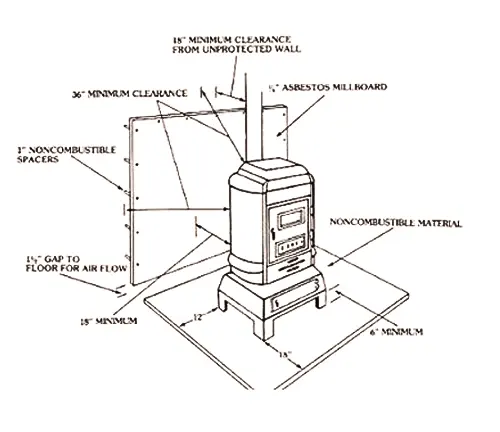
Combustible Walls
These are walls that can catch fire, like those made of regular drywall, wood panels, or wallpapered surfaces. The risks here are much higher. As a safety measure, wood stoves should be placed considerably farther from combustible walls, typically recommending a distance of 36 inches or more. However, it’s of utmost importance to consult the stove’s manufacturer guidelines, as stoves vary widely in design and heat output. Some stoves might require even more space, while others, especially those with built-in heat shields or designed for corner placements, might have slightly more lenient requirements.
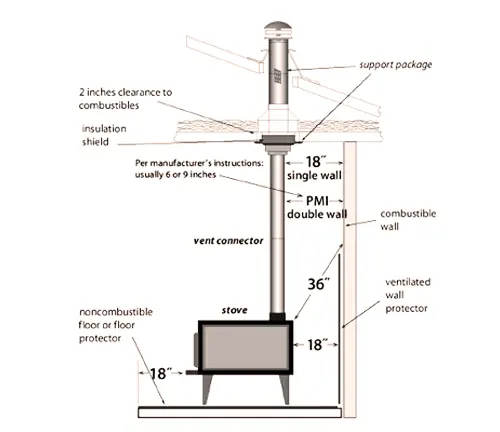
Regardless of wall type, always ensure there’s ample space for heat to circulate and for safety barriers or shields to be installed if necessary.
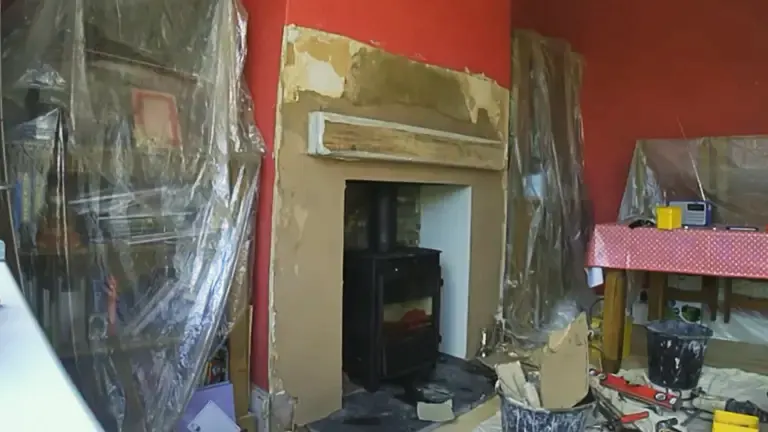
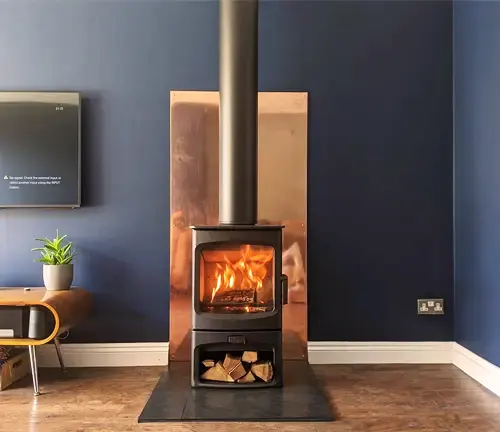
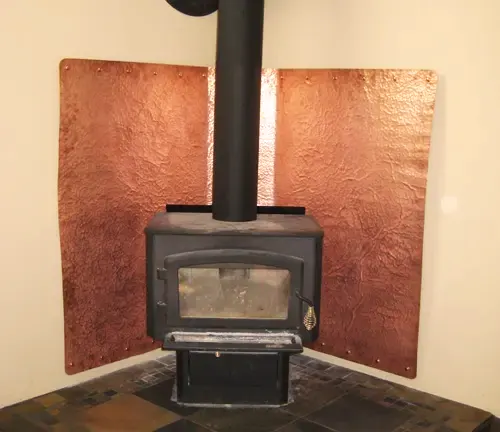
4. What to Put Behind a Wood Burning Stove?
The area directly behind a wood burning stove is particularly vulnerable to the intense heat it emits. Hence, it’s essential to employ certain protective measures not just to ensure safety but also to enhance the visual appeal of the setup.
a. Metal Heat Shields
Constructed usually from sheet metal or other heat-resistant materials, these shields act as effective barriers between the stove and the wall. Their primary function is to reflect the heat away from the wall, ensuring the wall does not absorb excessive heat which might lead to combustion or deterioration. Beyond the safety aspect, metal heat shields often come in various finishes, allowing homeowners to match them with the room’s decor.
b. Masonry Backdrops
Masonry materials, such as brick, stone, or ceramic tiles, offer a dual benefit. Firstly, they are naturally heat-resistant, making them an excellent protective layer against the high temperatures of the stove. Secondly, they introduce an element of rustic charm or sophisticated elegance to the room. A well-designed masonry backdrop can transform the wood stove from a mere heating appliance into a captivating focal point of the room.
c. Certified Wall Shields
These are specifically designed protective barriers that go beyond the simple reflection or absorption of heat. Certified by relevant authorities for their effectiveness, these wall shields are engineered to create a ventilated air space between the stove and the wall. This design minimizes direct heat transfer, allowing the wall behind to remain relatively cool. They are particularly handy for situations where the stove is close to the wall or where additional safety measures are desired.
When choosing what to place behind your wood burning stove, consider both the functional safety requirements and the aesthetic goals for your space. Always ensure installations are done as per manufacturer’s guidelines or under the guidance of professionals to maximize safety and efficiency.
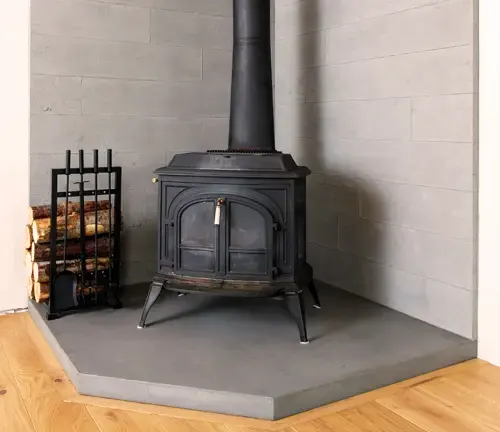
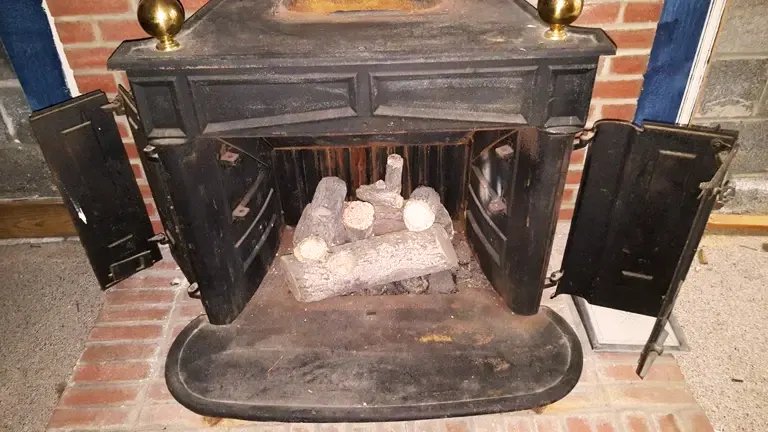
5. What to Put Under a Wood Stove?
The flooring beneath a wood stove is in the direct line of fire, quite literally. Given the high temperatures, potential stray embers, and occasional ash or coal spillage, what you place under your stove is of paramount importance. It serves as a protective barrier, safeguarding your floor and home.
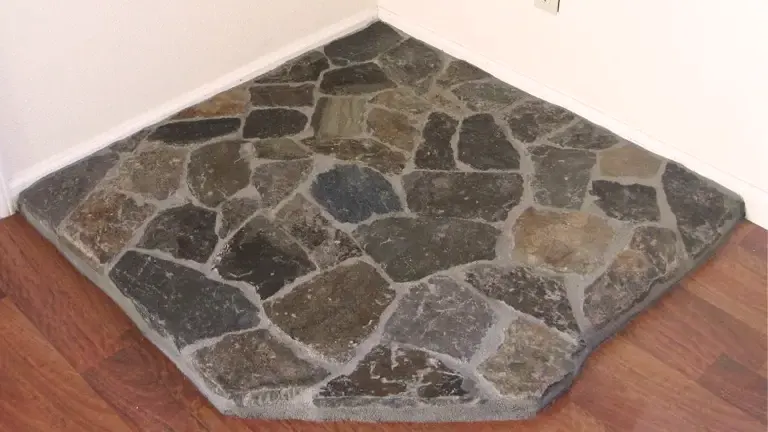
a. Steel or Stone Hearth Pads: Hearth pads, typically constructed from steel or various types of stone (like slate or granite), are a go-to choice for many homeowners. Their primary function is to offer a fire-resistant layer between the intense heat of the stove and the floor. Being solid and durable, they provide a robust shield against stray embers, hot ash, or any accidental coal spillage that might otherwise pose a risk to regular flooring.
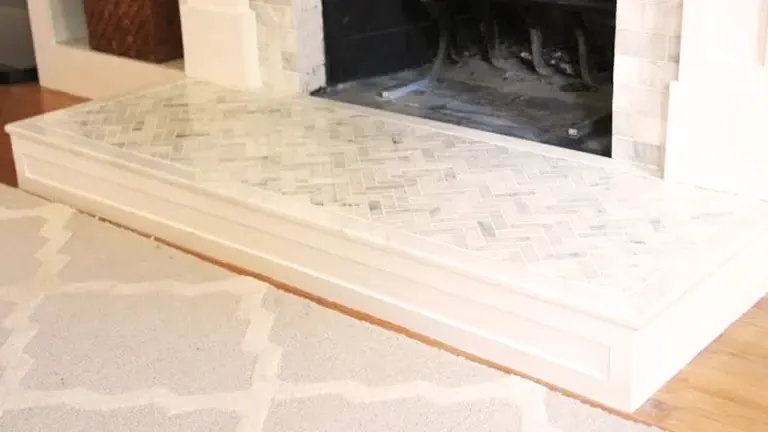
b. Ceramic or Porcelain Tiles: These tiles are more than just a protective feature; they bring an element of artistry to the setup. With countless designs, patterns, and finishes available, they can be tailored to fit any interior decor, from contemporary to classic. Beyond their aesthetic value, both ceramic and porcelain tiles are heat-resistant and easy to clean, making them an efficient barrier against the potential hazards of a wood stove.
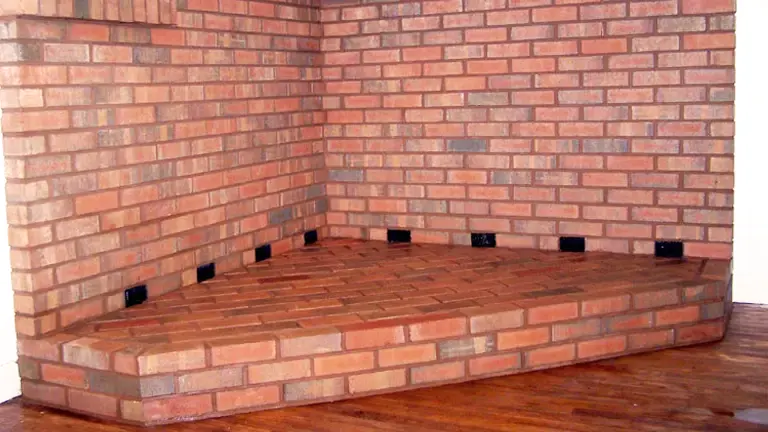
c. Brick Base: Bricks have been a traditional choice for fireplaces and stoves for centuries and for a good reason. They are incredibly heat-resistant and durable. When used as a base for a wood stove, bricks not only provide a solid, protective foundation but also add a touch of rustic charm to the setting. A brick base can be especially complementary in homes that aim for a vintage, country, or classic ambiance.
In choosing the right material for underneath your wood stove, consider the overall look and feel you desire for the space, but never compromise on safety. Proper installation and occasional maintenance of these materials ensure that the wood stove remains a secure and attractive addition to your home.
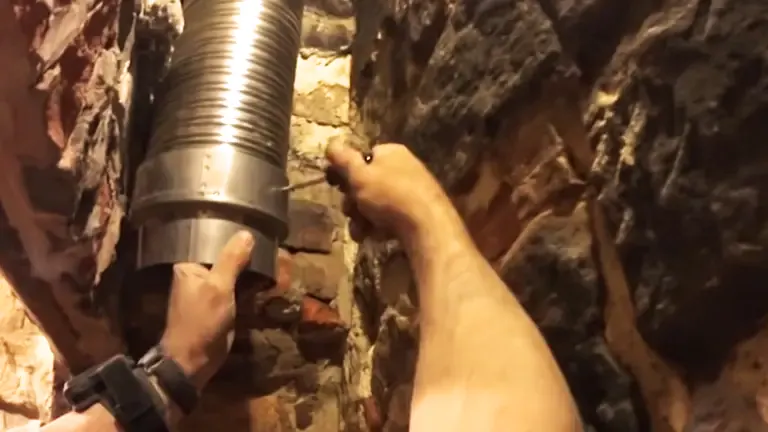
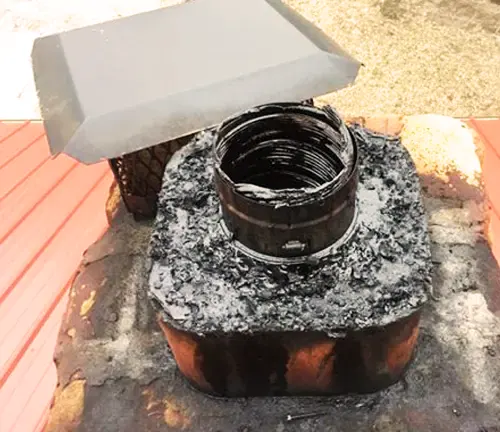
6. How to Vent a Wood Stove Through a Wall?
Selecting the Right Venting System
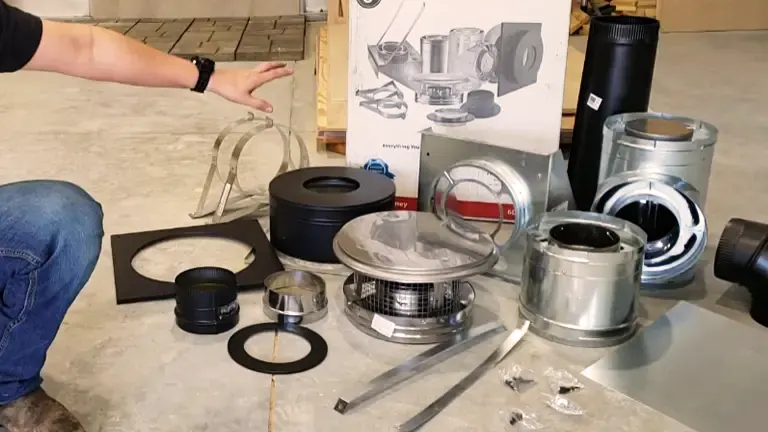
The heart of a well-vented wood stove lies in choosing the appropriate venting system tailored to your stove’s specifications. While all stovepipes serve the primary function of routing the smoke out, they aren’t universally interchangeable. The choice among single-wall, double-wall, or insulated stovepipes is heavily influenced by your stove type and its location in relation to nearby structures. Single-wall stovepipes, being a simpler construction, are suited for spaces where you want to optimize heat radiation into the room, but they demand more distance from combustibles. In contrast, double-wall stovepipes, with an insulating layer between two metal walls, maintain a cooler exterior surface, allowing for closer placement to walls. If you’re routing the pipe through walls or ceilings, insulated stovepipes, designed to reduce heat transfer to adjacent materials, become essential to prevent potential fire hazards.
Cutting an Appropriately Sized Hole
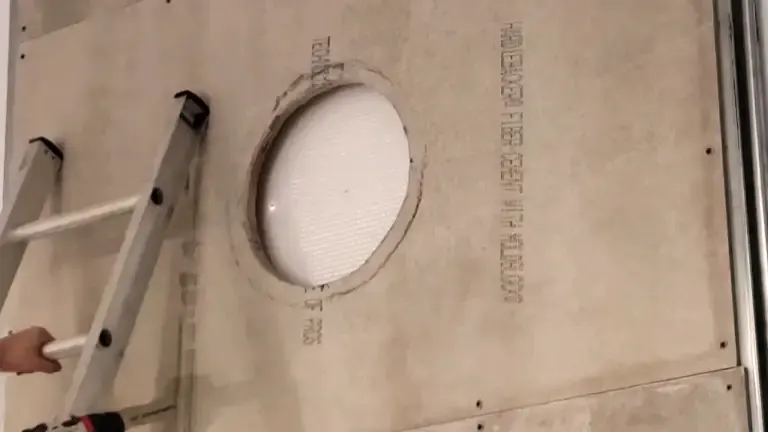
Venting a stove efficiently is an art that hinges on precision, starting with where and how you introduce the venting hole on the wall. This hole needs to be strategically positioned higher than the stove, capitalizing on the smoke’s natural propensity to rise. Additionally, the inclination or angle of the hole is crucial. An optimal angle ensures a consistent and efficient smoke flow out of the room, minimizing any chance of backflow or stagnation, which could lead to smoke filling your room or reduced stove efficiency.
Installing a Chimney Thimble
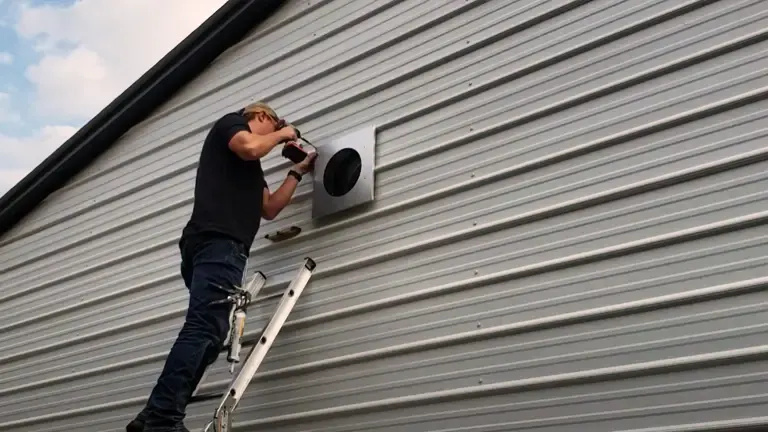
When a hot stovepipe meets a home’s wall, there’s a palpable risk of heat damage or even fire. Enter the chimney thimble: a protective element designed to offer a safe transition as the stovepipe passes through the wall. Crafted to withstand and deflect the heat emanating from the pipe, the thimble acts as a heat shield, ensuring the wall’s integrity remains uncompromised. Beyond its functional value, it provides peace of mind, knowing that the wall is guarded against the stovepipe’s intense heat.
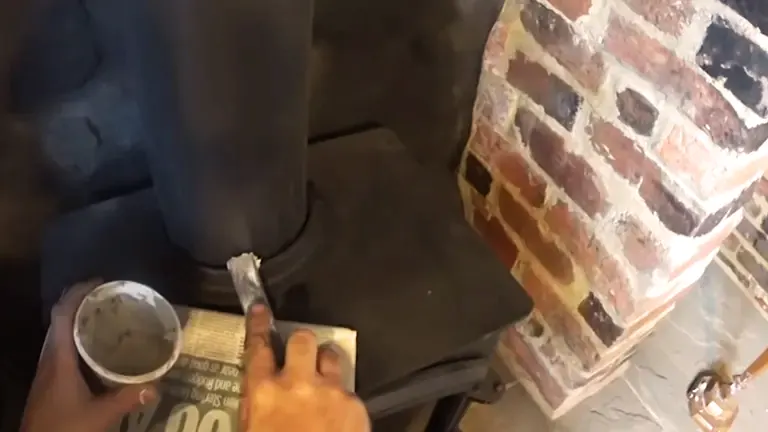
Attaching the Stovepipe
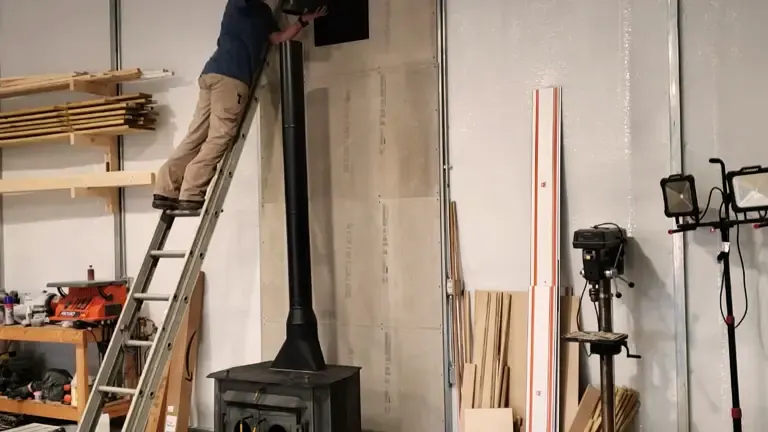
With preparatory steps out of the way, the final task is to establish a secure and efficient conduit for the smoke, linking the stove to the great outdoors. The stovepipe serves this very purpose. It needs to be meticulously connected from the stove, through the wall, and out to an external vent or chimney. This pathway must be continuous, unobstructed, and, above all, airtight. Every joint, every connection, must be sealed using high-temperature resistant sealants to prevent any leaks. This ensures not only efficient operation but also ensures no harmful gases or smoke seep into the living spaces.
Always remember that while these steps provide a foundational understanding, installing a wood stove and venting it properly often requires adherence to local building codes and regulations.
7. How Much to Install a Wood Stove?
Installing a wood stove in your home is a multifaceted venture that blends aesthetics, functionality, and safety. As such, the associated costs can vary significantly based on several determining factors. Here’s a deeper dive into the potential expenditures:
a. Stove Purchase
The cost of the wood stove itself can vary dramatically depending on its type, brand, build quality, and features. Basic models may begin at around $600, offering essential functions without many added features. Mid-range stoves, which balance functionality with design aesthetics, could set you back between $1,200 to $2,500. If you’re eyeing premium models with advanced features, better build materials, or designer brands, the price tag can soar, with some reaching up to $3,500 or more. Factors like heating capacity, efficiency ratings, and design intricacies can influence the stove’s cost.
If you’re interested in buying wood stoves, I’d recommend taking a look at our informative article here: Wood Stoves for Different Home Size 2023
b. Installation Costs
The process of installing a wood stove is intricate, necessitating expertise and an array of materials to ensure safety and efficiency. If you have an existing chimney, the costs might be on the lower side, as this eliminates the need for constructing a new venting system. However, even with an existing chimney, inspections, and potential modifications or lining might be required.
On the other hand, homes without a chimney would see a spike in installation costs due to the added expenses of constructing a suitable venting system. Installation also involves setting up protective hearths, and wall shields, and ensuring compliance with safety regulations. Taking into account labor costs, materials, and any modifications or additional structures, installation charges can range from $1,000 for simpler setups to $4,000 or more for complex installations or those in areas with higher labor rates.
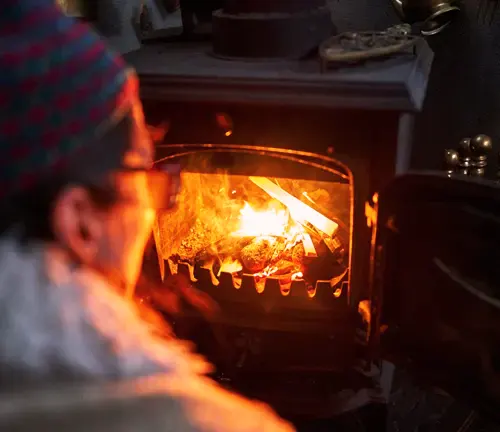
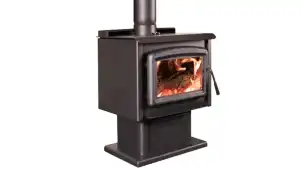
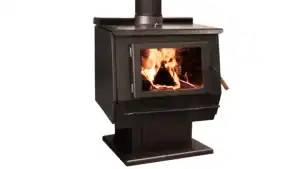
8. How to Use a Wood Stove
Safety First
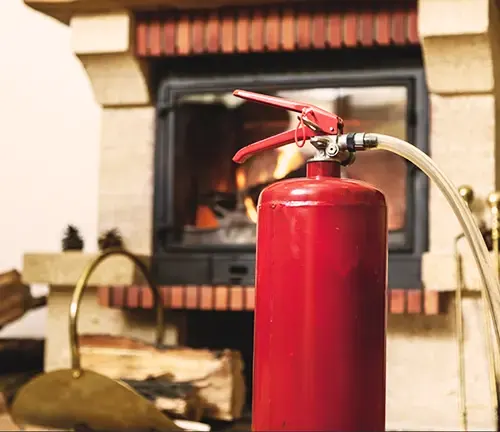
The foundation of using any wood stove effectively lies in ensuring safety. It’s paramount to have working smoke and carbon monoxide detectors in your home. Alongside this, a fire extinguisher, easily accessible and in functional condition, is a non-negotiable necessity. Regular maintenance is also key. Annual cleaning and inspection of your wood stove and chimney by professionals can dramatically reduce the risk of chimney fires and ensure efficient operation.
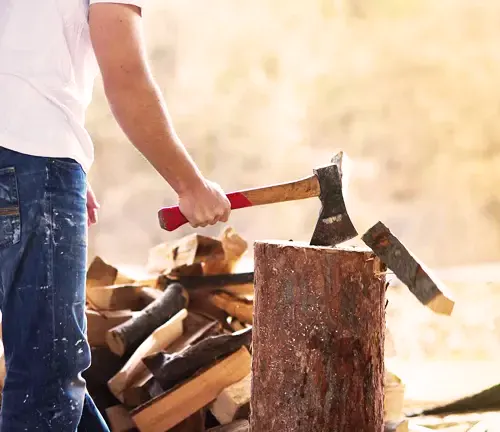
Prepare Your Wood
The quality of your firewood significantly influences the stove’s performance. Seasoned hardwoods, such as oak, hickory, or maple, are the gold standard. These types of wood not only burn hotter but also last longer than softwoods. For optimal results, wood should be split and stored in a dry environment for a minimum of 6 months to a year, aiming for a moisture content below 20%.
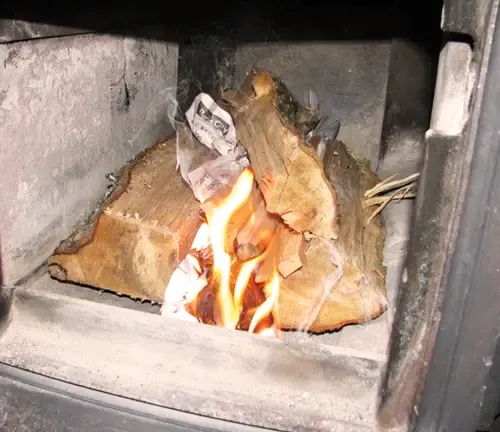
Starting the Fire
Initiating a fire requires a methodical approach. Begin by fully opening the stove’s air intake to ensure maximum airflow. At the base of the stove, place crumpled newspaper or a firestarter. Above this, stack small pieces of kindling wood in a crisscross pattern to allow good air circulation. Lighting the paper or firestarter will gradually ignite the kindling. As the kindling catches, you can then add larger wood pieces.
Feeding the Fire
Once the fire is well-established, it’s time to feed it with logs. However, moderation is crucial. Overcrowding the stove can suffocate the fire. Ensure there’s adequate space for air to flow around the logs. The stove’s air intake can be adjusted to control the fire’s intensity. More air invigorates the fire, making it burn hotter and faster, while reducing air slows it down.
Maintaining a Healthy Fire
Aim for a bright, vigorous fire with active flames. This not only provides optimal warmth but also minimizes creosote production—a leading cause of chimney fires. It’s advisable to avoid practices like “overnight burns”, where the stove is densely loaded and air intake is minimized. Such burns can lead to excessive creosote accumulation.
Using the Stove’s Features
Modern wood stoves come equipped with advanced features designed to enhance efficiency and safety. For instance, features like a secondary burn can help in re-igniting the smoke, allowing it to burn off before exiting through the chimney. It’s essential to familiarize yourself with these functionalities to optimize your stove’s performance.

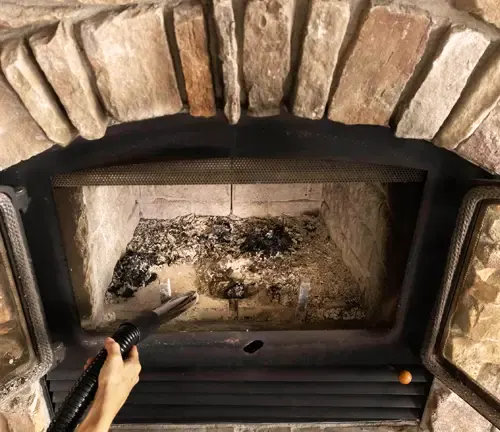
Cleaning Ashes
Ash accumulation can stifle a fire. Hence, regular removal is necessary. When doing so, always use a metal container with a secure lid. Given that hot coals might linger amidst the ashes, it’s prudent to let them cool for several days before final disposal.
Safe Operation
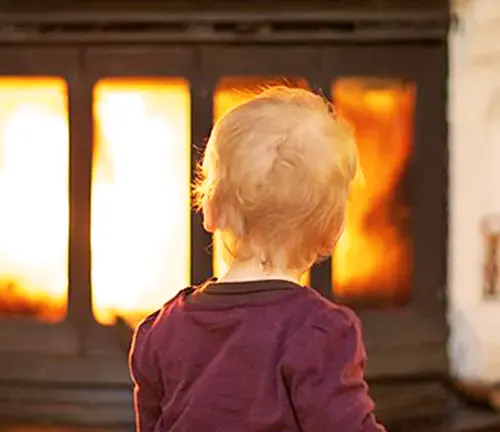
Operational vigilance is crucial. Never resort to using flammable liquids to ignite your fire. Additionally, maintain a buffer zone around your stove. Combustible materials, be it furniture or curtains, should be kept at a safe distance. Also, always ensure children and pets are supervised when the stove is active.
Shutting Down
If you’re faced with a situation where the fire needs to be extinguished swiftly, spreading out the logs and minimizing the air intake can help. In regular scenarios, letting the fire naturally burn down is the best approach. The coals will gradually extinguish on their own.
Using a wood stove is more than just lighting a fire; it’s an art, an experience, and with the right steps, it can be an efficient way to heat your space. Enjoy the cozy warmth and ambiance, but always prioritize safety.
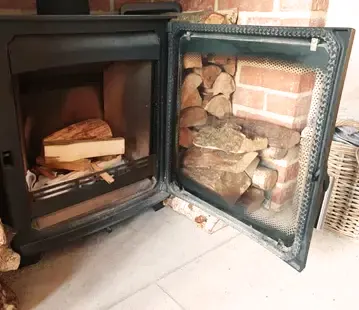
9. How to Clean Wood Stove Glass
The allure of a wood stove often lies in its mesmerizing flames visible through the glass door. However, as time passes, this glass can become coated with creosote, soot, and other residues, diminishing the charm. Cleaning the glass not only reinstates the aesthetic appeal but also ensures better fire monitoring. Here’s a step-by-step guide to approach this task.
1. Safety First
Before embarking on the cleaning process, it’s paramount to ensure the stove has cooled down sufficiently. Cleaning should ideally be undertaken several hours after the last use, or even the next day, to avoid any burns or accidents.
2. Gather Cleaning Supplies
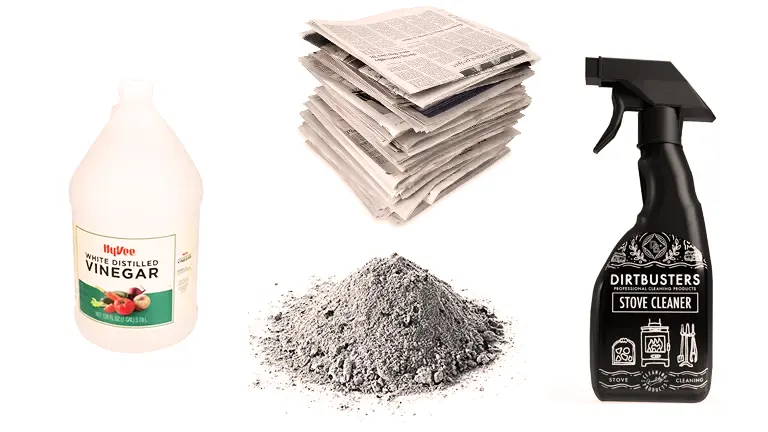
For cleaning, various household items can suffice. Some effective tools and solutions include:
- Newspaper or paper towels
- Vinegar or water
- Ash from the stove
- Commercial wood stove glass cleaner
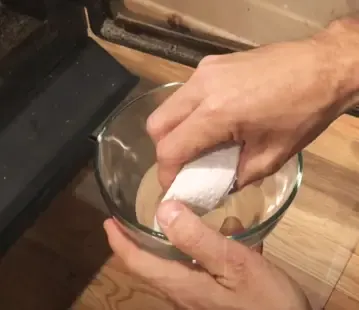
3. Ash Cleaning Method
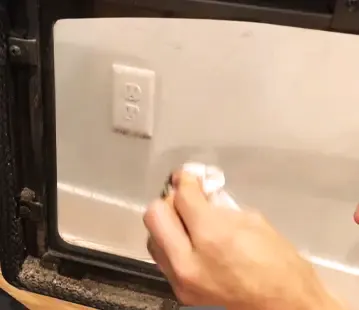
One of the traditional methods to clean the glass involves using ash. Start by dampening a newspaper or paper towel piece, then dip it into the stove’s cold ashes to coat it lightly. This ash-covered paper, when rubbed onto the glass in circular motions, acts as a mild abrasive, effectively removing soot without causing any scratches. Following the ash treatment, any residual ash can be wiped off with a clean, damp cloth.
If you’re interested in discovering additional applications for wood ash, you can find further information here. Best Uses for Wood Stove Ash 2023
4. Vinegar Solution
Another natural solution is using vinegar. By mixing equal parts of vinegar and water, you can create a simple yet effective cleaning solution. Spraying this mixture onto the glass and letting it sit for a few minutes can help in loosening the residue. A subsequent wipe with a clean cloth will often leave the glass gleaming.
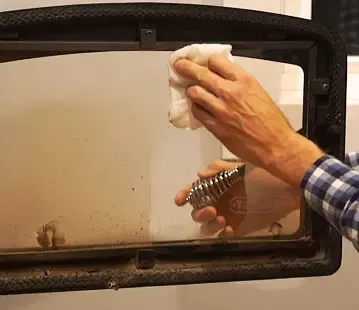
5. Commercial Cleaners
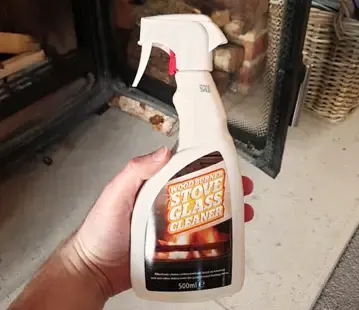
In cases where the soot and residue buildup is particularly stubborn, commercial wood stove glass cleaners might be the best recourse. It’s essential to adhere to the label instructions, but typically, these involve applying the cleaner, pausing for a moment, and then wiping it off.
6. Final Cleaning Touches

After the cleaning, it’s always a good practice to wipe the glass with a damp cloth to ensure no cleaning residues remain. Subsequent drying with a clean towel ensures a streak-free finish.
7. Preventive Measures
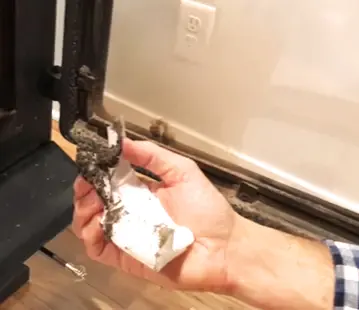
Lastly, adopting preventive measures can mitigate the frequency and intensity of cleanings. This includes burning well-seasoned wood to minimize creosote buildup, adjusting the stove’s air intake for better combustion, and periodically checking gaskets and seals.
By following this guide, you can ensure that the glass on your wood stove remains clean and clear, allowing you to enjoy the warmth and view of the flames with minimal interruptions.
FAQs
- How do modern wood stoves differ from their ancestors in terms of efficiency and emissions?
Modern wood stoves are designed to maximize heat output while minimizing harmful emissions through secondary burn chambers, tighter seals, and improved air intake systems. - Are there “smart” wood stoves that can be controlled via mobile apps?
Yes, some contemporary models have Wi-Fi connectivity, allowing users to monitor temperature, adjust airflow, and receive maintenance reminders through mobile apps. - How does the choice of wood type affect the stove’s performance and the environment?
Hardwoods like oak or maple burn hotter and longer. However, seasoned wood burns cleaner than green wood, impacting emissions. - What innovative features are available for improved safety in wood stoves?
Features like cool-touch handles, automatic dampers, and integrated fire suppressants enhance safety in modern wood stoves. - How do hybrid wood stoves work and what benefits do they offer?
Hybrid wood stoves combine traditional cat-and-non-cat technologies for longer burn times, higher heat outputs, and reduced emissions. - Can I retrofit my old wood stove to make it more efficient and eco-friendly?
While upgrades like adding a catalytic combustor are available, the most substantial gains come from investing in a newer model. - How has the design aesthetic of wood stoves changed in recent years?
Modern wood stoves incorporate sleek designs with more glass for viewing fires and come in various materials and finishes. - What is the significance of the EPA’s certification for wood stoves?
An EPA certification ensures the stove meets strict emissions standards, making it eco-friendly and often more efficient. - How often should I clean and maintain my wood stove for optimal performance?
Regular maintenance should be done at least annually, but ash removal and checking for creosote buildup might be needed more frequently based on usage. - Are there wood stoves designed specifically for smaller spaces or tiny homes?
Yes, compact wood stoves are available for small living spaces, offering efficient heating without occupying much room.
Thank you for delving into the Wood Stove Guide 2024 with us. We’re eager to hear from you! Whether you’re a seasoned wood stove user or just exploring your options, your insights and experiences can benefit our community. Drop a comment below and share your thoughts. Let’s keep the conversation burning bright!

David Murray
Forestry AuthorI'm David Murry, a forestry equipment specialist with a focus on chainsaw operation. With over 13 years of experience, I've honed my skills in operating and maintaining a wide range of machinery, from chainsaws to log splitters. My passion for the outdoors and commitment to sustainable forestry drive my work, which emphasizes safety, efficiency, and staying updated with industry advancements. Additionally, I'm dedicated to sharing my expertise and promoting environmental awareness within the forestry community.


Leave your comment