Expert Hedge Trimming Techniques
- April 3, 2024
- 0 comment
Discover professional Hedge Trimming techniques to enhance your garden’s beauty and health. Learn how to master the art of hedge care and achieve perfectly manicured greenery in our comprehensive guide.
Hedges are natural embellishments that provide privacy and structure to gardens. Yet, their upkeep is crucial to maintain their allure and health. While hedge trimming might seem straightforward, mastering certain techniques can elevate your garden’s aesthetics and the health of your hedges. This article delves into professional hedge trimming techniques to help you achieve well-manicured and thriving hedges.
Types of Hedge Trimmers
1. Double-sided Hedge Trimmers
Ideal for shaping, these trimmers allow for precision on both sides of the blade, making them perfect for crafting intricate hedge designs. They often come with an adjustable rear handle, enhancing flexibility and providing ergonomic support for side trimming tasks. If your garden artistry involves detailed shaping, a double-sided trimmer is your go-to tool.
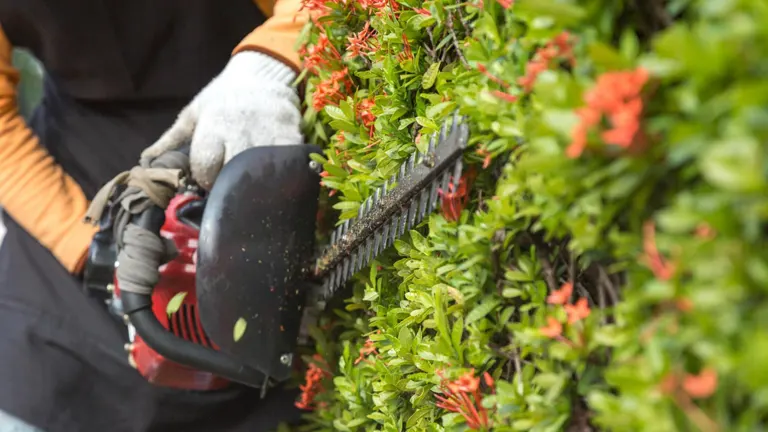
2. Single-sided Hedge Trimmers
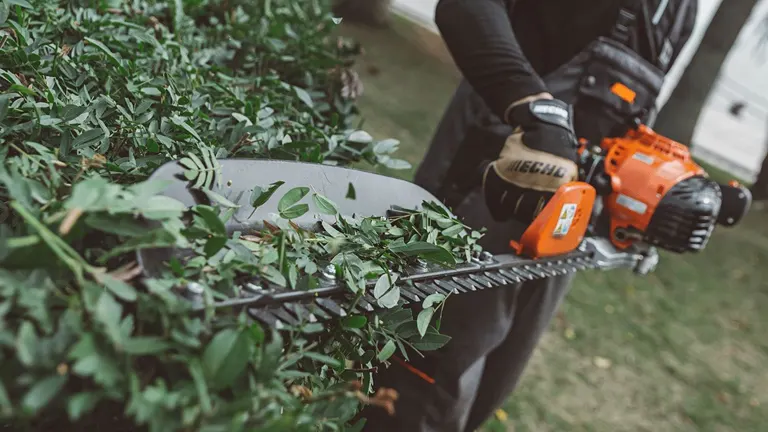
These are tailor-made for trimming straight, long sections of hedge. With teeth positioned on one side, the blade can extend longer without adding cumbersome weight, facilitating broad sweeps and efficient cutting over large areas. Choose this type if your garden has expansive hedges that require regular, straightforward trimming.
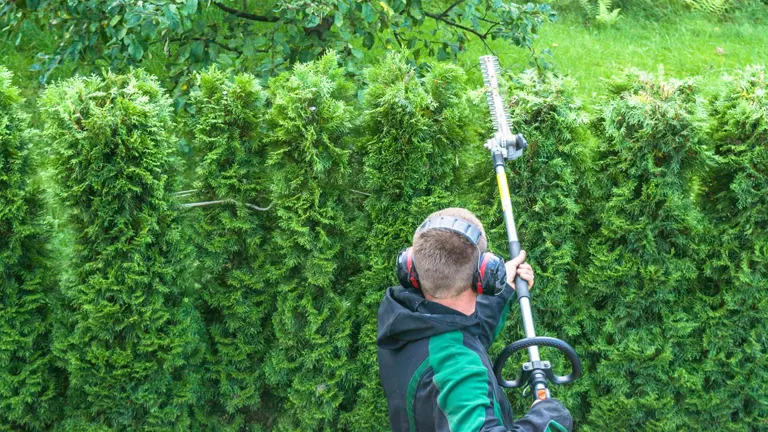
3. Pole Hedge Trimmers

For those hard-to-reach areas, whether towering above or nestled close to the ground, pole trimmers are invaluable. Their extended reach negates the need for ladders, and adjustable cutting bars make quick work of both high and low hedges. Opt for a pole hedge trimmer if your garden features tall hedges or you need the convenience of trimming ground cover without bending over.
Prepare for the Cleanup First
Before diving into hedge trimming, anticipate the aftermath and prepare for the cleanup to streamline the process. Hedge trimming can generate a surprising amount of debris, but with the right tools and preparations, managing this mess can be hassle-free.
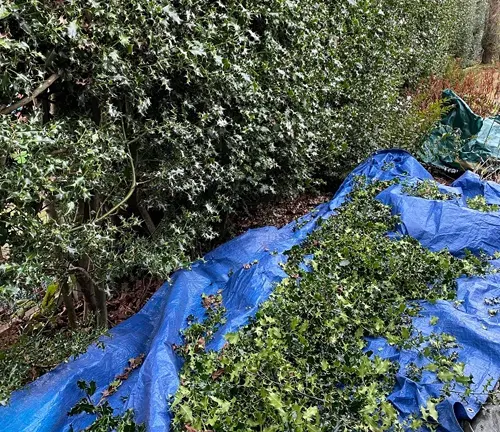
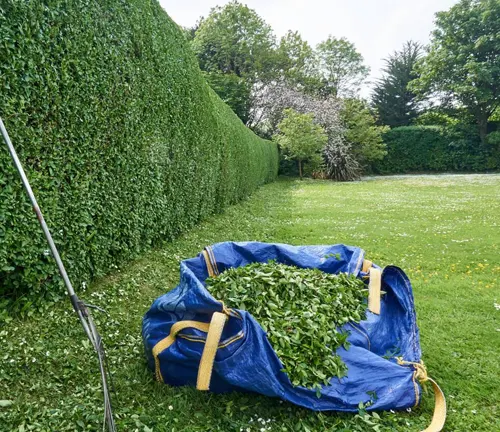
Groundsheet or Tarpaulin
Spread a groundsheet or tarpaulin under the hedge area before you start trimming. This will catch the falling debris, making it much easier to gather and dispose of later, either in compost heaps or garden waste bags.
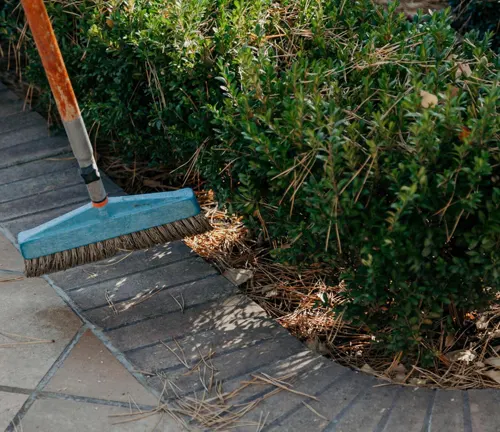
Hard Bristled Broom
Ideal for sweeping up leaves, branches, and other debris that fall onto pathways or beneath the hedge. This tool is essential for giving your garden a neat and tidy look post-trim.
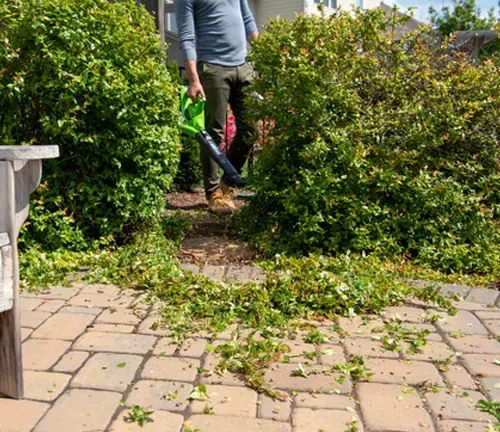
Leaf Blower
Utilizing a leaf blower after trimming can help dislodge and remove any remaining leaves and small branches from within the hedge. This not only cleans up the hedge but also ensures that no decaying material is left behind to spoil the appearance of your freshly trimmed hedge.
Rubbish Bags
During the cleanup, it’s also a good time to clear out any litter that might have accumulated under the hedge. This not only contributes to the aesthetic of your garden but also to its overall health and cleanliness.
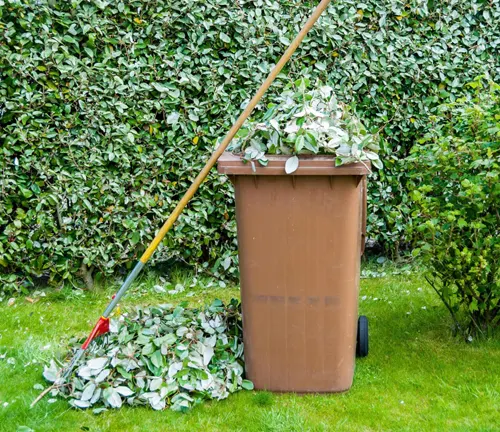
Heavy Duty Bin
Having a bin nearby during the trimming process allows for immediate disposal of cuttings. This is especially helpful in windy conditions, preventing the spread of debris across the garden.
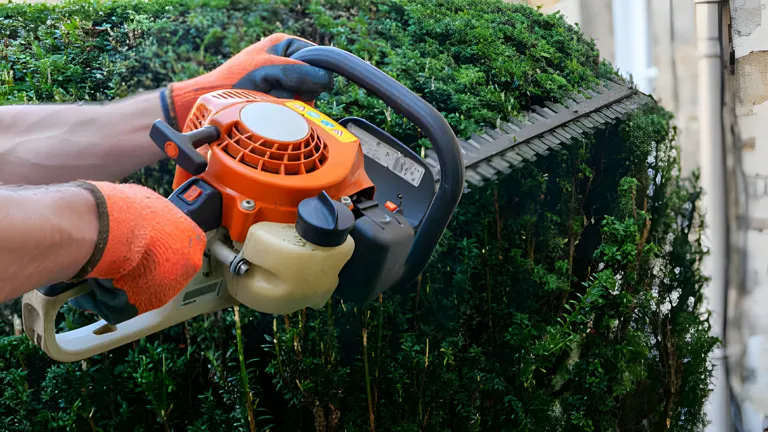
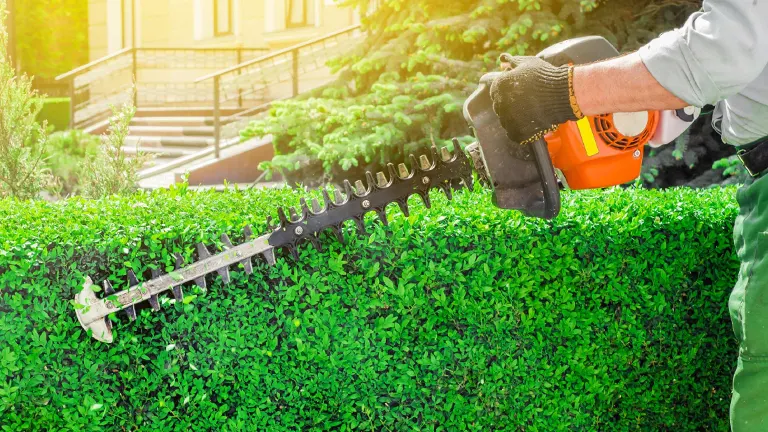
1. Essential Tools and Protective Gear
When setting out to trim your hedges, selecting the appropriate tools is crucial for both efficiency and safety. For smaller hedges, sharp pruning shears are indispensable, allowing for precision cutting and shaping. Larger hedges, however, require the power and speed of electric or petrol hedge trimmers to get the job done effectively. Safety cannot be overstated in hedge trimming. Protective gloves shield your hands from thorns and sharp edges, while goggles protect your eyes from flying debris. Ear protection is essential when using loud, powered trimmers to prevent hearing damage.
PPE Checklist for Hedge Trimming
- Heavy Duty Gloves: Safeguard against sap and thorns.
- Protective Eyewear: Must be safety-rated, offering UV protection. Note that prescription glasses are insufficient for safety.
- Long-Sleeved Top: Opt for tops with anti-cut properties to enhance protection.
- Long Legged Trousers: Trousers with anti-cut features offer optimal safety.
- Non-slip Footwear: Wear non-slip boots or shoes, crucial for ladder use and stability.
- Breathing Mask: Filters out spores and insects, preventing inhalation through the mouth or nose.
2. Best Time to Trim
To maintain your hedges in prime condition, it’s essential to trim them at the right time. Knowing when to trim can greatly affect the health and appearance of your hedges. Generally, a once-a-year trim is adequate for most types, but for denser and healthier growth, more frequent trimming is beneficial.
Cherry laurels and box hedges, for instance, flourish with two to three trims each year, ideally beginning in late spring and concluding in autumn. Privet hedges, known for their rapid growth, may require up to four trimmings annually to stay in shape. For conifers, summer trimming is optimal to prevent the development of bare spots, but ensure this is done no later than August to encourage recovery before the colder months. Yew hedges are best trimmed in early September to foster dense growth without risking frost damage to new cuts.
3. Pre-Trimming Assessment and Strategy
Initiating the hedge trimming process with a thorough assessment is crucial. Inspect the hedge meticulously for signs of damage, disease, or the presence of nesting wildlife, which is legally protected. This preliminary examination not only safeguards the living habitat within the hedge but also informs the trimming strategy to be employed. Planning your trimming approach is equally important. Determine the desired shape and height of the hedge, and identify any irregular areas that require special attention.
4. Trimming Method: Bottom Up
For a polished and consistent hedge appearance, initiate trimming at the base, gradually progressing upwards. This technique allows you to craft a uniform line and maintain an even shape across the hedge. Employ long, sweeping cuts to ensure a clean, straight edge. This bottom-to-top approach not only facilitates a visually pleasing result but also aids in achieving a balanced height and structure.
5. Precision Trimming Techniques
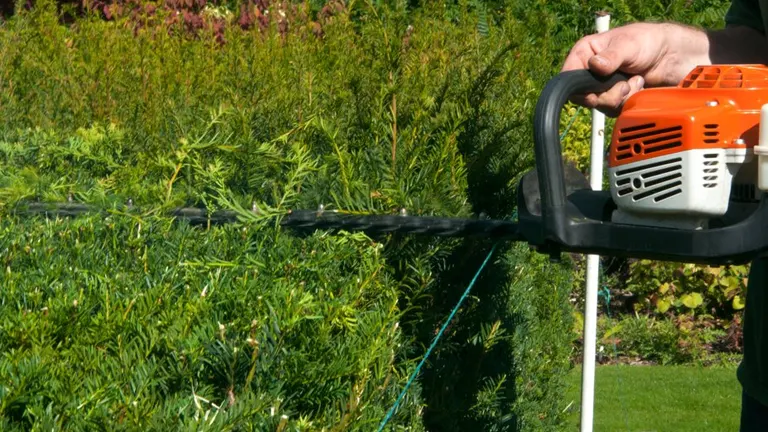
Achieving straight, clean edges on your hedge requires precision. To accomplish this, use a string line or a spirit level as a guide, stretching it along the length of the hedge at the desired height. This setup acts as a visual reference, ensuring that you trim in a straight line, which is key to attaining a neat, professional-looking finish. Additionally, taper the sides of your hedge so that the top is slightly narrower than the base. This technique, known as tapering, allows sunlight to penetrate the lower branches, fostering uniform growth and preventing the bottom from thinning out.
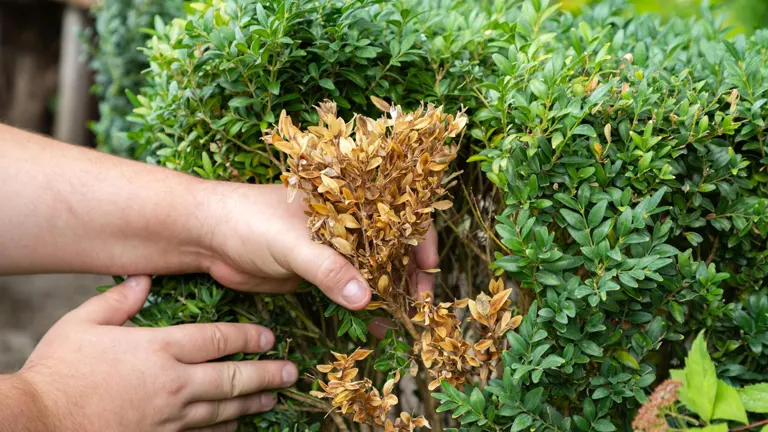
6. Enhancing Hedge Health and Appearance
To improve the health and appearance of your hedge, focus on identifying and addressing gaps. In denser sections, selectively prune branches to boost light penetration and air circulation. This targeted pruning encourages growth in sparse areas, leading to a fuller and more uniform hedge. Simultaneously, be vigilant about removing dead or diseased branches. These can be detrimental to the overall health of the hedge, as they may harbor pests or diseases that could spread to healthy sections.
7. Post-Trimming Care

The work isn’t over once the trimming is done. Proper aftercare is vital to maintain the health and appearance of your hedges. Immediately after trimming, it’s important to clear away all the debris and clippings. This not only keeps your garden tidy but also prevents potential pest infestations and diseases that can arise from decaying plant material. Regular maintenance activities like watering and fertilizing play a crucial role in the overall health of your hedges. They need consistent moisture, especially during dry periods, to facilitate growth and recovery from trimming. Fertilizing, on the other hand, provides essential nutrients that support lush, vibrant growth.
Embracing Topiary and Sculpting in Your Garden
Topiary, the art of shaping plants into ornate or geometric forms, can significantly enhance the aesthetic appeal of a garden. Starting with simpler geometric shapes can bring elegance and a sense of formality to your space. Here’s how to embark on the topiary journey successfully:
- Choose the Right Plant: Opt for a shrub with dense foliage and robust growth suitable for sculpting. Common choices include boxwood, yew, and privet, known for their compact leaves and adaptability to shaping.
- Employ Frames for Guidance: Utilize wire or wooden frames to outline the desired shape. These frames act as guides, helping the plant grow in the specific form you’re aiming for.
- Ensure Proper Care: Topiary requires consistent light and water to thrive. Position your plant in a spot that meets its sunlight and irrigation needs to encourage healthy growth.
- Use the Right Tools: A combination of hand secateurs for precision work and powered hedge trimmers for broader cuts is essential. These tools allow for meticulous shaping and maintenance of the topiary.
- Guide Growth with Cable Ties: Use cable ties to direct the growth of branches, ensuring they fill the frame evenly and maintain the intended shape.
- Initial and Ongoing Maintenance: After planting the shrub and installing the frame, perform a light trim to remove excess branches. This encourages growth in line with the frame’s shape. As the plant matures, more frequent trimming might be necessary to refine and maintain the shape, depending on the growth rate and type of shrub used.
Hedge Sculpting Ideas
Sculpting a hedge offers a delightful blend of artistry and horticulture, transforming a simple garden feature into a living sculpture. Here are some additional sculpting ideas to inspire your next garden project:
Animal Shapes
Create a whimsical garden by sculpting hedges into the forms of animals, such as elephants, giraffes, majestic deer, or graceful swans. Start with basic shapes and gradually add details to bring the animal forms to life.

Geometric Patterns
Incorporate a touch of modern design with hedges sculpted into precise geometric shapes, like spheres, cubes, or pyramids. These clean lines and regular forms can bring a structured aesthetic to your garden’s natural landscape.

Labyrinth Designs
A hedge maze or labyrinth adds an element of mystery and fun, providing both a visual spectacle and a physical journey. Design simple or complex pathways that invite exploration and contemplation.

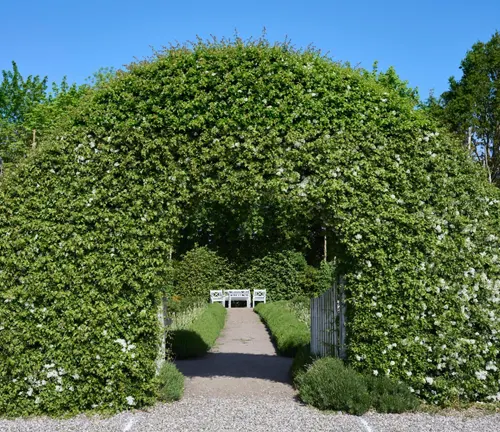
Architectural Elements
Echo the lines and forms of your home or famous landmarks by sculpting hedges into architectural features like arches, towers, or gateways. This approach can create a harmonious blend between the built environment and the natural world.
Seasonal Themes
Celebrate the changing seasons or festive occasions by adapting your hedge designs to reflect themes such as spring blossoms, summer suns, autumn leaves, or winter snowflakes. This dynamic approach keeps your garden visually interesting throughout the year.

Employing the proper techniques and care in hedge trimming transcends basic maintenance, elevating it to an art form that augments the beauty and vitality of your garden. By adopting these expert tips, you’ll not only enhance the aesthetic appeal of your hedges but also bolster their health and longevity, ensuring they remain a vibrant and attractive feature of your outdoor space.
FAQs
- What is the difference between a hedge trimmer and a hedge cutter?
Hedge trimmers are typically used for lighter, more precise jobs, such as shaping and final touches after a major trim. They are ideal for maintaining the hedge’s shape and health. Hedge cutters, conversely, are designed for more significant, heavy-duty tasks, such as cutting back overgrown or woody hedges, thanks to their larger blades and more robust power. - When is the best time to trim hedges in New Zealand?
The optimal time for hedge trimming varies with the type of hedge. For instance, cherry laurels and box hedges benefit from two to three trims per year, starting in late spring through autumn. Conifers should be trimmed in summer but not after August to avoid bare patches. Yew hedges are ideally trimmed in early September, while privet hedges might need up to four trimmings annually from spring to autumn. - How can I achieve straight lines when trimming hedges?
For perfectly straight lines, use string lines or a spirit level as a guide. Start trimming from the ground up, maintaining the guide line’s direction to ensure even cuts. For complex shapes like rolling waves or castle tops, use stakes and strings to outline the desired pattern before trimming. - Why is regular hedge trimming important?
Regular trimming promotes healthy growth, dense foliage, and maintains the desired shape of the hedge. It also prevents diseases and pest infestations by removing dead or diseased branches and facilitates sunlight penetration and air circulation within the hedge. - How should I prepare for hedge trimming cleanup?
Prepare by laying down a groundsheet or tarpaulin to collect debris, using a leaf blower to remove loose leaves, and having a hard-bristled broom and heavy-duty bin handy for cleanup. This preparation makes post-trimming cleanup more manageable and prevents waste from scattering across the garden. - What tools are needed for DIY hedge trimming?
For effective hedge trimming, you’ll need the right tools based on the hedge size and type. Small hedges require sharp pruning shears, while larger hedges may need electric or petrol hedge trimmers. Essential safety gear includes heavy-duty gloves, protective eyewear, long-sleeved clothing, non-slip shoes, and a breathing mask, especially when working with tall hedges or using ladders. - How do you trim taller hedges safely?
For taller hedges, consider using a hedge trimmer with an extended pole to avoid ladder use. If using a ladder, ensure it is stable and use a handheld trimmer for precision. Telescopic hedge shears offer a manual alternative, providing a quieter, maintenance-free option compared to powered trimmers. For very tall hedges or if you’re unsure about working at heights, hiring a professional tree trimming service is advisable for safety and efficiency.
I hope you found these tips helpful for mastering hedge trimming! Do you have any hedge-trimming tricks or questions? Share your thoughts in the comments below. Let’s keep our gardens looking sharp together!

David Murray
Forestry AuthorI'm David Murry, a forestry equipment specialist with a focus on chainsaw operation. With over 13 years of experience, I've honed my skills in operating and maintaining a wide range of machinery, from chainsaws to log splitters. My passion for the outdoors and commitment to sustainable forestry drive my work, which emphasizes safety, efficiency, and staying updated with industry advancements. Additionally, I'm dedicated to sharing my expertise and promoting environmental awareness within the forestry community.


Leave your comment