Mastering the Speed Square: A Handyman’s Ultimate Guide
- April 29, 2024
- 0 comment
A speed square may seem like just another tool in your toolbox, but its capabilities extend far beyond the basics. This guide will demystify the speed square, showcasing how its clever design makes it an indispensable tool for construction projects, woodworking, and more.
The Basics of a Speed Square
The speed square, also known as a rafter or triangle square, is distinguished by its rigid, triangular form. This tool is a fundamental element in the arsenals of both seasoned builders and enthusiastic DIYers, revered for its versatility in a multitude of tasks ranging from the simple to the complex.
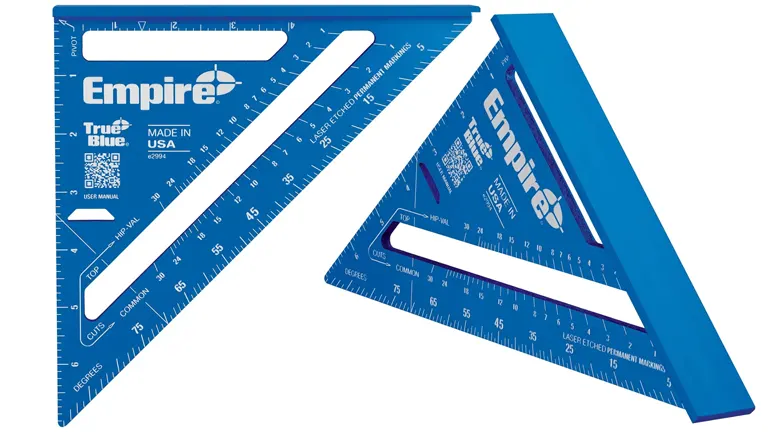
- The iconic shape of the speed square offers both straight edges and angular measurements, making it a multi-use tool that is compact and easy to handle.
- With its robust construction, the speed square is crafted to provide reliability and resilience, suitable for use with a wide array of materials including wood, metal, and plastic. Its durability ensures it can withstand the rigors of any job site.
- The thick edge, commonly referred to as the lip, is critical for precision. Designed to snugly align against any workpiece, it ensures that every measurement and cut is executed with accuracy. This edge is the foundation for all measurements, providing a stable base that prevents slipping or misalignment.
- Not merely for drawing lines, the speed square is invaluable for verifying squareness and flatness, measuring angles, and marking workpieces for cuts. Its ability to quickly and accurately determine angles enhances efficiency and precision in crafting joints, framing structures, and more.
Straight Lines and Simple Measurements
One of the most celebrated functions of the speed square is its ability to facilitate the drawing of perfect perpendicular lines with effortless precision. This fundamental capability is essential for countless projects, ensuring structures and components are squared and stable.
Effortless 90° Angles
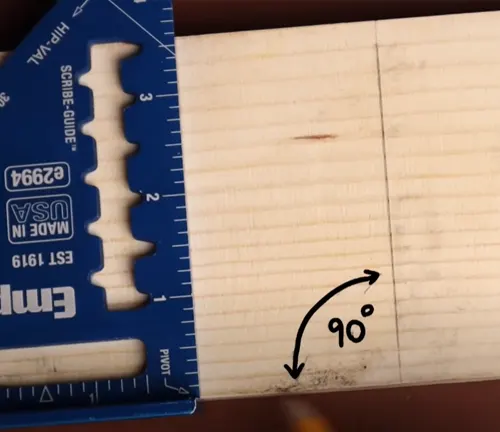
By aligning the lip—the speed square’s thick edge—flush against any material, it acts as a reliable guide for marking. This ensures that every 90° angle you draw is not only swift but flawlessly perpendicular. This is particularly crucial in projects where accuracy is paramount, such as in framing or when setting up foundational elements of a structure.
Versatile 45° Markings
A simple flip of the tool allows the user to transition smoothly from marking right angles to bisecting these into precise 45° angles. This feature is incredibly useful for tasks requiring diagonal cuts such as creating supports, braces, or decorative trims. The ease with which the speed square allows these adjustments exemplifies its value in improving task efficiency and precision.
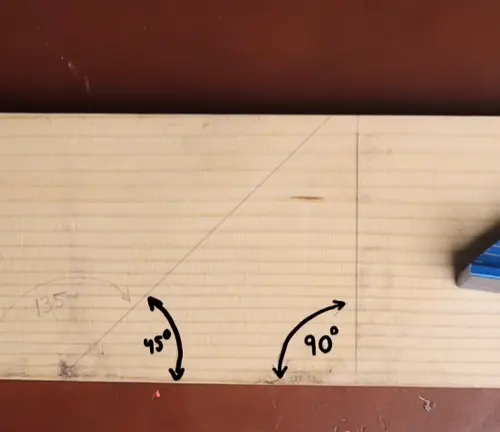
The ability to quickly and accurately establish these common angles streamlines the workflow, reducing the time and effort typically associated with measuring tools that require more complex setups. Whether you’re a professional craftsman or a home DIY enthusiast, the speed square simplifies your process, allowing you to focus more on the craftsmanship and less on the complexities of measurement.
Advanced Angling: More Than Just 90 Degrees
The speed square transcends its basic applications with its ability to mark any angle, serving as an invaluable tool for complex projects and custom designs. Its functionality as a protractor exemplifies its versatility and precision, essential for intricate woodworking, metalwork, and more.
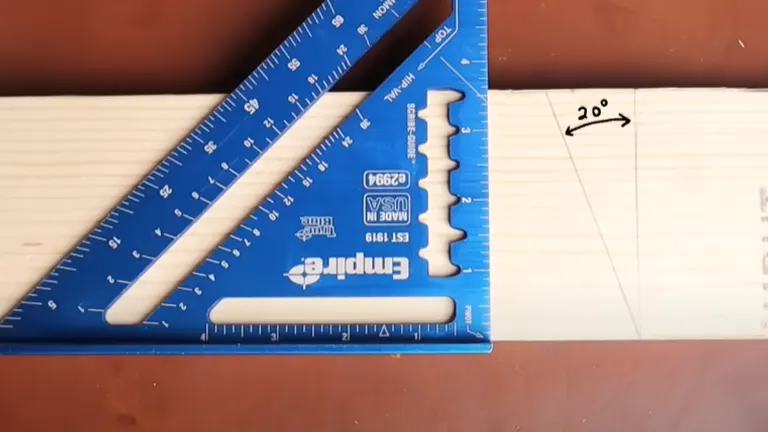
- The clever design includes a pivot point at one corner of the square, which serves as the fulcrum for angle adjustments. To mark a specific angle, such as 20°, you simply pivot the square around this point until the desired angle’s mark lines up with the edge of your material. This capability not only allows for the standard 45° and 90° angles but also for any other specific angle required, making it perfect for custom cuts and tailored project needs.
- This feature is especially beneficial in projects that require non-standard angles, such as custom furniture, complex joinery, or tailored framing. The ease of setting the tool to any desired angle accelerates the marking process, reduces errors, and enhances the overall quality of the finished work.
Leveling and Plumb Lines
The integration of leveling features within the speed square introduces another layer of utility, making it a multifaceted tool essential for ensuring vertical and horizontal accuracy.
Enhanced Accuracy with Levels
Attaching a level to the speed square can significantly increase the accuracy of angle measurements relative to the horizon. This setup is indispensable for tasks where precision is critical, such as in the accurate installation of joists, beams, or posts, ensuring that every element is perfectly horizontal or vertical.
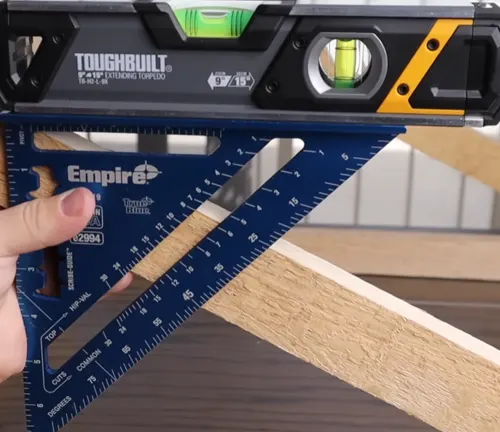
Plumb Lines for Vertical Accuracy
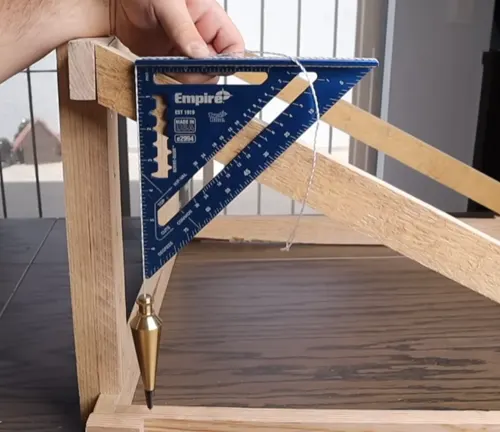
For situations where a traditional level cannot be used, a plumb weight offers a simple yet effective alternative. By suspending a plumb line from the pivot point of the speed square, you create a gravity-driven guide that indicates true vertical. This makeshift level is particularly useful in on-site adjustments where quick assessments are needed without the bulk of additional tools.
Whether you’re working on a high roof or adjusting structural components in tight spaces, the ability to turn your speed square into a plumb level means maintaining accuracy in all dimensions without needing extra tools.
Specialty Features: Scribe Notches and Rafter Calculations
The speed square is not just a simple angle-finding tool; it comes equipped with specialized features that enhance its utility in more complex construction tasks. Among these features are the scribe notches and integral rafter calculations, which cater to precise craftsmanship and detailed construction work.
Scribe Notches
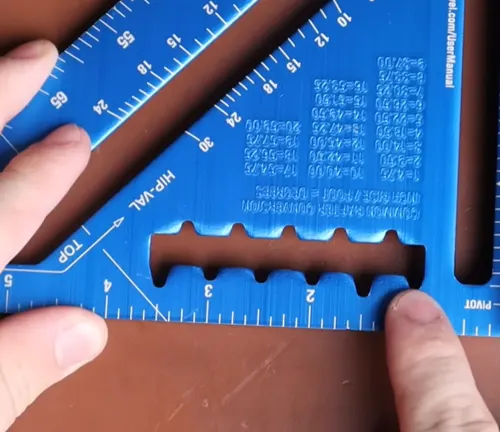
Most speed squares include scribe notches along one side, starting at one inch and marked at every quarter-inch interval. These notches facilitate the easy transfer of measurements across materials, making them indispensable for accurate marking and cutting tasks such as board ripping or precise layout work.
Whether you’re working on detailed joinery or need consistent spacing for hinges or handles, these notches allow for quick and consistent markings, enhancing workflow efficiency and reducing the chance of error.
Rafter Calculations
The design of the speed square includes specific markings that are crucial for constructing roof frameworks. These marks represent common roof pitches, providing carpenters with the essential angles needed to cut rafters accurately, ensuring they fit perfectly and form the structural backbone of any roof.
By simplifying what would otherwise be complex calculations, the speed square enables even those new to roofing to achieve professional results. The tool is designed to guide the user in making accurate plum and tail cuts, vital for the proper assembly and alignment of rafters.
Practical Applications in Construction
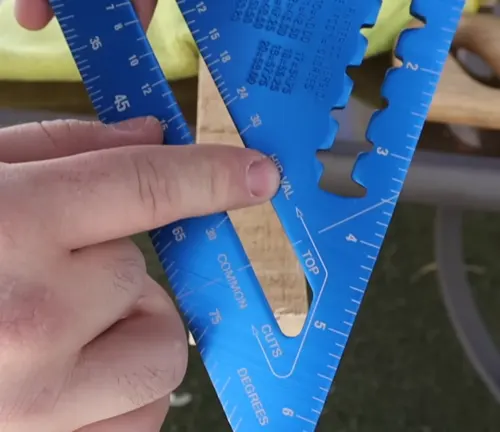
Understanding how to effectively use the bird’s mouth and tail cuts marked on a speed square is vital for ensuring that rafters integrate flawlessly into a building’s framework. These precise cuts are critical for the structural integrity and load distribution of a roof.
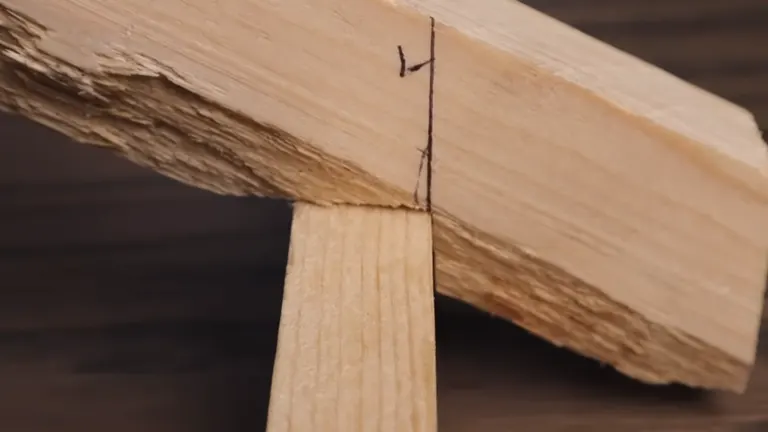
The speed square allows for exact markings, which translate into cuts that ensure the rafters not only fit seamlessly but also support the roof’s weight effectively. This precision is crucial in high-stakes environments where the safety and durability of the building depend on the accuracy of these cuts.
Advanced Roofing: Hip and Valley Angles with the Speed Square
Understanding the nuanced applications of hip and valley angles is essential for anyone involved in roofing, particularly when constructing rafters. These components are crucial for the structure of roofs, particularly where the rafters meet at non-perpendicular angles. The speed square simplifies these complex measurements, ensuring precision and consistency in every cut.
Hip and Valley Dynamics
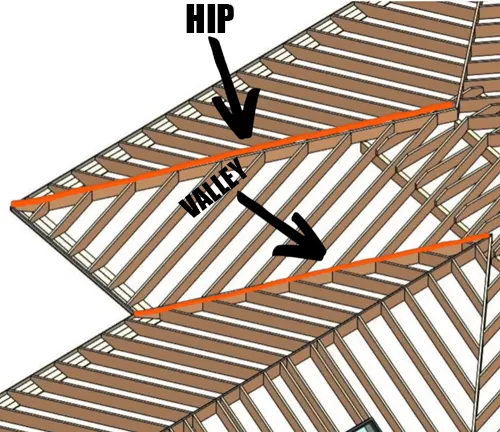
In roofing terminology, “hips” are the external angles formed by two sloping roof planes, while “valleys” are the internal dips where two slopes meet. Each requires careful calculation of angles to ensure tight, seamless fits that prevent weather ingress and maintain structural integrity.
When rafters are placed diagonally—as in hips and valleys—the distance they cover horizontally decreases, which affects the pitch. Traditional methods require recalculating these angles manually; however, the speed square comes with markings specifically for these adjustments, guiding the carpenter to make correct and efficient cuts for hip and valley rafters.
Practical Application in Construction
Using the tailored features of the speed square, carpenters can directly transfer the appropriate pitch marks to the material, eliminating guesswork. For example, when cutting a hip rafter:
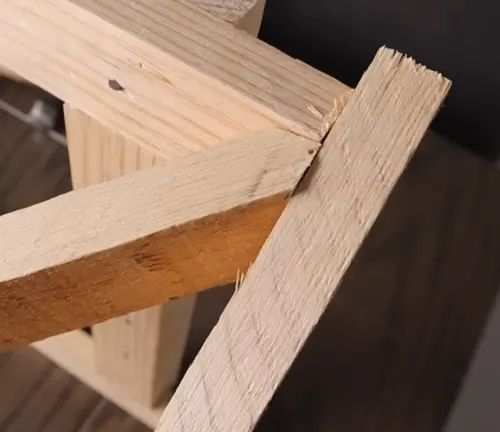
- Position the speed square on the lumber so that the hip and valley pitch markings align with the edge of the wood. This ensures that the angle of your cut will accommodate the unique geometry of hips and valleys.
- After marking the initial angle for the rafter, additional cuts for the bird’s mouth and tail are required. The speed square’s versatility allows you to mark these critical intersections quickly and accurately, ensuring that each piece fits precisely within the roof’s framework.
Versatility in Everyday Construction
The speed square is not limited to complex roofing tasks. It excels in everyday construction scenarios:
Repetitive Marking
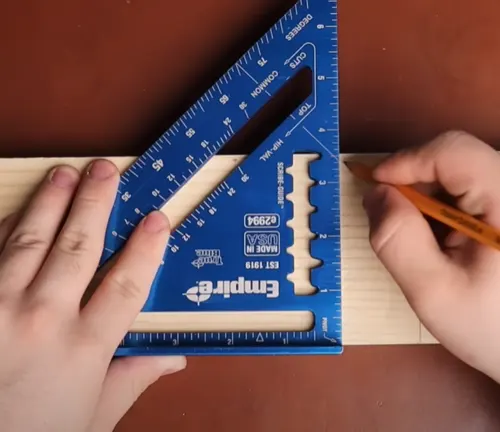
Many speed squares feature pre-marked notches or arrows at common dimensions, such as 1 and 1/2 inches, which is the standard thickness of a 2×4 used in framing. This allows for rapid marking of rafter positions and other repetitive tasks, speeding up the construction process and reducing errors.
Tool and Material Alignment
Beyond measuring and marking, the speed square is invaluable for ensuring the accuracy of other tools and assemblies. For instance, it can be used to verify that the base of a circular saw or the fence on a table saw is perfectly square to the blade, crucial for precise cuts.
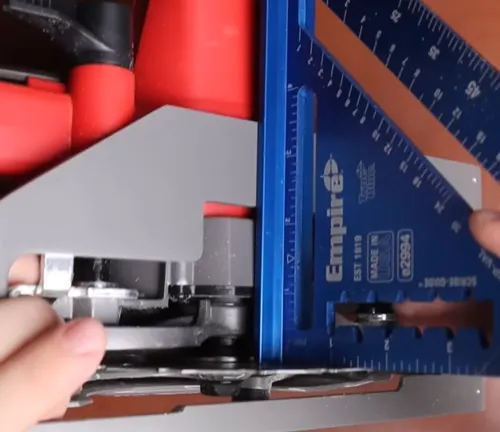
Checking Right Angles
Whether you’re assembling frames, and cabinets, or checking the squareness of welded joints, the speed square provides a quick reference to ensure everything is aligned at a perfect 90° angle.
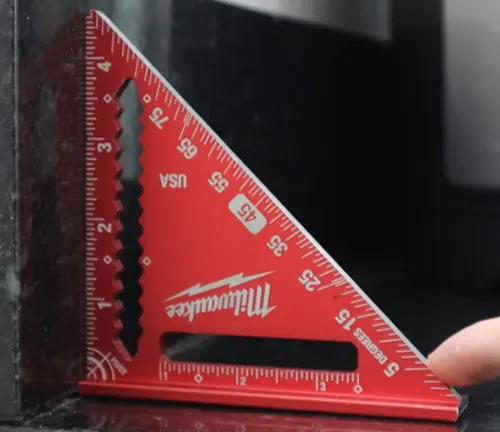
Speed Square vs. Protractor: Which Is Best?
 |  | |
|---|---|---|
| Primary Use | Marking angles and lines in construction | Measuring precise angles in various fields |
| Material | Metal or heavy-duty plastic | Usually plastic, sometimes metal or glass |
| Durability | High; built for rugged use | Varies; often less durable than metal |
| Functionality | Multi-functional; measures, guides cuts | Single-function; focused on angle measurement |
| Ease of Use | Easy for standard angles (90°, 45°) | Precise for any angle from 0° to 360° |
| Best For | Construction, woodworking | Technical drawing, education, engineering |
When choosing between a speed square and a protractor, consider the nature of your projects:
- Speed Square: Opt for this tool if your work primarily involves construction or woodworking. It’s sturdy, easy to use for common angles, and offers multiple functionalities beyond just angle measurement. Its robustness makes it suitable for heavy-duty tasks where quick, standard angle markings are frequently required.
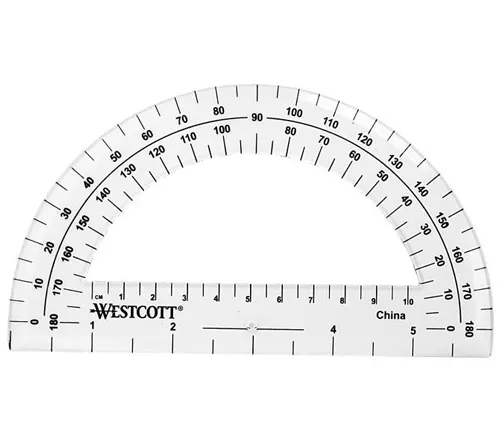
- Protractor: Choose a protractor if your projects require high precision in angle measurement across a wide range. It is essential for tasks in drafting, educational purposes, and engineering, where detailed and varied angle increments are crucial.
In summary, the decision between a speed square and a protractor hinges on the specifics of the task at hand—whether the priority is durability and multifunctionality for construction tasks or precision and range for detailed measurements in technical and educational settings.
Conclusion
A speed square might be compact, but its potential to impact projects is immense. From simple angle measurements to complex rafter calculations, this tool is a powerhouse that simplifies and enhances the craftsmanship in construction and beyond. Whether you’re a seasoned builder or a weekend warrior in your workshop, mastering the speed square can elevate your work from good to exceptional. Equip yourself with this knowledge, and your toolbox will never be the same.
FAQs
- What is a speed square used for in woodworking and construction?
A speed square is used for measuring and marking angles, making straight cuts, checking squareness, and laying out lines for cuts on various materials like wood, metal, and plastic. - Can a speed square replace a protractor?
Yes, a speed square can function similarly to a protractor. It can measure and mark various angles, making it invaluable for tasks requiring precision beyond standard 90° and 45° angles. - How do you use a speed square to find roof pitches?
Roof pitches can be calculated using the common rafter scale on a speed square. Align the pivot point with the top edge of the rafter and rotate the square until the desired pitch aligns with the edge of the rafter to mark the cut line. - What are scribe notches on a speed square for?
Scribe notches are small cuts along the edge of the speed square used for marking consistent, parallel lines, such as when ripping lumber or marking several points at a specific distance from the edge of a workpiece. - How does a speed square help with creating a bird’s mouth cut on a rafter?
To create a bird’s mouth cut, which allows a rafter to sit flat on the top plate of a wall, use the speed square to mark out the vertical and horizontal cuts of the notch by aligning the square with the correct pitch and angle on the rafter. - Is a speed square useful for checking the squareness of tools?
Absolutely. You can use a speed square to check the 90° angle between the blade and the base of tools like circular saws, table saws, and even check the squareness of door frames or furniture during assembly. - Can a speed square be used on non-wood materials?
Yes, speed squares are versatile tools that can be used on a variety of materials including metal, plastic, and tile, making them useful for a broad range of construction and DIY projects.
We hope you found our guide on mastering the speed square helpful! Whether you’re a seasoned pro or a curious newcomer, we’d love to hear how the speed square has transformed your projects. Share your stories or tips in the comments below, and if you found this guide useful, don’t hesitate to pass it along to fellow crafters. Let’s keep learning and building together!
David Murray
Forestry AuthorI'm David Murry, a forestry equipment specialist with a focus on chainsaw operation. With over 13 years of experience, I've honed my skills in operating and maintaining a wide range of machinery, from chainsaws to log splitters. My passion for the outdoors and commitment to sustainable forestry drive my work, which emphasizes safety, efficiency, and staying updated with industry advancements. Additionally, I'm dedicated to sharing my expertise and promoting environmental awareness within the forestry community.


Leave your comment