How to Treat Lumber for Outdoor Use
- August 20, 2024
- 0 comment
To ensure that wood used outdoors lasts longer and maintains its appearance, How to Treat Lumber for Outdoor Use is essential. Untreated wood is vulnerable to harsh weather conditions, such as rain, snow, and intense sunlight, which can cause it to warp, crack, or rot over time.
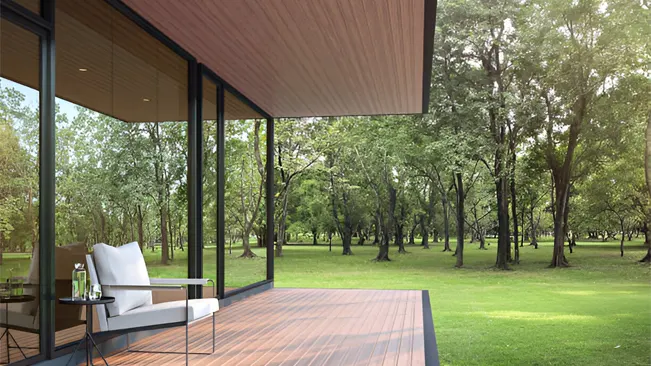
Additionally, outdoor wood is often at risk of insect infestations, such as termites and carpenter ants, which can weaken the structure. By following the steps in How to Treat Lumber for Outdoor Use, you can create a protective barrier that helps prevent these issues, allowing your outdoor projects like decks, fences, and furniture to remain strong and beautiful for many years.
Understanding the Importance of Lumber Treatment
Wood used outdoors faces harsh conditions like moisture, sunlight, and changing temperatures. If left untreated, wood can rot, warp, and attract insects, leading to damage and a shorter lifespan. Treating wood helps protect it from these elements, making it more durable, preventing decay, and keeping it looking good for longer.
By treating your outdoor wood, you not only extend its life but also maintain its appearance. This simple step can save you time and money in the long run, ensuring your outdoor projects remain strong and beautiful despite the weather and other environmental challenges.
Step-by-Step Guide to Treat Lumber for Outdoor Use
1. Prepare the Wood Surface
Before you start treating the wood, it’s essential to prepare it properly to ensure the treatment works effectively. Follow these steps:
- Clean the Surface: Start by removing any dirt, grime, or old coatings from the wood using a stiff brush. For areas affected by mold or algae, use a biocidal cleaner to eliminate these growths and prevent them from returning.
- Sand the Wood: After cleaning, sand the wood to smooth out rough spots and remove any leftover finishes. This step is crucial because it helps the treatment penetrate deeper into the wood, making it more effective.
- Inspect for Damage: Take a close look at the wood for any signs of rot or insect damage. If you find any damaged areas, repair or replace them before applying any treatment. This ensures the wood is in good condition and ready for the next steps.
2. Apply a Wood Preservative
Once the wood is clean, dry, and free of damage, it’s time to apply a wood preservative. This step protects the wood from rot, insects, and moisture. Here’s how to do it:
- Choose the Right Preservative: There are different types of preservatives available, including oil-based, water-based, and solvent-based options. For outdoor wood, oil-based preservatives are often the best choice because they penetrate deeply and provide long-lasting protection.
- Application: Use a brush or roller to apply the preservative generously. Be sure to coat all surfaces, including the ends and edges of the wood, as these areas are particularly vulnerable. Let the first coat dry completely, then apply a second coat if needed for added protection.
3. Stain the Wood (Optional)
If you want to enhance the wood’s appearance while adding extra protection, consider applying a stain:
- Select a Stain: Choose a stain designed for outdoor use that matches the wood type and your desired color. Stains come in a range of colors and finishes, so you can achieve the look you want while still protecting the wood.
- Application: Apply the stain evenly with a brush or cloth, working in small sections to ensure uniform coverage. Depending on the product and the look you’re going for, you might need to apply multiple coats. Make sure each coat dries completely before applying the next one.
4. Finish with a Sealant
To provide the ultimate protection, seal the treated wood with a sealant. This final step locks in the preservative and stain, while also adding a waterproof barrier that keeps the wood safe from the elements.
- Choose a Sealant: Look for a sealant that’s specifically designed for outdoor wood. Options include clear finishes, varnishes, or specialized wood sealers that offer different levels of protection and sheen.
- Apply the Sealant: Use a clean brush to spread the sealant evenly over the entire surface of the wood, making sure to cover all areas, especially joints and end grains where water can easily seep in. Let the sealant dry thoroughly before using the treated wood in your project. This will ensure that the wood is fully protected and ready to withstand outdoor conditions.
Maintenance Tips
To ensure your outdoor wood projects remain in top condition, regular maintenance is essential. By following a few simple steps, you can protect the wood from the elements and keep it looking great for years to come.
1. Inspect Annually
It’s important to inspect your outdoor wood structures at least once a year. Look for any signs of wear and tear, such as:
- Fading Color: Over time, exposure to sunlight can cause the wood to lose its rich color and appear dull or gray. Fading is a sign that the wood’s protective treatments may be wearing off.
- Cracks: Temperature changes and moisture can cause wood to expand and contract, leading to cracks. These cracks can allow water to penetrate deeper into the wood, increasing the risk of rot and decay.
- Peeling Finishes: If you notice that the wood’s finish is peeling or flaking off, it’s a sign that the sealant or stain is no longer providing adequate protection. This could leave the wood vulnerable to moisture and UV damage.
By catching these issues early, you can address them before they lead to more serious damage, ensuring the longevity of your outdoor wood.
2. Reapply Treatments
Outdoor wood is constantly exposed to the elements, so it’s important to reapply preservative treatments and sealants regularly. Depending on how much exposure your wood has to sunlight, rain, and other environmental factors, you may need to reapply these treatments every 12 to 18 months. Here’s what to keep in mind:
- Exposure Levels: Wood that is fully exposed to the sun or rain will wear down faster than wood that is partially sheltered. For fully exposed wood, consider reapplying treatments annually to maintain maximum protection.
- Visible Wear: If you notice significant wear, such as fading, cracks, or peeling finishes before the 12-month mark, it’s a good idea to treat the wood sooner. Waiting too long could lead to irreversible damage.
- Proper Application: When reapplying treatments, make sure the wood is clean and dry before starting. Follow the same steps as you did during the initial treatment to ensure even coverage and optimal protection.
3. Clean Regularly
Regular cleaning is crucial for keeping your outdoor wood in good condition. Over time, debris like leaves, dirt, and twigs can accumulate on the wood’s surface. If left unattended, this debris can trap moisture, leading to decay and mold growth. Here’s how to keep your wood clean:
- Remove Debris: Use a broom or brush to regularly sweep away leaves, dirt, and other debris from the wood surface. Pay special attention to corners and joints where debris tends to accumulate.
- Wash the Surface: Periodically, give your outdoor wood a thorough cleaning with mild soapy water and a soft brush. This helps remove any built-up grime or mildew. Avoid using harsh chemicals, as they can damage the wood or strip away protective treatments.
- Rinse and Dry: After washing, rinse the wood thoroughly with clean water to remove any soap residue. Allow the wood to dry completely before reapplying any treatments or sealants.
By following these maintenance tips, you can significantly extend the life of your outdoor wood projects, keeping them strong, beautiful, and protected against the elements for many years. Regular upkeep not only preserves the wood’s appearance but also ensures it remains a durable and reliable material for your outdoor spaces.
Conclusion
Treating lumber for outdoor use is essential to protect it from the harsh conditions it will face, such as moisture, sunlight, and temperature changes. Properly treated wood resists rot, warping, and insect damage, ensuring that your outdoor projects like decks, fences, and furniture remain strong and visually appealing for many years.
By following the steps of cleaning, sanding, applying preservatives, staining, and sealing, and then maintaining your wood with regular inspections and reapplications, you can significantly extend the life of your outdoor wood, saving time and money in the long run. Taking these proactive measures will help you create beautiful, durable outdoor spaces that can withstand the elements and continue to look great over time.
Frequently Asked Questions
1. Why is it important to treat lumber for outdoor use?
Treating lumber for outdoor use is important because it protects the wood from moisture, insects, and UV damage, preventing rot, warping, and decay.
2. What types of treatments can be used on outdoor wood?
Common treatments include applying wood preservatives, staining, and sealing. Pressure treatment is also widely used for outdoor wood.
3. How often should I reapply wood treatments?
Depending on the wood’s exposure to the elements, treatments should be reapplied every 12 to 18 months, or sooner if you notice signs of wear.
4. Can I treat the wood myself, or should I hire a professional?
You can treat the wood yourself by following the proper steps, but for large or complex projects, you might consider hiring a professional for the best results.
5. What is the difference between a wood preservative and a sealant?
A wood preservative penetrates the wood to protect it from decay and insects, while a sealant provides a surface barrier that protects against moisture and UV rays.
6. Do I need to sand the wood before applying a treatment?
Yes, sanding the wood helps remove old finishes and smooth rough areas, allowing the treatment to penetrate better.
7. Can I use any type of stain on outdoor wood?
No, you should use a stain specifically designed for outdoor use, as it will provide better protection against the elements.
8. What should I do if I notice cracks or peeling in the wood finish?
If you notice cracks or peeling, it’s time to reapply the treatment. Addressing these issues promptly will prevent further damage.
9. How do I clean treated outdoor wood?
Clean treated wood by regularly sweeping away debris and washing it with mild soapy water. Avoid harsh chemicals that could damage the wood.
10. Is it necessary to apply a stain if I’ve already used a wood preservative?
Applying a stain is optional but recommended if you want to enhance the wood’s appearance while adding another layer of protection.
We hope this guide on treating lumber for outdoor use has provided you with valuable insights to enhance your outdoor projects. Whether you’re building a deck, crafting a fence, or designing outdoor furniture, understanding how to properly treat your wood will ensure it lasts longer, stays strong, and looks great for years to come.
If you have any experiences or tips related to treating outdoor lumber, please share them in the comments below. Your input can help others in the woodworking and construction communities achieve better results. Also, don’t forget to share this article with fellow woodworkers, builders, and DIY enthusiasts to spread knowledge about this essential step in protecting outdoor wood. Happy building!

Edward Smith
Forestry AuthorWoodworking is about more than crafting; it's a harmonious connection with nature, mastering tools, and preserving our environment. I'm here to share my knowledge and experiences with you, forging a future where we can embrace wood's beauty and utility while safeguarding our forests' health and diversity.







Leave your comment