How to Build a Raised Garden Beds Easily and Effectively: Step-by-Step Guide
- October 1, 2024
- 0 comment
Creating a raised garden bed is a fantastic way to elevate your gardening, providing benefits like better soil quality, improved drainage, and easier upkeep. Whether you’re a gardening pro or just starting, building your own raised garden bed can help you grow healthier plants with less hassle. In this guide, we’ll walk you through simple steps and share Raised Garden Bed DIY tips to make your project successful, along with Easy Raised Bed Ideas for beginners.
Benefits of Raised Garden Beds
Raised garden beds offer many benefits, making them a top choice for all gardeners. One major advantage is improved soil drainage. The raised structure lets extra water drain away, reducing waterlogging and supporting healthier roots. Another perk is that you can fill these beds with the best soil for raised garden beds, providing plants with rich nutrients for strong growth. This setup also minimizes soil compaction, improving air flow to roots and helping plants thrive. Whether you’re after cheap raised garden bed ideas or aiming for a more customized setup, raised beds make gardening simpler and more rewarding.

Another big advantage of raised garden beds is accessibility. The elevated height reduces bending and kneeling, making it easier for people with mobility challenges to enjoy gardening. Plus, raised beds come in various shapes and sizes, offering flexibility to fit any garden space, even smaller areas. These beds also naturally help block pests and weeds, reducing the need for extra maintenance. With raised bed gardening tips and DIY garden bed ideas, you can create a garden that’s both beautiful and functional, making it easy to grow a wide variety of plants.
Tools Needed To Build a Raised Bed
Lumber
- 2 x 6″ heart redwood boards (for the sides)
- 4 x 4″ redwood (for corner support)
Tools
- Miter saw or circular saw (or have the hardware store cut wood for you)
- Power drill
- Measuring tape
Fasteners
- 2.5 or 3-inch long deck screws (8 gauge)
Optional Supplies
- Weed blocking landscape fabric (for under the beds)
- Hardware cloth (for gopher-proofing)
- Galvanized mending braces (to stabilize longest sides)
- Non-toxic food-grade wood sealer (for added longevity)
Step-by-Step Guide to Build Raised Garden Bed
Step 1: Prepare Your Site
The first step in building a raised garden bed is to prepare the spot you’ve chosen. Pick a location that gets plenty of sunlight, as vegetables and flowers usually need bright conditions to thrive. Once you’ve found the right place, use a sharp digging or trenching shovel to clear away the top layer of grass and weeds. This will make it easier to start fresh with healthy soil. Be sure to remove any rocks or roots you come across, as they can interfere with your plants. Prepping the area well helps create a smoother and more productive DIY garden bed.
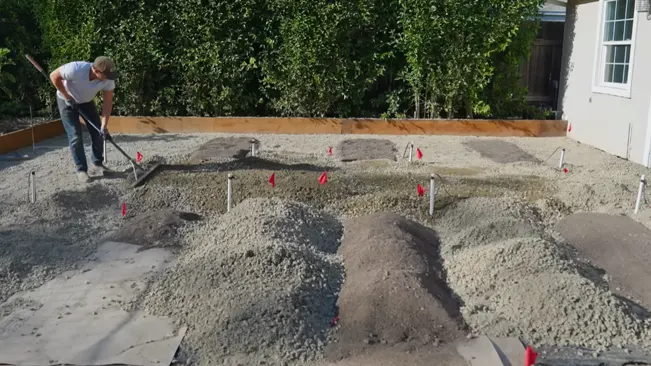
If your site is on a slope, start prepping from the lowest point. Use your shovel to dig a shallow trench for the first 10-foot board. It’s important to keep both sides of the raised bed level, so you might need to dig a bit deeper on the higher side. Take your time positioning the first board, as it sets the foundation for the entire raised garden bed layout. A level bed is key for good drainage and looks neat in your garden. Keep a level tool handy to check as you go, ensuring everything lines up perfectly for a smooth DIY garden bed.
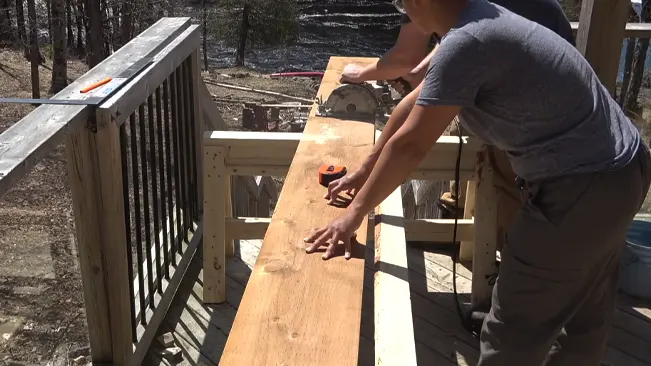
Step 2: Cut Boards to Length
When cutting your boards, consider which side you want facing outward. Since the soil inside the raised garden bed will push outward, it’s smart to account for any natural bowing in the wood. If a board has a slight curve, position it with the bow facing inward this way, the soil will help press it out evenly once the bed is filled. Choosing the right orientation for each board not only improves the look of your DIY garden bed but also strengthens its structure over time.
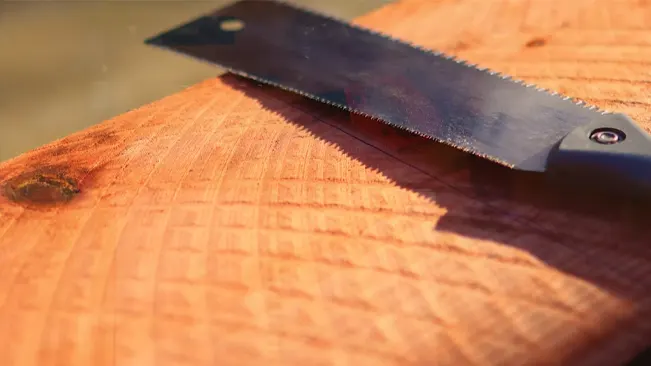
When cutting your boards, consider which side you want facing outward. Since the soil inside the raised garden bed will push outward, it’s smart to account for any natural bowing in the wood. If a board has a slight curve, position it with the bow facing inward—this way, the soil will help press it out evenly once the bed is filled. Choosing the right orientation for each board not only improves the look of your DIY garden bed but also strengthens its structure over time.
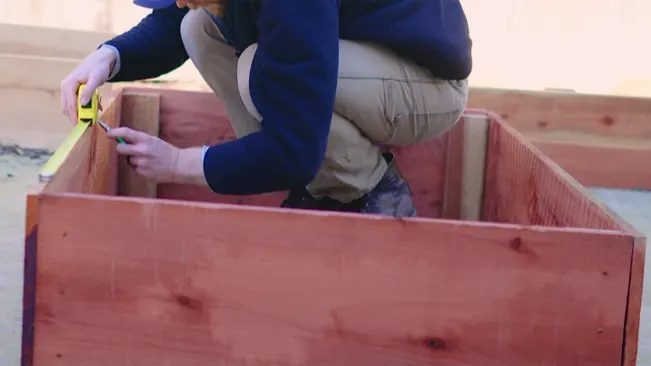
Step 3: Get Everything Level
Creating a level structure is essential when building a raised garden bed, and it can be one of the trickiest parts. If the first layer of boards isn’t level, adding more layers will become difficult, leading to an uneven or unstable bed. Use a level and a rubber mallet to adjust the first board as needed. You may need to remove soil from one side or add a bit to the other to get it just right. Once the board is level, secure it by piling dirt on each side or using clamps to keep it steady. Starting with a level base ensures a strong, balanced DIY garden bed that will last.
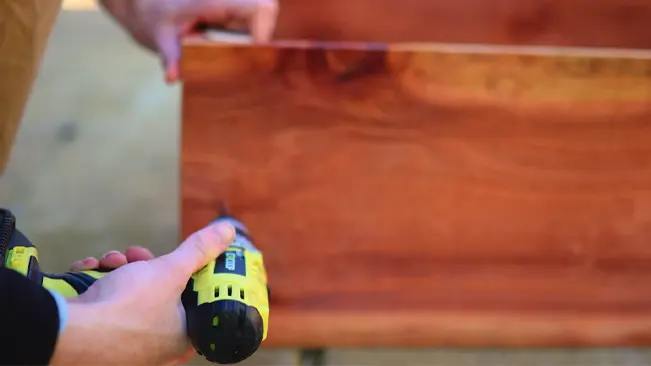
With your first layer level and secure, it’s time to fasten the corners of the raised garden bed. Start by positioning a 10-foot board along one of the 4-foot sides. To avoid splitting the wood, drill pilot holes at each corner. This step is essential for a snug fit without weakening the wood. Once the pilot holes are ready, use a driver to insert three 3-inch deck screws into each corner to keep the boards tightly secured. This will give your DIY garden bed a strong, stable frame that’s built to last.
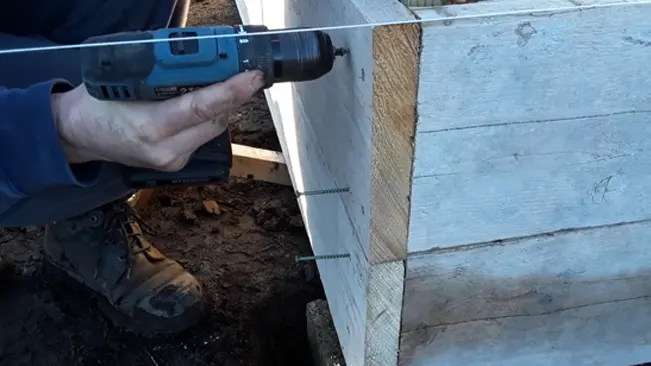
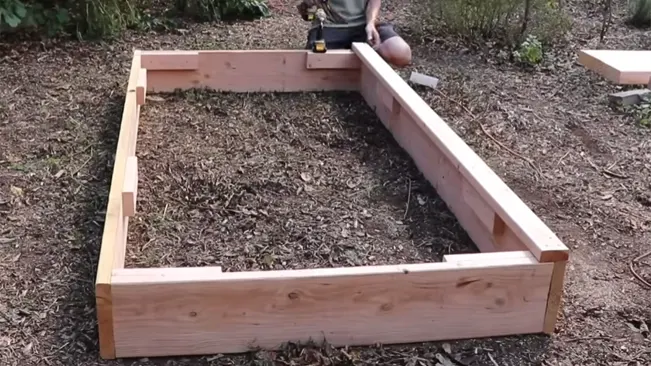
Step 4: Fasten Corners
With the first layer level and secure, you’re ready to fasten the corners. Align a 10-foot board with a 4-foot side at the lower elevation. To prevent the wood from splitting, drill pilot holes at each corner this step ensures a snug fit without damaging the wood. Once the pilot holes are ready, use a driver to insert three 3-inch deck screws into each corner, making sure the boards are firmly secured. This tight fastening will add strength and stability to your raised bed frame.
After fastening the first corner, repeat this process for the other 4-foot side. Keep checking that both sides are level and properly aligned with each other. Next, align the remaining 10-foot board, verifying the level once more. Use a framing square to make sure the corners are at right angles. If needed, gently tap the boards into place with a rubber mallet until everything lines up. Taking this extra care will pay off, as a well-built frame is key to the stability and durability of your raised garden bed.
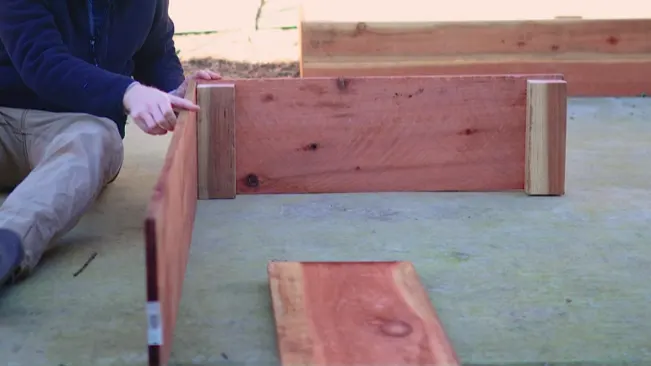
Step 5: Add Corner Stakes
To improve the stability of your raised garden bed, add corner stakes. Start by cutting a 2 x 4 x 12-foot board into four 2-foot sections. These stakes will go into the ground and extend slightly above the top of the bed for extra support. As you hammer each stake into place, position it snugly against each corner of the bed. Use a rubber mallet to secure the stakes firmly, driving them deep enough to provide solid support for your DIY garden bed.
With the stakes in place, drill pilot holes into the long 2×8 boards to securely attach them to the stakes. This connection strengthens the bed’s corners and prevents any shifting or bowing once it’s filled with soil. As you secure each corner, keep checking the level and use a framing square to ensure everything is square. To allow for final adjustments, start by driving just one screw into each board, then add the remaining screws once you’re sure everything is perfectly aligned. This careful setup will give your raised garden bed a sturdy, lasting structure.
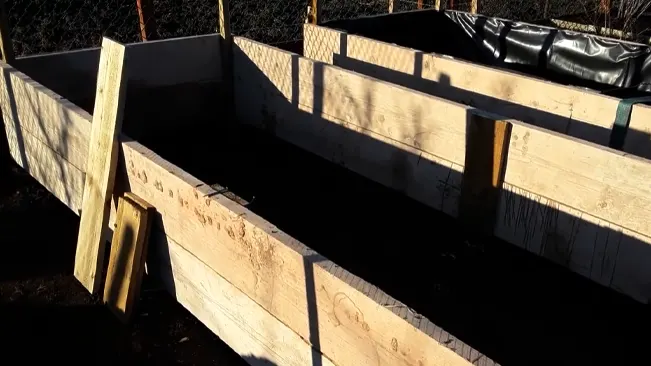
Step 6: Add the Second Row of Boards
With the stakes set, drill pilot holes in the long 2×8 boards and fasten them securely to the stakes. This extra step reinforces the corners, keeping the boards from shifting or bowing under the weight of the soil. As you secure each corner, keep an eye on the level and use a framing square to ensure everything is perfectly square. Begin by driving in one screw per board to allow for any final adjustments. Once you’re confident in the alignment, add the remaining screws to create a solid, stable frame for your raised garden bed.
Paying close attention during this step ensures that your raised garden bed stays level and looks great. Keep your level handy and adjust as needed to maintain alignment. Securing each corner of the boards creates a strong framework capable of supporting the weight of soil and plants, setting you up for a productive and enjoyable gardening experience.
Step 7: Cut and Add More Stakes
After finishing the second row, it’s time to add extra stakes for support. Cut four additional 2 x 4 x 2-foot stakes and place them evenly along the long sides of the raised garden bed. Hammer these stakes securely into the ground to reinforce the structure. These added stakes help prevent the long boards from bowing outward once the bed is filled with soil, ensuring it maintains its shape and durability over time.
With the stakes in place, secure them to the 2×8 boards using 2.5-inch screws. This added connection further stabilizes the structure, especially once the heavy soil and plants are added. Keep checking the level as you work to maintain the integrity of the frame. By reinforcing both the corners and the sides, you’ll create a sturdy raised garden bed that can easily support the weight of soil and the growth of your plants.
Step 8: Trim Stakes
With all corner stakes and side supports secured, it’s time to trim the tops of the stakes for a neat finish. Use a hand saw, circular saw, or reciprocating saw to cut the tops of the stakes flush with the top of the 2×8 boards. This step enhances the overall look of your raised garden bed and removes any potential hazards from protruding stakes. A clean cut also makes it easier to add a lip or cap later on, boosting both the appearance and functionality of your garden bed.
Trimming the stakes is a key finishing touch that improves both safety and the overall look of your raised garden bed. After cutting, double-check to make sure everything is still level and aligned. This extra attention to detail ensures that your garden bed not only looks great but also functions well, creating a stable and supportive environment for your plants to thrive.
Step 9: Add the Lip
Now that the structure is complete and the stakes trimmed, you can add a decorative and functional lip to your raised garden bed. Start by measuring the actual length of one side at the top, then cut a 2 x 4 to fit this measurement. Use a speed square to mark 45-degree angles at the ends of the board, then make miter cuts with your circular saw. These cuts will give the lip a clean, polished look, enhancing both the appearance and functionality of your DIY garden bed.
Once the lip is cut, drill pilot holes into the board and secure it to the sides and tops of the stakes with 3-inch screws. Repeat the process for the remaining three sides, making sure each miter joint is tightly fastened for added stability. The lip not only improves the appearance of your raised garden bed but also provides a handy surface for resting tools or plants while working in the garden.
Step 10: Build More Beds
If you’re enjoying the process of building your raised garden bed and want to expand your gardening area, consider adding more beds. Start by lightly tapping a stake into the ground to mark where your next bed will go. Then, stretch a length of string or twine between the stakes to create a straight line, helping align the edges of the new beds with the existing ones. This method will give your garden a neat and organized look, making it easy to expand your planting space.
Lastly, while it might sound like a fun idea, consider adding a quirky touch to your garden, like a decorative garden guardian perhaps even a robotic triceratops! This playful addition can enhance the aesthetic of your raised garden bed area and spark conversations with visitors. As you finish your project, take pride in your work and enjoy the rewards of your new, beautiful garden beds.
Conclusion
Building a raised garden bed is a rewarding project that enhances the beauty of your outdoor space while offering a practical way to grow healthier plants. By following the steps from site preparation and precise measurements to sturdy assembly and ongoing maintenance, you’ll create a thriving garden for fresh produce or vibrant flowers. The benefits of raised beds, like improved drainage, better soil quality, and easier access for gardening tasks, make them a great choice for both new and experienced gardeners.
FAQs
- What materials are best for building a raised garden bed?
Cedar and redwood are popular choices due to their natural resistance to rot, but untreated pine can also work if you’re on a budget. For a more permanent solution, consider using composite materials or concrete blocks. - How deep should a raised garden bed be?
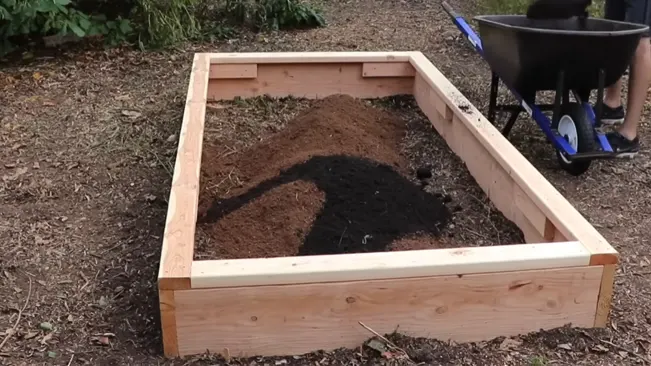
A depth of 12 to 18 inches is generally recommended for most vegetables and flowers, providing ample space for root growth. However, certain deep-rooted plants may benefit from even deeper beds. - How do I prepare the soil for my raised garden bed?
Fill your raised bed with a mix of high-quality topsoil, compost, and organic matter. A common ratio is one-third each of topsoil, compost, and peat moss or other organic materials to create a nutrient-rich growing environment. - Do I need to line the bottom of my raised garden bed?
Lining the bottom is optional, but it can help prevent weeds from growing up into your bed. Some gardeners use landscape fabric or cardboard to suppress weeds while allowing water to drain. - How often should I water my raised garden bed?
Raised beds tend to dry out faster than in-ground gardens, so it’s important to monitor soil moisture regularly. Aim for about an inch of water per week, adjusting based on rainfall and specific plant needs. - Can I grow any type of plant in a raised garden bed?
Yes, you can grow a wide variety of plants in raised beds, including vegetables, herbs, and flowers. Just be sure to select plants that suit your climate and the specific conditions of your garden. - How do I prevent pests in my raised garden bed?
Implementing companion planting, using row covers, and introducing beneficial insects can help manage pests naturally. Regular monitoring and prompt action at the first signs of trouble are essential. - How do I prepare my raised garden bed for winter?
Clear out any dead plants and debris, and consider adding a layer of mulch or planting cover crops to protect the soil during winter. This helps maintain soil health and prepares your bed for the next growing season. - Can I build a raised garden bed on concrete or gravel?
Yes, you can build a raised bed on hard surfaces like concrete or gravel, but it’s important to provide adequate drainage. Make sure to fill the bed with a proper soil mixture to ensure healthy root growth. - How long will my raised garden bed last?
The lifespan of a raised garden bed depends on the materials used. Cedar and redwood can last 10-15 years, while untreated wood may last around 5-7 years. Composite materials can last even longer, making them a durable option.

Joel Cunningham
Forestry AuthorI'm Joel Cunningham, an expert in pruning and weed management with over a decade of experience. My skills are rooted in formal training and extensive practice, focusing on advanced pruning techniques and efficient weed control. I'm known for my quality work, precision, and deep understanding of plant health and soil dynamics. My contributions extend to educational initiatives where I share sustainable practices and advice, establishing myself as a reliable and authoritative figure in the gardening community.


Leave your comment