5 Best Microgreens You Must Grow at Home
- June 11, 2024
- 0 comment
Microgreens are compact powerhouses of nutrition and flavor, making them essential additions to any home garden. Perfect for those with limited space, these tiny greens are surprisingly easy to cultivate right in your kitchen. This guide will walk you through the top five microgreens that you can grow at home, enhancing your meals with fresh, vibrant, and nutritious greens with minimal effort.
Why Grow Microgreens at Home?
Growing microgreens is a quick and easy way to add freshness to your meals. These small plants pack a big punch of flavor and nutrients, and you can grow them right in your kitchen. They only take a few weeks to be ready to eat, and you don’t need a lot of space or special tools. When you grow your own, you know they’re fresh and free from unwanted chemicals. Plus, watching your greens grow from tiny seeds to ready-to-eat plants is fun and very satisfying.
1. Sunflower Microgreens
Sunflower microgreens top the popularity charts due to their robust flavor and substantial texture. Start by soaking the seeds for 24 hours to ensure even germination. After soaking, spread them evenly across a pre-moistened coconut coir medium. Instead of burying them under the soil, simply place another container over the seeds to block out light and press down to encourage root growth. Within a week, you’ll witness the shoots reaching up to four inches tall, ready to be snipped and tossed into your next salad.
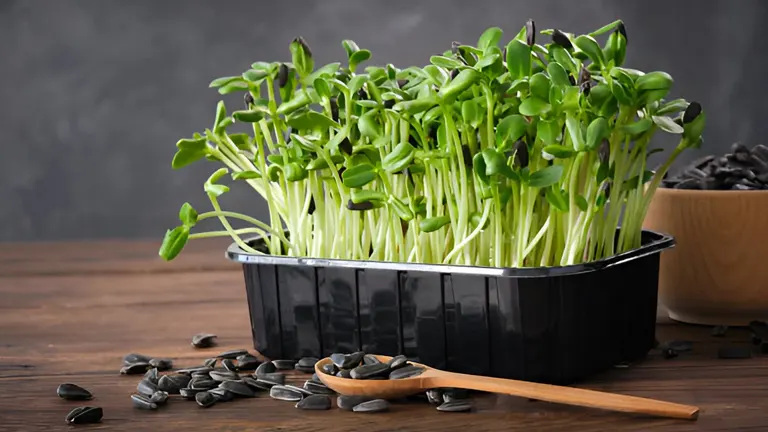
Sunflower microgreens are a nutritional powerhouse, rich in essential fatty acids, vitamins, and minerals. They are particularly high in Vitamin E, an antioxidant that helps protect skin from oxidative damage. Sunflower microgreens also provide significant amounts of Vitamin B6, magnesium, and iron, which support energy metabolism and blood health.
Usage Tip: Sunflower Microgreen Salad
- Ingredients: Sunflower microgreens, mixed baby greens, cherry tomatoes, cucumber, feta cheese, olive oil, lemon juice, salt, and pepper.
- Instructions: Combine sunflower microgreens with baby greens, sliced cherry tomatoes, and cucumber in a salad bowl. Crumble feta cheese over the top. Dress with olive oil, fresh lemon juice, salt, and pepper to taste. Toss gently and serve fresh.
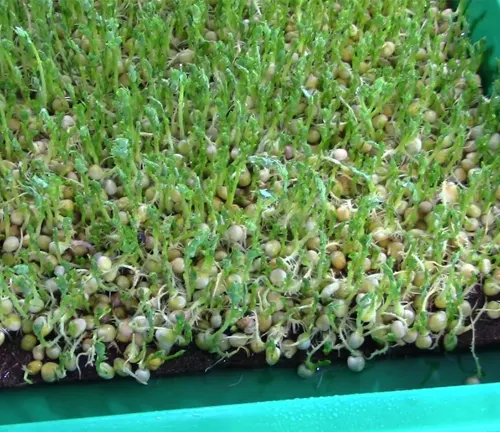
2. Pea Shoot Microgreens
Following closely are Pea Shoot microgreens, celebrated for their sweet taste and ease of cultivation. Similar to sunflower seeds, begin by soaking pea seeds in water for 24 hours. Whether you choose to cover the seeds with more medium or use another container to block light, pea shoots are forgiving and will thrive. In about a week, they’ll stretch up to five or six inches and can be harvested to add a fresh, sweet flavor to your dishes.
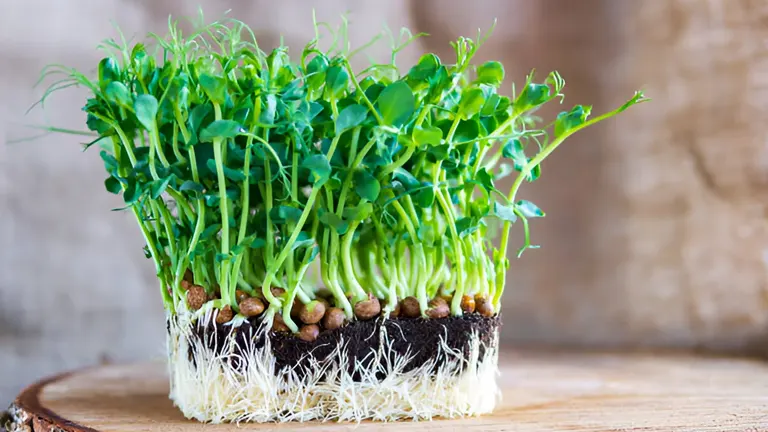
Pea shoots are tender and packed with several nutrients, including Vitamin C, which is crucial for immune function, skin health, and iron absorption. They also contain Vitamin A, which is important for vision health, immune function, and skin integrity. Additionally, pea shoots offer a good dose of folate, essential for DNA synthesis and cell division.
Usage Tip: Pea Shoot and Avocado Toast
- Ingredients: Pea shoot microgreens, ripe avocado, whole grain bread, lime, salt, red pepper flakes.
- Instructions: Toast the whole grain bread until golden and crisp. Mash the avocado with lime juice and salt, then spread generously on the toast. Top with a handful of pea shoot microgreens and a sprinkle of red pepper flakes for a bit of heat.
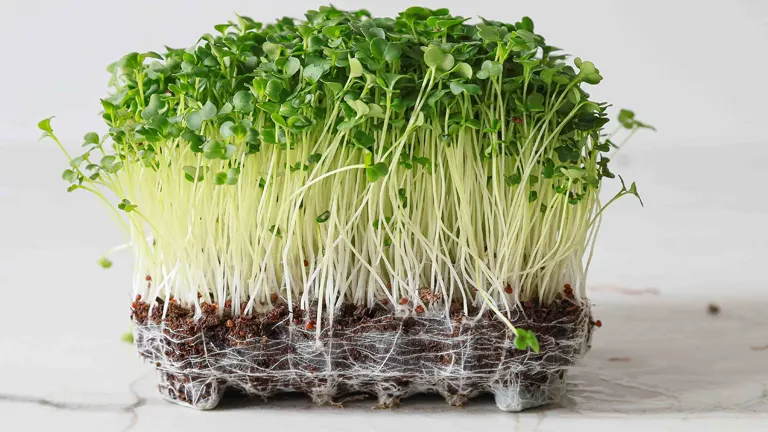
3. Radish Microgreens
For those who enjoy a spicy kick, Radish microgreens are a perfect choice. These fast-growers don’t require pre-soaking. Sprinkle the seeds over your medium, lightly cover them, and keep them well-watered. Radish microgreens shoot up quickly, ready for harvest in just six days, adding a peppery zing to soups, salads, and sandwiches.
Radish microgreens are high in Vitamin C, potassium, and dietary fiber, which can help in digestion and maintaining healthy blood pressure. They also have beneficial amounts of calcium and Vitamin K, which are important for bone health and blood clotting, respectively.
Usage Tip: Radish Microgreen Tacos
- Ingredients: Radish microgreens, soft corn tortillas, grilled chicken or fish, salsa, lime wedges, and cilantro.
- Instructions: Warm the tortillas and fill them with grilled chicken or fish. Add a generous helping of radish microgreens and top with your favorite salsa. Garnish with fresh cilantro and a squeeze of lime for extra zest.
4. Broccoli Microgreens
Broccoli microgreens are known for their health benefits, packed with vitamins and minerals. They require a similar method to others but make sure to weigh them down after seeding to ensure they grow straight and tall. Uncover after three days to reveal yellow shoots that will soon turn green with exposure to light. Within a week, these nutritious shoots are ready to enhance your meals.
Broccoli microgreens are supercharged with sulforaphane, a potent compound with powerful anticancer properties. They are also a great source of Vitamin C and K, along with folate and dietary fiber. Regular consumption of broccoli microgreens can help in reducing inflammation and protecting against various diseases due to their high antioxidant content.
Usage Tip: Broccoli Microgreen Soup
- Ingredients: Broccoli microgreens, vegetable broth, garlic, onion, potato, olive oil, cream (optional), salt, and pepper.
- Instructions: In a pot, sauté chopped onion and garlic in olive oil until translucent. Add diced potatoes and cook until slightly soft. Pour in vegetable broth and bring to a boil. Simmer until the potatoes are fully cooked. Stir in broccoli microgreens, cook for another minute, then blend the soup until smooth. Add cream for a richer texture, season with salt and pepper, and serve warm.
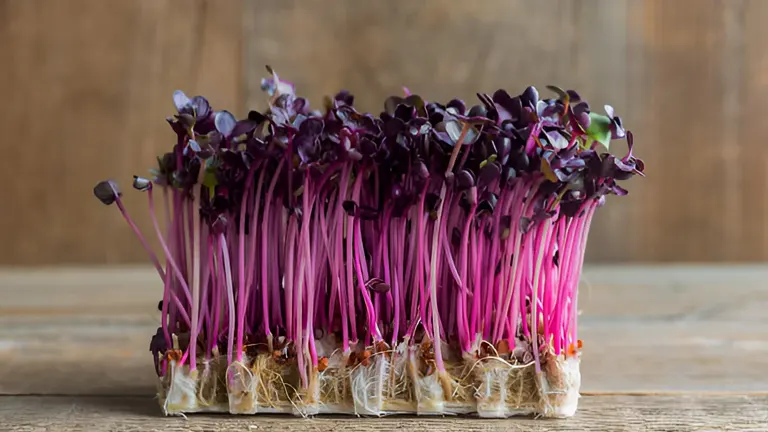
5. Cress Microgreens
Lastly, Cress microgreens are as delightful in flavor as they are in appearance. Start by soaking the seeds, which form a gel-like medium, for 24 hours. Transfer them directly to your growing medium and keep them moist. In about six days, these delicate shoots will be ready to harvest and make a great addition to sandwiches or as a garnish.
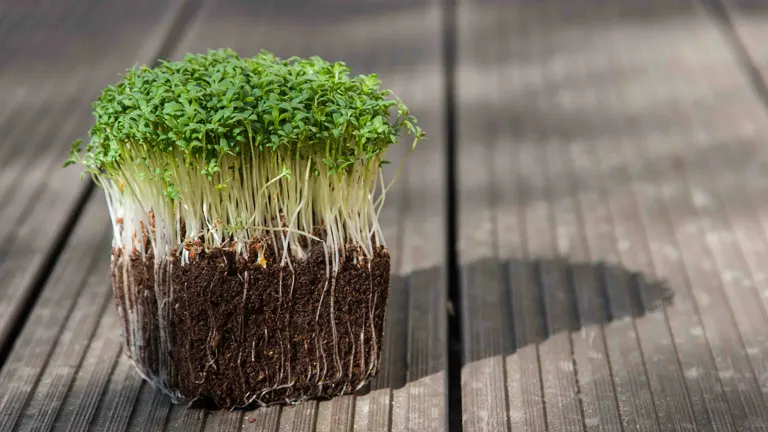
Cress microgreens are exceptionally rich in Vitamin C, Vitamin K, and Vitamin A. They also offer a substantial amount of dietary fiber, iron, and calcium. The peppery leaves are not only perfect for adding a kick to dishes but are also beneficial for bone health and the immune system.
Usage Tip: Cress Microgreen Sandwich
- Ingredients: Cress microgreens, whole grain bread, cream cheese, cucumber slices, salt, and pepper.
- Instructions: Spread cream cheese on two slices of whole grain bread. Layer one slice with cucumber, sprinkle with salt and pepper, and cover generously with cress microgreens. Top with the second slice of bread, press down lightly and cut in half.
Troubleshooting Tips for Growing Microgreens
Growing microgreens is generally straightforward, but like any gardening activity, it can sometimes present challenges. Here are common issues you might face along with practical solutions to ensure your microgreen garden thrives:
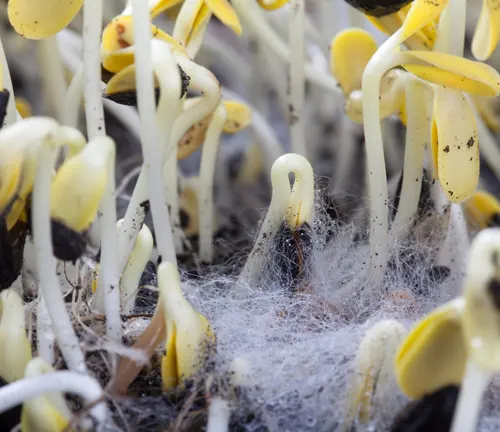
Mold Growth
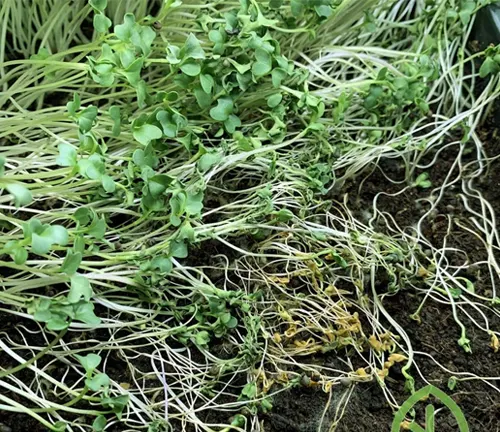
Mold on microgreens is usually a sign of too much moisture and poor airflow. To prevent mold, ensure your microgreens are not sitting in soggy soil and that the air around them moves freely. This can be achieved by not overwatering, ensuring proper tray drainage, and using a small fan to circulate air if growing indoors. A fine mist spray bottle can also help by keeping watering even and controlled.
Uneven Growth
Uneven growth in microgreens often results from inconsistent lighting. If some parts of your microgreen tray are reaching higher than others, try rotating the trays periodically to ensure all parts receive equal light exposure. If you’re using artificial lights, make sure they are evenly spaced above the trays. Reflective surfaces like aluminum foil can also help redirect light to less exposed areas.
Pests
Dealing with pests such as aphids or fungus gnats involves maintaining a clean growing environment and being proactive with natural pest controls. Keep your growing area free from plant debris and excess water. If pests appear, treat the microgreens with insecticidal soap or a diluted neem oil solution. It’s essential to test these treatments on a small section first to ensure they do not harm the plants.

Yellowing Leaves
If your microgreens’ leaves start turning yellow, this might be due to nutrient deficiencies, especially if you’re using a medium that lacks essential nutrients. Although microgreens generally need fewer nutrients than mature plants, starting them in nutrient-fortified soil or using a light, balanced, water-soluble fertilizer can provide them with sufficient nutrients for healthy growth.
Slow Growth
Slow or stunted growth can be caused by insufficient light or suboptimal temperatures. Make sure your microgreens are kept in an area with a temperature between 65-75°F (18-24°C) and receive adequate light. This might mean placing them closer to a sunny window or using grow lights for a longer duration each day.

Damping Off
Damping off is a fungal disease that causes microgreens to rot at the base and collapse. This problem is exacerbated by dense sowing and overwatering. To prevent it, sow seeds at a density that allows adequate air circulation, water carefully to avoid soaking the soil, and ensure your growing medium is well-draining. Adding perlite to your soil mix can improve drainage and help prevent this issue.
Equipment and Tool Recommendations for Growing Microgreens
| Equipment/Tool | Description | Recommended Product |
|---|---|---|
| Containers | Lightweight, shallow trays ideal for space management and easy handling. | 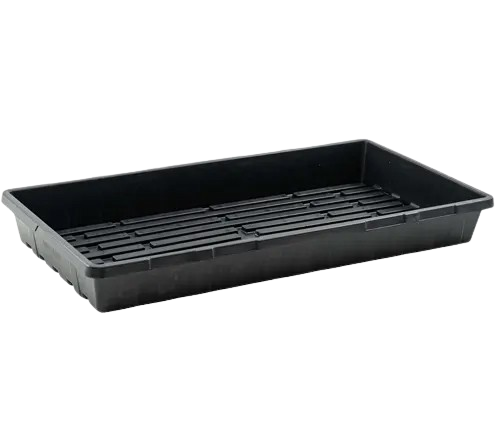 Bootstrap Farmer 1020 Trays Bootstrap Farmer 1020 Trays |
| Growing Medium | Lightweight, shallow trays are ideal for space management and easy handling. | 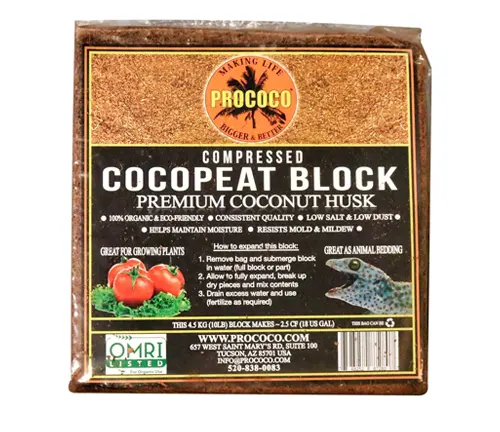 Prococo CocoPeat Prococo CocoPeat |
| Watering Can | Should provide a gentle shower to avoid disturbing the soil or seeds. | 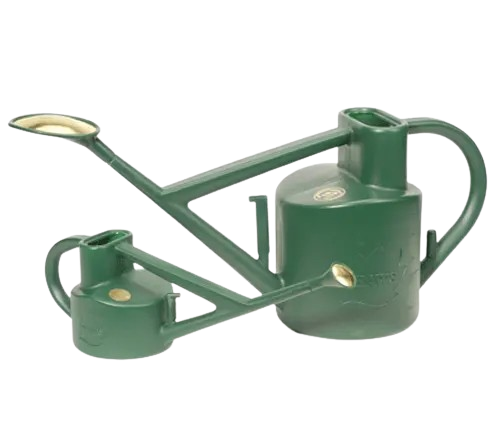 Haws Practical Watering Can |
| Spray Bottle | Essential for gentle watering, especially in the seedling stage. | 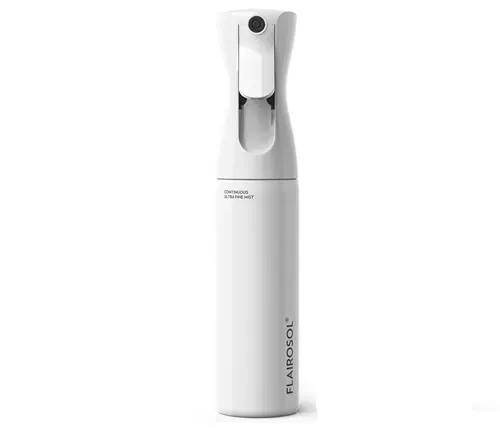 Flairosol Spray Bottle |
| Grow Light | Necessary for consistent light, beneficial in areas with limited natural sunlight. |  SunBlaster NanoTech T5 Grow Light |
| Nutrients | Optional for providing a nutrient boost in inert growing mediums like coconut coir. | 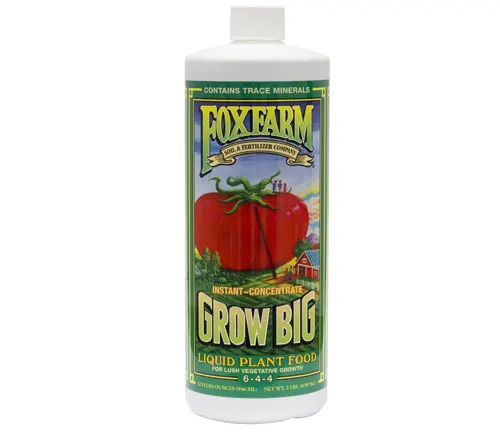 FoxFarm Grow Big Liquid Plant Food |
| Scissors | Sharp, precise for clean cutting during harvest without disturbing the roots. |  Fiskars Micro-Tip Pruning Snips |
Begin Your Microgreen Journey
With the basics now in your gardening toolkit, you’re ready to start your adventure with microgreens. These tiny but mighty greens not only add a burst of color and nutrition to your dishes but also bring the joy of gardening into any corner of your home. Remember, each microgreen variety offers its unique flavor and health benefits, so feel free to experiment and find your favorites. Whether you sprinkle them over a morning omelet, blend them into smoothies, or garnish your gourmet dishes, microgreens will surely elevate your home cooking.
FAQs
- What are microgreens?
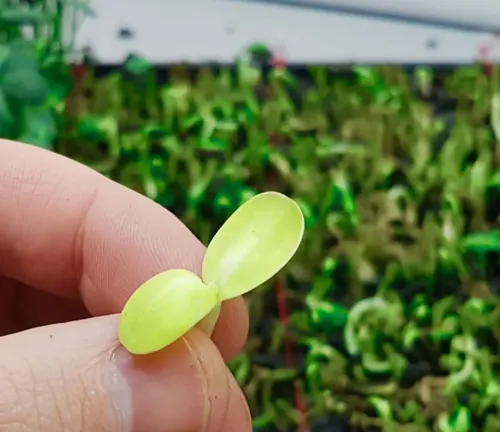
Microgreens are young vegetable greens that are approximately 1–3 inches tall. They are an intermediate growth stage between sprouts and baby leaf vegetables. Microgreens are renowned for their nutritional benefits and are used to enhance flavor in dishes. - Which microgreens are easiest to grow for beginners?
Pea shoots and radish microgreens are among the easiest to grow, making them perfect for beginners. They require minimal care and grow quickly, providing gratification in just a few days. - What is the best time of year to grow microgreens indoors?
Microgreens can be grown indoors year-round! The controlled environment of your home means you can start microgreens anytime as long as you provide them with sufficient light and warmth. - How often should I water microgreens?
Microgreens need to be kept consistently moist but not waterlogged. Typically, watering them once every day or two with a spray bottle is sufficient to keep the soil moist without oversaturating. - Do microgreens need sunlight?
While microgreens don’t require direct sunlight, they do need light. If sufficient natural light is not available, especially in winter months, consider using a grow light to ensure healthy growth. - How do I harvest microgreens without damaging the plants?
Use sharp scissors or a knife to cut the microgreens just above the soil line. Ensure your cutting tool is clean to avoid introducing any diseases to the plants. - Can microgreens be regrown after harvesting?
Most microgreens do not regrow after harvesting. However, some, like pea shoots, can produce a second or even third crop. Generally, it’s best to start a new batch for consistent yield and quality. - How do I prevent mold in my microgreen trays?
Ensure your growing medium is well-aerated and not overly wet. Good air circulation is crucial, so consider placing a fan near your growing area to improve airflow. Using a medium like coconut coir, which helps prevent overwatering, can also reduce the risk of mold. - What should I do if my microgreens are not growing evenly?
Uneven growth can be caused by inconsistent lighting or moisture. Make sure all parts of your microgreen tray receive equal light, either by rotating the tray regularly or adjusting your light source. - Are there any special nutrients I should add to the soil for growing microgreens?
Microgreens typically do not require additional nutrients if grown in a quality potting mix. Since they are harvested early in their growth cycle, they utilize the seed’s energy and minimal nutrients from the soil.
Have you tried growing microgreens, or are you planning to start? Share your experiences or any questions in the comments below—we’re excited to hear about your green adventures! If you found this guide helpful, please feel free to share it with fellow gardening enthusiasts on social media. Happy growing!

David Murray
Forestry AuthorI'm David Murry, a forestry equipment specialist with a focus on chainsaw operation. With over 13 years of experience, I've honed my skills in operating and maintaining a wide range of machinery, from chainsaws to log splitters. My passion for the outdoors and commitment to sustainable forestry drive my work, which emphasizes safety, efficiency, and staying updated with industry advancements. Additionally, I'm dedicated to sharing my expertise and promoting environmental awareness within the forestry community.


Leave your comment