7 Essential Tips for Successful Raised Bed Gardening
- June 3, 2024
- 0 comment
Raised bed gardening is a powerful technique for enhancing your garden, offering superior soil management and a longer growing season. Ideal for areas with poor soil quality or limited space, raised beds elevate your gardening game, literally and figuratively.
This guide provides you with seven crucial tips to set up and maintain your raised beds, ensuring you sidestep common pitfalls and cultivate a thriving garden. Let’s get your garden beds built right from the ground up!
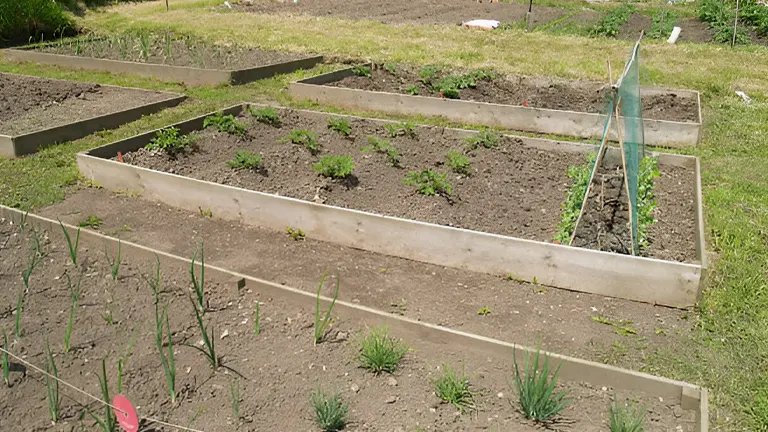
1. Optimal Size for Raised Beds
When planning your garden, choosing the right size for your raised beds is crucial, both for ease of maintenance and cost-effectiveness. A size of 4 feet by 8 feet is widely recommended. This dimension allows you to easily reach the center from either side without the need to step into the bed, which is essential for avoiding soil compaction.
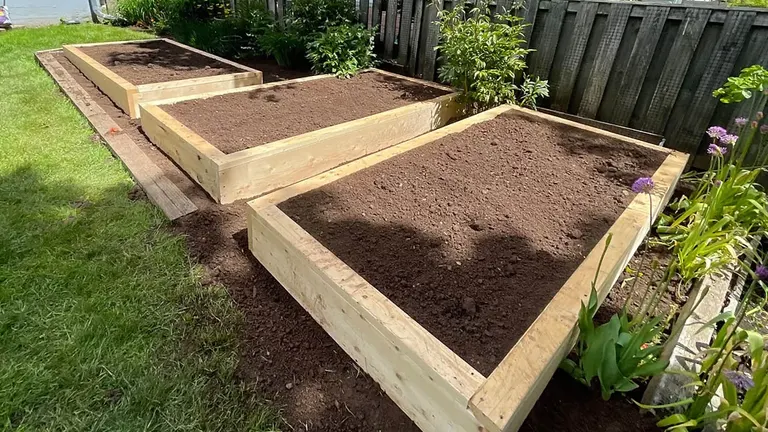
It also optimizes material use: typically, three 8-foot longboards are sufficient to construct one bed, with one board cut in half to serve as the shorter ends. This setup reduces waste and simplifies the construction process, making it a practical choice for gardeners of all skill levels.
2. Importance of Pathways
Properly planning the pathways between your raised beds is just as critical as the beds themselves. Pathways that are at least 3 feet wide are ideal because they provide ample room for easy access and movement, allowing you to work comfortably without stepping into the growing area.
This spacing helps prevent soil compaction, which can inhibit plant growth. To ensure the pathways meet your specific needs, it’s beneficial to physically measure and test the space. This step ensures that the pathways not only accommodate your garden tools and wheelbarrows but are also wide enough for comfortable kneeling and moving, thus enhancing your overall gardening efficiency.
3. Depth Matters
The depth of your raised beds is crucial for both your comfort and the health of your plants. For beds placed over fertile ground, a minimum depth of 6 inches is generally adequate. However, for gardens set on hard surfaces such as concrete, you’ll want a depth of 12 to 14 inches.
This ensures that vegetables with deeper root systems have enough space to thrive. Additionally, if you’re in an area with burrowing pests like gophers, adding a layer of hardware cloth at the base of deeper beds can provide essential protection, keeping your roots safe and your plants healthy.
4. Selecting the Right Materials
Choosing the appropriate materials for your raised beds is essential for ensuring both their longevity and the safety of your garden. Treated lumber, which can leach chemicals into the soil, should be avoided to maintain a healthy growing environment.
Instead, consider natural wood options like cedar or redwood. These woods are naturally resistant to decay and don’t release harmful substances, making them safer choices for your garden. Alternatively, fabric and metal raised beds offer unique benefits: fabric beds enhance root aeration and prevent root circling, while metal beds provide durability and can add a sleek, modern look to your garden setup.
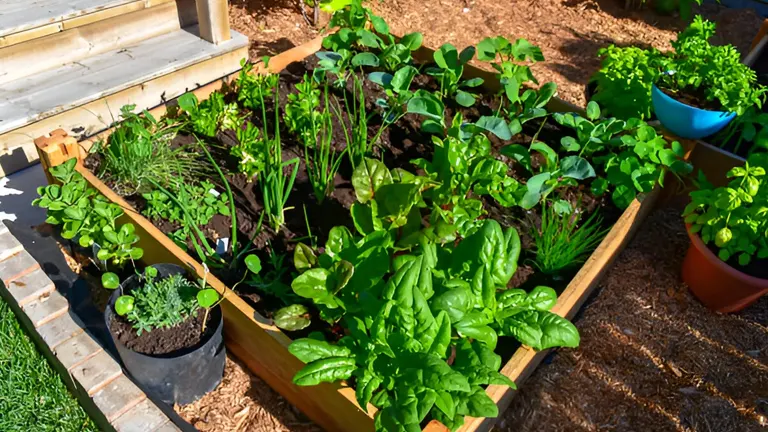
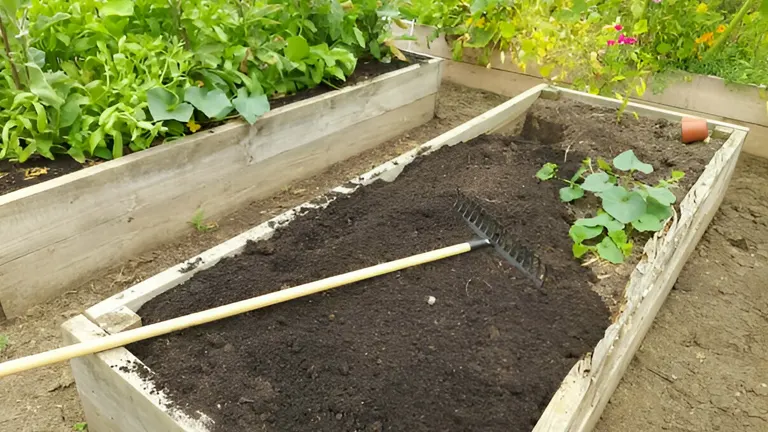
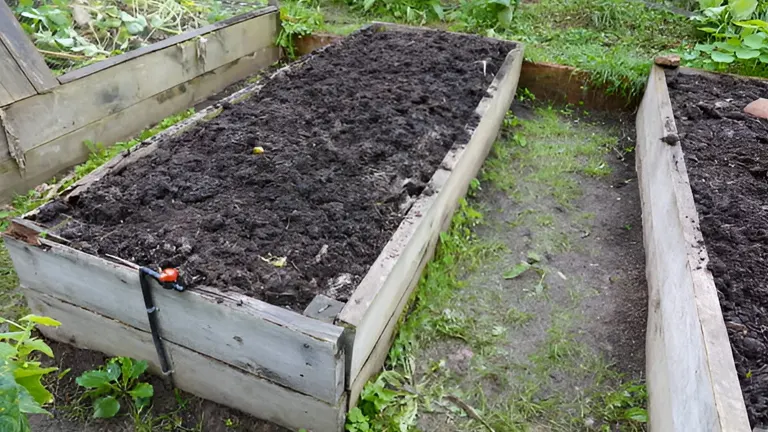
5. Filling Your Beds
One of the most common pitfalls in raised bed gardening is using the wrong type of soil. Standard garden soil is often too dense and can lead to poor drainage and compacted roots. Instead, use a light, fluffy potting mix designed for raised beds, which promotes better drainage and easier root growth.
For gardeners looking to economize, consider the “lasagna” method: layer organic materials like leaves and twigs under a top layer of quality soil. This approach not only cuts costs but also gradually improves soil fertility as the organic layers decompose.
6. Regular Maintenance
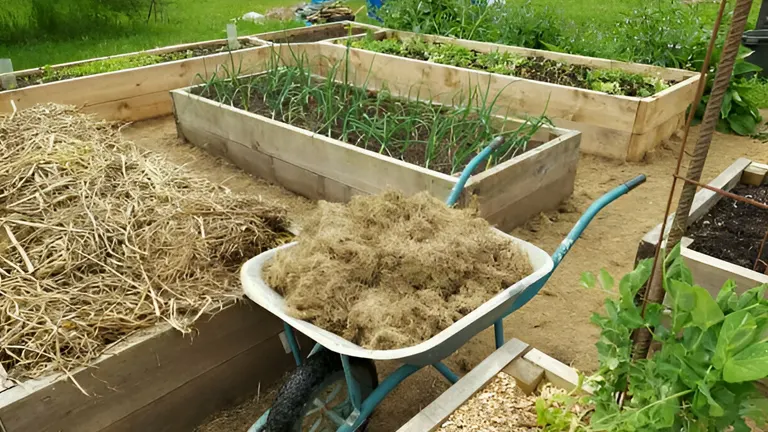
Regular upkeep is key to maintaining the vitality and structure of your raised bed soil. Annually adding fresh compost or topsoil is crucial as it replenishes lost nutrients and addresses the natural settling and compaction of the soil over time. Mulching is another critical maintenance step that should not be overlooked.
It helps retain moisture, regulate soil temperature, and suppress weeds, making it a multitasking powerhouse for any garden. However, it’s important to keep mulch away from the bases of plant stems to prevent issues like rot and pest infestations. By following these maintenance practices, you can ensure your raised beds remain productive and healthy year after year.
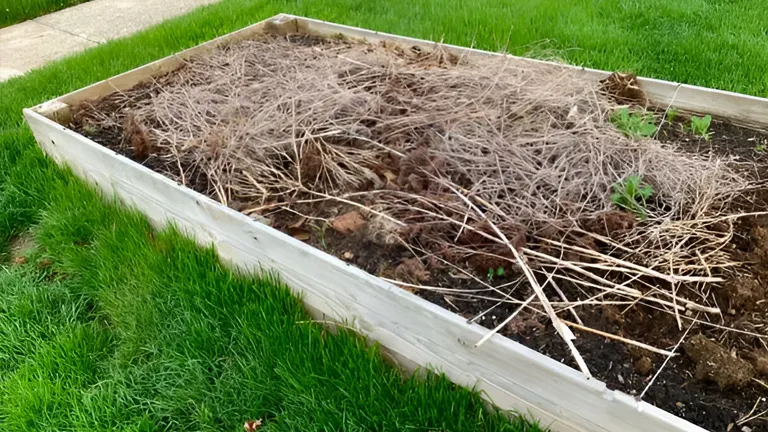
7. Winter Protection
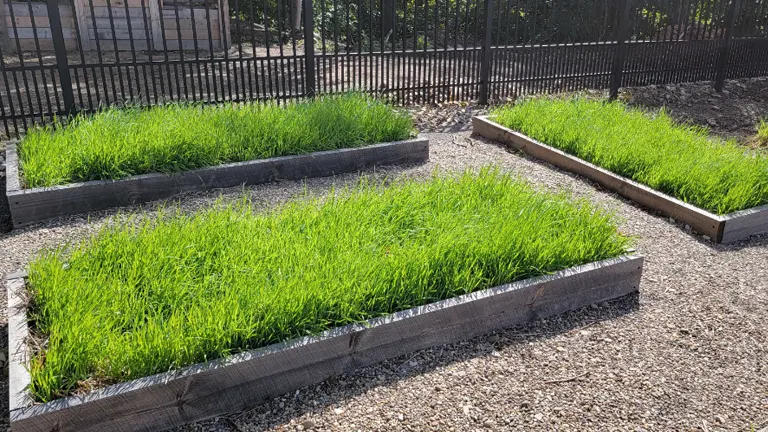
Ensuring your raised beds are well-protected during the winter is crucial for their longevity and for maintaining soil quality. Using cover crops such as winter rye or hairy vetch can significantly benefit the soil. These crops act as a natural blanket, protecting against erosion and freezing while adding organic matter as they decompose.
Alternatively, applying a thick layer of mulch over the soil can also help shield it from harsh winter conditions, preventing the soil from freezing and reducing nutrient runoff. Properly preparing your beds for winter means they will be rejuvenated and ready for planting as soon as spring arrives.
Step-by-Step Guide to Building a Raised Bed
Materials Needed
- Lumber (e.g., cedar or redwood)
- Screws or nails
- Drill or hammer
- Landscape fabric (optional)
- Measuring tape
- Saw (if wood needs cutting)
Instructions
- Plan Your Bed: Decide on the dimensions of your raised bed. A common choice is 4 feet wide by 8 feet long.
- Cut Your Materials: If your boards aren’t pre-cut, measure and cut two boards to 8 feet in length for the sides, and cut one board in half to 4 feet for the ends.
- Assemble the Frame: Using a drill or hammer, attach the boards together to form a rectangular frame. Use screws or nails to join the corners securely.
- Position the Bed: Choose a location that receives adequate sunlight and is level. Place the frame on the ground.
- Add Optional Liner: If you’re placing your bed over grass or weeds, lay down landscape fabric inside the frame to prevent growth through the soil.
- Fill with Soil: Fill the bed with a high-quality potting mix or a specially formulated raised bed soil.
Problem-Solving Section: Troubleshooting Common Raised Bed Gardening Issues
1. Soil-borne Diseases
- Problem: Common soil-borne diseases include fungal infections like root rot and wilt.
- Solution: Ensure good drainage in your raised beds as waterlogged soil can exacerbate these issues. Rotate crops annually to prevent diseases from taking hold. Consider incorporating disease-resistant plant varieties and using organic fungicides if necessary.
2. Pests
- Problem: Raised beds can attract various pests including aphids, slugs, and root-knot nematodes.
- Solution: Regularly inspect plants for signs of pests. Use barriers like copper tape for slugs, and introduce beneficial insects like ladybugs for aphids. For severe infestations, consider organic pesticides. Crop rotation and proper sanitation can also reduce pest populations.
3. Structural Issues
- Problem: Over time, wooden raised beds can decay or the soil pressure can cause the sides to bow out.
- Solution: Choose durable materials like cedar or use metal brackets at the corners to reinforce the structure. Inspect and repair any damaged parts annually. For bowing issues, you can reinforce the bed sides with additional stakes or supports placed externally.
4. Nutrient Deficiencies
- Problem: Plants showing stunted growth, discolored leaves, or poor yields might be suffering from nutrient deficiencies.
- Solution: Apply a balanced, slow-release organic fertilizer at the start of the season. Regularly top up beds with compost to replenish nutrients. Conduct a soil test to identify specific nutrient deficiencies and address them with targeted amendments.
5. Watering Issues
- Problem: Over-watering can lead to root rot, while under-watering can stress plants and reduce yields.
- Solution: Install a drip irrigation system for consistent moisture. Use a mulch layer to conserve water and monitor the soil moisture regularly to ensure it’s neither too wet nor too dry.
6. Weeds
- Problem: Weeds can be persistent and compete with your plants for nutrients and light.
- Solution: Apply a thick layer of mulch to suppress weeds. Hand-pull weeds regularly before they can establish or seed. Landscape fabric under the soil can also help prevent weeds from growing up from underneath.
Seasonal Tips for Maintaining Raised Beds
Spring: Planting and Early Growth
- Preparation: Begin by clearing any winter mulch or debris from your beds. Add a fresh layer of compost or a balanced slow-release fertilizer to replenish nutrients.
- Planting: Choose your crops based on the local climate and frost dates. Early spring is ideal for cool-season vegetables like lettuce, peas, and spinach. Use a soil thermometer to ensure the soil temperature is suitable for the seeds you are planting.
- Pest Control: Implement preventive measures against pests that become active in spring. Covering your beds with horticultural fleece can protect young seedlings from late frosts and pests.
Summer: Maintenance and Growth Management
- Watering: Install a drip irrigation system to maintain consistent soil moisture, crucial during the hotter months. Mulch around plants to retain moisture and keep roots cool.
- Pruning and Weeding: Regularly check for and remove weeds to prevent competition for nutrients. Prune any diseased or overgrown plants to encourage healthy growth and airflow, which helps prevent fungal diseases.
- Succession Planting: To maximize yield, plan for succession planting. As soon as one crop is harvested, replant with another crop to keep your garden productive through the season.
Autumn: Harvesting and Preparing for Winter
- Harvesting: Complete the harvesting of summer crops such as tomatoes, peppers, and squash. Begin planting fall crops like kale, carrots, and beets if your climate permits.
- Soil Care: After the final harvest, add organic matter like compost or manure to the beds. This is also a good time to test your soil and adjust pH levels if necessary.
- Winter Preparation: Cover your beds with a thick layer of mulch or plant cover crops to enhance soil health. Cover crops such as clover or oats can fix nitrogen in the soil and prevent erosion over the winter months.
Winter: Protection and Planning
- Protection: Ensure your mulch layer is intact to protect the soil from freezing temperatures and erosion. If using cover crops, cut them down before they set seed and leave them on the beds as green manure.
- Planning: Use this quieter time to plan next year’s garden. Rotate crops to prevent soil-borne diseases and consider new varieties or planting strategies based on the current year’s observations.
Conclusion
Raised bed gardening can be highly rewarding if done correctly. By planning carefully and avoiding common pitfalls, you can maximize your gardening success and enjoy a bountiful harvest. Remember, every little detail from the depth of the beds to the materials used can impact the health of your plants. Embrace these tips, and watch your garden thrive season after season.
FAQs
- How deep should my raised bed be for vegetable gardening?
The depth of your raised bed should be at least 6-12 inches for most vegetables. However, if you are planting root vegetables or using a hard surface like concrete, aim for a depth of 12-14 inches to accommodate deeper root systems. - What is the best material to use for constructing raised beds?
Untreated natural woods like cedar or redwood are excellent choices due to their durability and resistance to rot. Avoid treated woods that may contain harmful chemicals. Metal and fabric are also good options, offering longevity and enhanced root aeration, respectively. - Can I use garden soil in my raised beds?
It’s best not to use dense garden soil in raised beds as it can lead to poor drainage and compaction. Instead, use a light, fluffy potting mix or a specific raised bed mix that promotes good drainage and root growth. - How often should I replace the soil in my raised beds?
You don’t need to replace the soil entirely if you maintain it well. However, it’s beneficial to add fresh compost or topsoil annually to replenish nutrients and maintain soil structure. - What should I do to prepare my raised beds for winter?
Protect your soil by applying a thick layer of mulch or growing cover crops, which can be turned into the soil as green manure in the spring. This helps protect the soil from erosion and enriches it, improving its quality for the next planting season. - How can I prevent pests in my raised beds?
Regular monitoring is crucial. Use physical barriers, such as row covers, to prevent pests. Introducing beneficial insects like ladybugs can help manage aphid populations. For specific pests, organic pesticides can be used cautiously as a last resort. - Is mulching necessary in raised beds?
Yes, mulching is beneficial in raised beds as it helps retain soil moisture, suppress weeds, and regulate soil temperature. Organic mulches like straw or wood chips are ideal as they also add nutrients to the soil as they decompose.
We hope you found these seasonal tips for maintaining raised beds helpful! Do you have any of your own gardening strategies that work wonders? Or perhaps you have questions about getting your garden ready for the next season? Drop your thoughts and questions in the comments below—we love to learn from each other’s experiences and keep the gardening conversation growing. Don’t forget to share this guide with your fellow gardening enthusiasts! Happy gardening!

David Murray
Forestry AuthorI'm David Murry, a forestry equipment specialist with a focus on chainsaw operation. With over 13 years of experience, I've honed my skills in operating and maintaining a wide range of machinery, from chainsaws to log splitters. My passion for the outdoors and commitment to sustainable forestry drive my work, which emphasizes safety, efficiency, and staying updated with industry advancements. Additionally, I'm dedicated to sharing my expertise and promoting environmental awareness within the forestry community.


Leave your comment