8 Carrot Growing Tips for Perfect Carrots Every Time
- May 29, 2024
- 0 comment
Homegrown carrots taste much better and offer more varieties than those you find at the store. In this guide, we’ll walk you through eight essential tips to grow your own carrots. Whether you’re just starting out or looking to improve your carrot game, these pointers will help you grow vibrant, tasty carrots easily. Get ready to turn your gardening efforts into successful harvests with tips that make a difference!
1. Discover the Rich Variety of Carrot Colors and Sizes
Explore the vivid and diverse world of carrots, far beyond the familiar orange! Carrots dazzle in a spectrum of colors including purple, red, yellow, and white. Each color brings its own unique flavor and appeal, making carrots not just a nutritious choice but also a decorative one for any plate.

- Compact Varieties for Small Gardens: For those with limited growing space, such as urban gardeners, or those with only container gardening options, compact, stump-rooted carrots are perfect. These varieties excel in shallower soils and are ideal for balconies or small backyards.
- Large Varieties for Bountiful Harvests: For gardeners aiming for larger yields, the long and impressive Imperator carrots can reach lengths of 10 inches or more. These carrots are perfect for those who enjoy cooking and want a substantial product from their garden efforts.
- Adapting to Soil Conditions: Carrots are versatile and can adapt to various soil types. Rocky or heavy clay soils are perfect for conically shaped Chantenay carrots, which can push through tough earth without becoming misshapen. For those who want quicker results, early maturing types offer a speedy alternative, providing fresh carrots in less time.
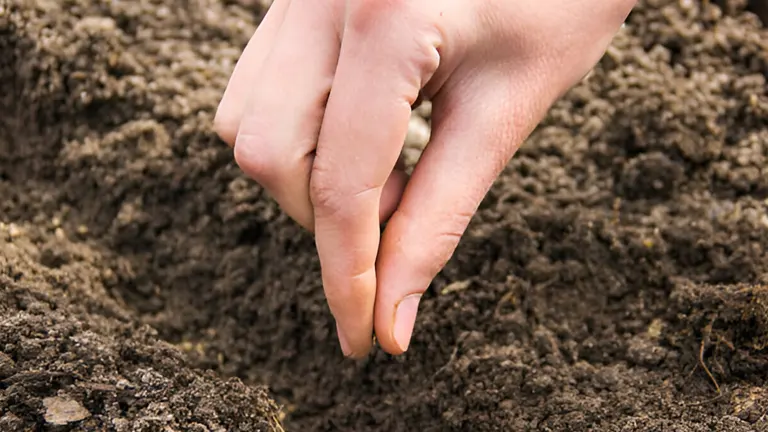
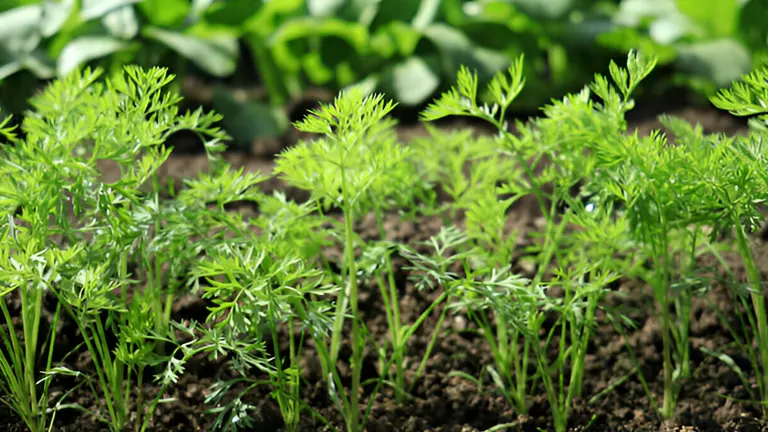
2. Best Practices for Direct Sowing of Carrot Seeds
To ensure a bountiful carrot harvest, direct sowing into the garden soil is the preferred method. Carrots are sensitive to transplanting, so sowing seeds directly into their final growing spot leads to stronger, healthier growth. Here’s how to get the best results:
- Optimal Conditions for Growth
- Location: Select a sunny area for planting since carrots require full sunlight to develop robustly.
- Soil Preparation: Prepare a well-draining, loose soil devoid of stones and clumps. This prevents any obstacles that might cause malformed roots.
- Timing: The best time to plant carrot seeds is early spring, especially for varieties that can withstand cooler temperatures. This ensures the carrots mature well before extreme summer heat or autumn frosts set in.
- Sowing Technique
- Seed Depth: Sow seeds shallowly, about half an inch deep, to promote effective germination without the seeds being too deep.
- Row Spacing: Arrange rows approximately 8 to 10 inches apart to give the roots ample space to expand.
- Seed Handling: Due to their tiny size, carrot seeds can be difficult to handle. Mixing them with sand can aid in evenly distributing them along the planting rows. Alternatively, seed tapes can be used to ensure even spacing automatically, eliminating the need for manual spacing.
- Care After Sowing
- Moisture: It is crucial to keep the soil consistently moist but not waterlogged to support germination, which might take up to three weeks, particularly in cooler conditions.
- Covering: To help maintain soil moisture and temperature, lightly cover the sown seeds with soil or fine mulch. In colder regions, using a cloche or a floating row cover may be necessary to shield the seeds from abrupt cold.
- Post-Germination Care
- Thinning: When seedlings appear and begin to develop their first true leaves, thin them to about an inch apart initially, and later to 2-3 inches apart. This spacing prevents overcrowding and ensures each carrot has sufficient space to mature.
- Watering: As the carrots grow, reduce the frequency of watering, allowing the soil to somewhat dry between sessions. This strategy encourages the roots to grow deeper, enhancing their drought tolerance.
3. How to Plant Carrots with Precision
Achieving precise planting of carrots is essential due to their small seed size and the sensitivity of their germination process. Here are some effective methods to ensure even sowing and successful carrot growth:
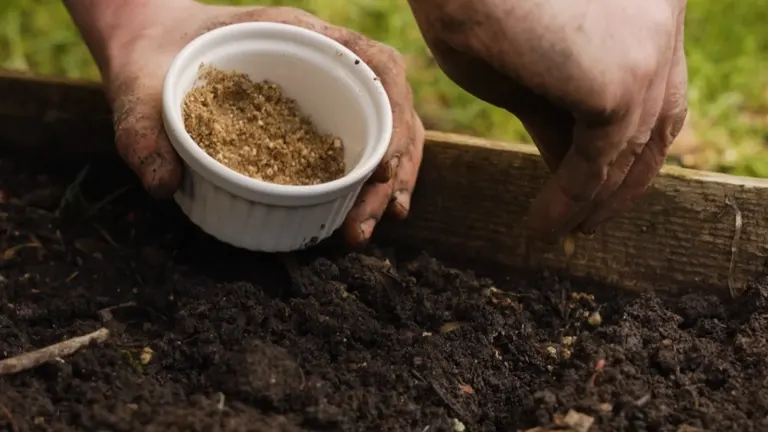
- Sand Mixing Method
- Purpose: This technique prevents the tiny seeds from clumping together, which ensures an even distribution across the planting area.
- Procedure: Mix the carrot seeds with fine sand. This mix not only makes it easier to handle the tiny seeds but also helps you visually track where seeds have been sown, promoting uniform coverage.
- Seed Tape Method
- Advantages: Seed tapes provide seeds pre-spaced on biodegradable strips, ensuring optimal spacing without the need for manual spacing adjustments. This method promotes even growth and reduces the need for later thinning.
- Application: Lay the seed tape along the prepared garden trench, cover with soil, and water gently. This approach is especially beneficial for those looking for a straightforward and accurate planting method.
- Optimal Conditions for Planting
- Soil Preparation: Prepare the soil by ensuring it is fine and crumbly, free of stones that could obstruct growth or cause malformed roots.
- Depth and Spacing: Plant seeds about a half-inch deep and space rows approximately 8 to 10 inches apart to minimize the need for thinning and reduce the risk of root damage.
- Aftercare
- Moisture Maintenance: Maintaining consistent soil moisture is crucial until seeds germinate. Light mulching or using a floating row cover can help retain soil moisture and warmth, aiding in quicker germination.
- Germination Period: Carrot seeds typically take up to three weeks to germinate, especially in cooler conditions, necessitating patience and careful monitoring.
- Additional Tips
- Thinning: If thinning is necessary, perform this task gently to minimize disturbance to the roots of remaining plants. Early thinning helps prevent overcrowding and ensures healthier root development.
- Watering: Employ a fine mist spray for watering, avoiding strong streams that can displace or uncover seeds, ensuring a gentle approach that fosters optimal seed growth.
4. Essential Tips for Keeping Carrot Seeds Moist
Achieving consistent moisture levels in the soil is pivotal for the successful germination of carrot seeds. Here are some essential tips to ensure that your carrot seeds have the best environment to thrive:
- Proper Soil Preparation: Start by preparing the soil to be fine and crumbly, removing any stones or hard clumps that could inhibit root growth. The soil should be moist to the touch, but not waterlogged, as overly wet conditions can cause seed rot and hinder germination.
- Sowing Techniques: Carrot seeds should be planted shallowly, about a half inch deep, to allow for easier and quicker germination due to better exposure to warmth from sunlight. Covering the rows with materials such as burlap or a thin layer of straw can help maintain the necessary soil moisture and protect the soil from direct sunlight, which reduces moisture evaporation.
- Watering Practices: Use a fine mist spray to water the seeds to prevent them from being washed away or buried too deep by heavy watering. Keep the soil consistently moist, especially during the critical germination period, which might require watering once or twice a day, depending on the weather conditions.
- Use of Mulches: Applying a thin layer of organic mulch, such as finely shredded leaves or grass clippings, can help retain soil moisture and control soil temperature without overwhelming the tiny seeds.
- Monitoring and Adjustment: Regularly check the moisture level of the soil by lightly pressing a finger into the soil, which should feel damp but not soggy. Adjust your watering practices based on weather conditions; more frequent watering may be necessary on hot or windy days, while less is required on cooler, cloudy days.
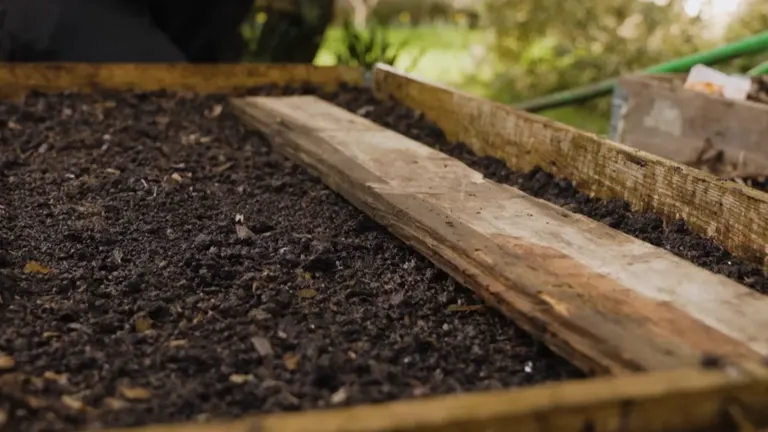
- Additional Tips: In hot climates, covering the newly sown seeds with wooden planks can help maintain necessary moisture and protect the seeds from harsh sun. Remove the planks once sprouts emerge. If manual sowing proves challenging, consider using seed tapes, which ensure proper spacing and help retain moisture around the seeds, as the paper tape holds moisture and biodegrades over time.
5. Thinning Techniques for Growing Carrots Successfully
Thinning is a crucial step to ensure the success of your carrot crop, particularly given the diversity of carrot varieties you might choose to grow. Whether you’ve planted the small and stout stump-rooted carrots ideal for shallow soils or the long, majestic Imperator carrots that thrive in deeply cultivated beds, proper thinning is key to their development.
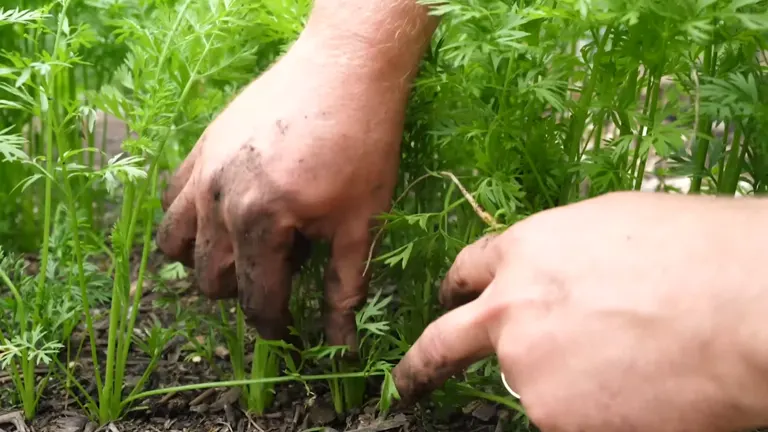
- Initial Thinning: As your carrot seedlings begin to sprout, their initial proximity can hinder growth, especially in densely sown rows. Begin by thinning them to about an inch apart when they are a few inches tall. This spacing helps prevent the young, tender carrots from competing for light, water, and nutrients, allowing them to establish robust roots.
- Subsequent Thinning: After a few weeks, assess the growth progress and thin the seedlings again, this time spacing them to about two to three inches apart. This additional space is crucial, particularly for varieties like the Imperator, which need more room to expand into the long, chunky roots that are their hallmark. For smaller varieties like the stump-rooted or Chantenay types, which are adapted to tighter spaces, this second thinning ensures they have enough room to mature without becoming misshapen or stunted.
- Managing Pests During Thinning: The act of thinning can release the carrot’s natural scent into the air, which may attract pests such as carrot flies. To mitigate this risk, it’s advisable to thin your carrots on overcast days or in the late evening when these pests are less active. Additionally, using a gentle touch to avoid crushing the foliage can help keep the scent contained. Consider covering the rows with garden fleece immediately after thinning to protect the vulnerable seedlings.
- Utilizing Thinnings: Don’t discard the thinned out carrot seedlings. These young carrots, though small, are delicious and can be used in salads or as a garnish, offering a preview of the flavors your garden will soon yield more abundantly.
6. Seasonal Carrot Care Guide
Carrots are remarkably adaptable and can thrive in a variety of climates, flourishing especially during cooler seasons. To achieve the best results in hot climates, it’s wise to grow carrots during the cooler months. This prevents the carrots from bolting, which can occur when they’re exposed to too much heat and disrupt their development.
- Regular Sowing: To ensure a continuous supply of fresh carrots, it’s essential to sow new seeds every few weeks. This practice keeps your carrot garden productive throughout the growing season, allowing you to harvest young, tender roots regularly.
- Transition to Main Crop: As the cooler weather sets in, transition your planting to main crop varieties. These are perfect for late-season growing and can be stored through the winter months, ensuring you have a stockpile of fresh, flavorful carrots. Main crop carrots are robust, larger, and suited for long-term storage, providing a steady supply during the colder months.
- Staggered Planting: By staggering your planting, you can enjoy a year-round harvest of carrots. This method allows gardeners in virtually any climate to schedule their carrot cultivation for optimal growth and yield, adapting the planting and harvesting periods to their specific environmental conditions.
- Link to Local Conditions: Just as with planning any garden structure, like a chicken coop, where one considers environmental threats and local fauna, understanding your local growing conditions is crucial for carrot cultivation. Whether dealing with extreme heat or the risk of frost, adjust your planting schedule to accommodate local climate patterns, ensuring your carrots have the best conditions for growth.
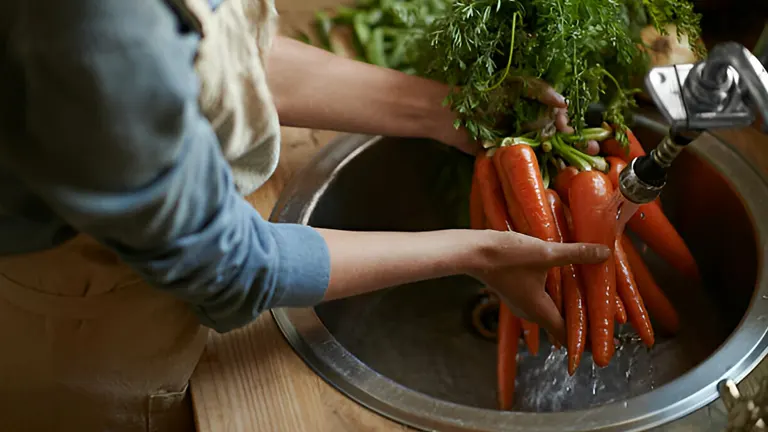
7. When and How to Harvest and Store Carrots
Harvesting carrots at the right time is crucial for enjoying their optimal flavor and texture. Just like ensuring a chicken coop is secure against predators and the elements, knowing when and how to correctly harvest and store your carrots is vital for protecting your yield.

- Identifying Harvest Time: Carrots are generally ready to harvest when their green tops are lush and vigorous, and the top of the carrot (the shoulder) begins to emerge from the soil. This visible shoulder is a clear indicator that they have reached a desirable size. Just as you would inspect a chicken coop for any gaps or vulnerabilities, inspect your carrot crop regularly as harvest time approaches to choose the best time to pull them from the ground.
- Harvesting Technique: To harvest, gently pull the carrots from the soil. If the soil is compacted, use a garden fork to loosen the earth around the carrots to avoid breaking them. This is similar to ensuring you have accessible cleaning options in a chicken coop, facilitating easier maintenance and care.
- Immediate Post-Harvest Care: After harvesting, immediately remove the tops to prevent them from drawing moisture from the carrots. This helps maintain their crispness and freshness, akin to protecting chickens from elements that could harm their health.
- Storing Your Carrots: Store carrots in a cool, dark place to preserve their quality over time. A method proven to be effective is storing them in boxes filled with damp sand or used potting mix, which mimics natural underground conditions, keeping the carrots hydrated and fresh. This storage method is as crucial as providing proper ventilation in a chicken coop to prevent moisture buildup that could lead to health issues for chickens.
- Longevity of Storage: Properly stored, carrots can maintain their texture and flavor throughout the winter months, offering fresh produce long after the growing season has ended. This is akin to using high-quality materials and thoughtful design in a chicken coop to ensure it stands up over time, providing continuous protection and comfort to the chickens.
8. Creative Ways to Enjoy Your Carrot Harvest
Freshly harvested carrots are a delight in the kitchen, offering a burst of sweetness and crunch that surpasses anything you’ll find at the store. Think of them like the essential components of a well-designed chicken coop: indispensable and versatile.
- Raw and Crunchy: Enjoy your carrots fresh and raw. Just wash and peel them to add a vibrant, crunchy component to salads or as a healthy snack. This is akin to making sure your chicken coop has easy access for daily tasks; simple and straightforward.
- Roasted Sweetness: Roast your carrots to caramelize their natural sugars, enhancing their inherent sweetness. Drizzle with olive oil, sprinkle with salt, maybe some herbs, and roast at 400°F until tender. It’s much like ensuring your coop is secure from predators—essential for the best outcome.
- Carrot Top Pesto: Utilize the entire plant by making a pesto from the carrot tops. Blend carrot tops with garlic, nuts, Parmesan cheese, olive oil, and lemon juice for a delicious and nutritious sauce. This uses resources to their fullest, much like optimizing every part of a chicken coop for maximum functionality.
- Preserving Your Harvest: For longer storage, blanch your carrots and then freeze them. Blanching locks in flavor, color, and nutrients, ensuring you can enjoy the taste of your garden carrots all year round. It’s similar to using durable materials in your coop that withstand the elements, keeping the interior safe and functional throughout the seasons.
Recipes: Delicious Ways to Enjoy Your Homegrown Carrots
Once you’ve harvested your carrots, the fun part begins—cooking! Here are a few simple and creative recipes to help you make the most of your fresh, flavorful carrots:
- Classic Carrot Soup
- Ingredients: Homegrown carrots, onion, garlic, vegetable stock, salt, pepper, and cream.
- Method: Sauté chopped onions and garlic until translucent. Add chopped carrots and cook until slightly softened. Pour in vegetable stock and simmer until the carrots are tender. Blend the mixture until smooth, then stir in a splash of cream. Season with salt and pepper to taste. Serve hot with a sprinkle of fresh parsley.
- Roasted Carrot and Beet Salad
- Ingredients: Homegrown carrots, beets, mixed salad greens, goat cheese, walnuts, olive oil, balsamic vinegar, honey, salt, and pepper.
- Method: Peel and slice carrots and beets. Toss them in olive oil and salt, then roast at 400°F until tender and caramelized. Combine with mixed greens, crumbled goat cheese, and walnuts. Whisk together olive oil, balsamic vinegar, and honey for the dressing. Drizzle over the salad and season with salt and pepper.
- Carrot Top Pesto
- Ingredients: Carrot tops, garlic, pine nuts or walnuts, Parmesan cheese, olive oil, lemon juice, salt, and pepper.
- Method: Rinse and dry carrot tops. Blend with garlic, nuts, and Parmesan in a food processor. Slowly add olive oil and lemon juice until the mixture reaches a pesto consistency. Season with salt and pepper. Use as a spread on sandwiches or as a pasta sauce.
- Sweet Carrot Pancakes
- Ingredients: Grated homegrown carrots, flour, baking powder, sugar, cinnamon, eggs, milk, and butter.
- Method: Mix flour, baking powder, sugar, and cinnamon. In another bowl, beat eggs and milk, then stir in grated carrots. Combine wet and dry ingredients. Heat butter in a skillet, pour in batter to form pancakes, and cook until golden on both sides. Serve with maple syrup or a dollop of yogurt.
- Carrot and Orange Juice
- Ingredients: Freshly harvested carrots and oranges.
- Method: Peel the carrots and oranges. Juice them together for a refreshing, vitamin-rich drink that highlights the natural sweetness of your carrots.
Conclusion
Growing your own carrots is truly rewarding. Not only do you get to enjoy the crisp, full flavors of your harvest, but there’s also a deep satisfaction in eating carrots that you’ve carefully tended from seed to harvest. Armed with these essential tips, you’re all set to produce your own delicious, crunchy carrots straight from your garden.
FAQs
- What should I do if my carrots don’t germinate?
Carrot seeds can be slow to germinate, often taking 2-3 weeks. Ensure the soil remains consistently moist during this period. If you don’t see sprouts after this time, consider re-sowing with fresh seeds and double-check that the soil temperature is within the optimal range of 50-75°F. - How can I improve soil fertility for growing carrots?
Carrots prefer well-drained, sandy soil rich in organic matter. Before planting, incorporate aged compost or well-rotted manure into the soil. Avoid fresh manure or high-nitrogen fertilizers, as these can cause carrots to fork or grow hairy roots. - What are common pests that affect carrot crops and how can I manage them?
The most common carrot pest is the carrot fly. To deter them, use floating row covers or plant aromatic herbs like rosemary and sage nearby, which can mask the scent of carrots. Regularly thinning the crop and avoiding crushing the foliage also helps reduce the risk of attracting carrot flies. - My carrots are forked or twisted. What causes this?
Forked or twisted carrots often result from rocky or compacted soil. Ensure your soil is well-tilled and free from stones before planting. Additionally, consistent soil moisture and proper spacing can help promote even root growth. - How do I know when it’s time to harvest my carrots?
Carrots are typically ready to harvest when their tops begin to peek out from the soil, and the diameter looks appropriate for their variety. Most varieties take about 50-80 days to mature. Feel free to pull one up and check its size and taste. - Can I leave carrots in the ground over winter?
In regions with mild winters, carrots can be left in the ground and harvested as needed. They often become sweeter after a frost. In colder areas, mulch heavily with straw or leaves to protect them from freezing. - How should I store harvested carrots?
After harvesting, remove the tops, wash off the dirt, and store the carrots in a cool, dark place like a refrigerator or root cellar. For longer storage, pack them in moist sand or peat moss to prevent them from drying out.
We hope this guide helps you grow the best carrots your garden has ever seen! Have tips or questions about growing carrots? We’d love to hear from you. Share your thoughts and experiences in the comments below, and let’s keep the conversation growing. Happy gardening!

David Murray
Forestry AuthorI'm David Murry, a forestry equipment specialist with a focus on chainsaw operation. With over 13 years of experience, I've honed my skills in operating and maintaining a wide range of machinery, from chainsaws to log splitters. My passion for the outdoors and commitment to sustainable forestry drive my work, which emphasizes safety, efficiency, and staying updated with industry advancements. Additionally, I'm dedicated to sharing my expertise and promoting environmental awareness within the forestry community.


Leave your comment