How to Adjust Lawn Sprinkler Heads
- March 21, 2024
- 0 comment
How To Adjust Lawn Sprinkler Heads Maintaining a lush and vibrant lawn is a dream for many homeowners. An efficient sprinkler system is vital to achieving this goal, ensuring your grass and plants receive the right amount of water. However, to keep your sprinkler system functioning optimally, regular adjustments to the sprinkler heads are necessary. This guide will walk you through the steps to adjust various types of lawn sprinkler heads.
List on How to Adjust Lawn Sprinkler Heads
- Inspect Your Lawn and Identify the Issues
- Gather Your Tools
- Clean Around Sprinkler Heads
- Adjust the Spray Pattern (for Fixed and Rotary Heads)
- Adjust the Spray Distance
- Correct the Sprinkler Head’s Position
Why Adjust Sprinkler Heads?
Heads Adjusting sprinkler heads is a crucial aspect of lawn maintenance that ensures efficient water use and promotes the health and aesthetic appeal of your garden. Properly adjusted sprinklers help to distribute water evenly across all areas of the lawn, preventing the common problems of over or under-watering. Over-watering can lead to water wastage and may cause issues like root rot, fungal growth, and an unhealthy, waterlogged soil environment. Conversely, under-watering can result in dry, brown patches on the lawn, stressing the grass and making it more susceptible to disease and pest infestation. By fine-tuning the spray pattern and reach of each sprinkler head, homeowners can ensure that every part of the lawn receives the optimal amount of water it requires to thrive.
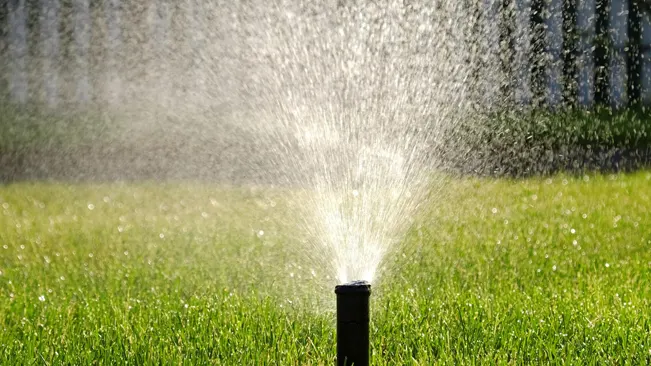
Moreover, adjusting sprinkler heads contributes to water conservation, an increasingly important consideration in today’s environmentally conscious world. By targeting the water spray to avoid non-grassy areas such as driveways, sidewalks, and patios, homeowners can significantly reduce water waste. Adjustments can also prevent water from spraying onto buildings or fences, which can cause damage over time. Through regular maintenance and adjustment of sprinkler heads, homeowners can achieve a lush, healthy lawn while minimizing their environmental footprint and potentially reducing their water bills. This proactive approach to lawn care not only enhances the beauty and value of the property but also contributes to the broader effort of conserving vital water resources.
Types of Lawn Sprinkler Heads
Fixed Spray Heads
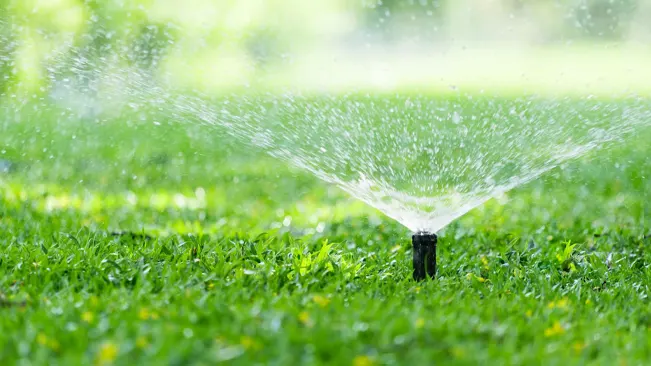
Fixed spray heads are ideal for precise watering needs in smaller lawn areas and intricate garden spaces. These sprinkler heads emit a continuous, uniform spray pattern, fixed in one direction, which helps to ensure that water is delivered exactly where it’s needed without wastage. They are particularly useful in landscapes with geometric layouts or where specific plants or areas require targeted hydration. Their low-to-the-ground profile also minimizes water loss due to wind drift and evaporation, making them a water-efficient choice for watering flower beds, shrubs, and other small garden areas.
Rotor Heads
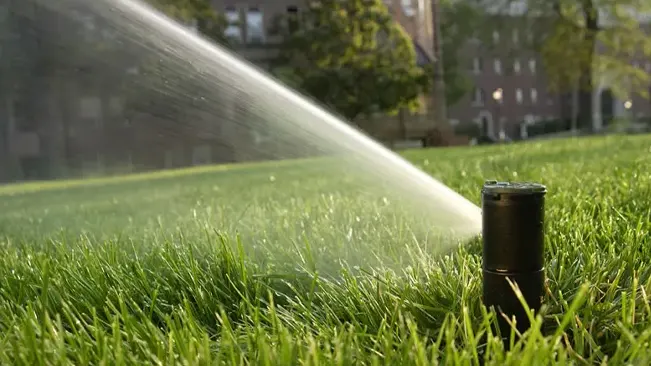
Rotor heads are designed for efficient watering over larger lawn areas thanks to their rotating motion, which covers a broad radius with water. These sprinklers are known for their versatility, as they can be adjusted to vary the arc and radius of the water spray, allowing for customizable watering patterns that can suit various lawn shapes and sizes. Some advanced models even allow for the adjustment of the rotation speed to control the amount of water delivered. This makes rotor heads an excellent choice for diverse landscapes, including large residential lawns and commercial spaces with expansive green areas.
Impact Sprinklers
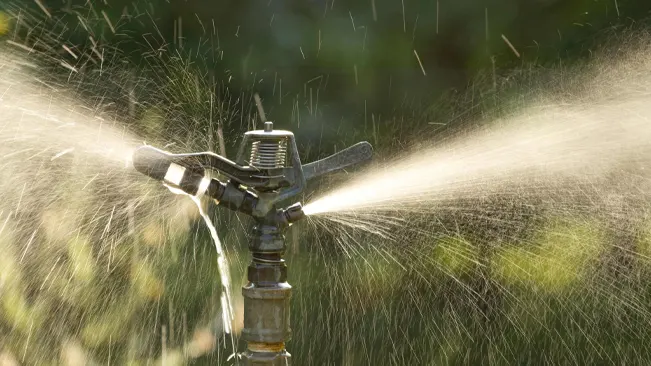
Impact sprinklers are a robust and reliable choice for gardeners and homeowners with larger lawns. Their unique mechanism allows for adjustable water coverage and can handle high water pressures without clogging, making them suitable for use in areas with sediment-laden water. The distinct sound they make as they operate is due to the mechanical action of the arm hitting the water stream, which not only helps in breaking the water into smaller droplets for more even distribution but also adds a level of durability that stands up well to tough outdoor conditions.
Oscillating Sprinklers
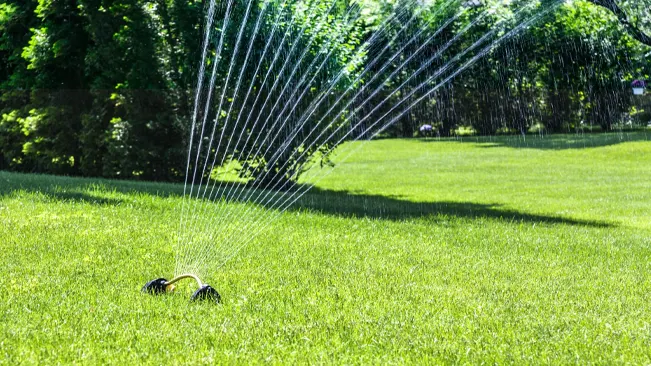
Oscillating sprinklers are known for their gentle watering action, which makes them perfect for newly seeded lawns, delicate plants, and flowers. The oscillating arm moves back and forth, creating a curtain of water that evenly covers a rectangular area. This type of sprinkler can be adjusted to control the width and length of the watering pattern, ensuring that the water reaches only the intended areas without wastage. The even and gentle distribution of water mimics natural rainfall, promoting healthy growth without causing erosion or soil compaction.
Bubbler Sprinklers
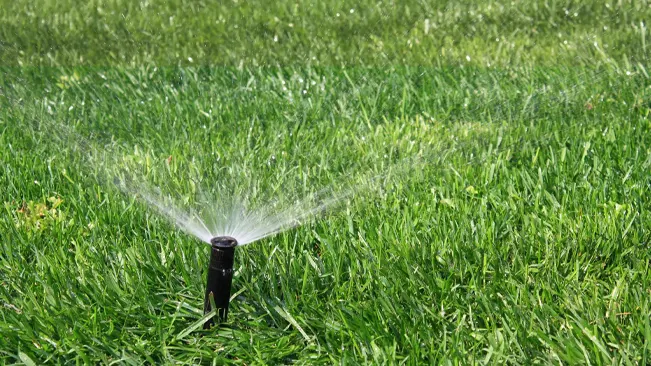
Bubbler sprinklers focus on deep watering at the root level, making them ideal for individual plants, trees, and shrubs. By delivering water directly to the base of the plant, bubblers reduce evaporation and runoff, ensuring that water penetrates deep into the soil where it’s most needed. This targeted approach is particularly beneficial for newly planted trees or shrubs that require consistent soil moisture to establish their root systems. Bubbler sprinklers can be adjusted to control the flow rate, making them adaptable to the specific water needs of different plants.
Drip Irrigation
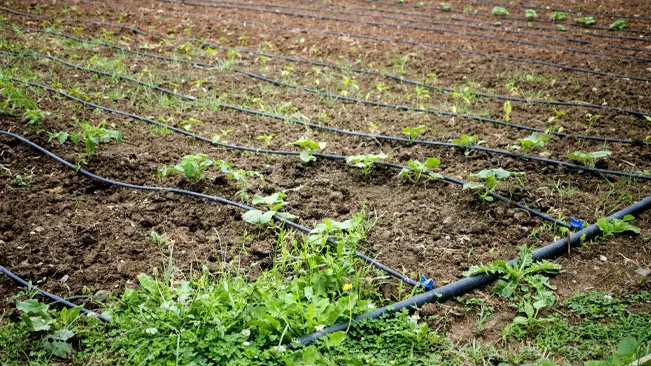
Drip irrigation systems represent a paradigm shift in watering efficiency, especially for garden beds, vegetable gardens, and densely planted areas. By delivering water directly to the soil surface or root zone of plants through a network of tubing and emitters, drip irrigation minimizes water loss due to evaporation and runoff. The system can be customized with different emitter types and flow rates to meet the specific hydration needs of each plant, ensuring that water is used conservatively and effectively. This targeted watering method not only conserves water but also promotes healthier plant growth by reducing the spread of leaf diseases associated with overhead watering.
Tools Needed for Adjustment
- Sprinkler Head Adjustment Key or Tool: Many rotor and rotary sprinkler systems come with a specific adjustment key or tool designed for that model. This tool is essential for making arc and radius adjustments on the sprinkler head. It’s often used to insert into a slot on the sprinkler head to adjust the spray pattern and distance.
- Flathead Screwdriver: A flathead screwdriver is a versatile tool that can be used to adjust the screw on the top of spray and rotor heads. Tightening or loosening this screw can change the spray distance and pattern. It’s particularly useful for fine-tuning fixed spray heads.
- Channel Lock Pliers or Adjustable Wrench: These tools can be handy for loosening or tightening the sprinkler heads themselves, especially if you need to replace or reorient them. They provide the grip and leverage needed to work with wet and potentially slippery sprinkler components.
- Small Shovel or Garden Trowel: When adjusting or replacing sprinkler heads, you might need to dig around the head to expose it fully without damaging the surrounding lawn or garden. A small shovel or garden trowel is perfect for this delicate excavation work.
- Waterproof Grease or Lubricant: Applying a waterproof grease or lubricant to the moving parts of a sprinkler head, especially rotor types, can ensure smooth operation and prolong the life of the sprinkler. Always check the manufacturer’s recommendations before applying any lubricant.
- Pressure Gauge: If you suspect that water pressure issues are affecting your sprinkler system’s performance, a pressure gauge can help you diagnose the problem. Attaching it to a spigot near your sprinkler system can give you an accurate reading of your water pressure.
- Stake Flags: When adjusting several sprinkler heads across a large area, it can be helpful to mark the positions that require adjustments or special attention. Stake flags are a simple and effective way to keep track of these spots.
- Clip Tool for Bubblers and Pop-up Sprinklers: Some sprinkler types, like bubblers and pop-up sprinklers, might require a specialized clip tool to hold them in the extended position while you make adjustments. This is especially useful for pop-up sprinklers that retract when not in operation.
Step-by-Step Guide to Adjusting Sprinkler Heads
1. Inspect Your Lawn and Identify the Issues
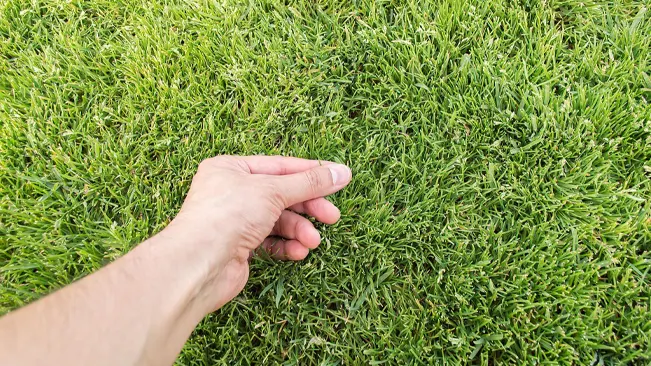
Begin by conducting a thorough inspection of your lawn while the sprinkler system is active. Observing the sprinkler system in action can reveal critical issues such as over-watering, indicated by puddles and soggy areas, or under-watering, evident from dry, brown patches in the grass. Pay particular attention to sprinkler heads that may be out of alignment, causing water to be wasted on non-grass areas like sidewalks, driveways, and even the sides of buildings. This initial step is crucial for identifying which areas of your lawn need attention and which sprinkler heads require adjustment.
2. Gather Your Tools
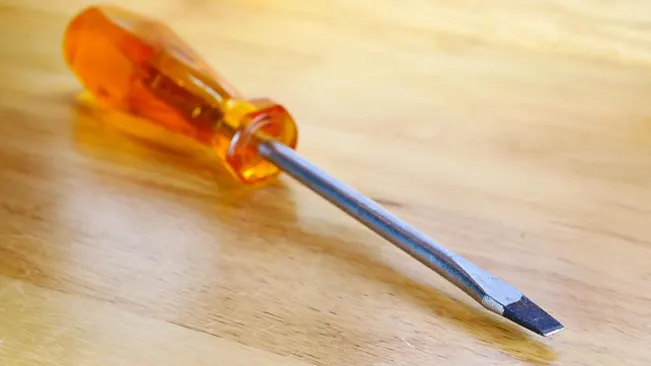
After identifying the issues with your lawn and sprinkler system, the next step is to assemble the necessary tools for making adjustments. The exact tools you’ll need can vary depending on the type of sprinkler heads you have and the nature of the adjustments required. Typically, you might need a sprinkler head adjustment key or tool for rotary and rotor heads, a flathead screwdriver for adjusting spray patterns, pliers for loosening or tightening, and a small shovel or garden trowel for digging around buried heads. Having all your tools ready beforehand can streamline the adjustment process.
3. Clean Around Sprinkler Heads
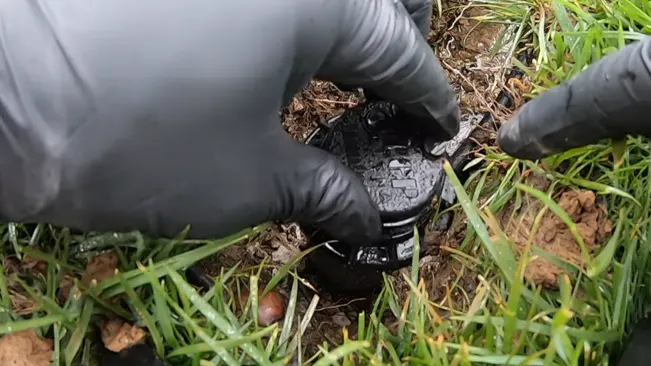
Before making any adjustments, it’s essential to clean around the sprinkler heads. Over time, dirt, grass clippings, and mulch can accumulate around the heads, potentially obstructing the water flow and altering the spray pattern. Use a small shovel or garden trowel to gently remove any debris around the sprinkler heads, ensuring they are free from obstructions. This not only facilitates easier access for adjustments but also improves the efficiency of the sprinkler system.
4. Adjust the Spray Pattern (for Fixed and Rotary Heads)
Fixed Spray Heads Locate the adjustment screw on top of each sprinkler head. Using a flathead screwdriver, you can adjust the screw to modify the spray distance—turn it clockwise to decrease and counterclockwise to increase the distance. This precise control allows you to tailor the water coverage to the specific needs of your lawn, ensuring that water is not wasted.
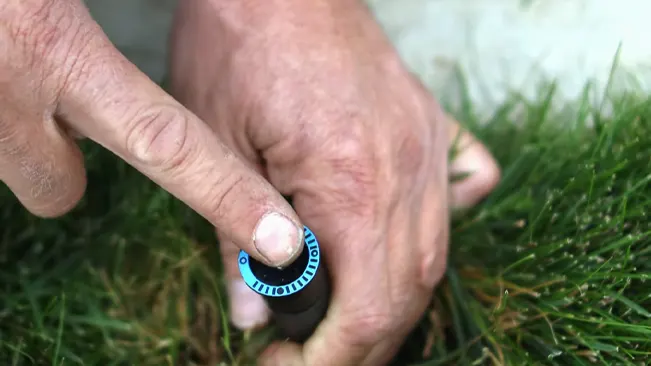
Rotary or Rotor Heads For these types of heads, use the specialized adjustment tool or a small flathead screwdriver to adjust the arc of the spray. This is done by inserting the tool into the adjustment socket and twisting it to modify the water’s arc. Properly adjusted rotor heads can efficiently cover larger lawn areas without leaving dry spots.
5. Adjust the Spray Distance
Rotor Heads Locate the radius adjustment screw, usually found near the top of the head. Adjusting this screw while the system is running allows you to visually gauge the change in spray distance—clockwise turns reduce the distance, and counterclockwise turns increase it.
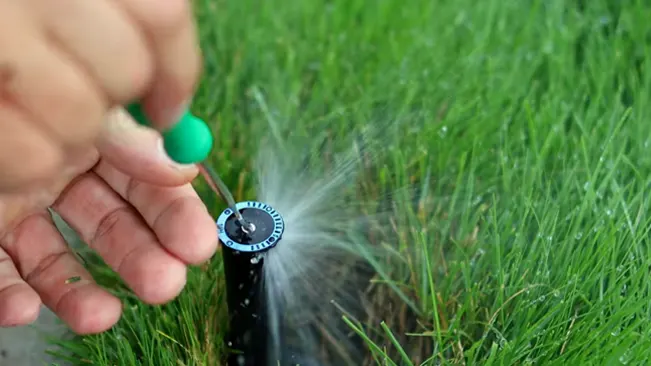
Spray Heads Similar to rotor heads, spray heads often have a distance adjustment screw at the top. Adjusting this screw follows the same principle: clockwise to reduce the spray distance and counterclockwise to increase it, ensuring that each area of your lawn receives the right amount of water.
6. Correct the Sprinkler Head’s Position
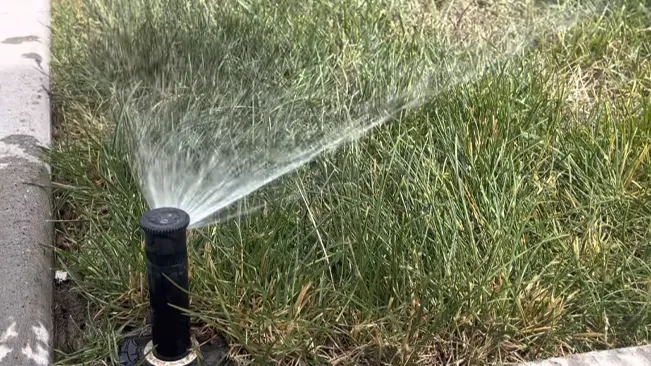
If you notice that a sprinkler head is not level with the ground, it’s important to adjust the soil or turf around it. A sprinkler head that is too high can be damaged by lawn mowers or foot traffic, while one that is too low may not distribute water effectively. Use a shovel to carefully reposition the soil and ensure the head is flush with the lawn surface, promoting even water distribution and protecting the sprinkler head from damage.
How To Tell When Sprinkler Heads Need Adjusting
Uneven Watering
- Dry Spots: If parts of your lawn or garden are consistently dry despite regular watering, it might indicate that the sprinkler heads aren’t covering those areas properly.
- Overly Wet Areas: Conversely, if you notice areas that are soggy, puddled, or exhibit signs of overwatering, such as moss growth, it suggests that some sprinkler heads may be directing too much water to these spots.
Misdirected Spray
- Water on Hardscapes: If you observe water spraying onto sidewalks, driveways, patios, or buildings, your sprinkler heads are likely misaligned and need adjustment to ensure water is directed solely onto landscape areas.
- Spray Blocked by Obstacles: Sprinkler heads can sometimes become obstructed by growing plants, resulting in blocked spray patterns. This requires realignment or relocation of the sprinkler heads to clear the path of the spray.
Changes in Landscape
- New Plantings or Landscape Features: Any significant changes to your landscape, such as the addition of garden beds, trees, or hardscapes, can affect the requirements of your irrigation system. Sprinkler heads may need adjustments to accommodate the altered watering needs.
- Lawn or Garden Renovations: After renovating your lawn or garden, including reseeding or replanting areas, it’s important to reassess your sprinkler coverage to ensure it meets the new layout and plant water requirements.
Visible Damage or Wear
- Leaking Sprinkler Heads: Visible leaks around the sprinkler heads, even when the system is off, can indicate a seal failure or damage that may affect the sprinkler’s performance.
- Physical Damage: Lawnmowers, vehicles, and foot traffic can cause physical damage to sprinkler heads. Cracked or broken heads will not function correctly and need to be repaired or replaced.
Inconsistent Spray Patterns
- Fluctuating Pressure: If the spray from your sprinkler heads seems weaker or more forceful than usual, it could be due to a pressure issue in the system or clogged nozzles that need cleaning or adjustment.
- Erratic Spray Patterns: Sprinkler heads that no longer have a uniform spray pattern, producing gaps in coverage or spraying water in an erratic manner, likely need to be cleaned, adjusted, or replaced.
Why Is it Important To Adjust Your Sprinkler Heads?
Adjusting your sprinkler heads is essential for maintaining a healthy and well-watered lawn. Over time, it’s common for sprinkler heads to become misaligned due to various factors, such as seasonal changes, activities in the yard like lawn mowing or play, and general wear and tear. These misalignments can lead to uneven watering, where parts of your lawn might receive too little water, resulting in dry patches or even grass death.
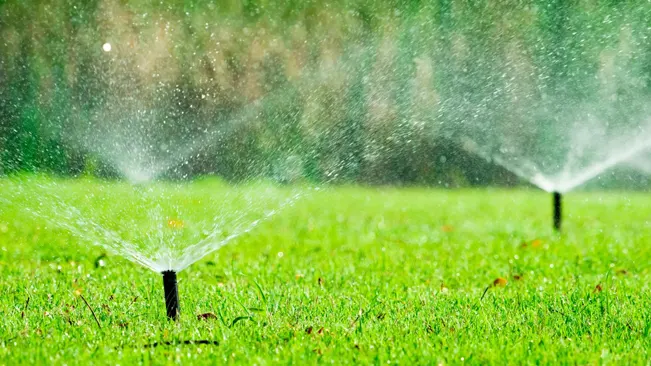
Tackling the task of adjusting sprinkler heads can be a manageable do-it-yourself project that, while time-consuming, especially in larger yards or those with numerous heads, is not overly complex. It’s a good practice to check and adjust your sprinklers annually, ideally at the start of the watering season. Sprinkler systems vary, and the complexity of adjusting them can depend on the type of system installed. For example, heads that are installed below ground level can present additional challenges, but with patience, these too can be adjusted effectively. Through personal experience, many homeowners learn the ins and outs of their sprinkler systems, acquiring the skills to make necessary adjustments and solve minor issues independently.
Related Article:
- When Is the Best Time to Seed Your Lawn? A Seasonal Guide
- What to Do After Dethatching Your Lawn: Next Steps for a Healthy Lawn
- How to Remove Mushrooms From Your Lawn
- How to Get Rid of Moss in Your Lawn: Effective Ways
- Unlock Lawn Health: The Secret Behind Solid & Hollow Aeration Tools
- How to Transform Your Lawn: The Single Application Solution
- Lawn Aeration: When to Do It and Why It Matters
- How to Aerate Your Lawn Easily: Essential Tips and Tricks
- How to Get Rid of Clover in Lawn Without Killing Your Grass
- How to Over Seed Your Lawn Easy Guide For Beginners
- When to Fertilize Your Lawn: Best Timing for Optimal Growth
- How to Achieve a Thick, Lush Lawn: Essential Tips for Beginners
- Why Does Dog Pee Kill Grass? Understanding and Solutions
- Budget-Friendly Tips for a Lush Spring Lawn: How to Save and Sow
- When to Fertilize a Lawn in Spring: Timing for Optimal Growth
- Is Gypsum Good for Lawns? What You Need to Know
- How to Change a Lawn Mower Blade: Easy Way
- How to Drain Gas From a Lawn Mower: Safe & Simple Methods
- How to Clean a Lawn Mower Carburetor: Easy Maintenance Tips
Conclusion
Adjusting your lawn sprinkler heads is a crucial task in maintaining a healthy, vibrant lawn. By understanding the types of sprinkler heads and how they operate, you can effectively manage your watering routine to suit the specific needs of your landscape. Regular adjustments, coupled with routine maintenance, can prevent water wastage, ensure optimal growth of your plants, and keep your lawn looking its best. Remember, a well-tuned sprinkler system not only conserves water but also saves you time and effort in lawn care. So, take the time to make these adjustments and enjoy the lush, green oasis you’ve cultivated.
FAQs
- How often should I adjust my sprinkler heads?
It’s advisable to check and adjust your sprinkler heads at the start of each watering season and periodically throughout the season as needed, especially if you notice changes in water coverage or pressure. - What should I do if a sprinkler head is not popping up?
Check for debris blocking the sprinkler head. If it’s clean and still not popping up, it may be damaged or the water pressure might be too low. Inspect for leaks or damage and replace the head if necessary. - Can I adjust the water pressure to my sprinkler heads?
Water pressure is generally adjusted at the valve or the main water source. Some sprinkler heads have built-in pressure regulation features, but for overall pressure adjustments, consult a professional or refer to your system’s manual. - Why is one area of my lawn getting too much water while another is dry?
This could be due to improperly adjusted sprinkler heads, clogged nozzles, or uneven water pressure. Ensure all heads are correctly aligned and functioning, and check for any leaks or blockages in the system. - Is it possible to add more sprinkler heads to my existing system?
Yes, but it’s important to ensure your system has enough water pressure to support additional heads. It’s recommended to consult with a professional to assess your system’s capacity and for proper installation.
For more expert gardening advice, explore our guides, discover top recommendations in our best section, and delve into in-depth product reviews in our review section. Happy Gardening.

Joel Cunningham
Forestry AuthorI'm Joel Cunningham, an expert in pruning and weed management with over a decade of experience. My skills are rooted in formal training and extensive practice, focusing on advanced pruning techniques and efficient weed control. I'm known for my quality work, precision, and deep understanding of plant health and soil dynamics. My contributions extend to educational initiatives where I share sustainable practices and advice, establishing myself as a reliable and authoritative figure in the gardening community.











Leave your comment