How to Fill Gaps in Timber Floors: Easy and Effective Solutions
- September 25, 2024
- 0 comment
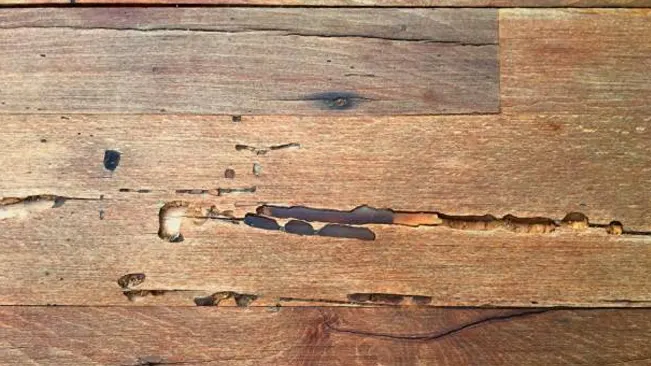
Timber floors offer a classic and elegant look to any home, but as time goes by, gaps may begin to appear between the floorboards. These gaps not only affect the aesthetic appeal of your floors but can also lead to issues like drafts and the collection of dust and debris. Addressing these gaps is crucial for maintaining both the beauty and longevity of the wood.
Several easy and effective methods can fill gaps in timber floors, each suited for different types and sizes of gaps, addressing both the causes and solutions.
Causes of Gaps in Timber Floors
1. Natural Expansion and Contraction
Timber is a natural material that reacts to changes in humidity and temperature. In humid conditions, the wood expands, while in drier conditions, it contracts. Over time, this expansion and contraction process can cause noticeable gaps between the boards, especially in regions with significant seasonal shifts.
2. Aging and Wear
As timber floors age, they naturally lose moisture, causing the wood to shrink. Daily wear and tear, along with changes in the structure of the building, can also contribute to gaps forming. Older floors, especially those in homes with long histories, are more prone to these changes as the wood continues to settle over the years.
Methods for Filling Gaps in Timber Floors
Here are seven methods for filling gaps in timber floors, including the necessary materials, detailed instructions, and tips on when to use each method.
1. Wood Filler
Wood filler is a ready-to-use, paste-like compound that hardens once applied and can be sanded and stained to match the timber floor. This is one of the easiest methods for filling small to medium-sized gaps.
Materials Needed:
- Wood filler (pre-colored or stainable)
- Putty knife
- Sandpaper
- Stain or varnish to match the floor

Step-by-Step Process:
- Clean the gaps to remove dirt, dust, and debris.
- Apply the wood filler into the gaps using a putty knife, ensuring it is pressed in firmly.
- Let the filler dry completely according to the manufacturer’s instructions.
- Sand the filled areas to create a smooth surface level with the rest of the floor.
- Apply a matching stain or varnish to blend the repair with the surrounding wood.
Tips: This method works best for small gaps, as wood filler may crack or break apart in larger gaps over time.
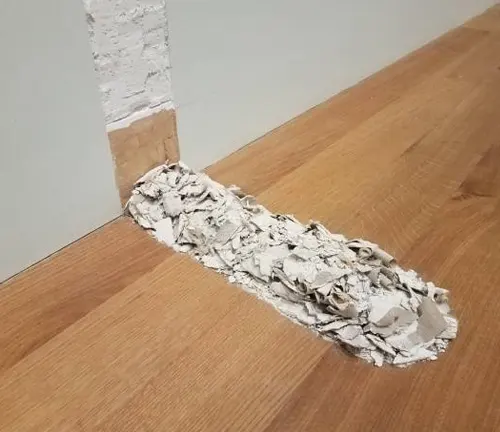
2. Rope Filler (Jute or Cotton)
Rope filler, made from natural fibers like jute or cotton, is a traditional method used for filling larger gaps. The rope acts as a durable filler, especially for older floors where the gaps are wider.
Materials Needed:
- Jute or cotton rope
- Wood glue (optional)
- Putty knife
- Varnish or paint to match the floor
Step-by-Step Process:
- Measure the gaps and cut the rope to the appropriate length and width.
- Optionally, apply a bead of wood glue inside the gap for extra adhesion.
- Press the rope into the gap with a putty knife, making sure it fits snugly and sits flush with the surface.
- Seal the rope with varnish or paint to protect it from wear and blend it with the floor.
Tips: Rope fillers are ideal for wide gaps and allow for some natural movement in the wood without breaking down. Choose rope that closely matches the color of the timber for a more seamless appearance.
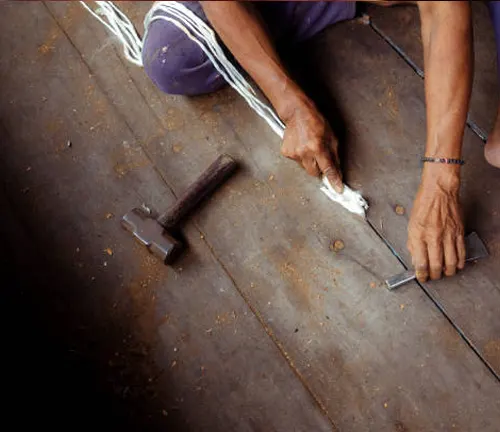
3. Floorboard Slivers
Floorboard slivers are thin pieces of wood cut to fit into gaps between floorboards. This method is a permanent, aesthetically pleasing solution for medium to large gaps.
Materials Needed:
- Pre-cut or DIY floorboard slivers (matching the wood species)
- Wood glue
- Mallet or hammer
- Sandpaper
- Floor stain or varnish
Step-by-Step Process:
- Clean the gaps to remove any debris or dirt.
- Apply wood glue to the edges of the sliver.
- Gently tap the sliver into the gap using a hammer or mallet.
- Allow the glue to dry, then sand the slivers to ensure they are level with the surrounding floor.
- Stain or varnish the area to match the rest of the timber.
Tips: This method works best for floors with large, consistent gaps. Be sure to select slivers that closely match the grain and color of the timber floor.
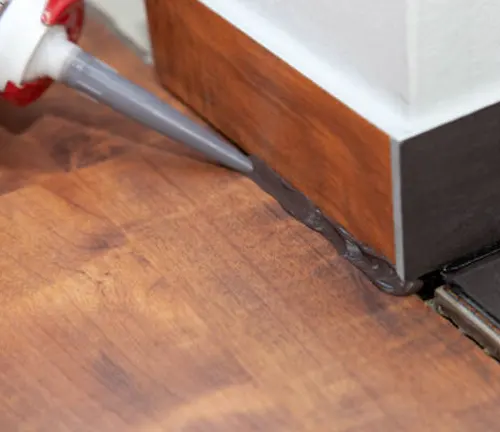
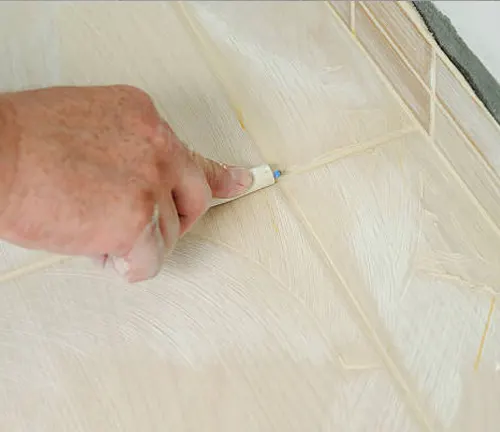
4. Flexible Floor Gap Filler (Caulk)
A flexible gap filler like silicone caulk is ideal for areas with significant movement, as it allows the wood to expand and contract without cracking or breaking.
Materials Needed:
- Flexible caulk (acrylic or silicone)
- Caulking gun
- Putty knife or smoothing tool
- Damp cloth
Step-by-Step Process:
- Clean the gaps thoroughly, ensuring they are dry before application.
- Use a caulking gun to apply the flexible filler into the gaps, ensuring complete coverage.
- Smooth the caulk using a putty knife or smoothing tool.
- Wipe away any excess caulk with a damp cloth before it dries.
Tips: This method is excellent for floors that experience frequent movement due to seasonal changes. Opt for paintable caulk if you plan to apply a finish after the filler has dried.
5. Sawdust and Glue Mixture
A mixture of fine sawdust (from the same timber species) and wood glue can create a custom filler that matches the natural color and texture of the floor.
Materials Needed:
- Fine sawdust (from the same wood species)
- Wood glue
- Putty knife
- Sandpaper
Step-by-Step Process:
- Mix the sawdust and wood glue to form a thick paste.
- Apply the mixture into the gaps using a putty knife, ensuring the gaps are filled completely.
- Allow the mixture to dry fully before sanding the filled area smooth.
Tips: This method is an economical solution for filling small gaps. Ensure the sawdust is clean and fine to achieve a smooth, professional finish.
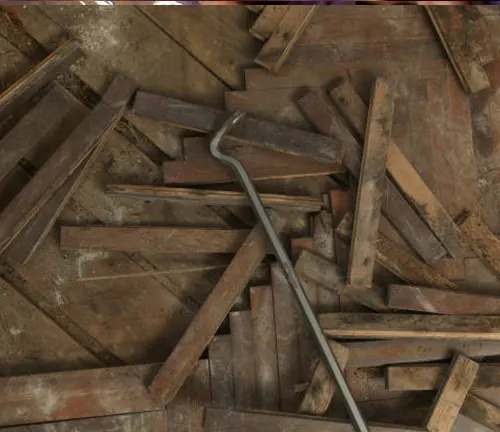
6. Timber Strips
Timber strips are narrow pieces of wood cut to fit into larger gaps. This method provides a more seamless, long-lasting repair for wide gaps.
Items Needed:
- Timber strips (matching the floor)
- Wood glue
- Hammer or mallet
- Sandpaper
- Stain or varnish to match the floor

Step-by-Step Process:
- Measure the gaps and cut timber strips to fit.
- Apply wood glue to the edges of the strips.
- Insert the strips into the gaps, gently tapping them with a mallet or hammer until snug.
- Sand the strips until they are level with the floor surface.
- Apply a matching stain or varnish.
Tips: Timber strips are best for large gaps in older floors. Select wood that closely matches the original floor for the best aesthetic result.
7. Wax Filler
Wax filler is a flexible material that is melted and applied into small gaps. Once hardened, it provides a smooth, durable finish.
Items Needed:
- Wax filler sticks (matching the timber floor color)
- Wax melting tool or heat gun
- Putty knife or cloth for smoothing
Step-by-Step Process:
- Heat the wax filler stick using a wax melting tool or heat gun.
- Press the melted wax into the gaps.
- Smooth the surface using a putty knife or cloth as the wax cools.
Tips: Wax filler works best for small gaps in areas that don’t experience heavy foot traffic. Choose a wax color that matches the timber to ensure a seamless finish.
Conclusion
Each of these methods offers a practical and effective solution for filling gaps in timber floors. From simple, quick fixes like wood filler to more permanent options like timber slivers or rope fillers, choosing the right method depends on the size of the gap and the type of timber floor. Addressing gaps promptly not only restores the aesthetic beauty of your floors but also helps prevent further damage, drafts, or moisture issues.
By selecting the appropriate solution and maintaining your floors regularly, you can ensure they remain in top condition and continue to add warmth and elegance to your home for years to come.
Frequently Asked Questions (FAQ’s)
- Why do gaps form in timber floors?
Gaps are primarily caused by natural expansion and contraction due to changes in humidity and temperature, as well as wear over time. - Can I prevent gaps from forming?
Maintaining stable humidity levels indoors and regular floor maintenance can minimize the chances of gaps forming. - What size gaps can be filled with wood filler?
Wood filler is best suited for small to medium-sized gaps, typically less than 5mm wide. - What is the best solution for wide gaps?
Wide gaps are best filled with materials like rope filler, timber slivers, or flexible caulk that can handle movement and expansion. - Can I use sawdust and glue for all gap sizes?
The sawdust and glue mixture works best for small to moderate gaps but is not ideal for large or structural gaps. - How do I know which method to choose?
The method you choose depends on the size of the gap, the age of the floor, and whether the floor experiences seasonal movement. - Is caulking a permanent solution?
Caulk offers flexibility but may require reapplication over time, especially in high-traffic areas. - Can I fill gaps myself, or do I need a professional?
Many gap-filling methods can be done as DIY projects, but for large or structural gaps, professional help may be needed. - How long does gap filling last?
Properly filled gaps can last for several years, depending on the method and environmental factors. - Is gap filling expensive?
Costs vary depending on the materials used, but many gap-filling solutions are affordable and cost-effective.

Charles Hayes
Forestry AuthorI'm Charles Hayes, I bring over 15 years of specialized expertise in landscaping and woodworking, blending artistic design with sustainable environmental stewardship. My career, fueled by a profound passion for the natural world, encompasses extensive education and hands-on experience in creating harmonious, eco-friendly outdoor spaces and responsibly managing forest resources. Recognized for my professional standing, I am committed to continuous learning and certification in cutting-edge practices. My expertise is not only reflected in my work but also in my contributions to community projects, educational workshops, and collaborations with industry leaders. As an authoritative voice in my field, I strive to share knowledge and promote environmentally conscious approaches, making me a trusted resource in landscaping and forestry.


Leave your comment