How to Grow and Care for Caladiums: Ensure Thriving Growth with Expert Tips
- June 11, 2024
- 0 comment
Learn how to grow and care for caladiums with expert tips that guarantee thriving, vibrant plants in your garden. Dive into the colorful and captivating world of caladiums, where each leaf adds a splash of drama to your garden.
This guide equips you with expert tips to cultivate these stunning plants effectively. Follow along to transform your garden with the vibrant beauty of thriving caladiums, ensuring a spectacular display throughout the growing season.
Table of Contents
- Understanding Caladiums
- Optimal Planting Conditions
- Planting Techniques
- Essential Care Techniques
- Common Pests and Diseases
- Seasonal Care Adjustments
- Propagation Methods
- Troubleshooting Common Issues
- Conclusion
- FAQs
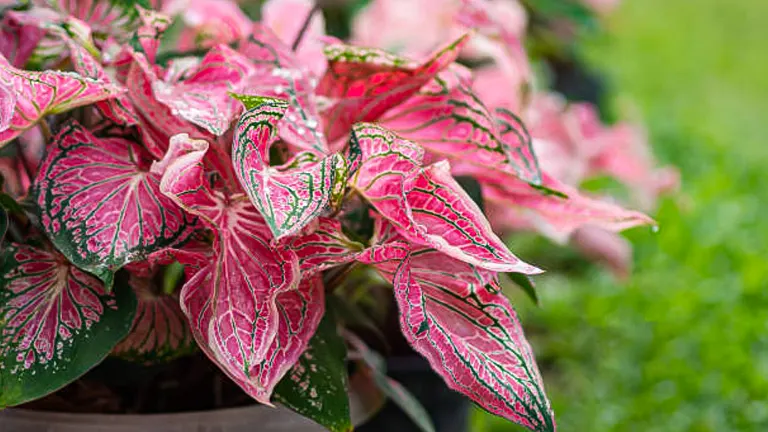
Understanding Caladiums
Caladiums, known botanically as Caladium bicolor, are native to the tropical rainforests of South America, particularly along the Amazon River basin. These plants are part of the Araceae family, which also includes notable species like philodendrons and anthuriums. Caladiums have evolved to thrive in warm, humid conditions under the dappled light of forest canopies, making them well-suited for similar environments in home gardens.
Caladium leaves are actually bracts or modified leaves called ‘spathe’ surrounding a floral spike known as a ‘spadix’. This adaptation is common among Araceae and serves to attract pollinators while protecting the flowers. The vibrant colors and patterns of caladium leaves are due to various pigments, including chlorophyll, anthocyanins, and carotenoids, which not only contribute to their striking appearance but also play roles in plant health and photosynthetic efficiency.
Genetic Diversity and Cultivation
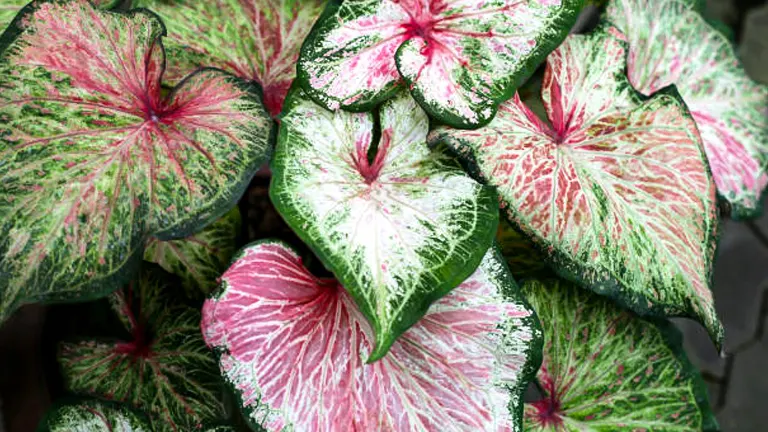
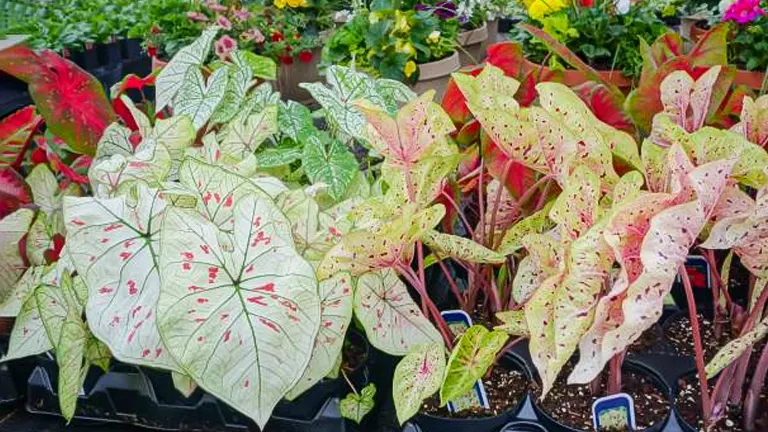
With over 1,000 recorded varieties, caladiums exhibit a remarkable genetic diversity that translates into a wide range of colors, patterns, and leaf shapes. This diversity is the result of both natural selection and extensive breeding efforts. Key breeding goals have included enhancing leaf color vibrancy, increasing disease resistance, and adapting to a wider range of climatic conditions.
Popular Varieties and Their Traits
Here’s a table that compares some of the most popular caladium varieties, highlighting their distinctive features and optimal growing conditions:
| Variety | Leaf Color | Sun Tolerance | Size | Unique Feature |
|---|---|---|---|---|
| Florida Sweetheart | Pink with green edges | Medium | Medium | Thrives in both pots and as border plants |
| Moonlight | Creamy white | High | Tall | Excellent for brightening shaded garden spots |
| Red Flash | Deep red with green | Low | Large | Features large leaves, ideal for visual impact |
| White Queen | White with red veins | Medium | Tall | Striking vein contrast, great for focal points |
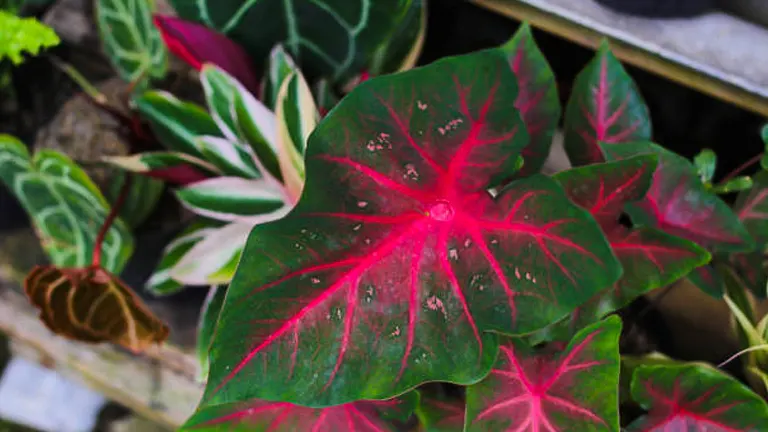
Ecological Role: In their native habitat, caladiums contribute to the ecological balance by providing ground cover that helps maintain soil moisture and prevent erosion. Their leaves also offer habitat and food for various tropical insects, playing a role in the nutrient cycling of the forest floor.
Adaptive Features: Caladiums have developed several adaptations to their rainforest environment. Their large leaves maximize the capture of sunlight in low-light conditions under the canopy, and their extensive root systems are adept at absorbing nutrients from the forest’s nutrient-poor soil.
Optimal Planting Conditions
Timing and Location
Planting caladiums in the spring ensures they grow in warm conditions, which they favor. Wait until the soil temperature reaches at least 70°F (21°C) to prevent root rot and promote vigorous growth. Caladiums thrive in partial shade or indirect light, as excessive direct sunlight can scorch their leaves. However, they can tolerate more sun if kept consistently moist. In cooler climates, start the bulbs indoors about 4-6 weeks before the last frost date to give them a head start. Use pots with good drainage and place them in a warm, bright area.
Soil Requirements
Caladiums require well-draining, slightly acidic to neutral soil, ideally with a pH between 6.0 and 7.0. Enhance the soil by mixing in organic compost or well-rotted manure to improve both drainage and nutrient content. This preparation ensures the soil is loose and not compacted, allowing the delicate roots to spread easily. Avoid heavy clay soils or waterlogged conditions, as they can lead to bulb rot.
Additional Information:
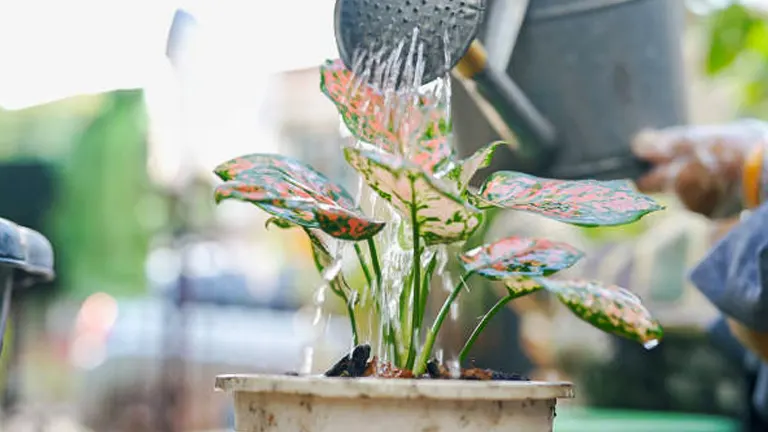
- Watering: Caladiums need consistent moisture but should not sit in water. Water the plants regularly to keep the soil evenly moist, particularly during dry periods. Mulching around the plants can help retain soil moisture and regulate temperature.
- Temperature and Humidity: These tropical plants thrive in temperatures between 70°F and 85°F (21°C – 29°C) and high humidity. If you live in a dry climate, consider using a humidifier or regularly misting the plants to maintain adequate humidity levels.
- Fertilization: Feed caladiums with a balanced, water-soluble fertilizer every 4-6 weeks during the growing season. A fertilizer ratio of 10-10-10 (N-P-K) is ideal. Be cautious not to over-fertilize, as excessive nutrients can damage the plants.
- Pest and Disease Management: Caladiums are generally resistant to pests, but they can occasionally suffer from spider mites, aphids, or slugs. Regular inspection and prompt treatment with insecticidal soap or neem oil can keep these pests at bay. Good air circulation and avoiding overhead watering can prevent common fungal diseases such as powdery mildew.
Key Factors for Optimal Caladium Planting
| Factor | Ideal Condition | Notes |
|---|---|---|
| Planting Time | Spring (soil temperature ≥ 70°F / 21°C) | Start indoors in cooler climates |
| Light Requirements | Partial shade or indirect light | Can tolerate more sun with consistent moisture |
| Soil pH | 6.0 – 7.0 | Slightly acidic to neutral preferred |
| Soil Type | Well-draining, loose, enriched with compost | Avoid heavy clay or waterlogged soils |
| Watering | Regular, even moisture | Mulch to retain moisture |
| Temperature | 70°F – 85°F (21°C – 29°C) | High humidity beneficial |
| Fertilization | Balanced 10-10-10 every 4-6 weeks | Avoid over-fertilization |
| Pest Management | Inspect regularly, use insecticidal soap | Manage spider mites, aphids, slugs |
| Disease Prevention | Good air circulation, avoid overhead watering | Prevent fungal issues like powdery mildew |
Planting Techniques
Bulb Planting
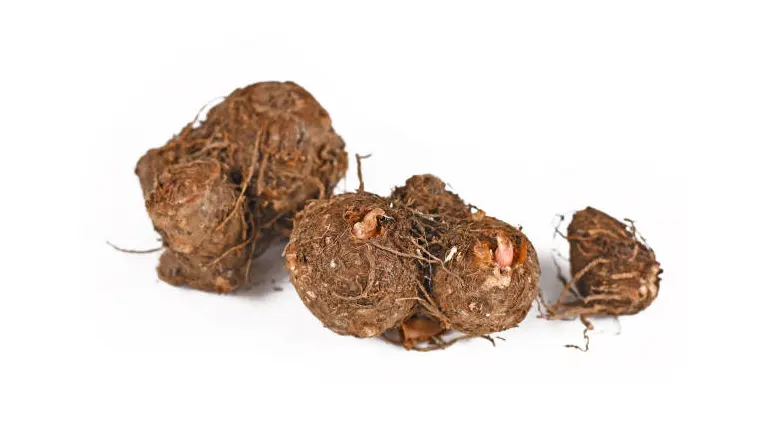
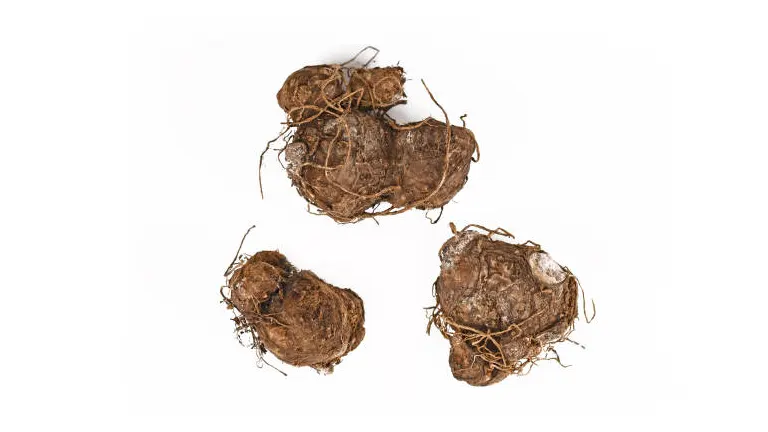
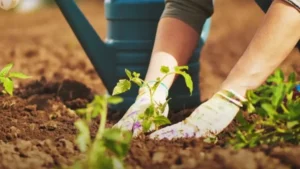
Planting caladium bulbs with precision is essential for their optimal growth and vibrant leaf development. Place the bulbs about 1 to 2 inches deep in the soil, ensuring the knobby side (the ‘eye’) faces upward—this is where new growth will emerge. For spacing, maintain about 8 to 12 inches between each bulb to ensure each plant has enough room to develop fully.
This spacing promotes not only aesthetic fullness but also healthy growth by allowing adequate air flow, which is crucial in preventing fungal diseases. For gardeners seeking a denser foliage display in limited spaces, reducing the spacing to about 6 to 8 inches is permissible, though increased vigilance for air circulation and moisture control is necessary to mitigate the risk of disease.
Container Planting
Growing caladiums in containers offers flexibility and control over the growing environment. Choose a container with sufficient drainage holes to prevent water accumulation and root rot. Fill the container with a high-quality potting mix, ideally formulated for container gardening. This mix should retain moisture while still allowing excess water to drain, and be rich in nutrients to support vibrant growth. Containers are particularly advantageous as they can be easily relocated to adjust the plants’ exposure to light and temperature throughout the season, which is essential for maintaining the health and color of the foliage.
Advanced Considerations:
- Depth and Eye Orientation: Scientific research indicates that caladium bulb planting depth and orientation significantly influence sprouting success and foliage quality. Bulbs planted too shallowly may result in weaker plants, while those planted too deeply may experience delayed or inhibited sprouting.
- Microclimate Management: In container planting, the choice of container material can affect soil temperature and moisture levels. For example, clay pots offer breathability, cooling the soil, while plastic containers retain more warmth and moisture, which can be beneficial in cooler climates.
- Nutrient Management: Fertilize caladiums every four weeks with a balanced, slow-release fertilizer. An N-P-K ratio of 10-10-10 is typically recommended. In scientific terms, caladiums require a steady supply of nitrogen for leaf growth, phosphorus for root development, and potassium for overall plant health and disease resistance.
- Pest Surveillance: Regularly inspect caladiums for signs of pests such as aphids and spider mites. Early detection and treatment are key to maintaining plant health. Integrated Pest Management (IPM) strategies can be effective, combining physical, biological, and chemical controls tailored to the specific pests and plant conditions.
Essential Care Techniques
Watering
Caladiums require consistent moisture to thrive, especially during dry spells. Water the plants deeply once the top inch of soil feels dry to the touch. However, avoid waterlogging, as standing water can lead to root rot. Implementing a mulch layer around the plants can help retain soil moisture and also keep the roots cool.
Fertilizing
Feed caladiums with a balanced, water-soluble fertilizer every four to six weeks during the growing season. This regular feeding schedule supports their rapid growth and vibrant leaf coloration. Be cautious not to over-fertilize, as this can damage the plants and lead to less vibrant foliage.
Temperature and Humidity
Being tropical plants, caladiums thrive in warm and humid conditions. They perform best when temperatures are between 70°F and 85°F. If you live in a cooler climate, consider using a plastic cover or garden fleece to raise the air temperature around your plants during cooler nights or unexpected cold snaps.
Common Pests and Diseases
Identifying Threats
Caladiums are susceptible to several pests and diseases that can compromise their health and aesthetic appeal. Two of the most common pests are spider mites and aphids, which tend to attack the undersides of leaves, extracting sap and reducing the plant’s vigor. Spider mites, in particular, can reduce photosynthetic efficiency by up to 30% by damaging the leaf surface. Aphids, on the other hand, excrete honeydew which can lead to sooty mold, further impairing photosynthesis.
Fungal infections such as leaf spot and root rot are prevalent under conditions of high moisture. Leaf spot is typically caused by fungi like Alternaria, Cercospora, or Helminthosporium, which create necrotic spots and can lead to significant leaf loss if untreated. Root rot, often caused by Pythium or Phytophthora species, thrives in poorly drained soils and can quickly lead to plant demise.
Preventative Measures
Effective air circulation is crucial for preventing fungal diseases. Space plants to allow air flow between them, reducing humidity around the foliage, which is a key factor in fungal growth. For pest control, regular inspections are essential. Treat infestations early with insecticidal soap or neem oil, applying every 5-7 days until the pests are controlled. These products disrupt the pests’ life cycle without causing significant harm to the plant or beneficial insects.
Scientifically-based Approaches for Disease Prevention
Maintain soil moisture levels at 20-30% to prevent conditions conducive to fungal growth. Utilize mulches to help stabilize soil moisture, but avoid direct contact with the plant stems to prevent rot. Adjusting the pH of the soil to slightly acidic conditions (pH 5.5-6.5) can also help suppress certain pathogenic fungi.
Management Strategies for Common Pests and Diseases in Caladiums
| Pest/Disease | Symptoms | Management Strategy | Frequency of Treatment |
|---|---|---|---|
| Spider Mites | Yellow speckling on leaves | Insecticidal soap or neem oil application | Every 5-7 days until control |
| Aphids | Sticky residue, leaf curling | Neem oil, strong water spray | As needed, monitor weekly |
| Leaf Spot | Brown or black leaf spots | Fungicide, improve air circulation | At first sign of symptoms |
| Root Rot | Soft, brown roots | Improve drainage, fungicide if severe | Adjust practices as needed |
Seasonal Care Adjustments
Spring and Summer Care
These seasons require diligent monitoring of soil moisture using a simple soil moisture meter. Caladiums should be fertilized just before the onset of the growth period to synchronize nutrient availability with growth spurts.
Fall Preparations
Begin reducing water and fertilizer applications gradually over 4 weeks to encourage the plants to harden off for dormancy. This reduces the risk of frost damage to the tubers, which should be stored at 55°F to 60°F with 85% humidity to maintain dormancy without desiccation.
Overwintering Tips
For indoor overwintering, ensure caladiums receive indirect light with a photoperiod of 12 hours. Keep the plants in a room with a stable temperature of about 65°F to prevent cold stress.
Essential Care Parameters for Caladiums
| Parameter | Value | Details |
|---|---|---|
| Soil Moisture | 25% – 30% | Prevents waterlogging and drought stress |
| Fertilizer NPK | 10-10-10 | Supports balanced growth and foliage color |
| Temperature | 70°F – 85°F (21°C – 29°C) | Optimal for growth |
| Humidity | 75% – 85% | Mimics native tropical conditions |
| Winter Temperature | 55°F – 60°F | Ideal for tuber storage |
| Winter Humidity | 85% | Prevents tuber desiccation |
Propagation Methods
Division of Bulbs
Propagating caladiums by dividing their tubers is a straightforward and effective method to expand your collection or rejuvenate older plants. The best time to divide caladium bulbs is during their dormant period in late fall or early winter. Carefully dig up the bulbs and gently separate them, ensuring each division has at least one growing point, commonly known as an “eye.” This method allows gardeners to selectively increase the number of plants and manage their health and size more effectively.
Replanting Tips
Once divided, prepare the new planting sites or pots as previously described, ensuring that the soil is fertile and well-draining. Plant the divided bulbs at the same depth they were originally growing and water them lightly. It’s essential to maintain a stable environment as the new plants reestablish themselves, avoiding extremes in temperature and moisture.
Troubleshooting Common Issues
Reviving Dull or Wilting Plants
If your caladiums begin to show signs of wilting or the leaves lose their vibrant color, it could be a sign of either water stress or nutrient imbalance. Check if the soil is either too dry or waterlogged. Adjusting your watering schedule accordingly and ensuring proper drainage can often restore plant health. Additionally, a light application of a balanced fertilizer can rejuvenate undernourished plants.
Handling Leaf Spot and Root Rot
These common ailments require swift action to prevent spread. For leaf spot, remove the affected foliage and avoid water splashing on the leaves when irrigating. For root rot, improve drainage and consider repotting the plant in fresh soil if necessary. Ensuring the soil dries slightly between waterings can prevent future occurrences.
Related Post
- How to Build a Barn: A Step-by-Step Guide for Beginners
- How to Build a Sustainable Compost Bin: Easy and Eco-Friendly DIY
- How to Fertilize Bougainvillea: A Complete Guide for Stunning Blooms
- How to Fertilize Apple Trees: Essential Tips for a Bountiful Harvest
- How to Fertilize Lemon Trees: Secrets for Thriving Citrus
- How to Fertilize Avocado Tree: A Step-by-Step Guide for Lush Growth
- 10 Best Bow Saws to Buy in 2024: Top Picks for the Money
- Best Miter Saw For Beginners
- Top 10 Pruning Saws to Buy in 2024: Best for the Money
- 7 Best Pocket Chainsaw
Conclusion
Growing and caring for caladiums can be a deeply rewarding gardening experience. These stunning plants offer a splash of color that few other foliage plants can match. With the expert tips provided in this guide, you are well-equipped to nurture healthy, thriving caladiums that will beautify your garden year after year. Remember, the key to success lies in understanding the specific needs of your plants and adapting your care techniques as you learn and grow as a gardener.
FAQs
- What is the best time to plant caladium bulbs?
Plant caladium bulbs in the spring, once the soil temperature has reached at least 70°F. This ensures the ground is warm enough to stimulate growth. - How often should I water my caladiums?
Water your caladiums once the top inch of soil feels dry. Aim to keep the soil consistently moist but not waterlogged to avoid root rot. - Can caladiums grow in full sun?
While caladiums can tolerate full sun, they thrive best in partial shade or filtered sunlight, especially in hotter climates, to prevent leaf burn. - What type of fertilizer is best for caladiums?
Use a balanced, water-soluble fertilizer every four to six weeks during the growing season to support vibrant growth and leaf coloration. - How do I store caladium bulbs over winter?
After the foliage dies back, dig up the bulbs, gently clean off the soil, and store them in a cool, dry place at temperatures between 50°F and 60°F. - When and how should I divide caladium bulbs?
Divide caladium bulbs during their dormant period in late fall or early winter. Each division should have at least one eye, or growth point, to ensure successful replanting. - How can I treat fungal diseases in caladiums?
Remove any infected leaves and adjust your watering habits to ensure the foliage doesn’t remain wet for long periods. Applying fungicide may also be necessary in severe cases. - Can I grow caladiums indoors?
Yes, caladiums can be grown indoors in pots with adequate drainage and placed in well-lit areas that receive indirect sunlight. Keep the soil consistently moist and provide humidity to mimic their natural tropical environment.
With these expert tips at your disposal, growing and caring for caladiums is a breeze. Embrace these guidelines and watch as your garden becomes a vibrant showcase of color and life. Happy gardening!

Emma Hudson
Forestry AuthorEmma's experience in farming shapes her detailed guides on gardening and farming tools, providing practical, actionable advice grounded in real-world experience. Her work targets both newcomers and experienced farmers, aiming to enhance their practices with a mix of traditional wisdom and modern techniques. By making complex agricultural concepts accessible, Emma's guides serve as valuable tools for those navigating the challenges of contemporary farming, offering strategies for sustainable success.


Leave your comment