How to Grow Heliotropes: Beginner’s Guide to Fragrant Blooms
- March 5, 2024
- 0 comment
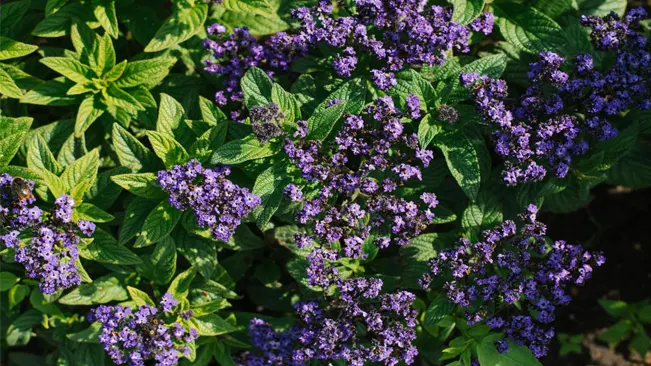
Heliotropes, with their vibrant clusters of sweet-scented, deep-purple flowers, are a favorite among gardeners seeking to add a splash of color and fragrance to their gardens. Originating from the Peruvian highlands, these beautiful plants are known for their unique ability to turn their blooms towards the sun. Growing heliotropes can be a rewarding experience for both novice and experienced gardeners. In this article, we’ll explore the essential steps and tips for successfully growing heliotropes in your garden.
Choosing the Right Location
Heliotropes thrive in sunny spots. They need at least six hours of direct sunlight each day to bloom profusely. Choose a location that receives ample sunlight, is sheltered from strong winds, and has good air circulation. Although they can tolerate partial shade, too little light may result in fewer flowers and leggy plants.
- The Importance of Sunlight for Heliotropes
Heliotropes are sun-loving plants, and their requirement for ample sunlight cannot be overstated. They flourish best when they receive a minimum of six hours of direct sunlight daily. This exposure is crucial for the development of their richly colored blooms and for maintaining robust, healthy growth. In their native environment, heliotropes are accustomed to bright, direct light, which encourages the production of their signature deep purple flowers and their intense, sweet fragrance. - Selecting the Ideal Spot in Your Garden
When selecting a spot in your garden for heliotropes, look for an area that is consistently bathed in sunlight. An east-facing location that receives morning sunlight or a west-facing spot that gets afternoon sun are good choices. South-facing locations are generally ideal as they usually provide the most sunlight throughout the day. It’s important to observe the patterns of sunlight in your garden across different times of the day and seasons, as this can vary significantly. - Protection from Wind and Ensuring Good Air Circulation
While heliotropes need plenty of sunlight, they also benefit from being planted in a location that is somewhat protected from strong winds. Winds can dry out the soil quickly, stress the plants, and cause physical damage to the delicate blooms. A spot near a fence, wall, or amongst other plants can provide a degree of shelter. However, it’s crucial to balance this with the need for good air circulation. Adequate air movement around the plants helps prevent the onset of fungal diseases and keeps the plants healthy. Avoid overly crowded planting, which can impede air flow. - Tolerating Partial Shade
Heliotropes can tolerate partial shade, but this comes with a trade-off. In less than ideal light conditions, you may notice that your heliotropes produce fewer flowers and the plant may become leggy as it stretches towards the light source. If your garden doesn’t provide full sun, you can still grow heliotropes, but be prepared for a potential reduction in floral display and overall vigor. - Adapting to Different Environments
In regions with extremely hot and intense sun, especially during the peak of summer, heliotropes might benefit from a little afternoon shade. This can prevent the foliage from scorching. In cooler climates, maximizing sun exposure becomes even more critical to compensate for the lower intensity of the sun.
Soil Preparation
These plants prefer well-draining soil with a neutral to slightly acidic pH. Before planting, enrich your garden soil with compost or well-rotted manure to improve its fertility and drainage. If you’re growing heliotropes in pots, use a high-quality potting mix.
- Understanding Soil Requirements
Heliotropes flourish in well-draining soil that retains enough moisture without becoming waterlogged. They prefer a neutral to slightly acidic pH, typically ranging from 6.0 to 7.5. Soil that is too alkaline or too dense can hinder their growth and affect flowering. - Improving Garden Soil
If you plan to plant heliotropes in your garden, it’s essential to start with soil preparation. Begin by testing the soil pH using a soil test kit, which is readily available at garden centers. If the soil is too alkaline, you can lower the pH by incorporating sulfur or peat moss. For overly acidic soil, adding lime can help neutralize it. - To improve soil drainage and fertility, mix in organic matter such as compost or well-rotted manure. This step is crucial because organic matter improves soil structure, enhances its ability to retain nutrients and water, and fosters a healthy root environment. A well-composted garden bed provides the heliotropes with the necessary nutrients and improves the overall soil health.
- Preparing Soil for Container Planting
If you’re growing heliotropes in pots or containers, the approach differs slightly. Containers require a potting mix that is specifically designed to provide good drainage and aeration. Choose a high-quality potting mix that often includes components like peat moss, perlite, and vermiculite. These ingredients ensure that the soil is well-draining yet capable of retaining enough moisture to keep the roots hydrated. - Adjusting Soil Texture and Drainage
In areas with heavy clay soil, it’s important to amend the soil to prevent waterlogging, which can cause root rot in heliotropes. You can improve the texture by adding coarse sand and organic matter, which helps break down the density of the clay and allows better root growth.
Conversely, in sandy soils, the challenge is retaining moisture and nutrients. Adding organic matter like compost or aged manure will increase the soil’s ability to hold water and nutrients, making it more suitable for heliotropes. - Regular Soil Maintenance
Once your heliotropes are planted, ongoing soil maintenance is key. Mulching around the plants with organic mulch helps conserve soil moisture, suppress weeds, and gradually improve soil quality as it decomposes. Additionally, periodic applications of a balanced, slow-release fertilizer can help maintain soil fertility throughout the growing season.
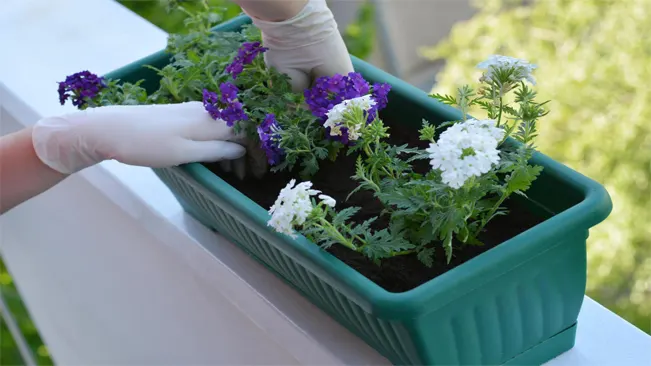
Planting Heliotropes
You can start heliotropes from seeds indoors about eight weeks before the last expected frost. Plant the seeds in a seed-starting mix, barely covering them, as they need light to germinate. Keep the soil moist and provide warmth. Once the seedlings emerge and grow strong enough, transplant them to your garden or larger pots after the danger of frost has passed.
Starting Seeds Indoors
- Timing: Begin about eight weeks before the last expected frost date in your area. This early start is crucial as heliotropes take a while to germinate and grow to a transplantable size.
- Seed Selection: Opt for high-quality heliotrope seeds from a reputable source. There are various cultivars available, so choose one that suits your climate and aesthetic preferences.
- Seed-Starting Mix: Use a light, well-draining seed-starting mix. This type of soil ensures the right balance of moisture retention and drainage, which is essential for seed germination.
- Sowing Seeds: Sow the heliotrope seeds on the surface of the moist seed-starting mix. Do not cover them completely with soil as they require light to germinate. You can gently press them into the soil with your finger.
- Light and Temperature: After sowing, place the seed tray in a warm, bright spot. Heliotrope seeds need temperatures between 70-75°F (21-24°C) to germinate effectively. You can use a heat mat to maintain a consistent soil temperature.
- Moisture Control: Keep the soil consistently moist but not waterlogged. Using a spray bottle to mist the soil surface can prevent overwatering. Covering the tray with plastic wrap or a clear dome can help maintain humidity levels, but ensure to remove it once you see sprouts.
Caring for Seedlings
- Light Exposure: Once the seeds have sprouted, they need plenty of light. Place them in a sunny window or under grow lights. If using artificial light, keep the seedlings about 2-3 inches away from the light source and maintain a schedule of 14-16 hours of light per day.
- Watering Seedlings: Water the seedlings when the top layer of the soil feels dry. Avoid overwatering as this can lead to root rot.
- Thinning: If you’ve sown multiple seeds in one container, thin the seedlings once they have a couple of sets of true leaves. Keep the strongest and healthiest-looking seedlings and gently remove the others.
Transplanting Outdoors
- Hardening Off: Before transplanting them outdoors, it’s important to acclimate the heliotrope seedlings to outdoor conditions. This process is called hardening off. Start by placing the seedlings outside in a shaded, protected area for a few hours each day, gradually increasing their exposure to sun and outdoor temperatures over a week.
- Transplanting: Choose a sunny spot in your garden with well-draining soil. Dig holes larger than the root ball of your seedlings. Gently remove the seedlings from their containers, being careful not to damage the roots, and place them in the holes. Fill the holes with soil and water thoroughly.
- Spacing: Plant heliotropes about 12-18 inches apart. This spacing allows for adequate air circulation and room for growth.
- Initial Care: After transplanting, keep the soil consistently moist for the first few weeks to help the seedlings establish. Mulching around the plants can help retain moisture and regulate soil temperature.
Watering and Feeding
Watering heliotropes correctly is essential for their health and flowering. These plants prefer consistent moisture but do not like to be waterlogged. Overwatering can lead to root rot, a common issue in poorly draining soils. To ensure proper hydration:
- Check the soil moisture regularly. The top inch of soil should be allowed to dry out slightly before the next watering. This practice encourages deeper root growth, making the plant more drought-tolerant.
- Water deeply but infrequently. This method helps in developing a strong root system. During hot summer months, heliotropes may need more frequent watering, especially if they are in containers.
- Use lukewarm water to avoid shocking the plant’s roots, especially in cooler weather.
Feeding your heliotropes is also crucial for their growth and blooming:
- Use a balanced, water-soluble fertilizer, like a 10-10-10 or 20-20-20 formula. This provides an equal proportion of nitrogen, phosphorus, and potassium, essential for overall plant health.
- Apply the fertilizer every four to six weeks during the growing season (spring through late summer). Avoid over-fertilizing, as this can lead to lush foliage at the expense of flowers.
- In the fall, reduce feeding to prepare the plant for winter, especially if you plan to overwinter them indoors.
Pruning and Maintenance
Deadheading, or removing spent flowers, encourages new blooms and keeps your plants looking tidy. Pinch back the tips of young plants to promote bushier growth. Keep an eye out for pests like aphids and treat them promptly with insecticidal soap or neem oil.
- Deadheading, the practice of removing spent blooms, not only keeps the plant looking neat but also encourages the production of more flowers. Snip off the flower stalks right below the spent blooms.
- Pinch back the tips of the plant when they are young. This encourages the plant to become bushier and fuller, rather than tall and leggy.
- Regularly inspect your plants for pests like aphids, spider mites, and whiteflies. These pests can be controlled with insecticidal soap or neem oil. Apply these treatments in the early morning or late evening to avoid harming beneficial insects and to reduce leaf burn.
Winter Care
In colder regions, heliotropes are treated as annuals. However, you can overwinter them indoors. Before the first frost, dig up the plants, pot them, and place them in a sunny window. Reduce watering and stop fertilizing during this period. Come spring, gradually acclimate them to outdoor conditions before replanting.
- Before the first frost, dig up your heliotropes and pot them in suitable containers with drainage holes. Use a good-quality potting mix.
- Place the potted heliotropes in a bright, sunny window. They need plenty of light to survive the winter months.
- Reduce watering in winter. The goal is to keep the soil barely moist, as the plant’s growth slows down.
- Stop fertilizing during winter. This period of rest is crucial for the plant’s health.
- In early spring, start to acclimate the plant back to outdoor conditions. Begin by placing it outside for a few hours a day in a sheltered location, gradually increasing its time outdoors over a week or two. This process is known as “hardening off” and helps the plant adjust to the change in environment.
Conclusion
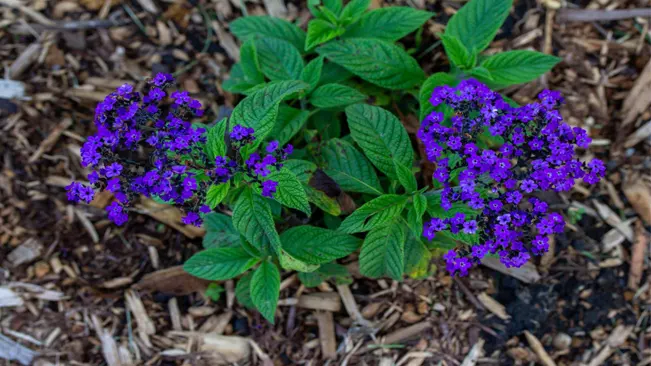
Growing heliotropes can be a delightful addition to any garden. With their alluring fragrance and stunning purple blooms, they bring beauty and a touch of whimsy to your outdoor space. By following these guidelines, you can enjoy the charm of heliotropes throughout the growing season.
FAQs (Frequently Asked Questions)
- What are the best conditions for growing heliotropes?
Heliotropes thrive in full sun, requiring at least six hours of direct sunlight daily. They prefer well-draining soil with a neutral to slightly acidic pH and a location sheltered from strong winds. - Can heliotropes be grown in pots?
Yes, heliotropes can be grown in pots using a high-quality potting mix. Ensure the pot has adequate drainage holes to prevent waterlogging. - When is the best time to plant heliotropes?
Plant heliotropes outdoors after the last frost of spring. If starting from seeds, begin indoors about 8 weeks before the last expected frost. - How often should I water heliotropes?
Water heliotropes regularly, allowing the soil to dry out slightly between waterings. They require consistent moisture but do not tolerate waterlogged soil. - Do heliotropes need fertilizer?
Yes, feed heliotropes every four to six weeks during the growing season with a balanced, water-soluble fertilizer to encourage healthy growth and flowering. - How do I encourage more blooms in heliotropes?
Deadhead spent flowers regularly to encourage new blooms. You can also pinch back the tips of young plants to promote bushier growth and more flowering sites. - Can heliotropes survive winter outdoors?
In colder climates, heliotropes are usually treated as annuals. However, they can be overwintered indoors in a sunny window with reduced watering. - Are heliotropes susceptible to any pests or diseases?
Heliotropes can attract aphids and whiteflies. They are also susceptible to root rot and powdery mildew if overwatered or with poor air circulation. Regular checks and prompt treatment can mitigate these issues. - How tall do heliotropes grow?
Most heliotrope varieties grow to be about 1 to 3 feet tall, depending on the cultivar and growing conditions. - Can heliotropes be propagated?
Yes, heliotropes can be propagated from cuttings. Take cuttings in late summer and root them in a moist soil mix, keeping them in a warm, bright spot until roots develop.

Kristine Moore
Forestry AuthorI'm Kristine Moore, a seasoned garden landscaping professional with over 30 years of experience. My extensive career has been dedicated to transforming outdoor spaces into stunning, sustainable landscapes. With a deep understanding of horticulture, design principles, and environmental stewardship, I have become a respected figure in the field, known for creating harmonious, visually appealing, and eco-friendly gardens. My commitment to excellence and continuous learning in landscaping trends and techniques has solidified my reputation as an expert in garden design and implementation.


Leave your comment