How to Plant Kiwi Seeds: Step-by-Step Guide for Juicy Harvests
- February 29, 2024
- 2 comment
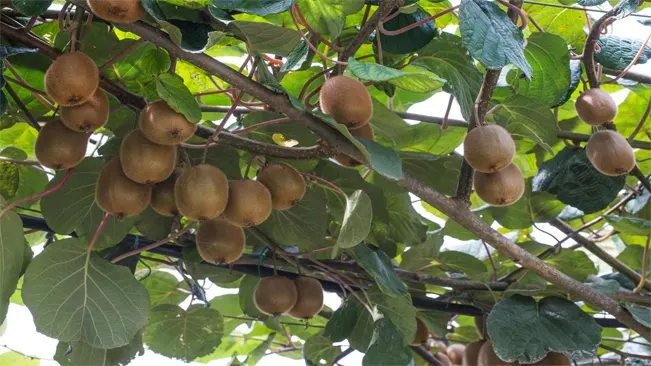
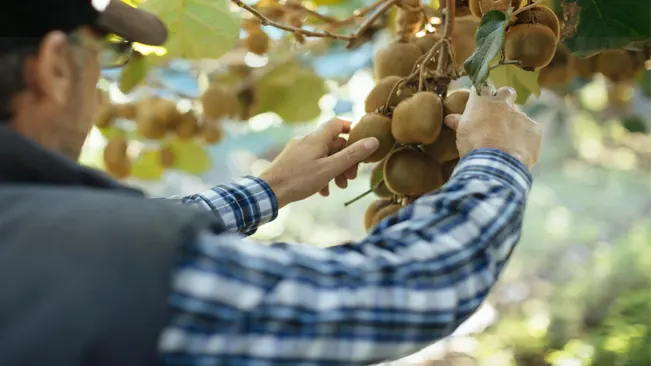
Kiwi, with its vibrant green color and unique taste, is not only a delicious fruit but also an interesting plant to grow. Planting kiwi seeds can be a rewarding gardening project. Here’s a step-by-step guide to help you start your own kiwi plant from seeds.
Nutritional Benefits of Kiwi
| Benefit | Description |
|---|---|
| Rich in Vitamins C and E | Kiwi is an excellent source of Vitamin C, which is essential for immune function, and Vitamin E, a powerful antioxidant that helps in protecting the body from free radicals. |
| High in Dietary Fiber | The fruit is high in fiber, which aids in digestion and can help prevent constipation. It also contributes to a feeling of fullness, which is beneficial for weight management. |
| Good for Skin Health | Thanks to its high vitamin C content, kiwi can aid in the synthesis of collagen, which helps keep skin firm and youthful. |
| Supports Heart Health | Kiwi contains potassium, which helps maintain blood pressure levels, and antioxidants that support heart health. |
| Helps in Managing Blood Sugar | The low glycemic index of kiwi makes it a suitable fruit for people with diabetes, helping in blood sugar regulation. |
| Rich in Antioxidants | Kiwis are loaded with antioxidants that help reduce oxidative stress, lowering the risk of chronic diseases such as cancer and heart disease. |
| Eye Health | Kiwi is a source of lutein and zeaxanthin, antioxidants that are known to protect the eyes and reduce the risk of macular degeneration. |
| Boosts Immunity | The high levels of vitamin C and antioxidants in kiwi help strengthen the immune system, making it more efficient in warding off infections and illnesses. |
| Improves Respiratory Health | Some studies suggest that the high vitamin C content in kiwi may help in reducing symptoms of asthma and other respiratory conditions. |
| Aids in Iron Absorption | The high vitamin C content in kiwi can enhance the absorption of iron from foods, which is beneficial for preventing iron-deficiency anemia. |
Before planting, it’s important to know that kiwi plants are dioecious, meaning they have male and female plants. For fruit production, you need at least one of each. However, growing kiwi from seeds might not produce fruit identical to its parent plant due to cross-pollination.
List on How To Plant Kiwi Seeds
- Extracting the Seeds
- Germination Process
- Caring for the Seedlings
- Transplanting Outdoors
- Ongoing Care
Materials Needed
- Kiwi fruit
- Small container
- Potting soil
- Water
- Plastic wrap or a plastic bag
- A sunny window or grow light
- Patience!
Extracting the Seeds
Choosing the Right Kiwi Fruit
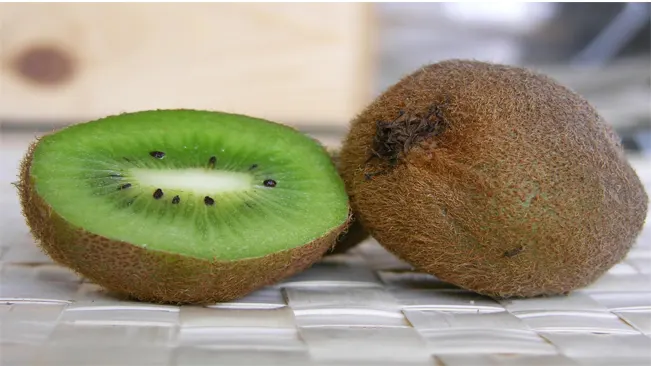
- Selecting a Ripe Fruit: The key to successful germination lies in using ripe kiwi fruits. A ripe kiwi is typically soft to the touch, and its skin may yield slightly under gentle pressure. The riper the fruit, the more mature and viable the seeds are likely to be.
- Why Ripe Fruit Matters: In ripe fruits, the seeds have completed their development and are ready for the next stage of their life cycle. Using underripe kiwi can result in poor germination rates as the seeds may not have developed fully.
Extracting the Seeds
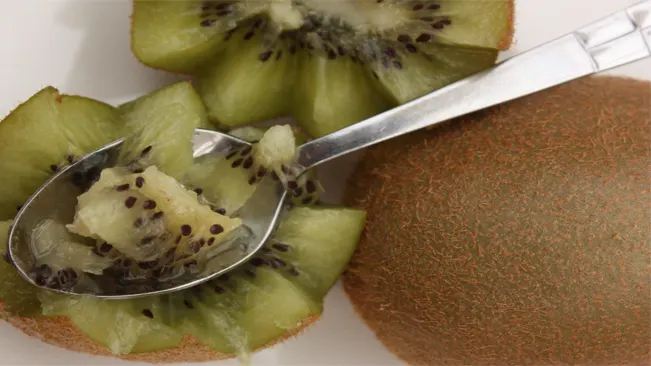
- Scooping Out the Pulp: Cut the kiwi in half and use a spoon to scoop out the pulp, which contains the seeds. Be gentle to avoid crushing the seeds.
- Separating Seeds from Pulp: This can be a bit tricky due to the slimy texture of the pulp.
- Place the pulp in a fine sieve.
- Run cold water over the pulp while gently rubbing it against the sieve. The goal is to wash away the pulp, leaving the seeds behind.
- Alternatively, you can let the pulp sit in a container of water for a few days. The viable seeds will sink to the bottom while the pulp and non-viable seeds float. Then rinse the seeds thoroughly.
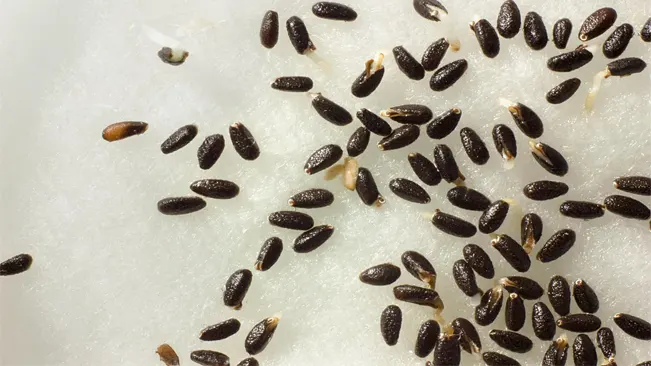
Drying the Seeds
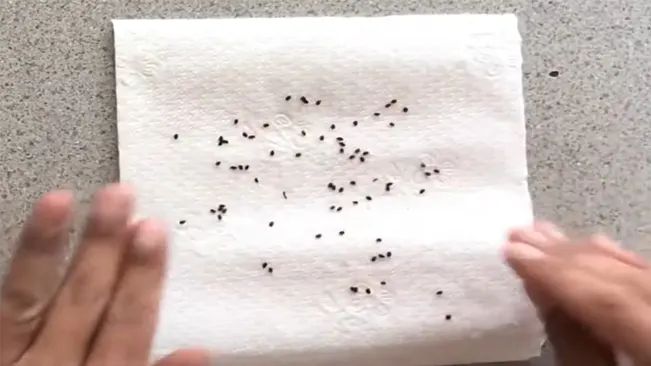
- Spreading Seeds for Drying: Once the seeds are separated, spread them out on a paper towel. Avoid clumping them together as this can hinder the drying process.
- Time and Environment for Drying:
- The drying process typically takes a few days.
- Choose a warm, dry, and well-ventilated area to aid in drying.
- Ensure the seeds are not exposed to direct sunlight during this time as extreme heat can damage them.
- Why Drying is Important: Drying the seeds removes excess moisture, which is crucial to prevent mold or rot when you store or plant them. Dry seeds are also easier to handle and sow.
Germination Process
Prepare the Container
- Selecting the Right Container: A small container, such as a seed tray or a small pot, is ideal. Ensure it has drainage holes to prevent waterlogging.
- Choosing Potting Soil: Use a high-quality, well-draining potting mix. Kiwi seeds prefer slightly acidic to neutral pH levels. The soil should be rich in organic matter to provide the necessary nutrients.
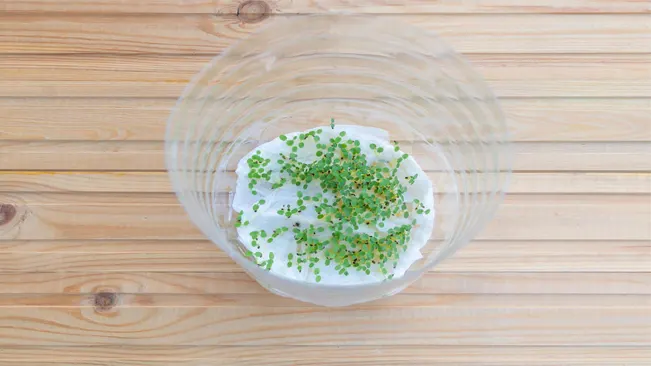
Plant the Seeds
- Seed Placement: Spread the seeds evenly on the surface of the moist soil. Avoid overcrowding, as this can lead to issues with mold and hinder growth.
- Soil Coverage: Gently press the seeds into the soil, ensuring good contact. Cover them with a thin layer of soil — about 1-2 millimeters deep. This helps to keep them moist and in a stable environment for germination.
Create a Greenhouse Effect
- Covering the Container: Use clear plastic wrap or place the container in a clear plastic bag. This creates a mini greenhouse environment, maintaining humidity and temperature.
- Ventilation: Every few days, briefly remove the cover to allow fresh air to circulate, reducing the risk of fungal growth.
Placement in a Warm, Sunny Spot
- Importance of Warmth: Kiwi seeds need a warm environment to germinate effectively. A temperature between 70-85°F (20-30°C) is ideal.
- Light Requirements: While sunlight is not crucial for germination, it becomes important once seedlings emerge. A sunny windowsill or an area under a grow light ensures they receive adequate light.
Maintaining Moist Soil
- Watering Technique: Use a spray bottle to gently mist the soil. This keeps it moist without disturbing the seeds with heavy watering.
- Monitoring Soil Moisture: Check the soil daily. It should feel damp to the touch but not waterlogged. Overwatering can cause the seeds to rot.
Caring for the Seedlings
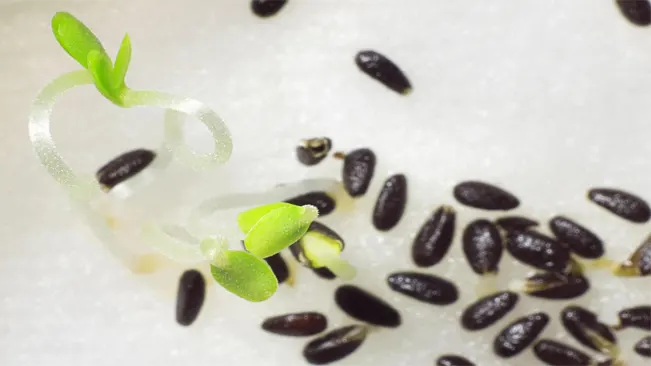
Waiting for Sprouts
- Patience is Key: After planting the seeds, the waiting period begins. Kiwi seeds generally take 2 to 4 weeks to germinate, but this can vary based on environmental conditions such as temperature and humidity.
- Ideal Conditions: To encourage germination, keep the soil consistently moist and in a warm environment. The plastic cover helps maintain the right level of humidity and warmth.
- Monitoring: Check the soil regularly to ensure it’s not drying out. A gentle mist with water can keep it adequately moist without overwatering.
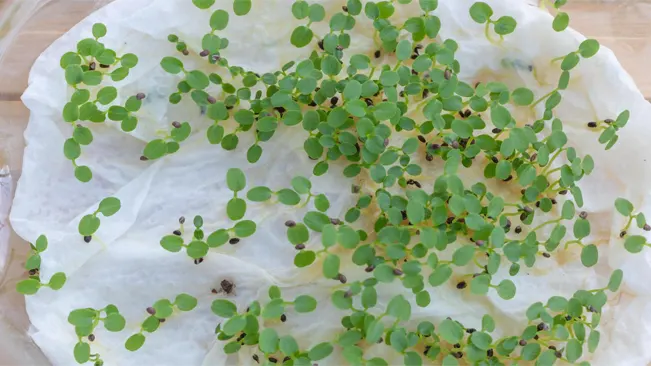
Providing Plenty of Light
- Sunlight Requirement: Once the seedlings emerge, they require ample sunlight for healthy growth. A minimum of 6-8 hours of direct sunlight is ideal.
- Artificial Lighting: If sufficient natural light is not available, especially in regions with less sunlight during certain seasons, consider using grow lights. Position them a few inches above the seedlings and adjust as they grow.
- Avoiding Leggy Seedlings: Lack of light can cause seedlings to become ‘leggy,’ meaning they stretch towards the light and become weak. Proper lighting helps them grow stout and strong.
Transplanting When Ready
- Size Indicator: When the seedlings are a few inches tall and have developed several sets of true leaves, they are ready for transplanting. This usually indicates that the root system is sufficiently developed.
- Choosing a Pot: For transplanting into pots, choose a size that gives the roots enough room to grow. Ensure the pot has adequate drainage holes.
- Outdoor Transplantation: If you’re moving them outdoors, make sure the climate is suitable. Kiwi plants prefer a temperate climate and well-drained, slightly acidic soil.
- Acclimatization: Before transplanting outdoors, gradually acclimate the seedlings to outside conditions over a week or two. This process, known as hardening off, reduces transplant shock.
- Spacing: If planting multiple kiwi plants, ensure they have enough space to grow. Kiwi plants can become quite large and need ample space for their root systems and vines.
Transplanting Outdoors
Choosing the Right Spot
- Sunlight: Kiwi plants require full sun, meaning at least 6-8 hours of direct sunlight per day. This is crucial for their growth and fruit production.
- Shelter: While they need sun, kiwi plants also benefit from some shelter from strong winds, which can damage vines and flowers.
- Orientation: If possible, position them on a north or northeast-facing slope to protect them from hot afternoon sun in warmer climates.
Preparing the Soil
- Soil Type: Kiwi plants prefer well-drained soil to prevent root rot. They thrive in soils rich in organic matter.
- pH Levels: The ideal soil pH for kiwi plants is slightly acidic to neutral (pH 5.5 to 7). You can test your soil’s pH and amend it accordingly.
- Compost and Fertilizers: Enriching the soil with compost provides essential nutrients. You may also consider adding a balanced, slow-release fertilizer at the time of planting.
Planting
- Spacing: Kiwi plants can grow quite large and need ample space. Spacing them about 10 feet apart allows sufficient room for growth.
- Depth and Method: Dig a hole as deep as the root ball and twice as wide. Place the plant in the hole and backfill with soil, ensuring the plant is at the same depth it was in the pot.
- Support Structures: Since kiwis are vigorous climbers, installing a strong trellis or support system at planting time is essential for their vertical growth.
Watering

- Consistency: Regular watering is key, especially in the first few seasons after planting. The goal is to keep the soil moist but not soggy.
- Mulching: Applying a layer of organic mulch around the base of the plants can help retain soil moisture and regulate temperature.
- Monitoring: Pay attention to rainfall and adjust your watering accordingly. Over-watering can be as harmful as under-watering.
Ongoing Care
Pruning
Pruning is crucial for maintaining the health and productivity of kiwi plants. Here are some detailed pointers:
- Timing: The best time to prune kiwi plants is in late winter when the plant is dormant. This timing helps avoid sap loss, which can be significant if pruning is done during the growing season.
- Objective: The goal of pruning is to maintain a balance between vegetative growth and fruit production. This involves removing excess vines and focusing the plant’s energy.
- Method:
- For young plants: Focus on establishing a strong framework of main vines.
- For mature plants: Regularly remove old canes that have already produced fruit, as kiwi fruits on new season’s growth emanating from one-year-old canes.
- Lateral Shoots: Prune lateral shoots to about five leaves beyond the last fruit. This helps in improving air circulation and sunlight penetration, essential for fruit ripening and health.
- Training: Train the main vine(s) along the support structure, which helps in managing the plant’s growth and makes harvesting easier.
Fertilizing
Proper fertilization is key to the growth and fruit production of kiwi plants:
- Type of Fertilizer: Use a balanced fertilizer, ideally one with equal parts nitrogen, phosphorus, and potassium (e.g., NPK 10-10-10).
- When to Fertilize: Apply fertilizer during the growing season, starting in early spring and ending in mid-summer. Avoid fertilizing late in the season as this can promote new growth that’s vulnerable to winter damage.
- Method: Apply fertilizer around the base of the plant, away from the trunk, and water it in well. This helps in the even distribution of nutrients to the roots.
- Special Considerations: If your soil is particularly deficient in any nutrients (commonly tested through a soil test), you might need to use a more specific fertilizer formula.
Providing Support
Kiwi plants are vigorous climbers and require a strong support system:
- Type of Support: A trellis, arbor, or pergola works well. The structure should be sturdy and well-anchored as mature kiwi vines can become quite heavy.
- Training the Vines: Train the main vine up the support and then along the horizontal wires or structure. This helps in spreading the plant for better light exposure and ease of maintenance.
- Height Consideration: Keep the structure at a manageable height to simplify pruning and harvesting. A height of about 6 feet is often recommended.
Conclusion
Growing kiwi from seeds is a patient gardener’s endeavor, taking several years to produce fruit. However, the process of nurturing a plant from a tiny seed can be incredibly satisfying. Enjoy the journey of growing your kiwi plants and the delicious rewards they may eventually bring!
FAQs (Frequently Asked Questions)
- How do I extract seeds from a kiwi fruit?
Cut a ripe kiwi fruit in half and scoop out the pulp. Separate the seeds by rinsing the pulp in a fine sieve under cold water. Dry the seeds on a paper towel before planting. - What is the best time of year to plant kiwi seeds?
The best time to plant kiwi seeds is in the spring when the danger of frost has passed and temperatures are consistently warm. - How long does it take for kiwi seeds to germinate?
Kiwi seeds typically germinate in 2 to 4 weeks, provided they are kept in warm and moist conditions. - Do I need to dry kiwi seeds before planting?
Yes, it’s advisable to dry the seeds for a few days at room temperature before planting to improve germination rates. - What type of soil is best for kiwi seeds?
Use a well-draining potting mix, rich in organic matter. Kiwi plants prefer slightly acidic to neutral soil pH levels. - How much sunlight do kiwi seedlings need?
Kiwi seedlings need plenty of light, ideally 6-8 hours of sunlight per day. A sunny windowsill or a place under a grow light is suitable. - How do I care for kiwi seedlings?
Keep the soil consistently moist but not waterlogged. Once seedlings are a few inches tall and have several sets of leaves, they can be transplanted into larger pots or outdoors. - When can I transplant kiwi seedlings outdoors?
Transplant kiwi seedlings outdoors in late spring or early summer, when there’s no risk of frost and the seedlings are strong enough. - Do I need both male and female plants to produce fruit?
Yes, kiwi plants are dioecious, meaning you need both male and female plants for pollination and fruit production. - How long does it take for a kiwi plant to bear fruit?
Kiwi plants grown from seeds may take several years (typically 5-7 years) to mature and start bearing fruit.

Kristine Moore
Forestry AuthorI'm Kristine Moore, a seasoned garden landscaping professional with over 30 years of experience. My extensive career has been dedicated to transforming outdoor spaces into stunning, sustainable landscapes. With a deep understanding of horticulture, design principles, and environmental stewardship, I have become a respected figure in the field, known for creating harmonious, visually appealing, and eco-friendly gardens. My commitment to excellence and continuous learning in landscaping trends and techniques has solidified my reputation as an expert in garden design and implementation.


It would be nice to know the growing zones for this plant. I don't see it mentioned in this article.
Jason Williams
February 29, 2024 3:28 pmMy apologies for the oversight. Kiwi plants typically thrive in USDA hardiness zones 7-9. If you're in a cooler area, you might need to consider some protective measures for the colder months or explore indoor growing options. Hope this clarifies things for your kiwi growing adventure!
Kristine Moore
March 4, 2024 7:00 am