How to Plant Marigold Seeds: A Step-by-Step Guide for Vibrant Blooms
- February 20, 2024
- 0 comment
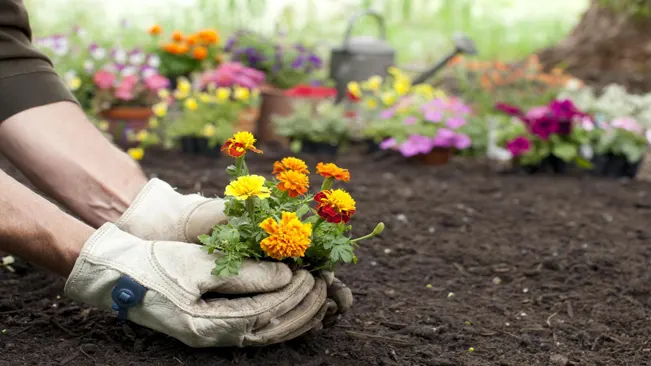
Marigolds are vibrant flowers known for their bright colors and ease of growth, making them a favorite among gardeners. Whether you’re a seasoned gardener or a beginner, planting marigold seeds is a straightforward and rewarding process. This guide will walk you through each step to ensure a beautiful marigold bloom in your garden.
Choosing the Right Time and Location
Best Planting Time

- Understanding Frost Dates: Marigold seeds are sensitive to frost. The ideal time to plant them is after the last frost date in spring. This date varies depending on your geographical location. You can check local frost dates online or consult a local gardening center for precise information.
- Why After Last Frost: Planting after the last frost ensures that the tender seedlings won’t be damaged by cold temperatures. Marigolds thrive in warmer conditions and planting them too early in cold soil can hinder their germination and growth.
- Temperature Considerations: The soil temperature should ideally be around 70°F (21°C) for optimal germination. Marigolds germinate and grow best in warm conditions.
Location

- Sunlight Requirements: Marigolds require a minimum of 6 hours of direct sunlight daily. This is crucial for their growth and bloom. More sunlight typically leads to more robust plants and brighter flowers.
- Choosing the Right Spot: Look for a spot in your garden that receives uninterrupted sunlight for most of the day. Avoid areas that are shaded for long periods, as this can lead to leggy plants and fewer blooms.
- Considerations for Potted Marigolds: If you’re growing marigolds in containers, ensure that the pots can be moved to sunny spots throughout the day to maximize sun exposure.
- Effect of Sunlight on Blooms: Adequate sunlight not only aids in growth but also influences the vibrancy of the blooms. Marigolds grown in full sun tend to have more brilliant colors and healthier foliage.
Preparing the Soil
Understanding Soil Requirements
- Well-Drained Soil: Marigolds thrive in well-drained soil. This means the soil should allow excess water to drain away quickly. Waterlogged or overly wet soil can lead to root rot, a condition where the roots of the plant begin to decay, which can severely impact the health of the marigolds.
- Moderate Fertility: While marigolds are not heavy feeders, they do benefit from soil that is moderately fertile. Soil that is too rich can lead to lush foliage at the expense of flowers, while very poor soil can inhibit growth and flowering.
- pH Level: Marigolds are tolerant of a wide range of soil pH, but they generally prefer slightly acidic to neutral soil (pH 6.0 to 7.0).
Steps for Soil Preparation

- Loosening the Soil:
- Use a garden fork or a tiller to loosen the soil to a depth of about 6 to 8 inches. This helps in improving aeration and drainage.
- Breaking up the soil also makes it easier for the roots of the marigolds to penetrate and establish themselves.
- Enhancing Soil Quality:
- Compost: Adding compost is an excellent way to improve soil structure and fertility. Compost provides essential nutrients and also improves soil texture, which helps in retaining moisture and providing good drainage.
- Balanced Fertilizer: If the soil is particularly poor, consider mixing in a balanced, slow-release fertilizer. A fertilizer with an equal balance of nitrogen, phosphorus, and potassium (such as a 10-10-10 formula) is suitable.
- Ensuring Proper Drainage:
- If you have clay-heavy soil, which tends to hold water, amend it with organic matter like compost or peat moss to improve drainage.
- In contrast, sandy soils, which drain quickly, can be improved by adding compost or organic matter to help retain moisture and nutrients.
- Testing and Adjusting pH:
- If possible, test the soil pH. If the soil is too acidic (below pH 6.0), you can add lime to raise the pH. If it’s too alkaline (above pH 7.0), adding sulfur can help lower the pH.
- These adjustments, however, should be done well in advance of planting, as they take time to alter the soil pH.
Sowing the Seeds
Planting Depth
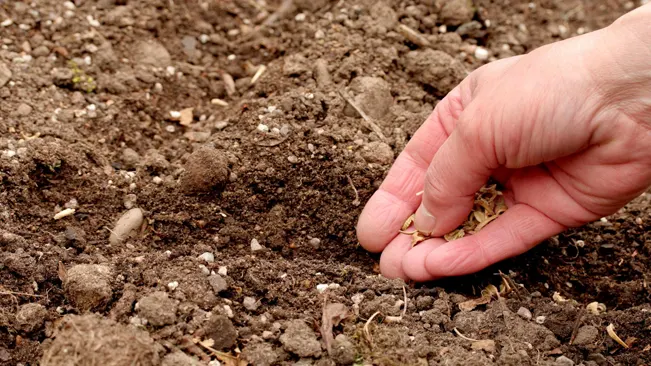
- When planting marigold seeds, it’s crucial to get the depth right. Planting them about ¼ inch deep is ideal. This depth ensures that the seeds have enough soil coverage to protect them and provide the darkness needed for germination, while not being so deep that they struggle to emerge.
- To plant, make a small hole or furrow with your finger or a gardening tool, place the seed, and gently cover it with soil.
Spacing
- Proper spacing is essential for the healthy growth of marigolds. Planting seeds about 8 inches apart allows each plant enough space to grow without competition for nutrients, water, and sunlight.
- This spacing also helps in air circulation around the plants, reducing the risk of disease and pest infestation.
- If you’re planting multiple rows of marigolds, ensure that each row is spaced about 12 to 18 inches apart. This spacing provides enough room for you to walk between rows for maintenance, such as weeding and watering.
Watering
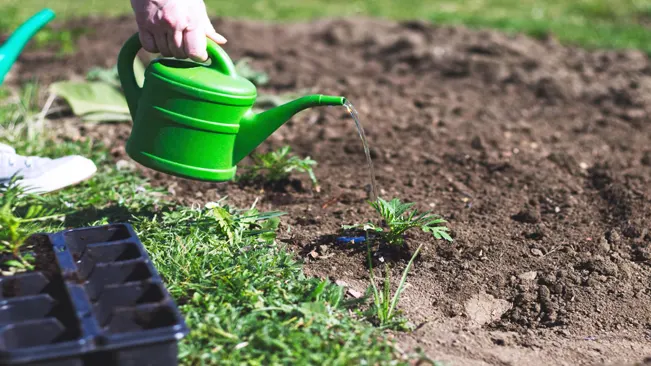
- After planting the seeds, it’s important to water them correctly. The goal is to moisten the soil without causing the seeds to wash away or become too deeply buried.
- Use a watering can with a gentle spray or a fine mist setting on a hose nozzle. This will provide even and gentle watering that won’t disturb the seeds.
- Keep the soil consistently moist but not waterlogged during the germination period. Marigold seeds typically sprout within 5 to 7 days, depending on the soil temperature and moisture levels.
- Once the seedlings have emerged, you can reduce watering, allowing the soil to dry out slightly between waterings. However, avoid letting the soil become completely dry.
Caring for the Seedlings
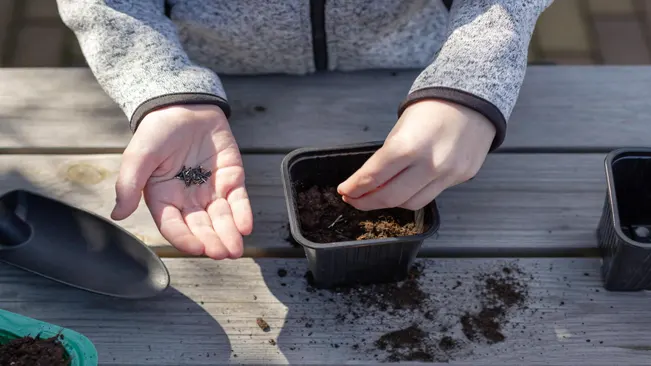
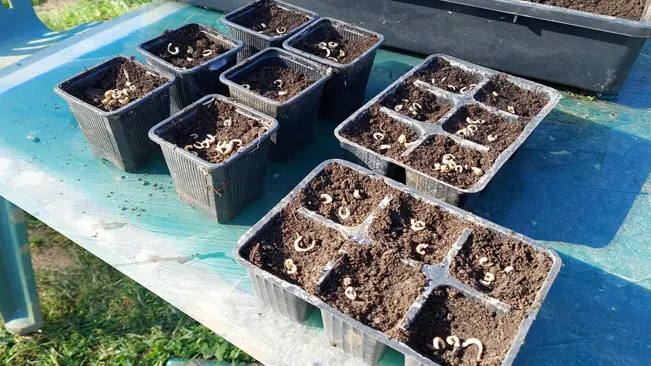
Germination
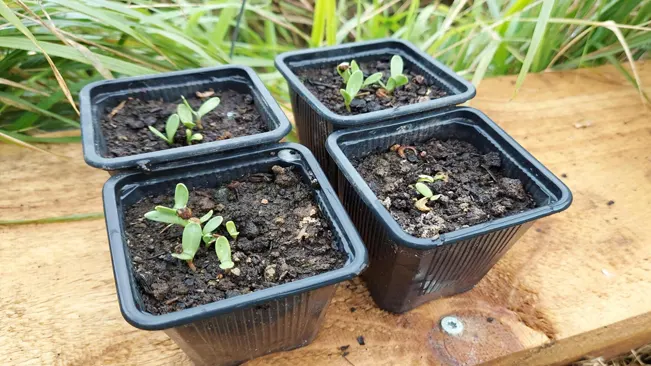
- Timing: Marigold seeds usually germinate quickly, often within 5 to 7 days, but this can vary slightly depending on the variety and environmental conditions.
- Temperature: Warm soil is crucial for successful germination. The ideal soil temperature is around 70°F (21°C). If you’re starting seeds indoors, using a heat mat can help maintain this temperature.
- Light: After planting, place the seed tray in a bright area but not in direct sunlight, as extreme sunlight can dry out the soil too quickly.
Thinning
- Importance: Thinning is crucial to prevent overcrowding, which can lead to weak growth and disease. Overcrowded plants compete for light, water, and nutrients.
- Method: Once the seedlings are a few inches tall and have at least two sets of true leaves, thin them. Use a pair of clean scissors or your fingers to snip or gently pull out the weakest seedlings, leaving the strongest ones.
- Spacing: The final spacing should be about 18 inches apart. This spacing gives each plant enough room to grow robustly and ensures adequate air circulation, reducing the risk of fungal diseases.
Watering
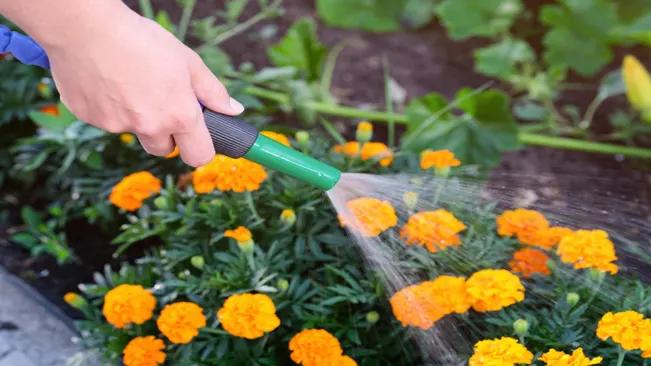
- Consistency: Water the seedlings to keep the soil moist but not waterlogged. Overwatering can lead to root rot, while under-watering can stress the plants, especially in the seedling stage.
- Technique: Use a watering can with a fine rose to gently water the seedlings. This method prevents the water from disturbing the soil or damaging the delicate seedlings.
- Frequency: The frequency of watering will depend on factors such as temperature, humidity, and soil type. In general, water when the top inch of the soil feels dry to the touch.
Fertilizing and Maintenance
Fertilization
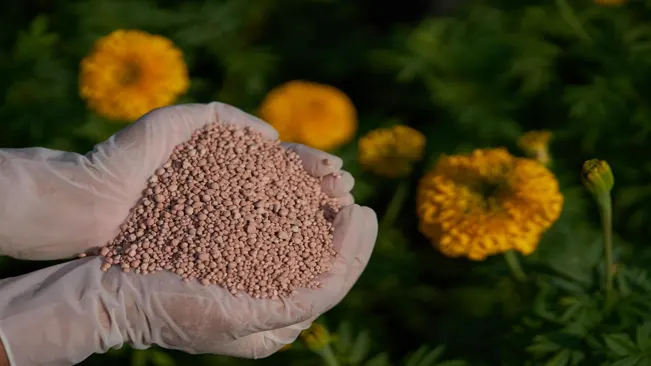
- Type of Fertilizer: A balanced fertilizer, typically labeled as 10-10-10 or 20-20-20, which indicates an equal ratio of nitrogen, phosphorus, and potassium, is ideal for marigolds. These nutrients support overall plant health, with nitrogen promoting leaf growth, phosphorus encouraging strong root development, and potassium aiding in flower formation.
- Frequency of Application: Fertilize marigolds every 4 to 6 weeks during the growing season. Over-fertilizing can lead to lush foliage at the expense of flowers, so it’s essential to follow the recommended frequency and dosage.
- Application Method: Apply the fertilizer around the base of the plants, avoiding direct contact with the foliage and flowers. Water the soil after applying the fertilizer to help it absorb into the soil and reach the roots.
- Organic Options: If you prefer organic gardening, well-rotted manure or compost can be an excellent alternative to synthetic fertilizers. These organic options release nutrients more slowly and improve soil structure.
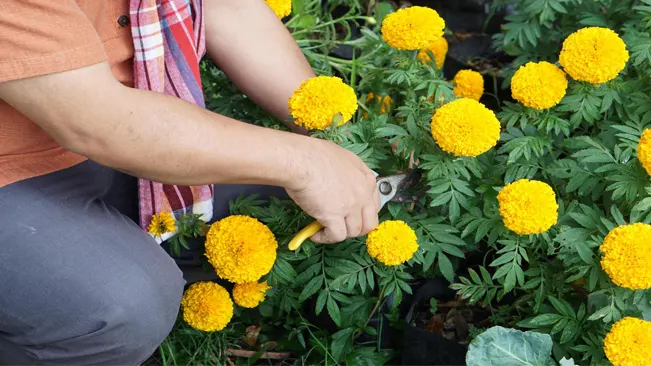
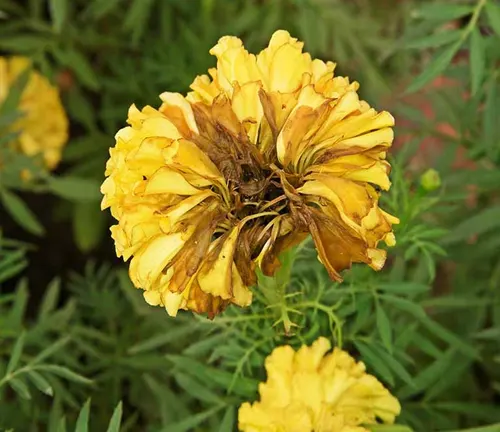
Deadheading

- Purpose of Deadheading: Deadheading involves removing spent or wilted flowers. This practice encourages marigolds to produce more blooms and extends the blooming period. It also prevents the plant from using energy to produce seeds, redirecting it towards new growth and flowers.
- How to Deadhead: Gently snip or pinch off the flower head at the base of its stem, just above the first set of healthy leaves. Be careful not to damage the surrounding foliage or buds.
- Frequency: Check your marigolds regularly for dead flowers. During peak blooming times, you might need to deadhead every few days to maintain a tidy appearance and encourage continuous flowering.
- Aesthetic and Health Benefits: Besides promoting more blooms, deadheading also keeps your marigold plants looking neat and healthy. It can help prevent fungal diseases by reducing the humidity around the plant, which can be higher around decaying plant material.
Pest and Disease Management
Managing Pests in Marigolds
Aphids
- Description: Small, soft-bodied insects that can be green, yellow, brown, red, or black. They usually cluster on the underside of leaves and stems.
- Impact: Aphids suck sap from the plant, causing distorted growth and potentially spreading viruses.
- Control: Natural predators like ladybugs and lacewings can be effective. A strong jet of water can dislodge aphids from plants. Insecticidal soaps or neem oil can be used as a more organic solution.

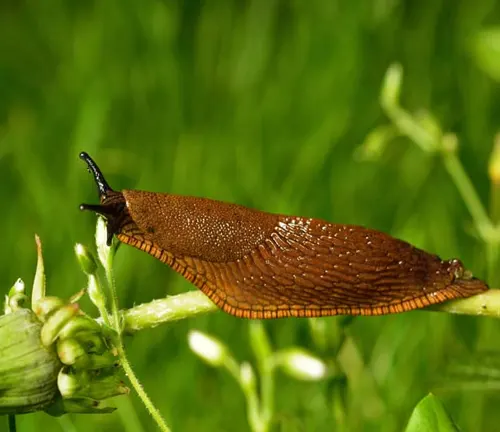
Slugs
- Description: Slugs are soft-bodied mollusks that leave a slimy trail behind. They are most active at night.
- Impact: They chew irregular holes in leaves, flowers, and stems.
- Control: Handpicking in the evening can be effective. Using barriers like diatomaceous earth or copper strips can deter slugs. Beer traps or bait can also be used.
- Other Pests: Marigolds might occasionally attract other pests like spider mites and whiteflies. Similar control methods as aphids can be applied.
Preventing Diseases in Marigolds
Fungal Diseases
- Common Types: Powdery mildew, leaf spot, and root rot.
- Prevention: Ensure good air circulation by spacing plants properly and avoiding overcrowding. Water at the base of the plants to keep the foliage dry. Mulching helps in maintaining an even soil moisture level and prevents spores from splashing onto the plants.
Bacterial and Viral Diseases
- Less common in marigolds but can occur.
- Infected plants should be removed and destroyed to prevent the spread.

General Tips
- Healthy Soil: Start with well-draining soil and consider rotating marigolds with other plants in subsequent years to prevent disease build-up.
- Clean Gardening Practices: Regularly clean tools and avoid working in the garden when plants are wet to prevent the spread of diseases.
Enjoying the Blooms
Flowering Phase
Marigolds are renowned for their quick blooming cycle and long-lasting flowers. After planting, you can typically expect to see the first blooms within 8 weeks, signaling the start of a vibrant display. These blooms last through the summer months and often into the early fall, depending on the climate and care.

- Continuous Bloom: One of the most remarkable aspects of marigolds is their ability to continuously produce flowers. To maximize this, regularly deadhead the plants by removing wilted or spent flowers. This process encourages the plant to produce more blooms.
- Varieties and Colors: Marigolds come in a wide range of colors, including shades of yellow, orange, and deep red. Some varieties also display multiple colors on a single flower. The size and shape of the blooms can vary greatly, from small, dainty flowers to large, pompom-like blooms.
- Sunlight and Flowering: For the best flowering, ensure marigolds receive ample sunlight. The more sun they get, the more flowers they tend to produce.
Uses of Marigold Flowers
Marigolds are not just a feast for the eyes in your garden; they have several uses that extend their appeal beyond the garden bed.
As Cut Flowers: Marigolds make excellent cut flowers for indoor decoration. Their bright colors and sturdy stems allow them to last several days in a vase, bringing a bit of your garden’s cheer indoors.

In Bouquets and Arrangements: Their vibrant colors and varying sizes make marigolds a popular choice for bouquets and floral arrangements. They can be combined with other flowers or used alone for a striking display.

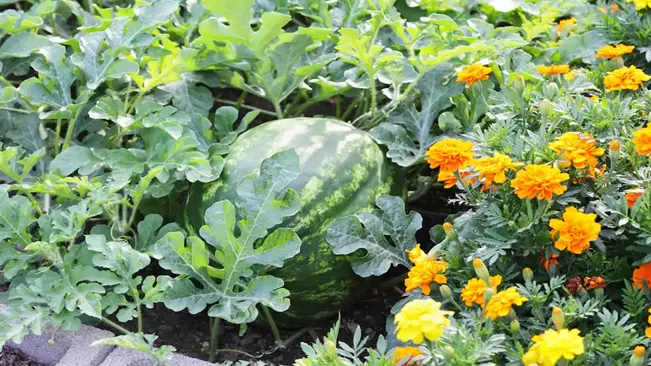
Companion Planting: Marigolds are known to help repel certain pests, making them an excellent companion plant in vegetable gardens. Their strong scent is believed to deter pests like nematodes and even rabbits.
Cultural and Religious Significance: In many cultures, marigolds hold significant meaning and are used in religious and ceremonial events. For example, in Mexico, they are a key component of the Day of the Dead celebrations.

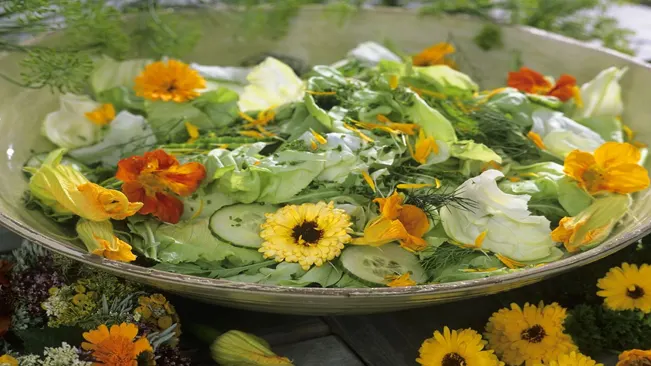
Edible Flowers: Certain varieties of marigolds produce flowers that are edible. They have a slightly spicy to tangy flavor and can be used as a garnish in salads or as an edible decoration on cakes and pastries.
Conclusion
Marigolds are more than just a pretty face in the garden. Their ease of care, continuous blooming, and versatile uses make them a favorite among gardeners and floral enthusiasts. Whether you’re admiring their vibrant colors outdoors, using them to brighten up your home, or incorporating them into your kitchen, marigolds offer a wealth of possibilities for enjoyment and utility.
FAQs (Frequently Asked Questions)
- When is the best time to plant marigold seeds?
Marigold seeds should be planted after the last frost in spring. They need warm soil to germinate effectively. - How deep should I plant marigold seeds?
Plant marigold seeds about ¼ inch deep in the soil. - Do marigolds need full sun or shade?
Marigolds thrive in full sun. They require at least 6 hours of direct sunlight daily for optimal growth and flowering. - How long does it take for marigold seeds to germinate?
Marigold seeds typically germinate within 5 to 7 days in warm conditions. - Should I start marigold seeds indoors or outdoors?
You can start marigold seeds indoors 6-8 weeks before the last frost date or directly sow them outdoors after the frost has passed. - How often should I water marigold seedlings?
Water marigold seedlings when the top inch of soil feels dry. Consistent moisture is key, but avoid overwatering. - Do I need to fertilize marigolds?
Marigolds are not heavy feeders, but applying a balanced fertilizer every few weeks can promote healthier growth and flowering. - How far apart should I plant marigold seeds?
Space marigold seeds about 8 inches apart when planting. Thin out the seedlings to about 18 inches apart as they grow. - Can marigolds be grown in containers?
Yes, marigolds grow well in containers. Ensure the container has drainage holes and use a well-draining potting mix. - Are marigolds susceptible to pests and diseases?
Marigolds are relatively pest-resistant, but they can occasionally attract aphids and slugs. Good air circulation and proper watering can help prevent most fungal diseases.

Kristine Moore
Forestry AuthorI'm Kristine Moore, a seasoned garden landscaping professional with over 30 years of experience. My extensive career has been dedicated to transforming outdoor spaces into stunning, sustainable landscapes. With a deep understanding of horticulture, design principles, and environmental stewardship, I have become a respected figure in the field, known for creating harmonious, visually appealing, and eco-friendly gardens. My commitment to excellence and continuous learning in landscaping trends and techniques has solidified my reputation as an expert in garden design and implementation.


Leave your comment