How to Plant Moringa Seeds: A Beginner’s Guide
- February 27, 2024
- 0 comment
Moringa, often referred to as the “miracle tree” for its highly nutritious profile and powerful anti-inflammatory, antioxidant, and tissue-protective properties, is not only beneficial for health but also easy to grow. This guide will walk you through the simple steps of planting Moringa seeds to cultivate your own Moringa tree.
List on How To Plant Moringa Seeds
- Seed Selection
- Preparing the Seeds
- Soil Preparation
- Planting the Seeds
- Watering
- Germination
- Transplanting (If Necessary)
- Ongoing Care
Nutritional Benefits of Moringa
| Benefit Category | Specific Benefits of Moringa |
|---|---|
| Nutritional Value | High in vitamins A, C, and E- Rich in calcium, potassium, and protein. Contains all nine essential amino acids |
| Antioxidant Properties | Contains antioxidants like quercetin and chlorogenic acid. Helps combat free radicals. May reduce oxidative stress |
| Anti-inflammatory Effects | Can reduce inflammation. Useful in managing conditions like arthritis and asthma |
| Heart Health | May help lower cholesterol. Potentially beneficial for reducing blood pressure and preventing plaque formation in arteries |
| Blood Sugar Regulation | Can assist in lowering blood sugar levels. Beneficial for diabetics or those at risk of diabetes |
| Digestive Health | High fiber content aids in digestion. Can help treat stomach disorders like constipation |
| Immune System Boost | Rich in iron and vitamin C, which are crucial for immune function. May help in fighting infections |
| Skin and Hair Health | Promotes healthy skin and hair due to its nutritional content. Has antibacterial and antimicrobial properties |
| Bone Health | High calcium and phosphorus content supports bone health. Can be beneficial in preventing bone degeneration |
Before diving into the planting process, it’s crucial to understand a bit about Moringa. Native to India, Moringa Oleifera is a fast-growing, drought-resistant tree, and almost all parts of it are edible or have some health benefits.
What You Need
- Moringa seeds
- Potting soil
- A planting pot (if starting indoors)
- A sunny location
Seed Selection
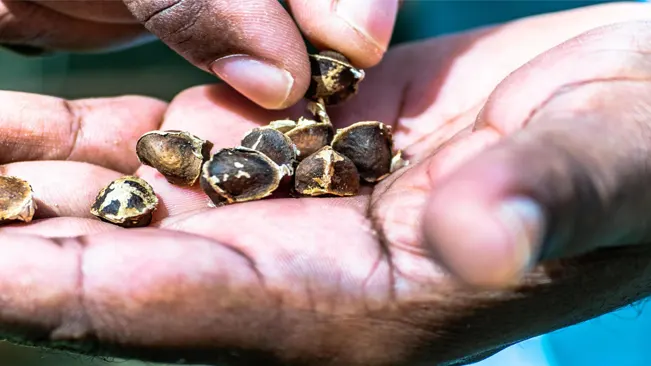
Start by selecting high-quality Moringa seeds. Look for plump, unbroken seeds. Avoid seeds that look shriveled or cracked.
- Germination Rate: High-quality seeds have a higher germination rate, meaning more seeds will sprout and grow into healthy plants.
- Plant Health: Good seeds lead to healthier plants. Healthy plants are more resistant to pests, diseases, and environmental stresses.
- Yield: Better seeds often result in plants with higher yields, especially important if you’re growing Moringa for its leaves, pods, or seeds.
Characteristics of High-Quality Moringa Seeds
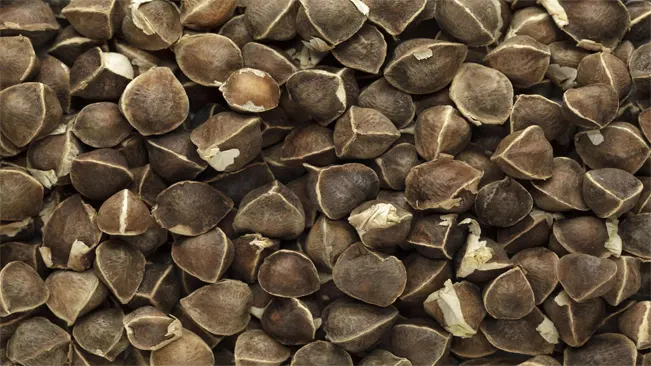
- Appearance: Look for seeds that are plump and robust. They should have a uniform color, typically a shade of brown, depending on the variety.
- Integrity: The seeds should be intact and unbroken. Any cracks or splits in the seed coat can reduce the viability of the seed.
- Size: Generally, larger seeds have better germination rates and lead to stronger seedlings. However, size can vary by variety, so this is not an absolute rule.
- Texture: The seed coat should be smooth and hard. Avoid seeds that feel soft or spongy, as this can indicate decay or poor storage conditions.
- No Signs of Aging or Damage: Avoid seeds that look shriveled, wrinkled, or discolored, as these are signs of aging or poor storage. Old or improperly stored seeds have lower germination rates.
Tips for Seed Selection
- Source from Reputable Suppliers: Purchase seeds from reputable nurseries or suppliers known for quality. This increases the likelihood of getting viable, healthy seeds.
- Check for Freshness: If possible, find out how old the seeds are. Fresh seeds (less than a year old) generally have better germination rates.
- Consider the Variety: Different varieties of Moringa may have slightly different seed characteristics. Research the specific variety to know what to look for.
- Test for Viability (Optional): You can perform a simple germination test by soaking a few seeds in water for 24 hours. Viable seeds will usually sink to the bottom, while non-viable seeds often float.
Preparing the Seeds
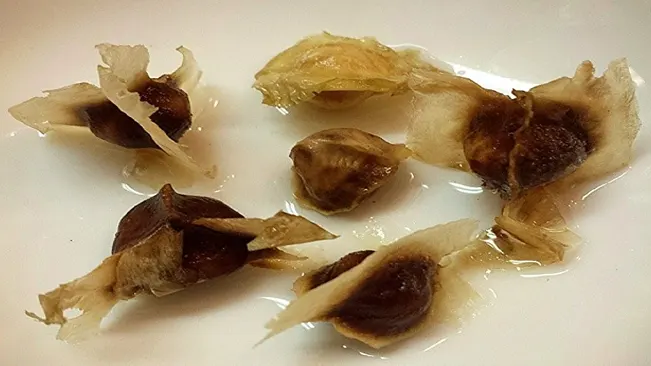
Seed preparation is a critical step in the germination process. For Moringa seeds, this involves a soaking period which serves several purposes:
- Hydration: Soaking seeds in water hydrates them, which is essential to kickstart the germination process. When seeds absorb water, it signals them to begin breaking dormancy and start germinating.
- Softening the Seed Coat: Moringa seeds have a hard outer shell. Soaking helps to soften this coat, making it easier for the embryonic plant inside to break through during germination.
- Identifying Viable Seeds: The soaking process also helps in identifying which seeds are most likely to germinate. Typically, viable seeds will sink to the bottom of the water container, while non-viable seeds tend to float. This is a general rule of thumb and not always 100% accurate, but it’s a useful guideline.
Steps for Preparing Moringa Seeds
- Select a Container: Choose a clean container that can hold all your seeds with enough water to fully cover them.
- Soak the Seeds: Place the Moringa seeds in the container and fill it with room temperature water. Ensure all seeds are fully submerged.
- Waiting Period: Leave the seeds to soak for about 24 hours. This duration is sufficient to hydrate the seeds and initiate the germination process.
- Discarding Non-Viable Seeds: After 24 hours, discard any seeds that are floating on the surface of the water. These seeds are less likely to germinate and can be removed to focus your efforts on the more promising seeds.
- Rinsing and Planting: Drain the water and gently rinse the seeds that have sunk to the bottom. These seeds are now ready to be planted.
Soil Preparation
Moringa trees thrive in well-draining soil. This is because they are susceptible to root rot in waterlogged conditions. The ideal soil should be loose enough to allow water to drain through it easily, yet rich enough to hold the necessary nutrients.
Components of Ideal Soil Mix for Moringa
- Garden Soil: This forms the base of your soil mix. It should be loamy and free of large clumps or stones.
- Sand: Sand improves the drainage capabilities of the soil. Coarse sand is preferable as it doesn’t compact over time, ensuring continued good drainage.
- Compost: Compost is rich in organic matter and nutrients, which are essential for the healthy growth of Moringa. It also helps in retaining moisture in the soil.
- Perlite or Vermiculite (Optional): These are mineral-based substances that further improve soil aeration and drainage. They can be particularly helpful if your garden soil is heavy or clay-like.
Steps for Soil Preparation
- Testing Soil pH: Begin by testing the pH of your garden soil. Moringa prefers a slightly acidic to neutral pH range of 6.3 to 7.0. If the pH is too high or too low, you can adjust it using lime (to increase pH) or sulfur (to decrease pH).
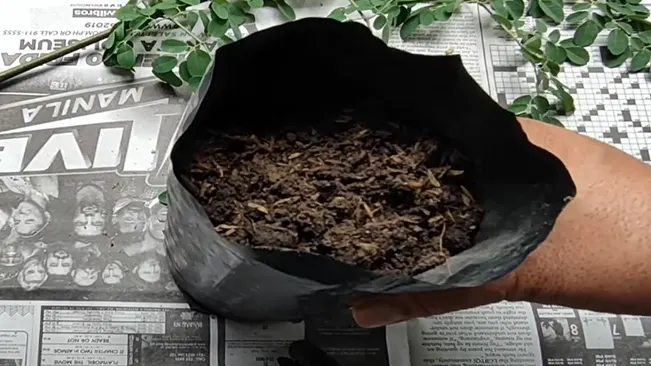
- Creating the Mix: If using a standard potting mix, ensure it’s of good quality and well-draining. For a homemade mix, combine garden soil, sand, and compost in a ratio of 40:30:30. Adjust the ratios based on the initial quality of your garden soil.
- Ensuring Drainage: If planting in a pot, make sure there are adequate drainage holes at the bottom. For ground planting, if the soil is particularly heavy, consider raising the planting bed to improve drainage.
- Final Preparation: Before planting, moisten the soil mix slightly. It should be damp but not waterlogged.
Planting the Seeds
Planting Moringa Seeds in Pots
Why Choose Pots?
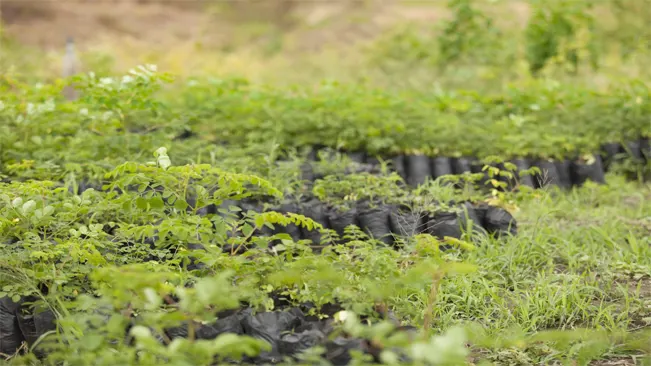
- Climate Considerations: In cooler climates, starting Moringa seeds in pots is advantageous because it allows you to control the environment. Moringa is a tropical plant and is sensitive to cold.
- Early Growth Stages: Growing in pots can protect the young seedlings from harsh elements and pests during their vulnerable early stages.
How to Plant in Pots
- Pot Selection: Choose pots that are at least 8-10 inches deep to accommodate the initial growth of the Moringa’s taproot. Ensure the pot has good drainage.
- Soil: Use a well-draining potting mix. Moringa doesn’t like waterlogged soil, so drainage is key.
- Seed Planting: Plant the seeds ¾ inch deep. You can plant multiple seeds per pot, about 2 inches apart.
- Watering: Keep the soil moist but not overly wet. Consistent moisture is important for germination.
- Thinning Seedlings: Once the seedlings sprout and grow a few inches tall, thin them out. Keep the strongest seedling and remove the others.
- Light: Place the pot in a location where it receives ample sunlight — at least 6 hours a day is ideal.
- Transplanting: Once the seedlings are about 6 inches tall and the outside temperature is warm enough, they can be transplanted outside. This is usually after the last frost in cooler climates.
Planting Moringa Seeds Directly in the Ground
Why Plant Directly in Ground?
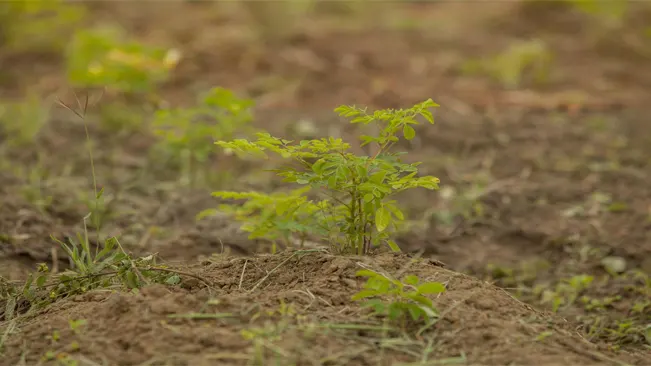
- Ideal for Warm Climates: In regions with warm, tropical, or subtropical climates, Moringa seeds can be planted directly in the ground. They thrive in these conditions.
- Natural Growth: Planting directly allows Moringa trees to grow without the stress of transplantation, fostering a stronger root system.
How to Plant in Ground
- Location: Choose a sunny spot. Moringa trees need full sun to flourish.
- Soil Preparation: Although Moringa is adaptable to different soil types, well-draining soil is best. Amend the soil with organic matter if necessary.
- Planting Depth and Spacing: Plant the seeds ¾ inch deep. Space the seeds about 2 feet apart. This spacing allows enough room for each tree to grow without competing for nutrients.
- Watering: After planting, water the seeds well. Continue to water regularly, allowing the soil to dry out slightly between watering.
- Weed Control: Keep the area around the young trees free from weeds. Mulching can help retain moisture and suppress weeds.
Watering
Water is essential for germination, as it activates the enzymes that kickstart the growth process in seeds. However, the balance of moisture is key. Moringa seeds, like many others, are susceptible to rot if the soil conditions are too wet.
Watering Moringa Seeds
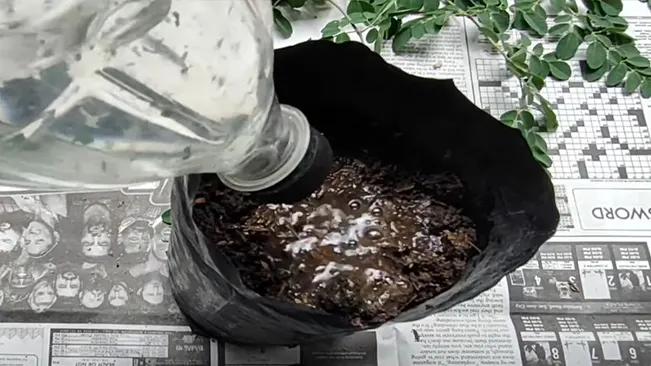
- Initial Watering: When you first plant the seeds, water them gently but thoroughly. This means ensuring the soil around the seed is moistened without being saturated. A light sprinkle or a gentle pour is enough, avoiding any forceful water flow that might displace the seeds.
- Soil Moisture Check: Before adding more water, always check the soil moisture. The top inch of soil should be your gauge – if it feels dry to the touch, it’s time to water. If it still feels moist, hold off on watering.
- Consistency: Consistency is key in the germination phase. Keep the soil consistently moist but not waterlogged. This might mean watering every few days, depending on your climate and soil type.
- Avoid Overwatering: Overwatering is a common mistake. It leads to a lack of oxygen in the soil, which seeds need to germinate effectively. Soggy conditions also promote fungal growth, which can cause the seeds to rot.
- Drainage: Ensure that your planting medium has good drainage. Whether you’re planting in pots or directly in the ground, the soil should be able to drain excess water. This helps in preventing waterlogging.
- Adjusting for Climate and Environment: Your watering schedule will depend on your specific climate and environment. Hot, dry conditions will require more frequent watering, while cooler, more humid conditions will require less.
- Misting: For very small seeds or surface-sown seeds, a fine mist spray bottle can be a good tool to keep them moist without disturbing them.
Germination
Germination is the process by which a seed emerges from its dormant state and begins to grow into a seedling. For Moringa seeds, this process is relatively quick and efficient, typically taking place within 1-2 weeks under optimal conditions.
Conditions for Germination
- Moisture: Moisture is crucial for germination. The seed absorbs water, which activates enzymes that kickstart the growth process. However, the soil should not be waterlogged, as this can lead to seed rot.
- Temperature: Moringa seeds prefer a warm environment for the best germination rates. A temperature range of 70-90°F (21-32°C) is ideal. If you’re starting the seeds indoors, maintaining a consistent temperature within this range can help improve germination success.
- Light: While Moringa seeds do not require light to germinate, once they sprout, they need plenty of sunlight for healthy growth. This is especially important for seedlings started indoors. They should be placed in a sunny window or under grow lights to ensure they receive enough light.
The Germination Process
- Initial Water Absorption: The seed absorbs water, swelling and breaking through its outer shell.
- Radicle Emergence: The first part of the seedling to emerge is typically the radicle, or the embryonic root. This anchors the plant into the soil and starts absorbing nutrients and water.
- Shoot Development: Following the radicle, the shoot begins to emerge, growing upwards towards the light. This shoot will develop into the stem and leaves of the plant.
Post-Germination Care
- Watering: Keep the soil consistently moist but not soggy. Overwatering can be as detrimental as under-watering.
- Thinning: If you planted multiple seeds in one pot, thin out the weaker seedlings to give the strongest ones room to grow.
- Transplanting: Wait until the seedlings are about 6 inches tall before transplanting them outdoors. This height indicates that they have developed a strong enough root system to handle the transition to a new environment.
Transplanting (If Necessary)
- Transplanting should be done carefully to minimize root disturbance. If you’re moving the seedlings from an indoor setting to outdoors, it’s a good practice to “harden off” the seedlings. This involves gradually exposing them to outdoor conditions over a week to acclimate them and reduce transplant shock.
Ongoing Care
Watering
- Adaptability to Drought: Moringa trees are renowned for their drought resistance, which makes them suitable for a variety of climates, especially arid and semi-arid regions. Once established, they can survive with minimal water.
- Watering Requirements: Despite their resilience, regular watering can enhance their growth and yield, particularly in dry periods. The key is to maintain a balance; the soil should be moist but not waterlogged to prevent root rot.
- Signs of Over/Under Watering: If leaves start to droop or turn yellow, this might indicate over-watering. On the other hand, slow growth or wilting could signify the need for more water.
Pruning
- Purpose of Pruning: Pruning is essential for maintaining the tree’s shape, encouraging branching, and ensuring easier harvest of leaves and pods. It also helps in controlling the height of the tree, making it more manageable, especially in a garden setting.
- When to Prune: Start pruning when the tree is about 1.5 meters tall. This encourages the tree to grow more branches, which in turn leads to more leaves and pods.
- Pruning Technique: Prune the top of the tree to encourage horizontal growth. You can also remove any dead or diseased branches to maintain the tree’s health and appearance.
Fertilizing
- Fertilizer Needs: While Moringa trees are not heavily dependent on fertilizers, they do benefit from occasional feeding, especially in poor soil conditions.
- Type of Fertilizer: Organic fertilizers are preferred for Moringa trees. Compost, manure, or a balanced NPK (Nitrogen, Phosphorus, Potassium) organic fertilizer can be used.
- Frequency and Application: Fertilize the trees once or twice a year for optimal growth. It’s important to spread the fertilizer evenly around the base of the tree and then water it in. Avoid over-fertilizing, as this can harm the tree and reduce yield.
Conclusion
In conclusion, planting Moringa seeds is a straightforward and rewarding process. By selecting quality seeds, ensuring proper soil conditions, and providing adequate water and sunlight, these seeds can be successfully cultivated into the nutritious and versatile Moringa tree. With regular care and minimal maintenance, Moringa can thrive in a variety of environments, offering a sustainable source of health benefits.
FAQs (Frequently Asked Questions)
- What is the best time of year to plant Moringa seeds?
Moringa seeds are best planted at the beginning of the rainy season or in early spring in climates without a distinct rainy season. - How deep should Moringa seeds be planted?
Moringa seeds should be planted about ¾ inch deep in the soil. - Can Moringa seeds be planted directly in the ground, or do they need to start in pots?
In warmer climates, Moringa seeds can be planted directly in the ground. In cooler climates, it’s better to start them in pots and then transplant them outdoors when the weather warms. - How much space is needed between Moringa plants?
Space Moringa plants about 2 feet apart to ensure adequate room for growth. - Do Moringa seeds need to be soaked before planting?
Soaking Moringa seeds for 24 hours before planting can improve germination rates, but it’s not strictly necessary. - How long does it take for Moringa seeds to germinate?
Moringa seeds typically germinate within 1-2 weeks under ideal conditions. - What type of soil is best for planting Moringa seeds?
Moringa trees prefer well-draining soil with a slightly acidic to neutral pH (6.3 to 7.0). - How often should Moringa seedlings be watered?
Water Moringa seedlings when the top inch of soil feels dry. Avoid over-watering, as this can lead to root rot. - When is the right time to transplant Moringa seedlings from pots to the ground?
Transplant Moringa seedlings when they are about 6 inches tall and after the last frost in cooler climates. - Do Moringa plants need fertilizer?
Moringa plants are not heavy feeders, but they can benefit from occasional application of organic fertilizers like compost or manure.

Kristine Moore
Forestry AuthorI'm Kristine Moore, a seasoned garden landscaping professional with over 30 years of experience. My extensive career has been dedicated to transforming outdoor spaces into stunning, sustainable landscapes. With a deep understanding of horticulture, design principles, and environmental stewardship, I have become a respected figure in the field, known for creating harmonious, visually appealing, and eco-friendly gardens. My commitment to excellence and continuous learning in landscaping trends and techniques has solidified my reputation as an expert in garden design and implementation.


Leave your comment