How to Plant Pea Seeds: Step-by-Step Guide for a Successful Crop
- February 26, 2024
- 0 comment
Peas are a delightful addition to any garden. They are relatively easy to grow and their tendrils add a whimsical touch to the garden landscape. This guide will walk you through the process of planting pea seeds, ensuring a bountiful harvest.
List on How to Plant Pea Seeds:
- Choose the Right Time
- Prepare the Soil
- Plant the Seeds
- Provide Support
- Watering and Care
- Mulching
- Harvesting
Nutritional Benefits of Peas
| Benefit | Description |
|---|---|
| Nutritional Value | Peas are a good source of vitamins A, C, K, and several B vitamins. They also contain minerals like iron, manganese, and phosphorus. |
| High in Fiber | Peas are high in dietary fiber, which is beneficial for digestive health and helps in maintaining a healthy gut. |
| Protein-Rich | They are a great source of plant-based protein, making them an excellent food choice for vegetarians and vegans. |
| Low in Calories | Peas are low in calories, which makes them a great addition to weight loss diets. |
| Heart Health | The fiber and antioxidants in peas can contribute to heart health by reducing bad cholesterol levels and promoting good cholesterol. |
| Blood Sugar Control | Their high fiber and protein content can help in regulating blood sugar levels, beneficial for people with diabetes. |
| Anti-inflammatory | Peas contain anti-inflammatory properties due to the presence of antioxidants and phytonutrients. |
| Supports Immune System | The high levels of vitamins, particularly vitamin C, in peas help in strengthening the immune system. |
| Environmental Benefits | Growing peas benefits the environment as they help in fixing nitrogen in the soil, reducing the need for artificial fertilizers. |
Materials Needed
- Pea seeds
- Compost or well-rotted manure
- Garden fork or tiller
- Rake
- Garden stakes or trellis
- Mulch (optional)
- Watering can or hose
Choose the Right Time
- Peas thrive in cooler weather and can be one of the first crops planted in the spring. The ideal time to plant them is as soon as the soil can be worked, which is usually a few weeks before the last frost date in your area.
Understanding the Ideal Climate for Peas
- Cool Weather Preference: Peas are cool-season crops. They thrive in temperatures between 55°F and 70°F (13°C to 21°C). They can tolerate light frosts, making them ideal for early spring planting.
- Heat Sensitivity: Pea plants do not fare well in hot weather. High temperatures can cause the plants to stop producing pods or lead to the development of tough, less flavorful peas.
Timing Your Planting
- Early Spring Planting: In most regions, the best time to plant peas is as early as the ground can be worked in the spring. This period is typically a few weeks before the last expected frost date.
- Soil Readiness: The soil should be sufficiently thawed and not too wet. You can check this by grabbing a handful of soil; it should crumble instead of forming a mud ball.
Considering Frost Dates
- Last Frost Date: This is the average date of the last spring frost in your area. Planting a few weeks before this date takes advantage of the cool weather peas prefer.
- First Frost Date in Fall: If you’re considering a fall planting, peas can also be planted in late summer or early fall, about 8-10 weeks before the first expected fall frost.
Regional Variations
- Milder Climates: In areas with mild winters, such as some parts of the southern United States, peas can be planted in late fall or winter for a spring harvest.
- Cooler Northern Regions: In colder climates, wait until the soil is workable and not frozen, which might be later in the spring.
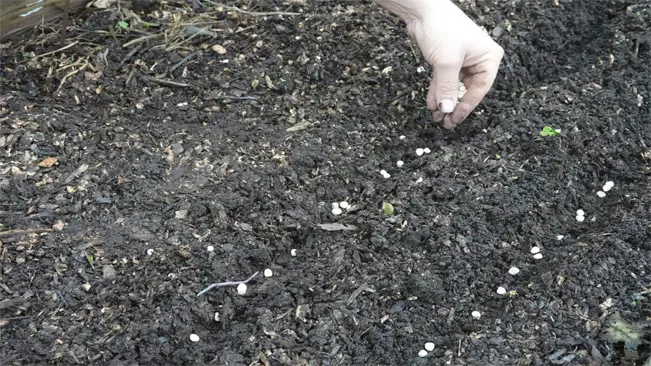
Prepare the Soil
- Start by loosening the soil with a garden fork or tiller to a depth of about 12 inches. Peas prefer well-drained soil rich in organic matter. Add compost or well-rotted manure to enrich the soil. Rake the soil to create a smooth, level surface.
Loosening the Soil
- Why It’s Important: Loosening the soil is crucial for several reasons. It improves drainage, allows roots to penetrate more easily, and enhances air circulation within the soil. For peas, which have relatively delicate roots, this is particularly important.
- How to Do It: Use a garden fork or a tiller to turn the soil. Be sure to reach a depth of about 12 inches, as this will adequately loosen the soil for the pea roots to grow deeply and establish themselves well.
Soil Quality
- Well-Drained Soil: Peas thrive in well-drained soil. This means the soil should allow water to percolate through it easily, avoiding waterlogging which can lead to root rot. If your soil is heavy or clayey, consider mixing in some sand or organic matter to improve drainage.
- Rich in Organic Matter: Organic matter, such as compost or well-rotted manure, is essential for a nutrient-rich soil. It improves soil structure, provides nutrients, and enhances the soil’s ability to retain moisture.
- Adding Compost or Manure: Spread compost or well-rotted manure over the soil before you start loosening it. As you till the soil, these amendments will get mixed in, enriching the soil with nutrients. This step is particularly important if your soil is not naturally fertile.
Raking for a Smooth Surface
- Creating a Level Surface: After loosening the soil and adding amendments, use a rake to smooth and level the surface. This step is important for two reasons: It makes planting easier and more uniform, and it helps in preventing water from pooling in certain areas.
- Removing Debris: While raking, you also have the opportunity to remove any large clumps of soil, stones, or plant debris that might hinder the growth of young pea plants.
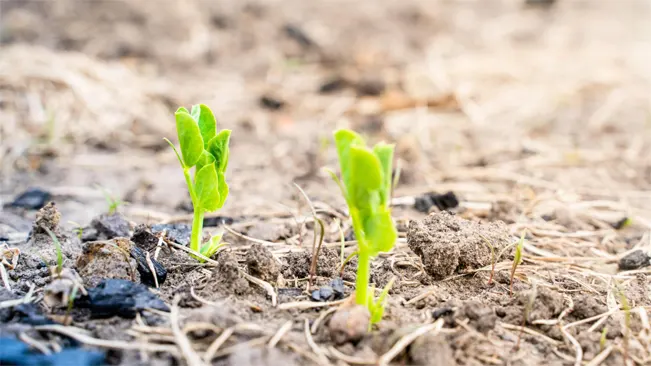
Plant the Seeds
- Plant the pea seeds about 1 inch deep and 2 inches apart in rows. The rows should be spaced about 18 inches apart. If you’re planting multiple rows, this spacing allows for easy access and air circulation.
Depth and Spacing
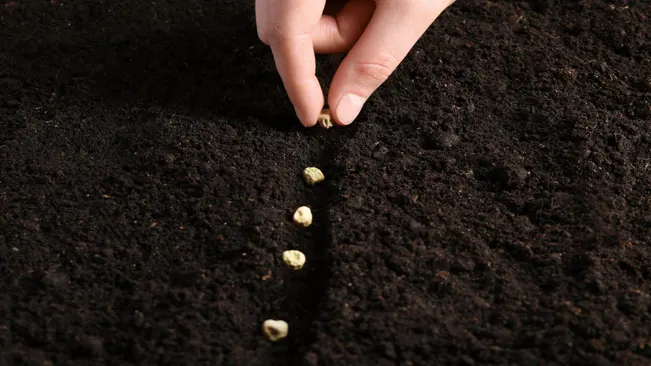
- Depth: Planting pea seeds at a depth of about 1 inch is crucial. This depth ensures that the seeds have enough soil coverage to retain moisture, which aids in germination, while not being so deep that they struggle to emerge.
- Spacing Between Seeds: Spacing the seeds 2 inches apart allows each plant enough room to grow and develop without competing excessively with its neighbors for nutrients, sunlight, and water.
- Row Spacing: The recommendation to space rows about 18 inches apart is designed to provide adequate air circulation around the plants. Good air circulation is essential for preventing fungal diseases, which peas can be prone to in damp conditions.
Why This Spacing?
- Ease of Access: The 18-inch spacing between rows makes it easier for you to walk between rows for weeding, watering, and harvesting without damaging the plants.
- Air Circulation: Adequate space between rows helps in reducing the moisture on the leaves and stems of the plants, which can reduce the likelihood of disease.
- Sunlight Exposure: This spacing ensures that each plant receives enough sunlight, which is critical for healthy growth and development.
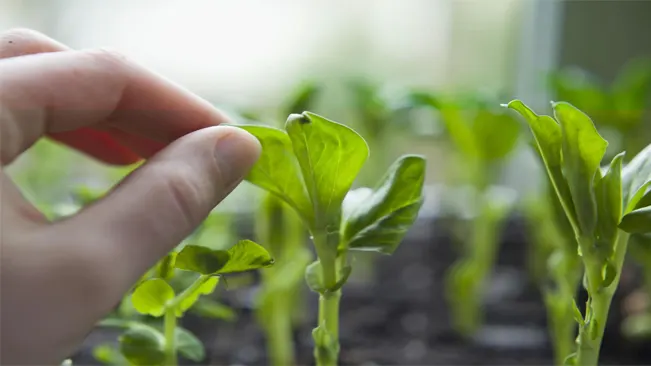
Provide Support
Peas are climbers, so they will need support as they grow. Install garden stakes or a trellis at the time of planting to avoid disturbing the roots later. The tendrils of the pea plants will cling to the support as they grow.
Why Provide Support for Pea Plants?
- Climbing Habit: Pea plants are natural climbers. They grow tendrils that seek out and cling to anything they can wrap around, helping the plant to ascend.
- Health and Productivity: Support systems allow peas to grow upwards, which promotes better air circulation around the plants. This reduces the risk of soil-borne diseases and can lead to a more bountiful harvest.
- Ease of Harvest: Vertically grown peas are easier to harvest than those sprawling on the ground. This makes the harvesting process less time-consuming and more efficient.
Types of Support Systems
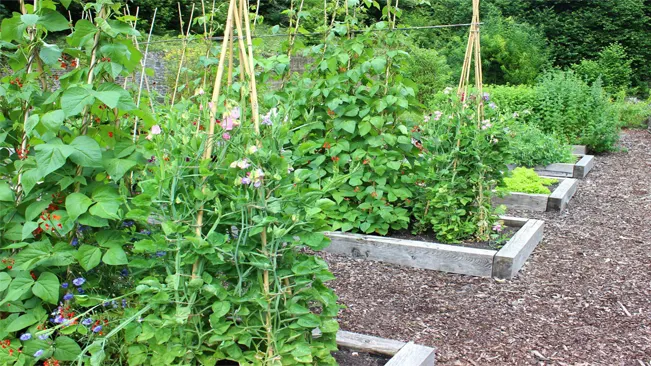
- Trellises: A trellis is one of the most popular support structures for peas. It can be made from various materials like wood, metal, or plastic. Trellises come in several forms, such as flat panels, A-frames, or arches.
- Garden Stakes: Simple stakes can also work if arranged in a row along the planting line. You can tie strings or netting between the stakes to provide additional structure for the peas to climb.
- Netting: Using netting or mesh is another effective way. The netting can be attached to a frame or stakes to create a sturdy support structure.
How to Install Support
- Timing: It’s best to install the support system at the time of planting. This prevents damage to the roots and shoots that might occur if you install it after the plants have started growing.
- Positioning: Place the support system directly over the row where the peas are planted. Ensure it’s securely anchored to withstand wind and the weight of the growing plants.
- Encouraging Growth: Initially, you may need to gently guide the young tendrils of the pea plants onto the support. Once they latch on, they will continue to climb naturally.
- Maintenance: Check the support system regularly as the plants grow. Make sure it remains stable and adjust or reinforce if necessary.
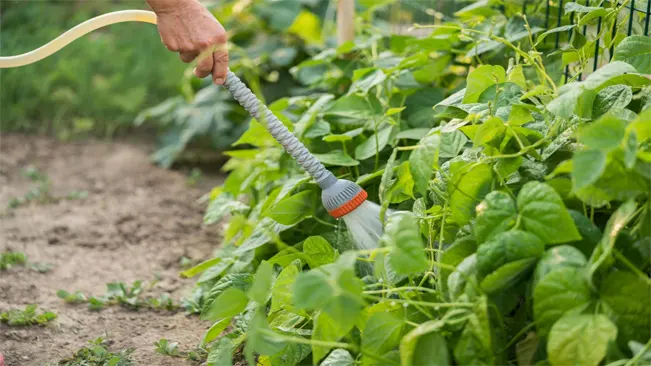
Watering and Care
Water the seeds gently but thoroughly after planting. Keep the soil moist but not waterlogged. As the peas grow, they may need additional water, especially during dry spells.
Watering and Care for Pea Plants
- Initial Watering After Planting
- Right after you plant the pea seeds, it’s crucial to water them gently yet thoroughly. This initial watering helps settle the soil around the seeds, ensuring good contact and aiding in germination. Be careful not to displace the seeds with a too-strong water flow.
- Maintaining Soil Moisture
- Peas prefer consistently moist soil. The goal is to keep the soil evenly moist but not soggy. Overly wet soil can lead to root rot and other fungal diseases. If the soil dries out completely, the plants might not produce well or could become stressed, leading to poor pod development.
- Watering Frequency
- The frequency of watering depends on your soil type and weather conditions. In general, watering once a week with about an inch of water is sufficient. However, in warmer or windy conditions, more frequent watering may be necessary.
- Best Practices for Watering
- It’s best to water early in the morning or late in the afternoon to reduce evaporation. Water at the base of the plants to avoid wetting the foliage, as damp leaves can encourage mildew and other diseases.
- Mulching
- Applying a layer of organic mulch around the pea plants can help retain soil moisture, regulate soil temperature, and suppress weeds. Straw, grass clippings, or bark chips are suitable choices.
- Checking Soil Moisture
- To gauge if your peas need water, check the soil moisture by sticking your finger into the soil near the plants. If the top inch of soil feels dry, it’s time to water.
- Adjusting Watering as Peas Grow
- As peas grow and begin to flower and produce pods, their water needs may increase. Monitor the plants and soil moisture closely during this stage and adjust your watering accordingly.
- Avoiding Water Stress
- Consistent watering is key, as fluctuations in soil moisture can lead to problems like blossom drop or poor pod development.
- Dealing with Rainfall
- If you receive adequate rainfall, you may not need to water as frequently. However, after heavy rain, check your pea plants for any signs of damage or disease.
- Signs of Over-Watering or Under-Watering
- Signs of over-watering include yellowing leaves and a lack of flowering or pod development. Under-watered plants may have wilting or drooping leaves and stunted growth.
Mulching (Optional)
- Applying a layer of mulch around the plants can help retain moisture, suppress weeds, and keep the soil cool.
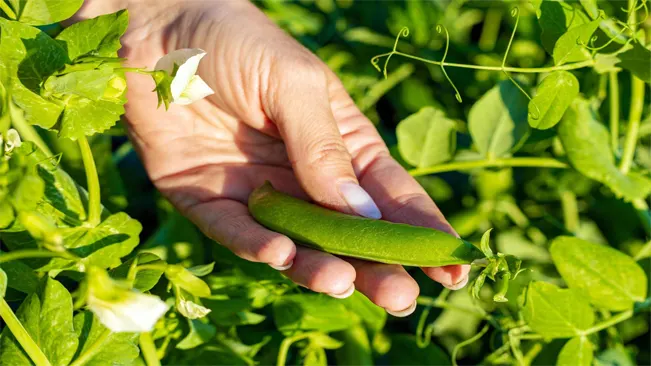
Harvesting
Peas are usually ready to harvest in about 60-70 days, depending on the variety. Harvest them regularly to encourage more pods to develop.
Knowing When to Harvest
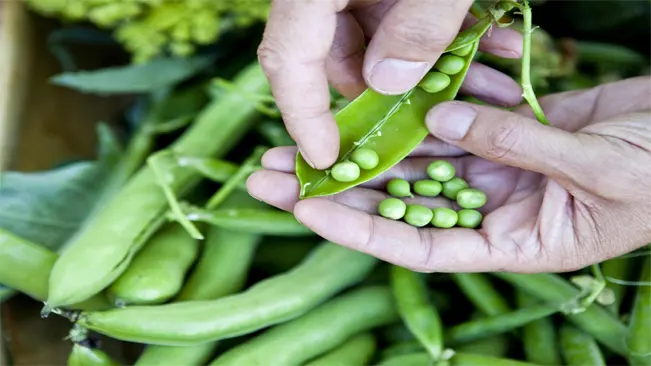
- Maturity Signs: Peas are usually ready for harvest about 60-70 days after planting, but this can vary by variety. The key indicator is the size of the pods. For most types, the pods should be firm and swollen, but not overly bulgy.
- Taste Test: The best way to judge if peas are ready is by taste. Young peas are tender and sweet. As they mature, they become starchier and less sweet.
- Pod Appearance: For shelling peas, the pods should be bright green and appear slightly rounded. For snap peas, the pods should be plump but still crisp. For snow peas, harvest when the pods are still flat and the peas inside are just beginning to form.
How to Harvest
- Gentle Picking: Use both hands when picking peas. Hold the vine with one hand and pull the peas off with the other. This prevents damaging the plant.
- Regular Harvesting: Regular picking encourages the plant to produce more pods. If peas are left on the vine too long, the plant will stop producing new pods.
Frequency of Harvesting
- Pea plants usually need to be harvested every 1-3 days once they start producing. This frequent harvesting keeps the plants productive.
Post-Harvest Handling
- Immediate Use or Storage: Freshly harvested peas are best used immediately, as they lose their sweetness quickly. If you can’t use them right away, refrigerate them to slow down the sugar-to-starch conversion.
- Freezing: Peas freeze well and retain their quality. Blanch them in boiling water for 1-2 minutes, then plunge into ice water. Drain and freeze in airtight containers or freezer bags.
End of Season Harvest
- At the end of the growing season, you can harvest all the remaining pods. Even if they are a bit over-mature, they can be used in soups or stews.
Utilizing Over-Mature Peas
- If you miss the ideal harvest time and the peas become too starchy, you can still use them. Dry these peas and use them in soups or as split peas.
Conclusion
Planting pea seeds is a simple and rewarding process. With the right care, you can enjoy a plentiful harvest of fresh, sweet peas straight from your garden. Happy gardening!
FAQs (Frequently Asked Questions)
- When is the best time to plant pea seeds?
Plant pea seeds in early spring as soon as the soil can be worked, a few weeks before the last frost date. - Do peas need full sun or shade?
Peas prefer a location with full sun, although they can tolerate partial shade. - How deep should I plant pea seeds?
Plant pea seeds about 1 inch deep in the soil. - What is the ideal spacing for planting pea seeds?
Space the seeds about 2 inches apart in rows, with each row spaced about 18 inches apart. - Do peas need a lot of water?
Water regularly to keep the soil moist, especially during dry periods, but avoid over-watering. - Should I use fertilizer when planting peas?
Peas generally do not require a lot of fertilizer, especially if you enrich the soil with compost or well-rotted manure before planting. - How do I support pea plants as they grow?
Install a trellis, stakes, or a net for the pea plants to climb as they grow. - When can I expect to harvest peas?
Peas are usually ready to harvest in about 60-70 days after planting, depending on the variety. - Can I plant peas in containers?
Yes, peas can be grown in containers. Ensure the container is deep enough and has good drainage. - How do I protect pea plants from pests?
Keep an eye out for common pests like aphids. You can use insecticidal soap or neem oil to control them. Also, practicing crop rotation and keeping the area weed-free can help prevent pests.

Kristine Moore
Forestry AuthorI'm Kristine Moore, a seasoned garden landscaping professional with over 30 years of experience. My extensive career has been dedicated to transforming outdoor spaces into stunning, sustainable landscapes. With a deep understanding of horticulture, design principles, and environmental stewardship, I have become a respected figure in the field, known for creating harmonious, visually appealing, and eco-friendly gardens. My commitment to excellence and continuous learning in landscaping trends and techniques has solidified my reputation as an expert in garden design and implementation.


Leave your comment