How to Replace the Gasket on a Wood Stove 2025
- October 2, 2023
- 0 comment
Noticing smoke leaks or a drop in your wood stove’s efficiency? It might be time to replace the gasket. A good gasket is key to keeping your stove running safely and efficiently. Over time, gaskets can wear out, which might compromise the performance of your stove and even pose safety risks.
This guide provides a simple, step-by-step approach to replacing your wood stove’s gasket, ensuring your home stays warm and secure. Ready to get your stove back in top condition? Let’s get started with the details.
Tools and Materials You’ll Need
- Replacement Gasket – Central to the task is the replacement gasket, your stove’s new seal. It keeps smoke and heat inside, ensuring your stove operates safely and efficiently. To find the right gasket, measure the thickness and diameter of the old one and consult your stove’s manual for specifications. Gaskets come in various shapes, including flat and round, so selecting the correct type is crucial.
- Stove Adhesive or Gasket Cement – Not just any glue, but a high-temperature adhesive specifically designed for gasket placement. It’s vital to apply this in a well-ventilated space as it’s made to endure the extreme heat of wood stoves. Apply sparingly; too much can cause overflow and a weak seal.
- Tools: Screwdriver or Wrench – Depending on your stove’s design, you’ll need either a screwdriver or a wrench to remove and later secure the stove door. Ensure you use the correct size to avoid any damage.
- Cutting Tools: Utility Knife or Scissors – Use these to trim the new gasket to size and remove the old one. Exercise caution: always cut away from yourself and store the tools safely after use.
- Wire Brush – Before installing the new gasket, it’s essential to prepare the surface. Use a wire brush to clean off any residue or corrosion, ensuring the new adhesive and gasket will attach smoothly.
- Gloves – Safety is paramount, and durable gloves will protect your hands from sharp edges, residual heat, or harsh chemicals. Choose heavy-duty gloves that are resistant to both heat and chemicals.
- Cleaning Supplies: Rags or Paper Towels – Keep your workspace neat with rags or paper towels, ideal for wiping up spills or cleaning surfaces. Keep a damp rag handy for quick clean-ups.
- Well-Ventilated Workspace – Finally, make sure your workspace is well-ventilated. The fumes from the adhesive are potent and can be hazardous if inhaled, so work near open windows or in an open area like a garage.
- Pro Tip: Always double-check your gasket’s fit and adhesive application before closing up the stove door to ensure a perfect seal.
1. Safety First
When it comes to maintaining or repairing a wood stove, prioritizing safety cannot be overstressed. It’s crucial to understand the risks and take the necessary precautions to avoid accidents, especially when replacing a stove’s gasket. Firstly, ensure your stove has completely cooled off before you start working. This might mean waiting a day after its last use. It’s essential because live embers can remain hot enough to burn for hours, posing serious risks of burns or fires. A cool stove not only makes it safer to work on but also easier, as you won’t be rushing through the process to avoid heat.
Secondly, always wear protective gloves. They do more than protect against burns; they prevent injuries from unexpected sharp edges and metal splinters, particularly common in older stoves. High-quality gloves can save you from unnecessary scrapes and cuts. Remember, when dealing with any repair task, especially involving high temperatures and sharp objects, cutting corners on safety can lead to severe injuries. Always approach maintenance with caution and respect for the equipment.
2. Open the Stove Door
Gaining full access to the stove’s interior is crucial when replacing a gasket, which starts by opening the stove door—the gateway to all internal components. First, determine how the door is secured to the stove. This varies by model and age; some use screws or bolts, while others might employ latches. You’ll often find these fasteners either on the door’s hinges or around its perimeter. This is important to note because using the correct tool is key to avoiding damage. A wrong-sized screwdriver or wrench can strip these fasteners, making future repairs difficult or damaging the stove.
Choose the right tool—either a screwdriver or a wrench—that fits these fasteners perfectly. When you begin loosening them, support the door to prevent it from falling or swinging unexpectedly, which could cause injury or further damage to the stove. After the fasteners are removed, open the door cautiously. Be mindful of its weight, as it can be heavier than expected, and position yourself to manage the weight safely. With the door open, you now have clear access to proceed with replacing the gasket, setting the stage for a straightforward and effective maintenance task.
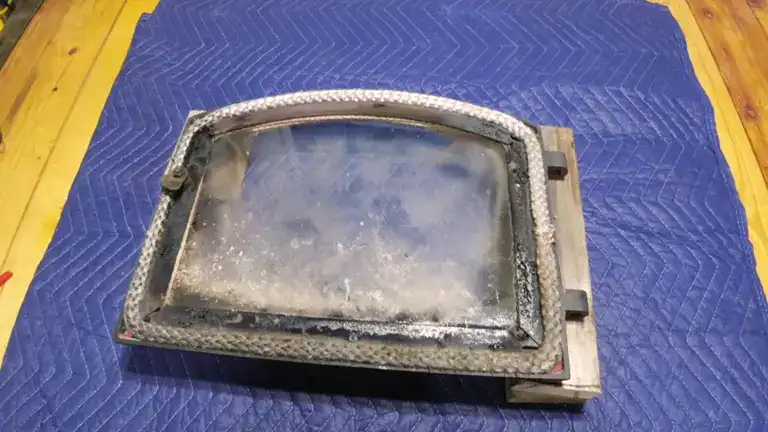
3. Remove the Old Gasket
Removing the old gasket is critical to maintaining the efficiency and safety of your wood stove. As gaskets age, they degrade and fail to seal properly, necessitating their replacement to ensure optimal performance.
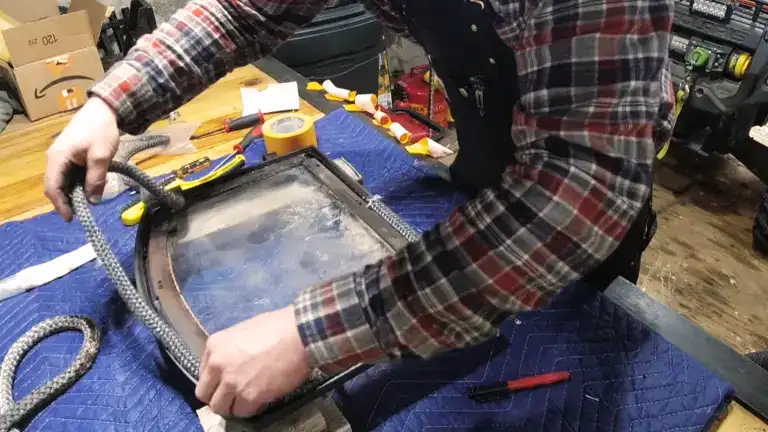
Initial Extraction
Begin the removal process by locating an end or loose segment of the old gasket. You might need to use a pair of pliers or your fingers to pull it gently from its channel.
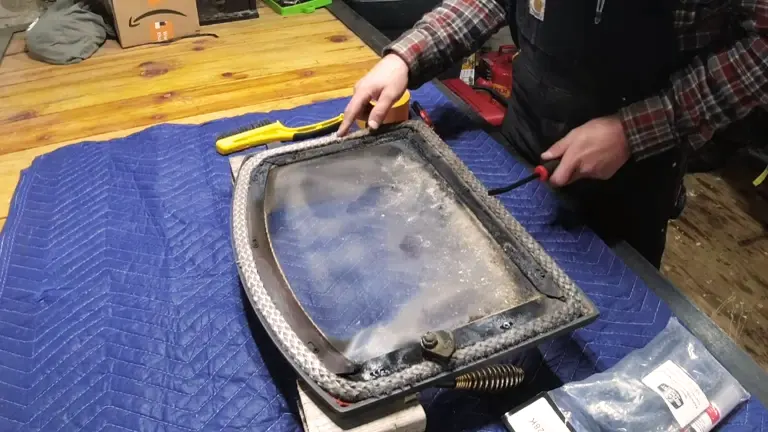
The gasket may come out in one piece or break apart if it’s particularly worn or brittle. This variability depends largely on the age and condition of the gasket material.
Dealing with Adhesive
Gaskets are typically held in place by a special adhesive that can become quite tenacious over time. If the gasket doesn’t come away easily, use a utility knife for assistance.
Slide the blade carefully under the gasket, ensuring you do not damage the stove’s surface or the channel. Apply gentle pressure to cut through any adhesive, making the removal process smoother. Always cut away from your body to enhance safety during this step.
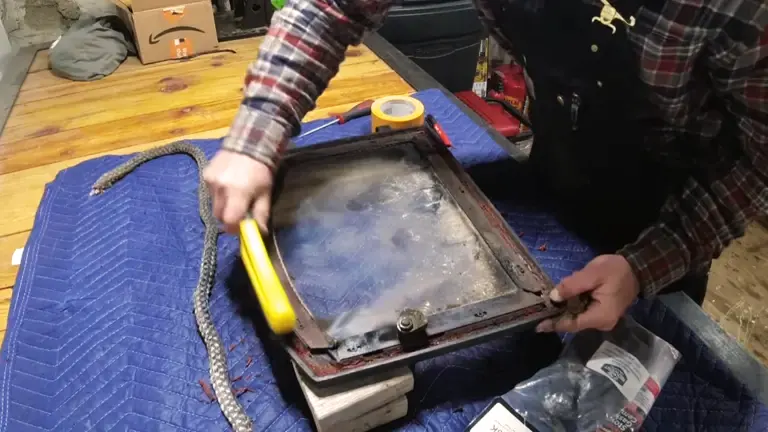
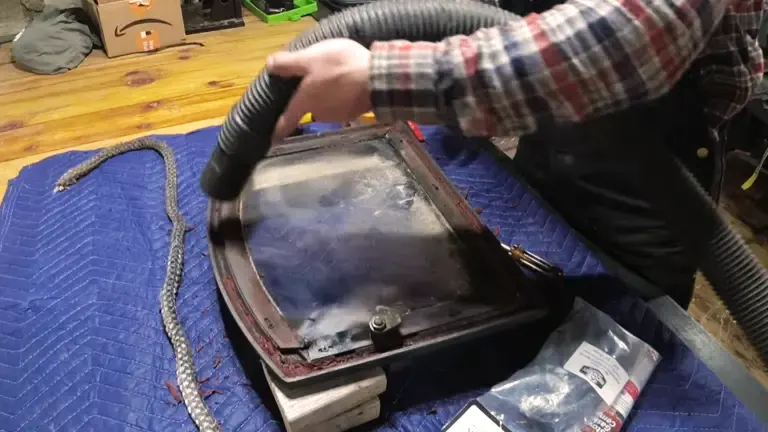
Thorough Cleanup
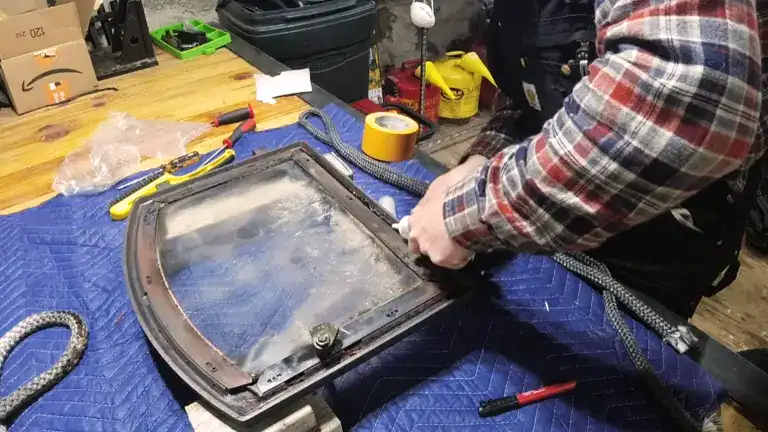
After removing the gasket, you’ll likely encounter some residual adhesive in the channel. This leftover adhesive must be completely removed to ensure a clean surface for the new gasket to adhere to properly. Use a wire brush to vigorously clean out the groove. The stiff bristles are perfect for removing stubborn adhesive and debris, reaching deep into the crevices of the channel.
For particularly tough residues, a flat-head screwdriver can be used cautiously to scrape away any remaining bits. However, be gentle to avoid damaging the channel, which could impair the effectiveness of the new gasket. Once the scraping and brushing are complete, wipe down the area with a cleaning rag or paper towel to remove all dust and particles. This step is crucial for preparing a clean surface that will secure the new gasket effectively.
Prepping for the New Gasket
Ensuring the groove is immaculate is key to the successful installation of the new gasket. Any remnants from the old adhesive or gasket pieces can hinder the new adhesive from bonding correctly, potentially compromising the stove’s safety and efficiency.
Double-check the channel is free of any debris or residue, setting the stage for a straightforward installation of the new gasket. This attention to detail will help ensure your wood stove continues to operate safely and effectively, keeping your home warm and comfortable.
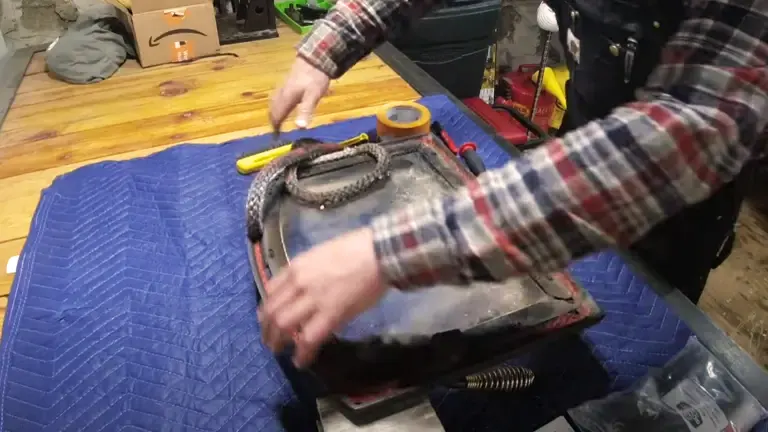
4. Measure and Cut Your New Gasket
Achieving the correct fit for your new gasket is essential for the optimal performance of your wood stove, as it prevents heat loss and blocks harmful fumes. Ensuring your new gasket is precisely measured and cut is key to creating a tight seal. Start by unrolling the gasket material on a clean, flat surface, which helps in taking accurate measurements and allows for inspection of any potential defects or inconsistencies.
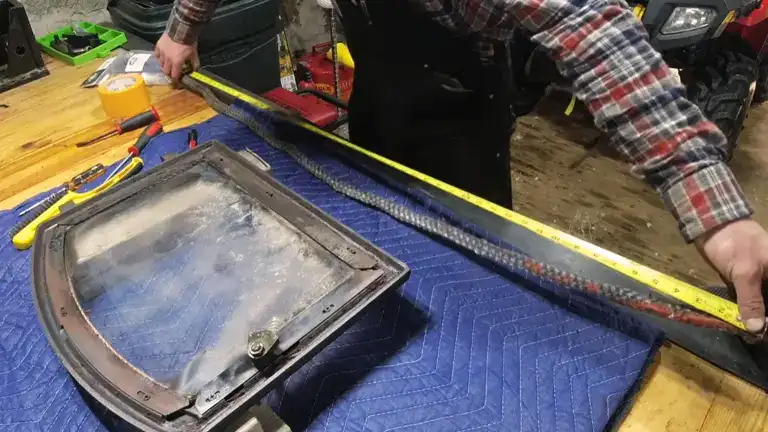
First, lay the new gasket along the groove of the stove’s door to compare lengths and ensure it matches the required specifications. If the door has rounded corners, add a little extra length to accommodate the curves. It’s better to have the gasket slightly longer than too short, as you can trim the excess later. Measure the length needed with a tape measure or ruler, marking where to cut with a pencil or chalk for visibility.
For cutting the gasket, choose tools based on the material’s firmness. A utility knife is ideal for denser materials and should be used on a cutting board to avoid damaging underlying surfaces. For thinner materials, scissors may provide a cleaner cut. After making the cut, test-fit the gasket by placing it in the stove’s groove to ensure it fits perfectly without gaps or overlaps. This verification step is crucial before applying any adhesive to avoid adjustments during installation. By meticulously measuring and cutting your gasket, you ensure a seamless fit that enhances the safety and efficiency of your wood stove.
5. Apply the Adhesive
To ensure the new gasket on your wood stove is securely attached and maintains a perfect seal, it’s crucial to use the right adhesive, capable of withstanding the high temperatures inside your stove. Begin by thoroughly cleaning the groove on the stove door to remove any old adhesive, dirt, or debris, as leftover residues can impede the new adhesive’s effectiveness. Once cleaned, follow the specific application instructions provided by the adhesive manufacturer, which can be found on the product packaging. This will guide you on the amount of adhesive to use, required drying times, and safety precautions.
When applying the adhesive, aim for a steady and even bead along the entire groove using the tube nozzle or a small applicator. It’s important to maintain consistency in the adhesive layer without overapplying, as too much adhesive can seep out when the gasket is installed, causing mess and potentially affecting the door’s seal. If excess occurs, quickly wipe it off with a clean rag. Depending on the type of adhesive, allowing it to become slightly tacky before setting the gasket in place can improve adhesion. Ensure you check the manufacturer’s recommendations to see if this step applies to your chosen product. By properly preparing and applying the adhesive, you’ll ensure a strong, durable bond that keeps your wood stove operating safely and efficiently.
6. Place the New Gasket
Installing the new gasket is a critical step that determines the effectiveness and safety of your wood stove. Begin by positioning one end of the gasket at the start of the adhesive-coated groove, ensuring it’s properly aligned as this sets the placement for the rest of the gasket. Gently press the gasket into the groove, applying steady pressure with your fingers to make sure it embeds evenly into the adhesive. Take special care around curves or corners, adjusting the tension on the gasket to fit these areas without leaving gaps or bunching up.
After laying the gasket throughout the groove, double-check its placement to ensure it sits uniformly without any raised or twisted sections. If the gasket extends beyond the endpoint, trim the excess with a utility knife or scissors so that the ends meet neatly without significant overlap. This precise fit is crucial to maintaining an effective seal, ensuring your wood stove functions safely and efficiently.
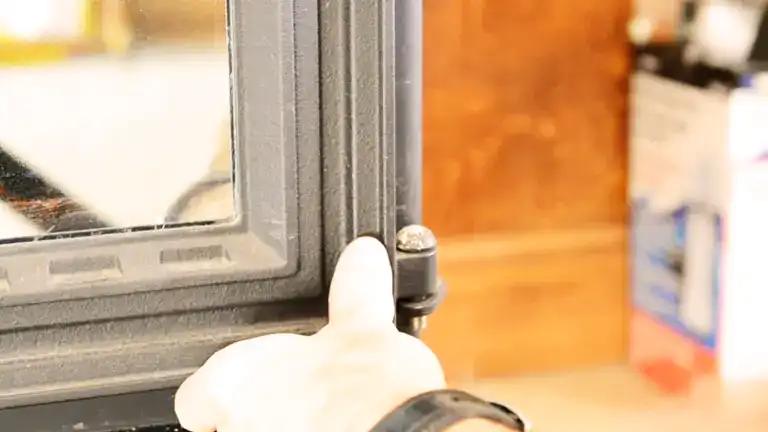
7. Reattach the Door
Reattaching the woodstove door marks the final step in the gasket replacement process, crucial for ensuring the stove’s safety and operational efficiency. Start by carefully aligning the door with the hinges or mounting points on the stove. Doors can be heavy, so you might need an extra set of hands or a temporary support like a wooden block to keep it steady.
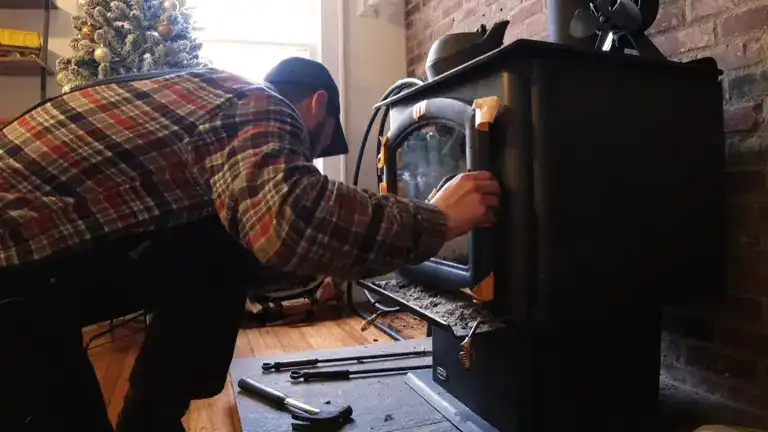
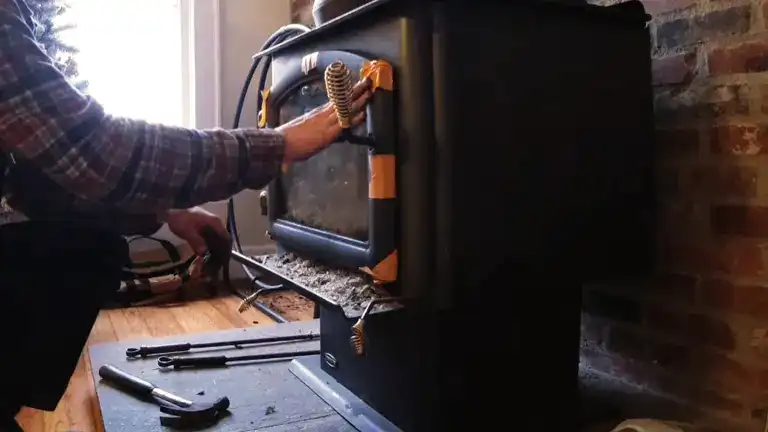
Once the door is in position, insert and lightly fasten the first few screws or bolts. This preliminary step prevents the door from shifting as you work on securing the remaining fasteners. Proceed to tighten each screw or bolt gradually, using a crisscross pattern if possible. This method helps distribute pressure evenly across the door, preventing any warping or misalignment. After all fasteners are snug, close the door to check the new gasket’s seal. It should be uniform around the door, with no gaps or bulging areas.
Finally, operate the door several times to ensure it opens and closes smoothly, indicating a well-seated gasket. Make sure the door latches correctly without excessive force. Conclude with a thorough check to confirm all fasteners are securely tightened and the door is stable, ensuring the stove is safe to use and efficiently sealed.
8. Let it Dry
After replacing the gasket on your wood stove, the next critical step is to allow the adhesive to cure properly. This drying phase is vital to ensure the gasket bonds securely and attains the necessary heat-resistant properties for effective stove operation. The adhesive or gasket cement, specifically formulated for high temperatures, needs time to set and harden fully. During this curing period, the adhesive develops a robust bond that can handle the intense heat of the stove. Igniting the stove too soon can disrupt this process, weakening the seal and potentially shortening the gasket’s lifespan.
Typically, it is advisable to wait at least 24 hours for the adhesive to cure fully. However, this duration can vary depending on the specific product and environmental conditions such as humidity and temperature. Always refer to the manufacturer’s instructions on the adhesive packaging for precise curing times. During this time, ensure the area is well-ventilated to expedite the drying process and to keep the environment safe from potentially harmful fumes. After the recommended period, inspect the gasket to ensure it is firm and securely in place, indicating that the adhesive has set correctly and the stove is ready for safe use.
Conclusion
Maintaining the efficiency and safety of your woodstove is paramount. Regularly inspecting and replacing worn-out parts, such as the gasket, can save you money in the long run and ensure your stove operates at its best. So, with these steps in hand, you are all set to keep your woodstove in top-notch condition!
Feel free to explore our other articles to dive deeper into the world of woodstoves.
- How to Choose the Right Wood Cooking Stoves for Your Needs
- Best Camping Wood Stoves 2025
- How to Keep a Wood Stove Burning All Night 2025
- Best Wood Stove Thermometer on Amazon 2025
- When to Replace Your Wood Stove 2025
- Choosing a Wood Stove 2025
- Best Small Wood Stoves on Amazon 2025
- How to Keep Wood Stove Glass from Getting Black 2025
- How to Remove Creosote from a Wood Stove 2025
- How to Clean and Maintain Your Wood Stove 2025
- Wood Stove Guide 2025
- Wood Stove vs. Pellet Stove 2025
- Common Wood Stove Problems: Solved 2025
- How to Maximize Your Wood Stove Uses 2025
- Wood Stove Ash For Garden in 2025
- Wood Stoves for Different Home Size 2023
FAQs
- Why do woodstoves have gaskets?
Gaskets create an airtight seal that ensures the stove operates efficiently. They ensure that air only enters the stove through the designed vents, allowing for precise combustion control. - How can I tell if my woodstove gasket needs replacing?
Over time, gaskets can become compressed, brittle, or frayed. If you notice excessive smoke leakage or decreased stove efficiency, it may be time to inspect and potentially replace your gasket. - What materials are gasket replacements typically made of?
Most gaskets for woodstoves are made from fiberglass or graphite-impregnated rope. They are designed to withstand high temperatures and maintain an airtight seal. - Can I use any adhesive for attaching the new gasket?
No. It’s crucial to use a high-temperature adhesive specifically designed for woodstove gaskets. Regular adhesives can emit harmful fumes or fail under high temperatures. - Is there a ‘break-in’ period for a new gasket?
After installing a new gasket, it’s recommended to have several smaller fires initially. This helps the adhesive cure properly and ensures a long-lasting seal. - Do all woodstoves have the same size gasket?
No, gaskets come in various sizes and profiles. Always measure and check your stove’s specifications before purchasing a replacement. - Can I replace a woodstove gasket on my own?
Yes, with the right tools and materials, replacing a gasket is a DIY-friendly project. However, if you’re unsure, it’s always best to consult with a professional. - How often should I check my gasket’s condition?
It’s good practice to inspect your gasket at least once a year, preferably before the heating season begins. - How do I measure and cut the gasket accurately?
Measure the groove’s length where the gasket will sit, ensuring you allow an extra inch for a snug fit. Always use a sharp pair of scissors or a utility knife for a clean cut. - Is there an optimal time of year to replace my woodstove gasket?
Replacing a gasket during warmer months ensures your stove is ready for the cold season. It also allows any adhesive fumes to dissipate before the stove is used heavily.
And that’s a wrap on our guide, How to Replace the Gasket on a Wood Stove 2025! We hope you found these steps helpful and that they add some warmth and efficiency to your stove experience. Now, we’d love to hear from you! Got a story, a tip, or perhaps a question about your stove maintenance? Drop us a comment below. Let’s turn this into a cozy conversation sharing is not only about giving but also about connecting. Looking forward to your insights and stories!

David Murray
Forestry AuthorI'm David Murry, a forestry equipment specialist with a focus on chainsaw operation. With over 13 years of experience, I've honed my skills in operating and maintaining a wide range of machinery, from chainsaws to log splitters. My passion for the outdoors and commitment to sustainable forestry drive my work, which emphasizes safety, efficiency, and staying updated with industry advancements. Additionally, I'm dedicated to sharing my expertise and promoting environmental awareness within the forestry community.


Leave your comment