Top 10 Mistakes to Avoid When Buying Wood
- May 20, 2024
- 0 comment
Woodworking projects are incredibly rewarding, but choosing the right wood is essential to avoid costly mistakes. The quality of your wood can make or break your project, turning your vision into reality or leading to frustration and wasted money. This guide will help you steer clear of the ten most common mistakes when buying wood, ensuring your projects are not only beautiful but also durable and well-crafted.
1. Warped Wood Woes
Beware of the trap of warped wood when you’re eager to start a project. It’s easy to hastily grab a piece of lumber at stores like Home Depot, only to later discover it’s warped—resembling a game where “drunk monkeys played pickup sticks.” Here’s how to avoid taking home these twisted nuisances:
Bow
This common warp makes the wood curve outward like a smile, with a straight edge but a curved face.

Crook or Crown
Here, the face remains flat, but the edge curves upward, creating a gap when laid flat.

Cup
Appears as a shallow bowl with the board rocking side-to-side due to a dip in the middle.

Twist
The most problematic, this warp spirals the board, complicating any attempts to achieve a flat surface. If one corner is down and the opposite corner pops up when pressed, you’ve got a twist.

Wet Noodle
Less common but notorious in smaller lumber sizes, this type bends and twists unpredictably. If spotted, it’s best to avoid it entirely.
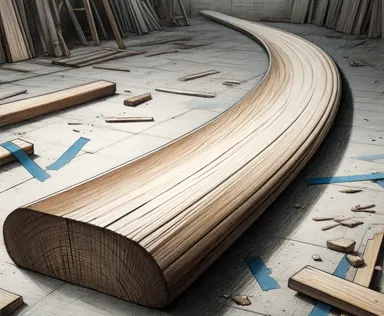
To check for these warps, adopt the technique of sighting down the board from its end—look along the face and then turn it 90 degrees to examine the edge. Opt for pieces with minimal warping; if imperfect pieces are your only option, prefer those with bows or crooks, as they’re easier to work with. Cutting these into smaller sections might also reduce the warp enough to be usable.
Remember, selecting the right wood is critical not just for the ease of your project but for its final integrity and appearance. Take your time to choose wisely and avoid these common pitfalls.
2. Moisture Matters
Don’t let damp wood dampen your project’s success. Moisture is a prime factor in wood warping, as it causes the wood to dry unevenly. To combat this:

- Always check the wood’s moisture levels with a moisture meter while in the store. Aim for wood with a moisture content of less than 15%, which is typically ideal for preventing future warping.
- Wood that feels heavier and cooler than its counterparts usually contains more moisture. This can be a quick way to gauge the general moisture content without a meter.
- Additionally, look for signs of moisture such as darker coloration or a clammy feel, reminiscent of that uncomfortably sweaty hand you had to hold in third grade.
Investing in a moisture meter can save you from future headaches. There are various types available, from high-end models offering detailed insights to more affordable options under $50 that still provide relative humidity readings. Comparing these readings to known dry wood in your shop can help you pick the best boards available.
Remember, selecting drier wood not only ensures stability but also enhances the longevity and appearance of your finished project. Make sure to take these steps seriously to avoid the pitfalls of warping as the wood adjusts to your home environment.
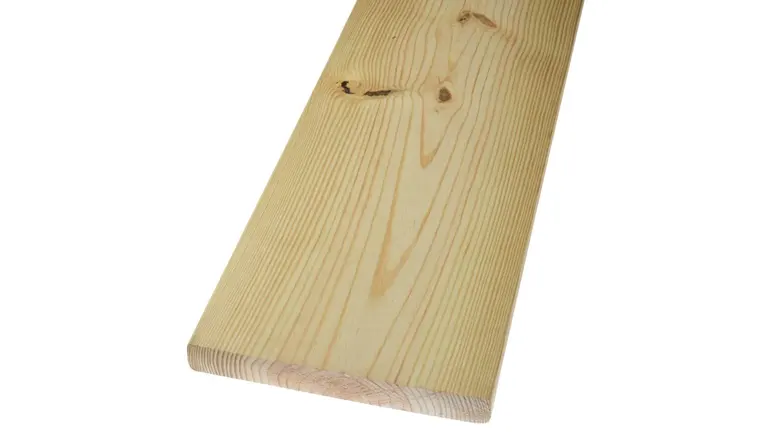
3. Inspect for Imperfections
Before you commit to buying, thoroughly inspect each piece of wood for defects that could affect your project’s outcome. Here’s what to watch for:
Knots
These are common but vary in impact. Small, tight knots might not pose a problem, but large, loose knots can weaken the wood’s structural integrity.

Sap Pockets
These are areas filled with tree sap that can seep out over time, especially problematic if you plan to paint or stain the wood as they can cause discoloration and stickiness.

Cracks
Also known as checks, these can expand and compromise both the wood’s strength and cosmetic appeal. Deep or numerous cracks are particularly troublesome.

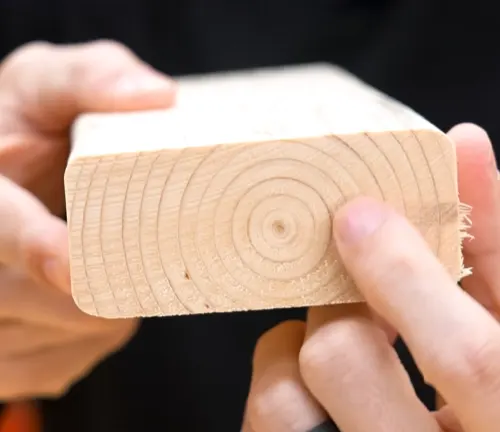
End Grain Inspection
Look at the end grain for the pith, the soft core in the center of the tree. Wood containing the pith is more likely to warp or split as it dries. Prefer wood with uniform grain that avoids this central area.
In addition to these points, feel the surface of the wood. Areas that are rough or have a fuzzy feel might indicate tear-out or poor cutting, which could require extra preparation work. Taking the time to select wood free of major defects will ensure a smoother process when you move from the lumberyard to the workshop.
4. Species Selection
Selecting the right species of wood is crucial for projects where the natural beauty of the wood is a highlight. The choice of species affects not only the aesthetic but also the project’s overall harmony:
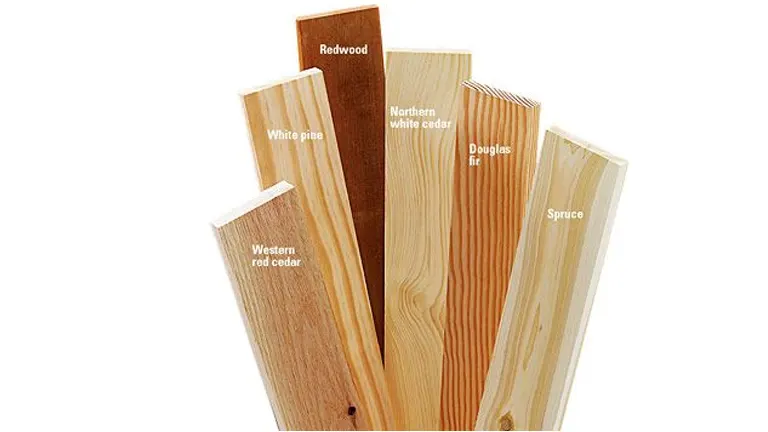
- Use wood from the same species to ensure uniformity in color and grain patterns. This is especially important when you plan to use a clear finish, which will amplify discrepancies between different types of wood.
- Common varieties like spruce, pine, and fir each have distinct appearances and properties. Spruce is typically light with a fine, even texture, making it good for subtle finishes. Pine, known for its knots and robust grain, offers a rustic look but can vary in color from pale yellow to rich golden. Fir has a straight grain and is more uniform in color, suitable for projects requiring a smoother finish.
- Consider the end use of your project. For instance, spruce might be ideal for a delicate piece of indoor furniture, while fir could be better suited for outdoor applications due to its moisture-resistance qualities.
By carefully selecting wood species that match the design and functional requirements of your project, you enhance both the craftsmanship and the visual appeal of the finished piece.
5. Hardwood vs. Softwood
Selecting between hardwood and softwood hinges on the specific needs of your project, particularly in terms of durability and aesthetic appeal:
- Hardwoods: Known for their density and durability, hardwoods like oak, maple, and cherry are excellent choices for furniture and items that endure frequent use, such as dining tables, kitchen counters, and flooring. Their tight grain patterns not only provide robustness but also offer a rich visual appeal, making them a prime choice for projects where longevity and aesthetics are prioritized.
- Softwoods: Typically lighter and less expensive, softwoods such as pine, cedar, and spruce are better suited for decorative or low-stress applications like wall paneling, trim, or outdoor projects not directly exposed to harsh conditions. While they are easier to work with due to their softer nature, they may not withstand heavy wear as effectively as hardwoods.
Understanding the characteristics of each wood type helps ensure that you choose the most appropriate material for your project’s demands, balancing beauty, functionality, and cost.
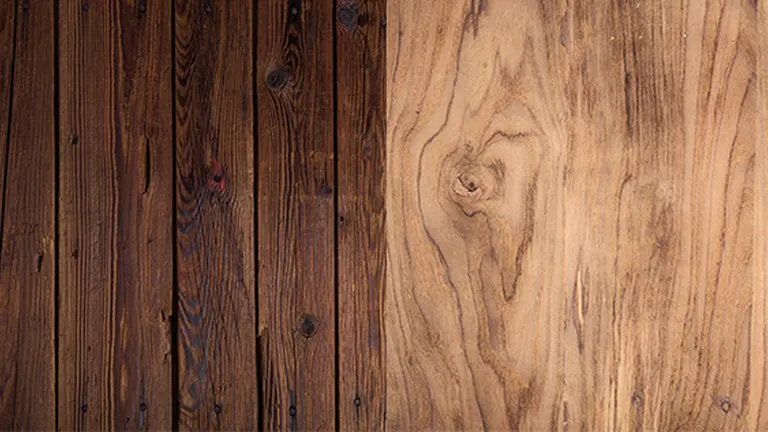
6. Outdoor Appropriateness
Selecting the right wood for outdoor projects is critical to ensure longevity and durability against the elements:

- Choose species like cedar, teak, or redwood, which naturally resist rot, decay, and insect damage. Cedar, for instance, not only withstands moisture but also repels insects naturally, making it an ideal choice for outdoor furniture, decks, and fencing.
- If budget constraints are a consideration, opt for pressure-treated pine. This wood has been chemically treated to resist rot, decay, and termites. While more affordable, it requires careful handling and specific hardware due to the chemicals used in the treatment process.
- Be wary of using untreated, non-resistant woods like regular pine for exposed outdoor projects. These types require extensive maintenance, including regular sealing, staining, or painting to protect against moisture and UV damage.
By choosing the appropriate wood type for your outdoor projects, you ensure not only the structural integrity but also the aesthetic quality for years to come. Always consider the specific environmental challenges and maintenance commitments associated with your choice.
7. Check the End Grain
The end grain of wood provides critical clues about its quality, stability, and suitability for your project:
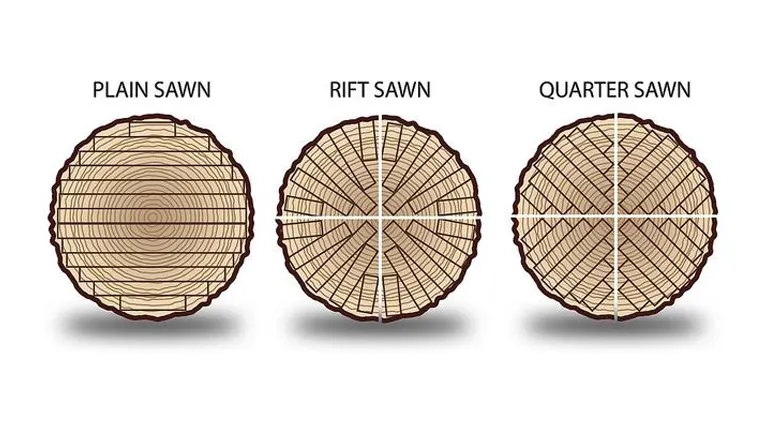
- Observing the end grain can reveal how the wood will react over time, including its propensity to warp or crack. Wood with a straight and tight grain pattern typically indicates greater stability and uniformity, which is crucial for high-quality finishes and structural integrity.
- The end grain also influences the wood’s final appearance. Patterns like straight, quartersawn, or riftsawn grains not only ensure stability but also enhance the wood’s natural beauty, offering appealing visual textures that are ideal for visible surfaces in furniture or flooring.
- Be sure to avoid wood with the pith, or the center of the tree, visible in the end grain. Wood containing the pith is more likely to develop internal stresses and distort as it dries, leading to future problems with twisting or splitting.
A thorough examination of the end grain before purchasing can save you from potential issues down the line, ensuring that the wood you choose is both beautiful and capable of standing up to the demands of your project.
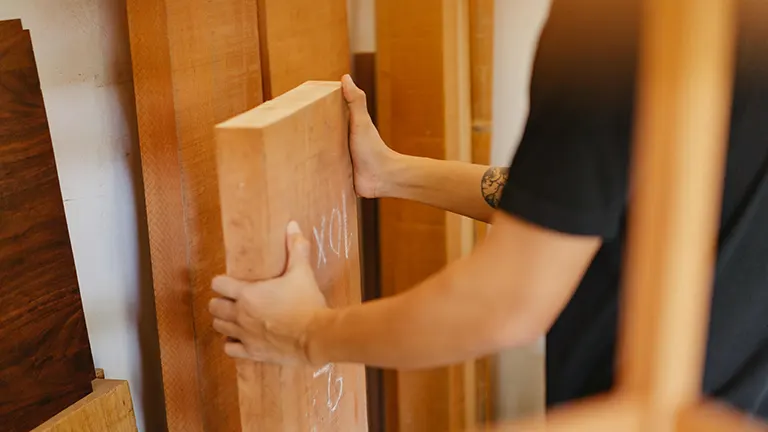
8. Go Big for Fewer Defects
Choosing larger lumber like two by twelves can significantly improve the quality of your projects:
- Larger boards often come from the heart of mature trees, where the wood is more consistent and less prone to defects like knots and irregular grain patterns.
- Due to their size and the part of the tree they come from, larger boards typically have a lower moisture content, which makes them more stable and less likely to warp after purchase.
- When you need smaller pieces, splitting these larger boards can be more cost-effective. You get more uniform, high-quality wood from a single large board, reducing waste and often resulting in a better yield of usable material.
By investing in larger pieces of lumber, you not only ensure a higher quality of wood but also maximize the efficiency of your materials, making your woodworking more sustainable and cost-effective.
9. Shop Smart
Smart shopping is crucial when purchasing wood to ensure you get the best value and quality for your money:

- Wood prices can vary widely between suppliers, often due to differences in quality, source, or even seasonal availability. Before making a purchase, it’s wise to call around or check online to compare prices at different stores and lumber yards.
- Don’t overlook the clearance areas. These sections often contain wood that has minor defects such as small knots or slight warps that may not affect your project’s outcome but are priced substantially lower.
- While searching for the best deal, also assess the quality of the wood. Lower prices might sometimes mean lower quality, which could affect the durability or appearance of your final project.
- Consider buying in bulk if your project scope and storage space allow. Larger purchases can often secure better rates and uniformity in wood quality, especially useful for larger projects.
By adopting these smart shopping tactics, you can significantly enhance the cost-effectiveness and quality of your woodworking projects. Always balance cost against the potential impact on your project’s requirements to make the most informed decision.
10. The Right Wood for the Right Project
Choosing the correct type of wood is critical to the success and functionality of your woodworking project:
- Consider the end use of your project. For high-end furniture that will be showcased in your home, opt for hardwoods like oak, maple, or walnut, which offer both beauty and durability. These woods are less prone to wear and provide a refined finish that enhances the aesthetics of fine furniture.
- For more utilitarian projects such as shelving or workshop fixtures, construction-grade lumber like pine or fir is more than sufficient. These materials are cost-effective and adequately serve purposes where aesthetics are secondary to function.
- Match the wood to the necessity. Using expensive hardwoods for basic projects not only inflates costs unnecessarily but also could waste valuable resources better suited to more prominent, visible projects.
- Factor in the lifespan and maintenance requirements of the wood. Hardwoods, while initially more expensive, may prove more economical over time due to their longevity and minimal upkeep compared to softer woods that may need frequent refinishing or replacement.
By carefully matching wood types to the specific requirements of your projects, you ensure not only the effectiveness and durability of your work but also manage costs wisely, ensuring that your woodworking remains both satisfying and sustainable.
Conclusion
Selecting the right wood is an essential skill for any woodworking enthusiast. By avoiding common pitfalls like warped or damp wood, inspecting for imperfections, and choosing the right species and grade for your project, you can ensure high-quality results. Remember to shop smart, compare prices, and consider the specific requirements of your project when making your selection.
With these tips, you’ll navigate lumber stores with confidence, make informed choices, and achieve better-built projects without wasting money. So the next time you’re in the lumber aisle, keep these pointers in mind. Happy woodworking, and may your projects turn out beautifully and sturdily every time!
FAQs
- How can I avoid warped wood?
Inspect wood by sighting down its length to check for bows, crooks, cups, and twists. Choose pieces with minimal warping. - How do I check if wood is too moist?
Use a moisture meter to ensure moisture content is below 15%. Moist wood feels heavier and cooler to the touch. - What defects should I look for?
Watch for knots, sap pockets, and cracks. Avoid wood with large knots, sap pockets, and deep cracks. - Why do wood species matter?
Different species vary in color, grain, and durability. For a uniform look, use the same species throughout your project. - When should I use hardwood vs. softwood?
Use hardwoods like oak for durable furniture. Softwoods like pine are suitable for decorative or less demanding projects. - What wood is best for outdoor projects?
Choose cedar or pressure-treated pine for outdoor use. Regular pine requires frequent maintenance to prevent decay. - Why choose larger boards?
Larger boards from mature trees have fewer defects and are often drier. They provide more usable wood when cut down. - How can I shop smart for wood?
Compare prices between suppliers, check clearance sections for deals, and consider buying in bulk for better rates. - How does inspecting the end grain help?
The end grain shows the wood’s stability. Look for tight, straight grains and avoid wood with the pith. - What common mistakes should I avoid?
Avoid buying warped or moist wood, neglecting to inspect for defects, and choosing the wrong species or grade for your project.
Selecting the right wood is key to any successful woodworking project. By avoiding common pitfalls and making informed choices, you can create beautiful, durable pieces. We hope these tips help you on your woodworking journey. Have questions or tips of your own? Share your thoughts in the comments below, and don’t forget to share this article with fellow woodworking enthusiasts. Happy woodworking!

David Murray
Forestry AuthorI'm David Murry, a forestry equipment specialist with a focus on chainsaw operation. With over 13 years of experience, I've honed my skills in operating and maintaining a wide range of machinery, from chainsaws to log splitters. My passion for the outdoors and commitment to sustainable forestry drive my work, which emphasizes safety, efficiency, and staying updated with industry advancements. Additionally, I'm dedicated to sharing my expertise and promoting environmental awareness within the forestry community.


Leave your comment