Common Wood Stove Problems: Solved 2024
- September 21, 2023
- 0 comment
Wood stoves have long been a favorite way to warm up homes. They’re not just heaters; they’re a touch of tradition, a nod to a time when life was simpler. The gentle crackle of burning wood and the comforting glow they produce can turn any room into a cozy sanctuary. But like all good things, wood stoves can sometimes give us a bit of a headache. Smoke not going up the chimney? Stove taking too long to heat? These hitches are common but solvable. In this article, we’ll dive into these everyday challenges and offer simple solutions. Our goal? To ensure your wood stove remains the heart of your home, always inviting and always reliable.
1. Smoke in the Room
The Problem: Every time I tried to enjoy the cozy warmth of my wood stove, I found myself battling a room filled with smoke. Instead of basking in a comforting glow, I was left waving away a smoky haze, wondering where I had gone wrong.
How I Solved It
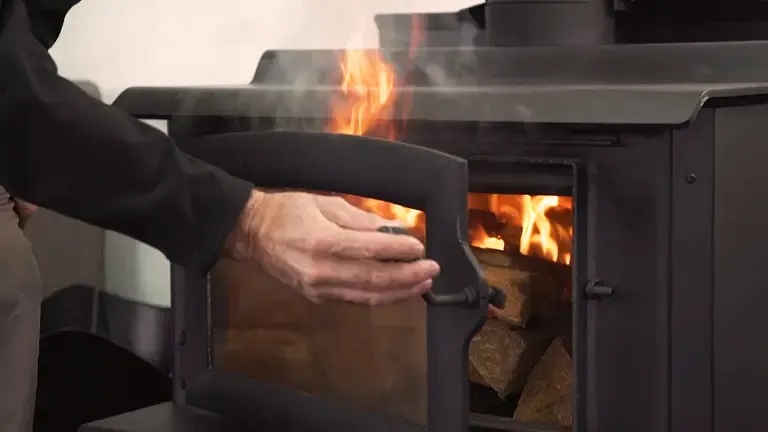
- Mastering the Damper: I quickly learned the importance of the damper. It’s essentially the ‘traffic controller’ for the smoke. At first, I didn’t always open it fully when lighting the stove. But once I made sure it was completely open, it paved the way for the smoke to head straight up the chimney, saving my room from turning into a smoke chamber.
- Choosing the Right Wood: I had to be picky about the wood I used. I discovered that wet or ‘green’ wood was a major culprit. It burned inefficiently and produced more smoke. So, I began using only dry, seasoned wood, which made a world of difference. It was like giving my stove the best-quality fuel.
- Keeping the Chimney Clean: Over time, I realized that my chimney and flue needed as much care as any other part of my house. When they got clogged with soot or creosote, smoke had a hard time escaping. I began to inspect and clean them regularly, ensuring they were always in top shape.
- Checking the Seals: The door seals on my wood stove were more crucial than I’d initially thought. Once, I noticed smoke seeping out from the sides, and upon inspection, I found that the seals had degraded. Replacing them made sure my stove’s door was snug and tight, preventing any unwanted smoke leakage into the room.
Tips for a Smoke-Free Environment
- Proper Ventilation: Ensure your room is adequately ventilated. An occasional open window or door can help balance the room’s air pressure, making it easier for the chimney to draw smoke.
- Avoid Overloading: While it’s tempting to load up the stove with lots of wood, doing so can choke the fire and produce excess smoke. It’s about finding a balance.
- Invest in a Good Chimney Cap: A quality chimney cap can prevent external obstructions like bird nests or debris, which can hinder smoke flow.
- Watch the Weather: On days with little to no wind, chimneys might not draw as effectively. Be mindful of the external environment when lighting your stove.
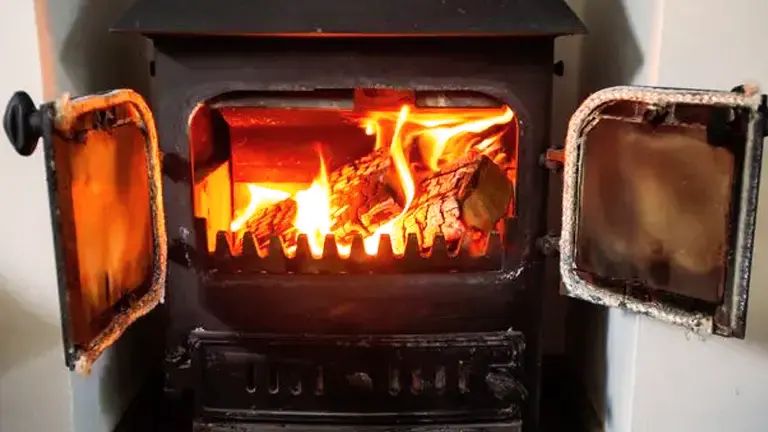
2. Stove Won’t Produce Enough Heat
The Problem: I was excited to enjoy the comforting warmth of my wood stove during those cold evenings. But, much to my dismay, even though the flames were dancing, the room remained chilly. The stove was burning, but the heat just wasn’t enough.
How I Solved It
- Choosing the Right Wood: At first, I didn’t give much thought to the type of wood I was using. But after a bit of research, I realized that the kind of wood matters a lot. I switched to harder woods like oak, hickory, and maple. These woods burn hotter and for longer. The change was palpable, and my room began to feel as toasty as I’d hoped.
- Tending to the Air Vents: I used to occasionally forget to check the air vents. But I learned the hard way that they play a crucial role in how well the stove burns. Making sure they were open and unobstructed became a regular part of my stove-lighting routine. This simple action allowed the fire to breathe and burn more efficiently.
- The Kindling Game: Another game-changer was the way I started my fires. I began to use more kindling to establish a strong, robust fire right from the start. It’s like giving the fire a strong head start. This small adjustment made a significant difference in how quickly and intensely my stove heated up.
Tips for Maximizing Heat
- Insulation Matters: If your room or home isn’t well-insulated, much of the heat produced by your stove might be escaping. Check for drafts and consider investing in better insulation or draft stoppers.
- Positioning the Stove: The placement of the stove in the room can influence how well it heats the space. Centralized positions often distribute heat more evenly.
- Regular Maintenance: Just as we maintain our vehicles for peak performance, our stoves need care too. Yearly professional check-ups can keep your stove in top shape, ensuring it produces heat effectively.
- Using a Fan: Consider using a heat-powered stove fan. These fans help distribute the heat produced by the stove more evenly throughout the room.
3. Wood Burns Too Quickly
The Problem: Every time I stoked my wood stove, I felt like I was watching my wood vanish before my eyes, almost as swiftly as an ice cream cone melting under the blazing summer sun. I couldn’t understand why it was burning up so fast.
How I Solved It
- Choosing the Right Wood: I once believed all wood was the same, but I was wrong. It turns out that the seasoning process is vital. Initially, I was using wood that was still a bit damp and not properly dried. This caused it to burn faster and inefficiently. So, I made the switch to well-seasoned wood, and voila! Not only did it burn at a more leisurely pace, but it also gave off better heat.
- Playing with the Air Vents: The air vents were a revelation for me. At first, I left them wide open, thinking it would give me the best burn. But I soon realized that by adjusting the air intake vents, I could control how fast the wood was consumed. It felt empowering to have that level of control over my stove’s performance.
- Log Positioning: How I placed the logs on the stove made more of a difference than I expected. Instead of throwing them in haphazardly, I began to position them more compactly. This created a slower, denser burn, and the wood lasted noticeably longer.
Tips for Efficient Burning
- Wood Selection: Different woods have varying burn rates. Hardwoods like oak and maple generally last longer than softwoods like pine or spruce. Get to know your wood types.
- Stove Temperature: A stove thermometer can help you understand your stove’s efficiency. Too cool, and it’s not burning efficiently. Too hot, and you might be wasting wood.
- Regular Cleaning: A clean stove is an efficient stove. Removing excess ash and ensuring there’s no creosote buildup in the chimney can significantly improve burn efficiency.
- Invest in a Moisture Meter: This tool can help you determine if your wood is dry enough to burn efficiently. Ideally, wood should have a moisture content of less than 20% for optimal burning.
- Educate Yourself: Take some time to read your stove’s manual. Many have specific recommendations for best practices to ensure efficient burning.
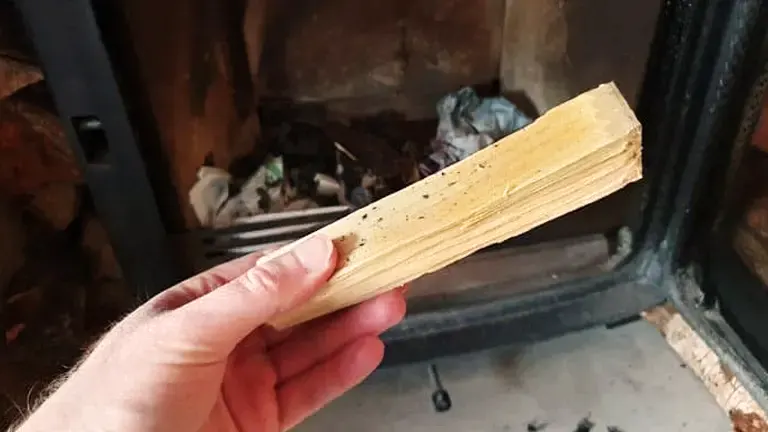
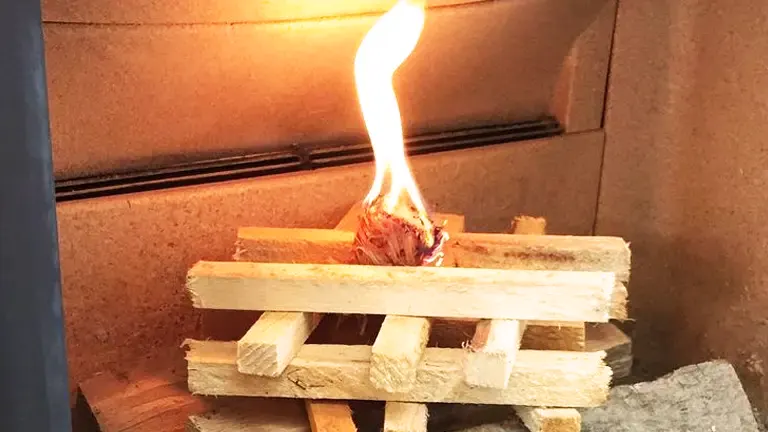
4. Difficulty in Lighting the Fire
The Problem: It felt like a ritual. I’d sit in front of my stove, matchstick after matchstick, trying to ignite the wood. But despite my best efforts, the flames either wouldn’t catch or would fizzle out quickly. The struggle to get that perfect blaze was real.
How I Solved It
- Starting with the Right Kindling: My first lesson was about the importance of kindling. I began experimenting with different types, from newspaper strips to dry twigs. I even tried commercial fire starters. The difference was night and day. With the right kindling, the fire caught easily and burned more vigorously.
- The Seasoning Matters: I used to think any wood would do, but I couldn’t have been more wrong. My early attempts used wood that was either too fresh or improperly stored, making it harder to light. Once I switched to well-seasoned, dry wood, lighting the stove became a breeze.
- Checking the Damper: It turned out that one of my overlooked mistakes was the damper position. There were times I’d forgotten to open it, basically trying to start a fire in a suffocated environment. Now, before I strike a match, I always make sure the damper is open to allow for good airflow.
- Keeping it Clean: Over time, ash built up at the base of my stove, and I didn’t think much of it. But then I realized this ash mountain was hampering airflow, making it harder to start a fire. Regularly cleaning out the ash not only made my stove look better but significantly improved its performance.
Tips for a Trouble-Free Ignition
- Layering is Key: When setting up your fire, think of it as layering. Start with the smallest kindling at the bottom, gradually working your way up to larger pieces of wood. This helps ensure a steady progression of the fire.
- Aerate Your Woodpile: Make sure your wood storage allows for air circulation. This prevents moisture buildup, ensuring your wood remains dry and ready for burning.
- Safety First: Always keep a fire extinguisher nearby. Lighting fires can sometimes be unpredictable, and it’s essential to be prepared for any mishaps.
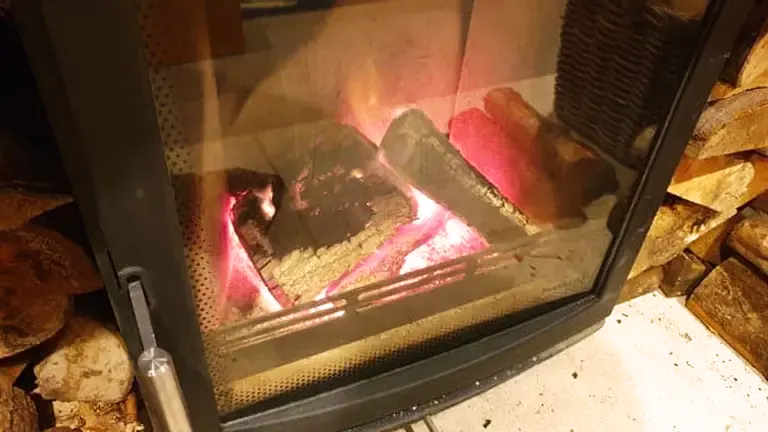
5. Persistent Creosote Buildup
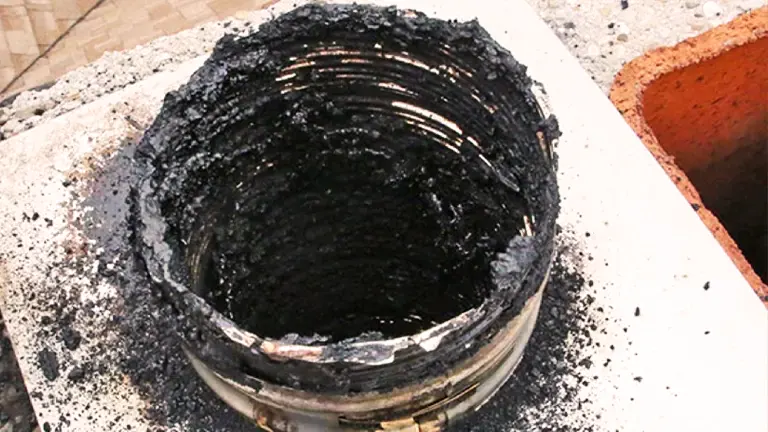
The Problem: Every time I peered into my chimney, I was dismayed to find a thick layer of creosote staring back at me. This tar-like substance seemed to build up faster than I could manage. It wasn’t just about cleanliness; I knew that excessive creosote could be a fire hazard.
How I Solved It
- Being Picky About Wood: I once thought any wood would do, but I quickly learned the error of my ways. Burning green or wet wood became the arch-nemesis of my clean chimney dream. These woods don’t burn cleanly, leading to more creosote. I made it a rule to use only dry, seasoned wood, which greatly reduced the buildup.
- Hot Fire Over Slow Burn: I used to love a slow, simmering fire, thinking it was more economical. But that often resulted in a smoky, inefficient burn and more creosote. I shifted my approach, aiming for a hotter, cleaner burn, which made a world of difference in combating that stubborn creosote.
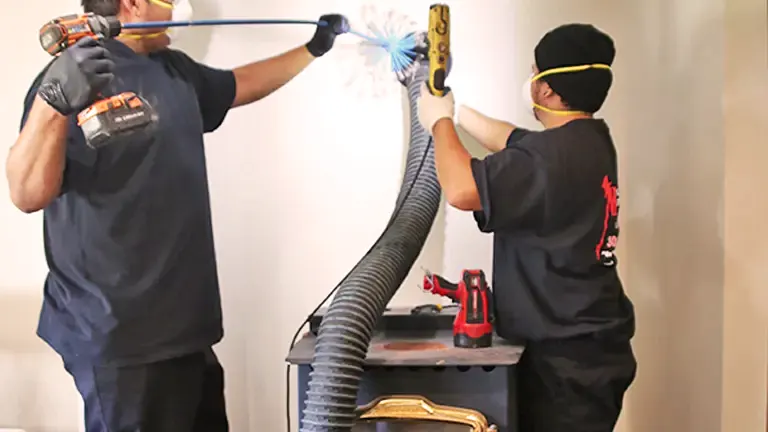
- Routine Chimney TLC: I learned to be proactive rather than reactive. Instead of waiting for the creosote to become a problem, I made regular chimney and flue inspections a part of my routine. And of course, regular cleaning became a must, ensuring my chimney was always in tip-top shape.
Tips to Prevent Excessive Creosote
- Stove Thermometer: Investing in one gave me real-time insights into how hot my fire was burning. This helped me maintain the right temperature to minimize creosote formation.
- Educate Yourself: I took the time to learn more about creosote: what it was, how it formed, and how to prevent it. This knowledge empowered me to take better care of my wood stove and chimney.
- Professional Help: While DIY is great, sometimes it’s good to get an expert’s touch. I started scheduling annual professional chimney sweeps to ensure thorough cleaning and peace of mind.
- Avoid Compressed Logs: Though convenient, many of them can lead to increased creosote. I opted for natural wood instead.
- Air Supply: Ensuring that the stove had a good supply of air improved combustion and reduced smoke and creosote formation. I made it a point to regularly check and clear any obstructions to the stove’s air intake.
6. Glass Door Turns Black

The Problem: Every time I cozied up to my wood stove, anticipating the comforting sight of flickering flames, I was met with a disheartening view. The glass door, which should have offered a clear window to the blazing warmth, was smudged black, obstructing my view and dampening the ambiance.
How I Solved It
- Selecting the Right Wood: Initially, I wasn’t too particular about the wood I used, but the blackened glass was a wake-up call. I found out that unseasoned wood was the main culprit, producing excessive soot which clung to the glass. Making a conscious switch to seasoned wood made all the difference, reducing the amount of soot significantly.
- Tweaking the Air Vents: I used to play it by ear with the air vents, but this issue prompted me to be more deliberate. Keeping the air vents open ensured the fire had enough oxygen to burn hot and efficiently, preventing the formation of excessive soot on the glass.
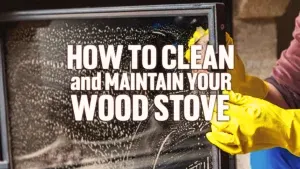
- Regular Cleaning Ritual: Waiting for the glass to turn completely black before cleaning wasn’t the best approach. I began cleaning the glass door more frequently using a soft cloth and a specialized stove glass cleaner. This routine maintenance ensured I always had a clear view of the mesmerizing flames.
Tips to Keep Your Stove’s Glass Pristine
- Watch Your Fire: A smoky, smoldering fire produces more soot. Aim for a bright, lively flame, which is not only efficient but also easier on the glass.
- DIY Cleaning Hack: In a pinch, damp newspaper dipped in ash can be an effective cleaner for the glass. Just rub gently in a circular motion and then wipe clean.
- Avoid Overloading: While it’s tempting to pile on the wood for a long burn, overloading the stove can lead to incomplete combustion and more soot on the glass.
- Professional Cleaners: While there are many stove glass cleaners available, it’s worth investing in a high-quality one. They can remove stubborn stains more effectively and leave your glass sparkling.
- Regular Checks: Keeping an eye on the condition of the glass is essential. If you notice it blackening quickly, it could be an indication of other issues with your stove that need addressing.
7. Unusual or Loud Noises
The Problem: There’s something deeply soothing about the subtle crackling of burning wood. But to my dismay, this calming soundtrack was occasionally interrupted by jarring, odd noises coming from my stove and its pipes. I knew the usual sounds of my stove, and these weren’t it.
How I Solved It
- Understanding the Basics: I recalled that metal has the tendency to expand when heated, so some noise from the stove as it warmed up was normal. This realization put some of my initial fears to rest.
- Inspection Time: But when the noises persisted and grew louder, I knew it was more than just the usual sounds. The chimney became my prime suspect. Perhaps there were obstructions or even damage. I got it inspected, and sure enough, there were a few areas that needed attention.
- Securing the Components: A thorough check of my stove revealed that some parts had come loose over time. Ensuring that all components of the stove were intact and securely fastened eliminated several of the weird sounds. It was like giving my stove a much-needed tune-up.
Tips to Address and Prevent Unusual Stove Noises
- Know Your Stove: Being familiar with the regular sounds of your stove can help you quickly identify when something’s amiss.
- DIY Inspection: Between professional checks, occasionally shine a flashlight into your stove’s pipes and see if there’s any noticeable buildup or blockage.
- Safety First: If you’re unsure about the source of a sound and can’t easily identify a cause, it’s best to consult with a professional. A stove isn’t just an appliance; it’s a fire source, so safety should always be a priority.
- Regular Maintenance: Just like any other appliance, your stove will benefit from regular maintenance. This not only ensures it operates efficiently but can also preemptively address issues that might cause unusual noises.
- Use Quality Fuel: Ensure that you’re burning good quality, seasoned wood. Wet or poor-quality wood can cause sizzling or popping sounds, which might be mistaken for something being wrong with the stove.
8. Reduced Draft
The Problem: One winter evening, as I lit my wood stove anticipating its familiar warmth, I noticed the smoke wasn’t rising through the chimney as seamlessly as it used to. Instead of swiftly disappearing upwards, it lingered, creating a haze that left me concerned.
How I Remedied It
- The Chimney Sweep Chronicles: My first thought was the chimney. Over time, I’d heard stories about chimneys getting blocked and flues becoming clogged. Determined to rule this out, I got both cleaned. Sure enough, a substantial amount of soot and debris had built up, restricting the smoke’s path.
- Mother Nature’s Whims: On some days, even after cleaning, the draft wasn’t as efficient. That’s when I learned that outside conditions, like atmospheric pressure, could be the sneaky culprits. On such days, patience became my ally. Often, by simply waiting a bit, nature would take its course and restore the draft.
- A Breath of Fresh Air: One unexpected revelation was the room’s ventilation. I learned that for the chimney to draw air properly, there had to be a good balance of air pressure in the room. By cracking open a window just a tad, I was able to improve the draft dramatically. It was a simple yet game-changing solution.
Tips for Maintaining a Steady Stove Draft
- Routine Checks: Regularly inspect your chimney and flue for any visible obstructions. Even bird nests or fallen leaves can sometimes impede the flow.
- Professional Cleaning: While DIY checks help, nothing beats a thorough professional cleaning. Consider scheduling one at least once a year, preferably before winter sets in.
- Monitor Your Fire: A robust, hot fire typically creates a better draft. Make sure you’re using well-seasoned wood and that your fire is lively and strong.
- Awareness of Surroundings: Tall trees or buildings around your house can sometimes affect the draft. Being aware can help you troubleshoot on days the draft seems unusually weak.
- Ventilation Matters: If you’ve recently made your home more airtight (e.g., with new insulation or windows), it could affect the draft. Keep this in mind and adjust room ventilation as needed.
In Conclusion
A wood stove is a marvelous piece of equipment, offering both warmth and ambiance. Like any appliance, it requires understanding and maintenance. By being proactive and addressing common problems, you can ensure your stove operates efficiently and safely for many cozy nights to come.
FAQs
- Why does my wood stove sound like a popcorn machine?
This is often due to moisture trapped inside the wood. As the water in the wood heats up, it turns to steam, causing a crackling or popping sound. Make sure you’re using well-seasoned wood to reduce these sounds. - My wood stove has a rainbow-colored flame. Is this normal?
Colorful flames can be mesmerizing, but they often indicate the presence of minerals or impurities in the wood. While it’s generally harmless, consistently seeing these flames might mean you’re not using the best quality wood. - Why does my wood stove smell like a campfire?
A wood stove should provide a clean burn without too much of a smoky smell. If your stove smells very strongly, it could be due to unseasoned wood or inadequate ventilation. Make sure to check both! - I’ve heard wood stoves can “back-puff.” What does that mean?
“Back-puffing” refers to small explosions inside the wood stove or its pipe. It’s typically a result of a combination of unburned gases and insufficient air. It’s essential to ensure proper ventilation and clean burning to prevent this. - Why is there a whistling sound coming from my stove when it’s windy outside?
This might be due to the wind passing over your chimney, especially if you have a chimney cap. It’s similar to the whistling sound you hear when the wind passes through gaps in a window. - The wood in my stove keeps smoldering and won’t catch fire. Why?
Smoldering wood is often a sign of insufficient air intake. Ensure your vents are open and unblocked, and consider using more kindling to establish a stronger initial burn. - Can I use any wood on my stove, even the old wooden furniture I want to dispose of?
It’s not advisable to burn treated or painted wood as it can release harmful chemicals. Stick to natural, untreated logs for a safe and efficient burn. - Why is there a white, powdery substance at the bottom of my wood stove?
That’s likely creosote, a byproduct of wood burning. It’s essential to clean this up as creosote buildup can lead to chimney fires. - My wood stove glass is clear in some spots and black in others. Why?
The clear spots might be where the flame directly touches the glass, keeping it clean. The blackened areas could be due to soot buildup where the flame doesn’t make direct contact. - Why does my room feel humid when I use the wood stove?
Burning wood releases moisture into the air. If your room feels excessively humid, consider improving room ventilation or using a dehumidifier.
Your journey through the maze of “Common Wood Stove Problems: Solved 2024” has now come to an end, but the dialogue doesn’t have to stop here. Every wood stove and its caretaker have their unique tales of trials, triumphs, and embers. Have you faced any challenges that weren’t mentioned, or do you have tips and tricks from your own experiences? Perhaps you have a heartwarming story of a winter evening by the stove. Whatever it may be, the floor is now yours. Dive into the comments section below and share your insights, stories, and solutions. Let’s keep this conversation burning bright and help each other achieve the perfect, hassle-free warmth that only a wood stove can offer. Share, discuss, and let’s kindle a community of wood stove enthusiasts!

David Murray
Forestry AuthorI'm David Murry, a forestry equipment specialist with a focus on chainsaw operation. With over 13 years of experience, I've honed my skills in operating and maintaining a wide range of machinery, from chainsaws to log splitters. My passion for the outdoors and commitment to sustainable forestry drive my work, which emphasizes safety, efficiency, and staying updated with industry advancements. Additionally, I'm dedicated to sharing my expertise and promoting environmental awareness within the forestry community.


Leave your comment