How to Measure and Cut Lumber Accurately
- August 20, 2024
- 0 comment
Measure and cut lumber accurately is essential for any woodworking or construction project. How well you measure and cut your lumber determines how well the pieces fit together, which affects the strength, appearance, and overall quality of your work. Whether you’re building furniture, constructing a house, or tackling a DIY project, precise measurements help ensure that everything lines up correctly, reducing the chances of gaps or misaligned edges.
This attention to detail not only makes your project look better but also makes the building process smoother and more efficient. If measurements and cuts are not accurate, you can face problems like wasted materials, higher costs, and longer project times. Incorrectly cut pieces might not fit as they should, which can weaken the structure and require extra work to fix.
By measuring and cutting lumber precisely, you also minimize waste, saving money and resources. Understanding the importance of accuracy in these tasks is key for anyone working with wood, as it directly impacts the success of your project. When you measure and cut carefully, your projects are more likely to turn out well, with fewer mistakes and better results.
1. Understanding Lumber Dimensions
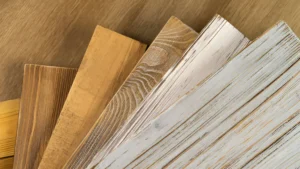
Before diving into the measuring and cutting process, it’s essential to understand how lumber is classified and sold. Lumber sizes can be confusing, as the nominal dimensions (like 2×4 or 1×6) differ from the actual dimensions after the wood has been planed and smoothed. For example:
- 2×4 Lumber: Nominally, this piece is supposed to measure 2 inches by 4 inches, but its actual dimensions are approximately 1.5 inches by 3.5 inches.
- 1×6 Lumber: This piece, nominally 1 inch by 6 inches, actually measures around 0.75 inches by 5.5 inches.
Understanding these discrepancies is vital because they affect how you measure and cut the lumber. Always base your measurements on the actual dimensions of the lumber, not the nominal ones.
2. Essential Tools for Accurate Measure and Cut Lumber
To measure and cut lumber with precision, you’ll need a variety of tools. Here’s a more detailed look at the essential tools:
- Tape Measure: Choose a tape measure that is easy to read, with clear markings. A 25-foot tape measure is versatile for most projects. Ensure that the hook at the end of the tape is secure and accurate, as even a slight variation can throw off your measurements.
- Pencil or Marking Tool: A fine, sharp pencil works well for most marking tasks. For more precise work, consider using a marking knife, which can create a very thin and accurate line.
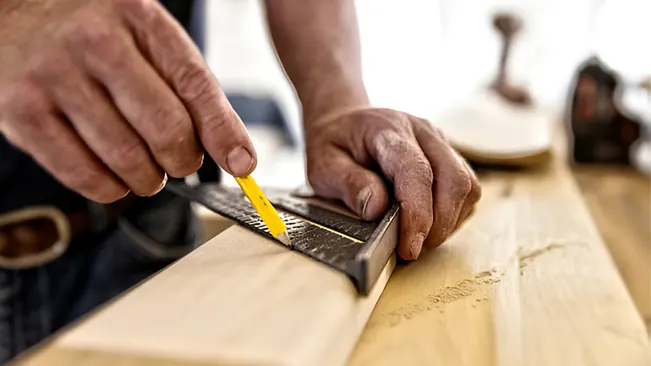
- Square: There are different types of squares, including carpenter’s squares, speed squares, and combination squares. Each type serves a unique purpose:
- Carpenter’s Square: Ideal for marking straight lines at 90 degrees, often used in framing.
- Speed Square: A small, triangular square that is perfect for marking lines at various angles, especially 45 and 90 degrees.
- Combination Square: This versatile tool can mark 45 and 90-degree angles and measure depths.
- Saw: The type of saw you use depends on the cut you’re making. Here’s a breakdown:
- Handsaw: Best for smaller, detailed cuts or where power tools aren’t practical.
- Circular Saw: Ideal for quick, straight cuts. With an adjustable base, it can also make bevel cuts.
- Miter Saw: Perfect for making crosscuts and miter cuts, often used in trim work.
- Table Saw: Essential for rip cuts, where you cut along the length of the board. It’s also useful for making precise, repeatable cuts.
- Clamps: Clamps are your third hand in woodworking. They hold the wood firmly in place, preventing movement during cutting. Choose clamps that are strong enough to hold the lumber securely without damaging the surface.
- Sawhorses or Workbench: A stable work surface is critical for accurate cutting. Sawhorses are portable and can be set up anywhere, while a workbench provides a more permanent and stable surface.
3. Detailed Guide to Measuring Lumber
Accurate measurement is the foundation of precise cutting. To start, ensure your workspace is organized and free of clutter, as a clean area minimizes mistakes and enhances safety. Before you begin measuring, it’s essential to have a clear plan or blueprint. This plan should include all the necessary dimensions and angles to guide you through the project, ensuring that each piece of lumber is cut to the correct size.
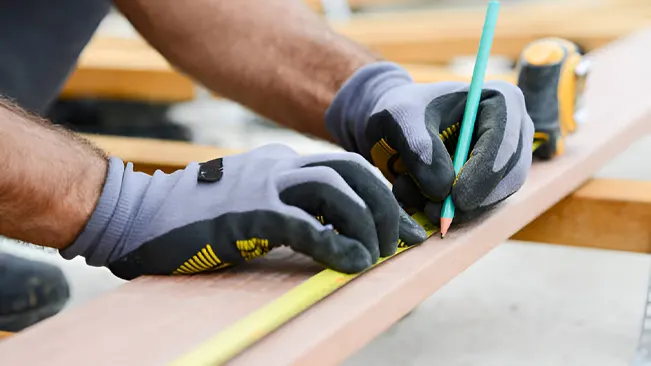
When measuring, always use the same reference point on the lumber for consistency. This approach helps avoid small discrepancies that can add up over multiple cuts. It’s also important to use the straightest edge of the lumber as your measuring base, as this will give you more accurate results. After measuring, mark your cut line clearly using a square to ensure it’s straight.
For angled cuts, use tools like a protractor or bevel gauge to mark the correct angle. Additionally, you need to consider the kerf—the width of the material removed by the saw blade. If you cut directly on the marked line, the kerf will reduce the size of the piece slightly. To prevent this, mark and cut along the edge of the line, leaving the main piece intact.
4. Advanced Techniques for Accurate Cutting
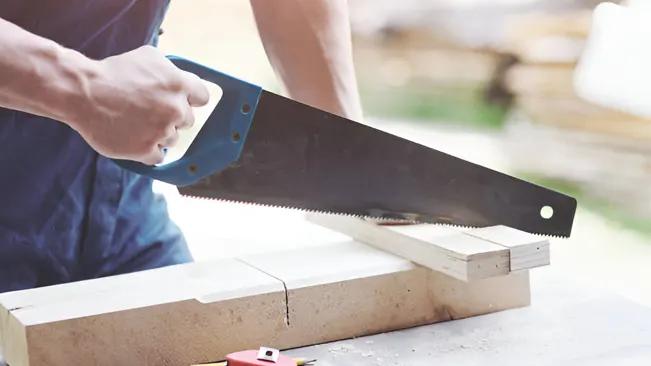
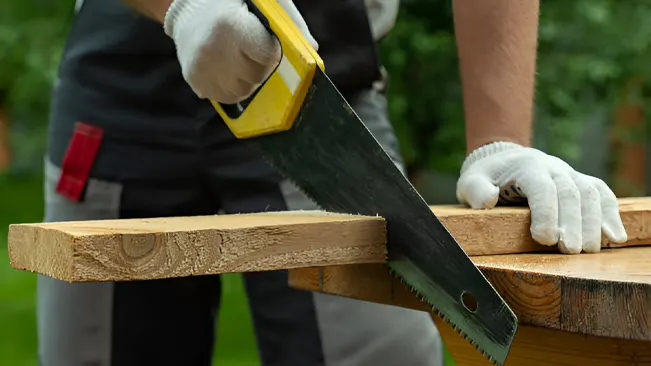
Once you’ve measured your lumber, the next step is to make your cuts. The type of cut you need will depend on your project, and each cut requires a slightly different approach to ensure accuracy. Understanding how to properly execute these cuts crosscuts, rip cuts, miter cuts, and bevel cuts is key to achieving professional results.
Crosscuts
Crosscuts are one of the most common types of cuts in woodworking and are used to cut across the grain of the wood. These cuts are essential in framing and general construction. To make an accurate crosscut, start by setting the depth of your saw blade just slightly deeper than the thickness of the wood. This ensures that the cut goes all the way through without splintering the bottom edge.
Next, carefully line up the blade with the outside edge of your marked line, ensuring that the saw is aligned correctly before you start cutting. As you make the cut, hold the saw steady and move it slowly through the wood, maintaining a consistent speed to avoid any deviations from the line.
Rip cuts
Rip cuts run parallel to the grain and are often used to trim boards to the desired width. These cuts are typically made using a table saw, which is ideal for guiding the wood through a straight and even cut. To ensure precision, use a rip fence to guide the wood as it passes through the blade.
The rip fence should be adjusted to the exact width you need and locked firmly in place to prevent any movement during the cut. As you feed the wood through the saw, keep steady pressure against the fence and move the board slowly and evenly to maintain a straight line. Consistency in speed and pressure is crucial to avoid a wavy or uneven edge.
Miter cuts
Miter cuts are angled cuts, commonly used in molding, trim work, and framing projects where two pieces of wood need to fit together at an angle. To make a precise miter cut, first set your miter saw to the desired angle.
Carefully position the lumber so that the blade lines up exactly with your marked line, ensuring that the angle is correct before you begin cutting. When you’re ready, make the cut in one smooth motion, keeping the lumber firmly in place to prevent it from shifting. A steady hand and consistent pressure will help achieve a clean and accurate angle.
Bevel cuts
Bevel cuts are similar to miter cuts but involve cutting at an angle along the edge or end of the wood rather than across the face. These cuts are often used to create decorative edges or joints. To make a bevel cut, adjust the angle of your saw blade to the desired bevel angle.
Secure the lumber on your workbench or sawhorses to keep it stable, then guide the saw steadily along the marked line. Maintaining control and a steady pace is important to ensure that the bevel is smooth and even, without any rough edges or deviations.
Mastering these cutting techniques will greatly enhance the quality of your woodworking projects. By understanding the nuances of each type of cut and taking the time to set up your tools and materials correctly, you can achieve precise and professional results in your work.
5. Avoiding Common Measurement and Cutting Mistakes
Even experienced woodworkers can make mistakes, but there are ways to avoid some of the most common errors. One key practice is to always measure from the same edge or reference point on the lumber. Measuring from different points can lead to small discrepancies that may not seem like much at first but can add up over multiple cuts, causing pieces not to fit together properly.
Another important step is to always double-check your measurements before making any cuts. It’s easy to become confident and skip this step, but taking a moment to verify your measurements can prevent costly mistakes that could ruin your project. Using the right tool for each type of cut is also crucial. Each cutting tool is designed for specific purposes, and using the wrong one can result in inaccurate cuts and potential damage to the wood.
For example, using a saw meant for crosscuts to make a rip cut can lead to uneven edges and wasted material. Additionally, it’s important not to rush through your cuts. Cutting too quickly can cause the saw blade to veer off course, resulting in uneven or jagged edges. Taking your time, especially on long or critical cuts, will help ensure a clean, straight line.
Finally, never overlook safety precautions. Accurate cuts are difficult to achieve without following proper safety measures. Always use push sticks when working with table saws to keep your hands away from the blade, and never remove safety guards from power tools. Wearing appropriate safety gear, such as eye and ear protection, is essential to protect yourself from potential injuries. By being mindful of these common pitfalls, you can improve the accuracy of your work and stay safe in the process.
6. Mastering Precision and Safety Techniques
To consistently achieve precise cuts, follow these additional tips:
- Maintain Your Tools: Dull blades and poorly maintained tools can lead to inaccurate cuts and pose safety risks. Regularly check and sharpen your blades, and keep your tools clean and well-oiled.
- Use Jigs for Repetitive Cuts: If your project requires multiple identical cuts, consider using a jig. A jig is a custom-made tool that holds the wood in place and guides the saw, ensuring each cut is exactly the same.
- Practice Makes Perfect: If you’re new to woodworking or trying a new tool, practice on scrap wood before cutting your final pieces. This practice will help you gain confidence and fine-tune your technique.
- Stay Focused: Distractions can lead to mistakes. Work in a quiet, well-lit environment where you can concentrate fully on your measurements and cuts.
- Keep Your Work Area Clean: A cluttered workspace can be dangerous. Clear away offcuts, sawdust, and tools that are not in use. A clean area reduces the risk of tripping or knocking something out of alignment.
7. Troubleshooting Cutting Errors
Despite your best efforts, cutting errors can still occur. Here’s how to address some common issues:
- Cut is Too Short: If your cut ends up shorter than intended, you may need to start over with a new piece of lumber. If possible, adjust your project plan to accommodate the shorter piece.
- Cut is Not Straight: If a cut veers off course, try using a hand plane or sanding block to smooth out the edge. For significant deviations, you may need to re-cut the piece.
- Rough Edges: If the cut edge is rough or splintered, use sandpaper or a block plane to smooth it. This is especially common when cutting plywood or other composite materials.
- Incorrect Angle: If your miter or bevel cut is off, recheck your saw’s settings before attempting the cut again. Make small adjustments and test the angle on scrap wood before cutting the final piece.
Final Thoughts
Measuring and cutting lumber accurately is a skill that takes time and practice to master. By understanding the dimensions of lumber, using the right tools, and following precise measuring and cutting techniques, you can improve the accuracy and quality of your woodworking projects. Always prioritize safety, take your time with each measurement and cut, and don’t be afraid to practice and refine your skills. With patience and attention to detail, you can achieve professional results that you’ll be proud of in every project.
Frequently Asked Questions
1. What is the most important tool for measuring lumber accurately?
The most important tool is a high-quality tape measure. It should be easy to read and long enough to handle the dimensions of your lumber. Consistent and accurate measurement is key to ensuring all pieces fit together correctly.
2. How do I avoid making mistakes when measuring lumber?
To avoid mistakes, always measure from the same edge or reference point on the lumber. Double-check your measurements before cutting, and use a square to ensure your lines are straight and accurate.
3. What should I do if my cut is not straight?
If your cut isn’t straight, you can use a hand plane or sanding block to smooth out the edge. For more severe deviations, you might need to re-cut the piece, ensuring your saw is properly aligned before you begin.
4. Why is the saw blade kerf important when cutting lumber?
The kerf is the width of the material removed by the saw blade. It’s important to account for the kerf when measuring and cutting because it can make your pieces slightly smaller if not considered.
5. How can I make precise angled cuts, like miter or bevel cuts?
To make precise angled cuts, use a miter saw for miter cuts and adjust the saw blade to the correct angle for bevel cuts. Always secure the lumber and guide the saw steadily along the marked line to maintain accuracy.
6. What are the common mistakes to avoid when cutting lumber?
Common mistakes include inconsistent measuring, rushing the cut, using the wrong tool for the job, and ignoring safety precautions. Taking your time and using the right tools can help you avoid these errors.
7. How can I prevent wood from splintering when cutting?
To prevent splintering, especially with plywood or hardwoods, make sure your saw blade is sharp and set to the correct depth. Cutting slowly and steadily also helps minimize splintering.
8. What safety gear should I wear when cutting lumber?
You should always wear safety glasses to protect your eyes from flying debris and ear protection to safeguard your hearing from loud saws. Gloves can also help protect your hands from splinters and cuts.
9. How can I ensure that multiple cuts are exactly the same size?
To ensure consistency in multiple cuts, use a stop block or jig on your saw. This allows you to make repeat cuts of the same length without having to measure each time.
10. Why is it important to keep your tools maintained?
Keeping your tools, especially saw blades, sharp and well-maintained is crucial for making clean, accurate cuts. Dull blades can cause the saw to wander, leading to uneven cuts and potential safety hazards. Regular maintenance ensures your tools perform at their best.
We hope this guide on measuring and cutting lumber accurately has provided you with valuable insights to improve your woodworking projects. Whether you’re building furniture, framing a house, or tackling a DIY project, mastering these essential techniques will ensure your cuts are precise, your materials are used efficiently, and your finished product is top-notch.
If you have any experiences or tips related to measuring and cutting lumber, please share them in the comments below. Your input can help others in the woodworking and construction communities achieve better results. Also, don’t forget to share this article with fellow woodworkers, builders, and DIY enthusiasts to spread knowledge about this crucial aspect of the craft. Happy building!

Edward Smith
Forestry AuthorWoodworking is about more than crafting; it's a harmonious connection with nature, mastering tools, and preserving our environment. I'm here to share my knowledge and experiences with you, forging a future where we can embrace wood's beauty and utility while safeguarding our forests' health and diversity.


Leave your comment