15 Woodworking Basics You Should Know
- March 27, 2024
- 0 comment
Immersed in the realm of woodworking, I’ve encountered a plethora of techniques, tips, and critical skills that have profoundly improved my craft. Yet, it’s the fundamental principles, once thoroughly understood and applied, that genuinely enhance the quality and craftsmanship of woodworking.
Level up your workshop! We’ve rated the best table saws, best circular saws & best jigsaws for all your cutting needs.
In this article, I present an insightful review of “15 Woodworking Basics You Should Know,” a collection of essential skills pivotal for any woodworker to master. Drawing from my personal journey, I provide a detailed analysis, combining both quantitative measures and qualitative experiences, to illuminate the significance of these foundational practices in the art of woodworking.
List of 15 Woodworking Basics You Should Know:
- Understanding Wood Movement
- The Weakness of Butt Joints
- The Truth About 2×4 Dimensions
- Calculating Board Feet
- Emphasizing Safety
- Avoiding Cross Cutting on a Table Saw
- Measure Twice, Cut Once
- Accounting for Saw Blade’s Kerf
- Navigating Router Direction
- Exploring Hardwoods vs. Softwoods
- Open Grain vs. Closed Grain
- Rip Cut vs. Cross Cut
- The Sanding Process
- Pre-drilling for Screws
- The Blue Tape Trick
Basic Understanding About Woodworking Operations
Woodworking operations encompass a broad range of techniques and processes integral to transforming raw lumber into finished products. At its core, woodworking combines the art of design with the science of carpentry, involving operations such as measuring and marking, cutting, shaping, joining, and finishing.
These foundational tasks require a keen understanding of wood’s properties, the use of various hand and power tools, and the application of finishes to protect and enhance the wood’s natural beauty. Successful woodworking also demands an awareness of safety practices to mitigate risks associated with the tools and materials used.
Whether for professional projects or hobbyist creations, mastering these operations is essential for anyone looking to excel in woodworking, making it a craft that marries precision with creativity.
1. Understanding Wood Movement
Wood movement is a fundamental concept that all woodworkers must grasp to ensure the longevity and stability of their projects. Wood is a hygroscopic material, meaning it absorbs and releases moisture from the air, causing it to expand and contract with changes in humidity and temperature.
This natural process can lead to warping, cracking, and other forms of distortion if not properly accommodated in the design and construction of wood projects. To mitigate these effects, it’s essential to select wood acclimated to the project’s environment, use construction techniques that allow for movement, and apply finishes that help regulate moisture exchange.
Learning about wood movement the hard way through experience highlights the importance of considering these factors from the outset, ensuring that woodwork remains beautiful and intact over time.
2. The Weakness of Butt Joints
Butt joints, the simplest form of joinery, involve joining two pieces of wood end-to-end without any overlapping surfaces. While convenient for quick assembly, their structural integrity is significantly lower compared to more complex joinery methods.
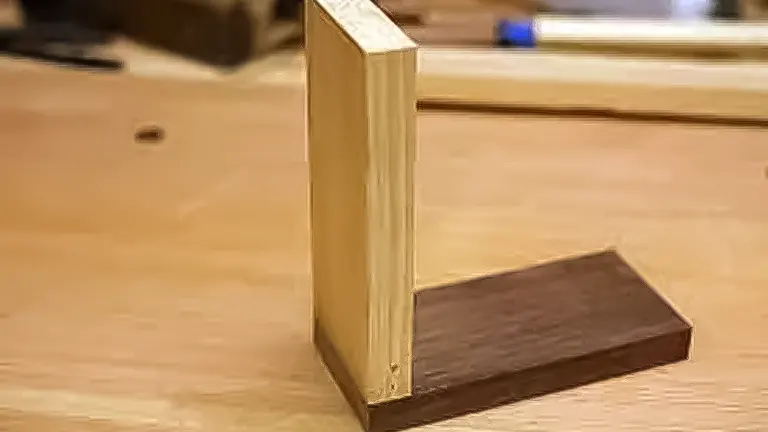
This weakness is primarily because the end grain of wood does not adhere well to other surfaces, making butt joints susceptible to breaking under stress. Reinforcing butt joints with dowels, biscuits, or using advanced joinery techniques like dovetails or mortise and tenon joints can vastly improve the strength and durability of the connection.
Through trial and error, woodworkers learn to incorporate these stronger joinery methods into their projects, ensuring their creations can withstand the test of time and use.
3. The Truth About 2×4 Dimensions
The nominal dimensions of lumber, such as the 2×4, can be misleading for those new to woodworking. Initially, a 2×4 did measure two inches by four inches, but modern milling practices and the drying process reduce the size to 1.5 inches by 3.5 inches.
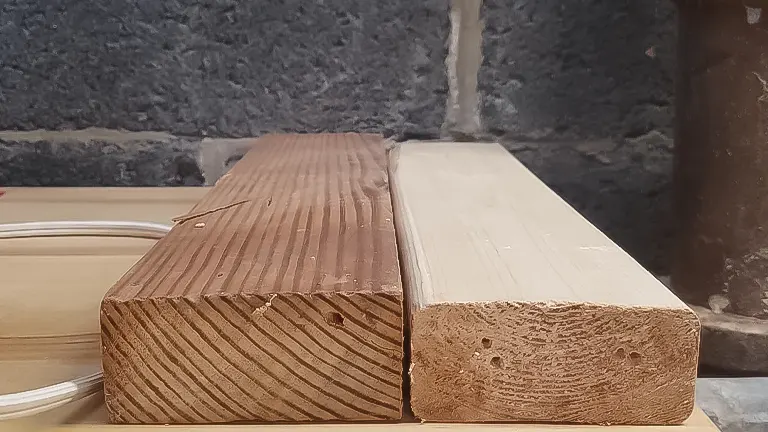
This discrepancy between nominal and actual dimensions is crucial for accurate project planning and avoiding material shortages. Understanding this early on helps woodworkers adjust their measurements and calculations, ensuring their projects turn out as intended without unnecessary waste or last-minute adjustments.
4. Calculating Board Feet
Calculating board feet is a critical skill for anyone working with hardwoods, especially when purchasing lumber from a mill or lumberyard where pricing is often based on volume. A board foot is a unit of measure representing a volume of wood 12 inches long, 12 inches wide, and 1 inch thick.
Mastering the calculation of board feet enables woodworkers to accurately budget for projects, ensuring they purchase the right amount of material without excessive waste. This knowledge is particularly valuable when working with expensive hardwoods, where efficiency can lead to significant cost savings.
5. Emphasizing Safety
Woodworking involves the use of sharp tools and machinery that can pose serious risks if not handled with care. Emphasizing safety involves adopting a comprehensive approach to workshop practices, including wearing appropriate personal protective equipment (PPE) like safety glasses, hearing protection, and dust masks.
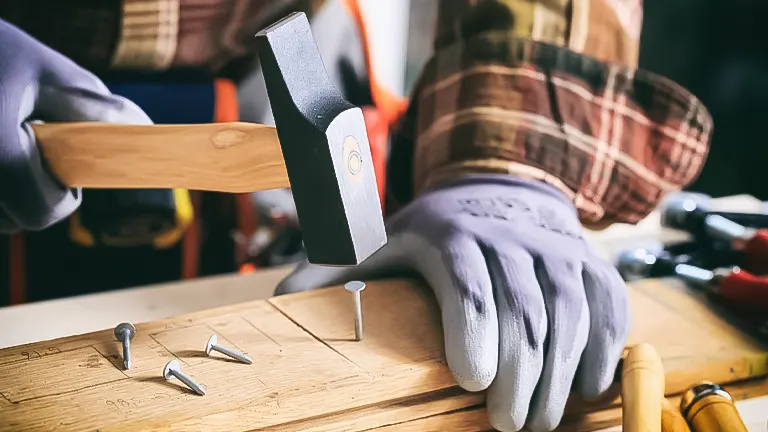
It also means being mindful of how tools are used, respecting their power and potential hazards. A close call or accident can be a sobering reminder of the importance of safety, leading to more diligent practices that protect the woodworker’s well-being and ensure a safer working environment.
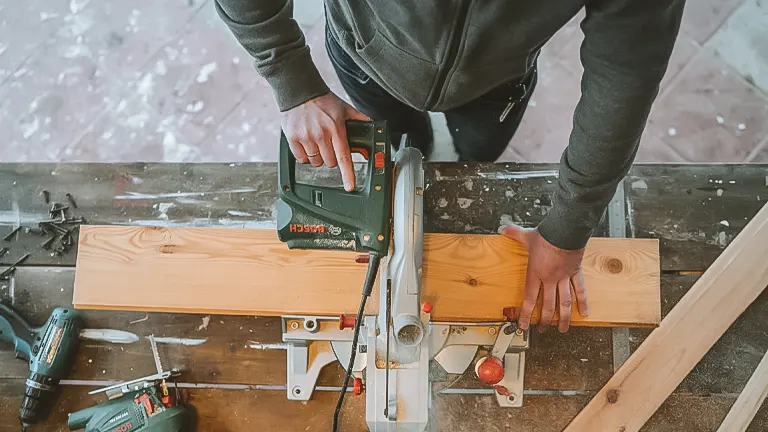
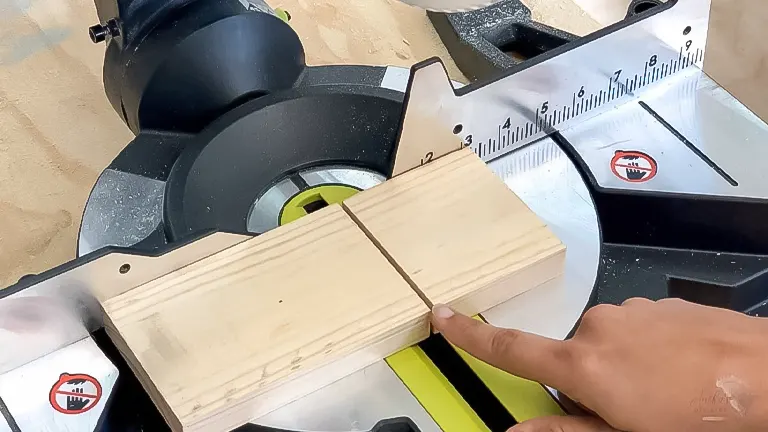
6. Avoiding Cross Cutting on a Table Saw
Cross-cutting against the fence on a table saw is fraught with danger, primarily because of the risk of kickback, where the wood can be propelled back towards the operator at high speed.

Using a miter gauge or a crosscut sled allows for safer and more accurate cross-cuts by securing the wood and guiding it smoothly through the blade.
This lesson is often learned after witnessing or experiencing the consequences of unsafe practices, leading to a greater appreciation for using the right tools and techniques for each type of cut.
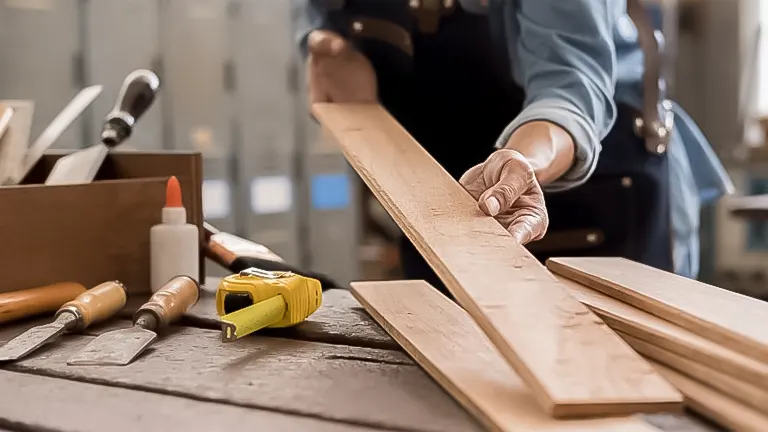
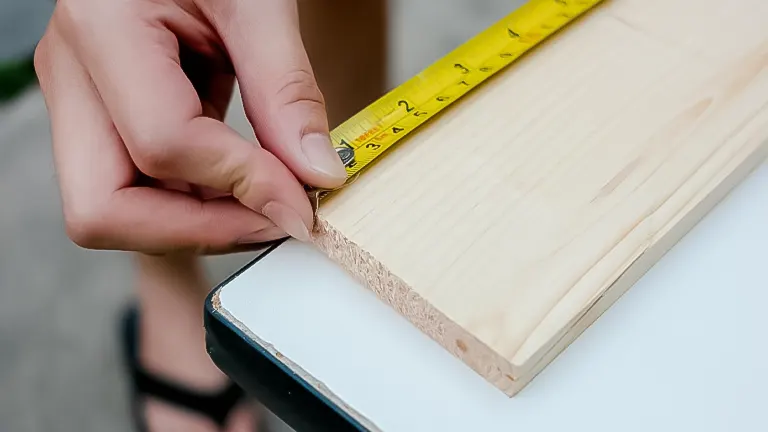
7. Measure Twice, Cut Once
The adage “measure twice, cut once” embodies the importance of accuracy in woodworking. Mis-measurements can lead to wasted material, time, and effort.
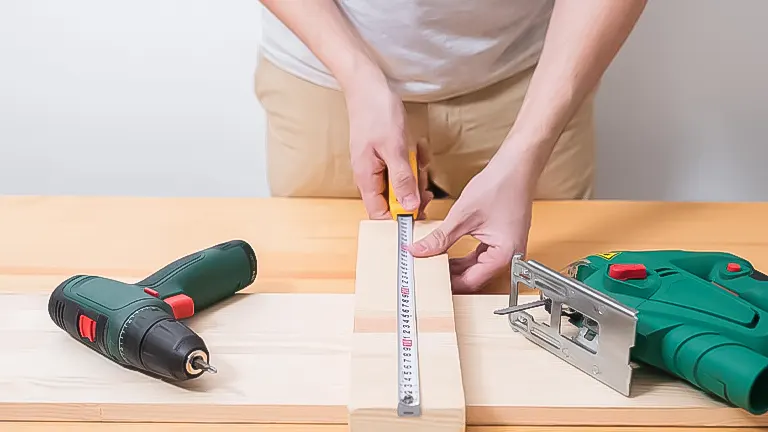
Taking the time to double-check measurements before making a cut can prevent errors and ensure that pieces fit together as intended.
This principle encourages meticulousness and precision, qualities that enhance the quality of the finished product and reduce the likelihood of costly mistakes.
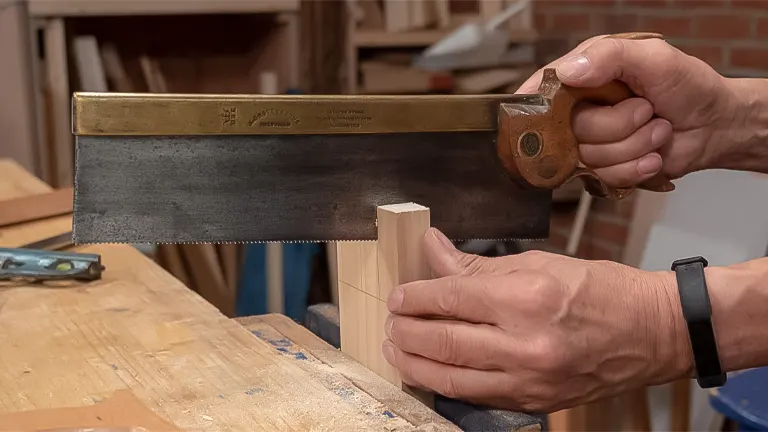
8. Accounting for Saw Blade’s Kerf
The kerf refers to the width of the cut made by a saw blade, a factor that can affect the dimensions of the final piece if not accounted for.
Understanding that the blade removes a small amount of material with each cut is crucial for achieving precise measurements in woodworking projects.
By adjusting for the kerf, woodworkers can ensure that their pieces are cut to the exact required dimensions, leading to better fitting joints and a more professional finish.
9. Navigating Router Direction
Properly navigating the direction in which to feed a router is essential for control and safety. The bit of a router spins in a specific direction, which dictates that the wood should be fed against the direction of the spin to maintain control and achieve a clean cut.
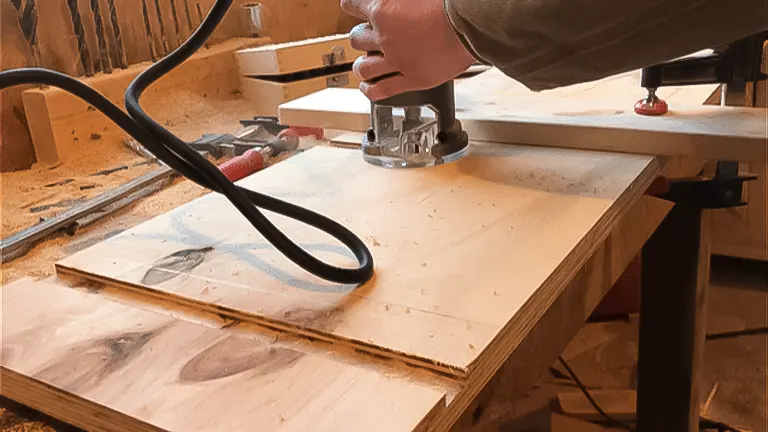
For handheld routing, moving counter-clockwise around the outside edges of a piece ensures that the cutting force is directed against the wood, providing better control and reducing the likelihood of the router “kicking out.” Conversely, when routing the inside of a frame or an enclosed area, moving clockwise counters the bit’s tendency to pull away, ensuring smooth operation.
10. Exploring Hardwoods vs. Softwoods
The choice between hardwoods and softwoods significantly influences the aesthetics, functionality, and longevity of woodworking projects. Hardwoods, derived from deciduous trees, offer a denser and more durable material, ideal for furniture, flooring, and fine woodworking projects that demand a high-quality finish and resilience.

Softwoods, from coniferous trees, are generally easier to work with and more cost-effective, making them suitable for structural projects, outdoor applications, and where the visual appeal is less critical. Understanding the properties, applications, and working characteristics of each type of wood allows woodworkers to make informed decisions that best suit the requirements of their projects, ensuring satisfaction with the final product.
11. Open Grain vs. Closed Grain
Choosing the right type of wood grain is crucial for specific applications, particularly when it comes to items that will be in contact with food, such as cutting boards or kitchen utensils. Open-grain woods, like Oak and Ash, have larger pores that can harbor bacteria and absorb moisture, making them unsuitable for such uses.
Closed-grain woods, such as Maple, Cherry, and Walnut, have finer pores that do not readily absorb liquids or harbor bacteria, making them ideal for kitchenware. This distinction not only impacts the functionality and hygiene of the final product but also its aesthetic appeal and longevity. Recognizing the suitability of open vs. closed grain woods for different projects is an important consideration that affects both the utility and the safety of wooden items in everyday use.
12. Rip Cut vs. Cross Cut
Understanding the difference between rip cuts and cross cuts is fundamental to woodworking, as each type of cut interacts with the wood’s grain differently and requires specific tools or blades for optimal results. Rip cuts are made parallel to the wood grain, allowing for easier and faster cutting but requiring a blade with fewer, larger teeth to efficiently remove material.
Cross cuts, made perpendicular to the grain, require a blade with more teeth to ensure a cleaner cut without tearing the wood fibers. A combination blade offers a practical compromise for hobbyists or those not wishing to change blades frequently, although dedicated blades will always perform best for their specific task. This knowledge significantly improves the efficiency and quality of cuts, contributing to the overall success of woodworking projects.
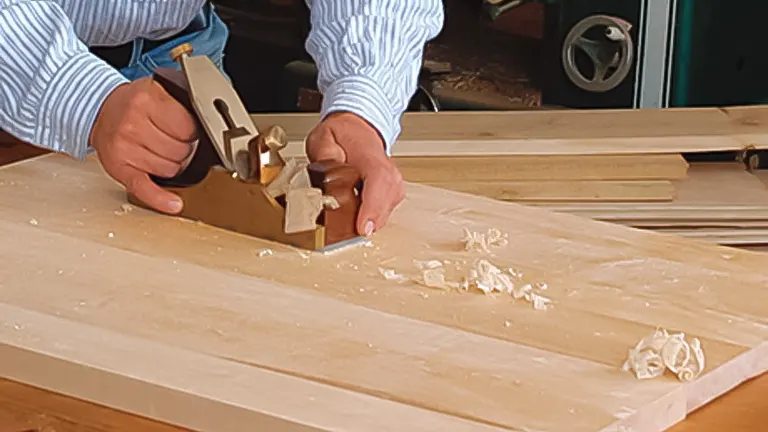
13. The Sanding Process
Sanding is more than a mere finishing touch; it’s a critical process that affects the final appearance and feel of a project. Skipping grits or rushing the sanding process can leave visible marks and uneven surfaces.

Progressing methodically through grits, from coarse to fine, removes the previous grit’s scratch marks and prepares the wood for a finer finish. This gradual progression ensures a smooth, blemish-free surface ideal for staining or finishing.
Patience and attention to detail during sanding pay off in the project’s aesthetic appeal and tactile quality, underscoring the importance of this oft-underappreciated step in woodworking.
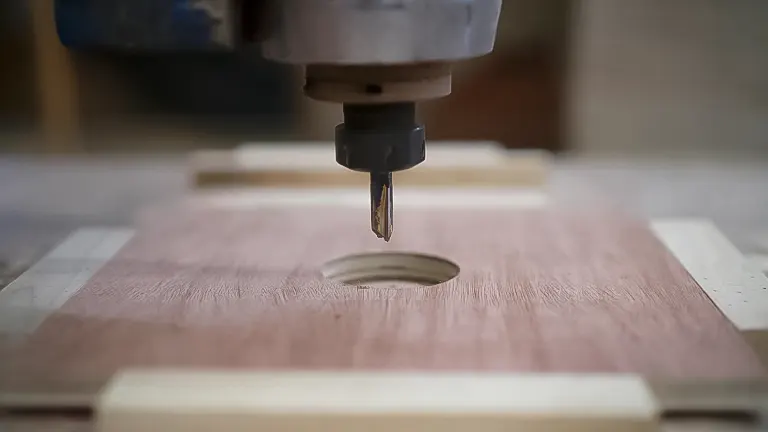
14. Pre-drilling for Screws
Pre-drilling holes for screws is a simple yet crucial practice to prevent wood from splitting, especially when working near the end grain or with hardwoods. This preparatory step, coupled with using a countersink bit, ensures screws sit flush with or below the wood’s surface, providing a cleaner look and stronger hold.
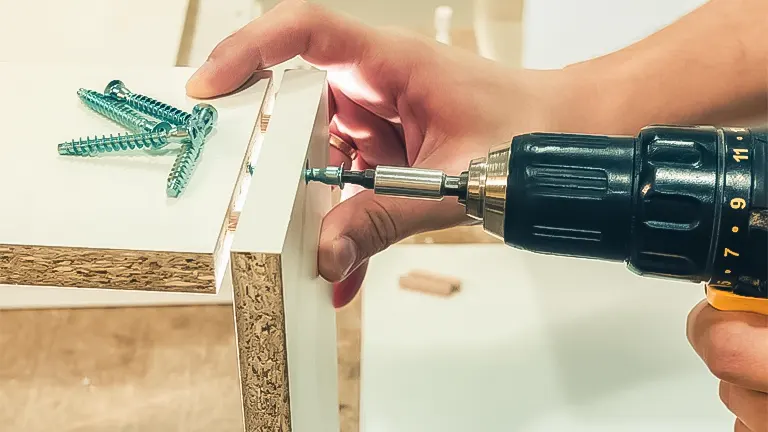
This technique also allows for more precise screw placement, reducing the risk of misalignment or damage to the workpiece. Adopting the habit of pre-drilling exemplifies attention to detail and care in craftsmanship, contributing to the structural integrity and aesthetic quality of the finished project.
15. The Blue Tape Trick
Using blue painter’s tape as a visual depth indicator on drill bits is a clever hack that enhances accuracy and consistency when drilling holes to a specific depth. This simple method prevents over-drilling, ensuring each hole is uniform, which is particularly useful when creating multiple pieces or fittings that require precision.
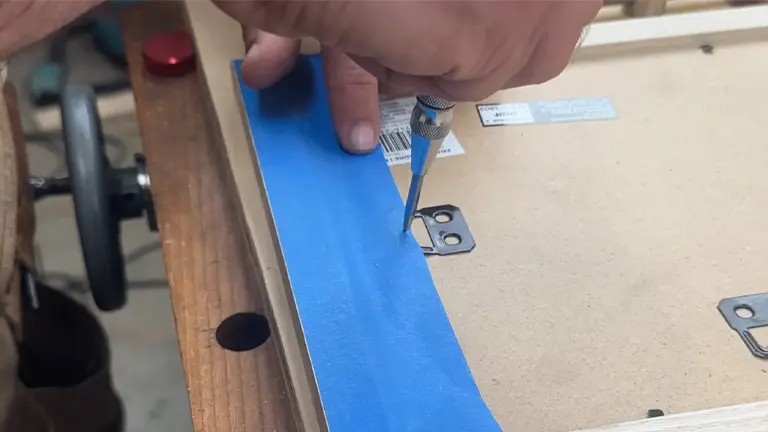
The blue tape trick is an example of the innovative, practical solutions woodworkers develop to overcome everyday challenges in the workshop, showcasing the blend of creativity and technical skill that defines the craft.
Additional Tips For Making User’s Perspectives
When considering users’ perspectives for the product “15 Woodworking Basics You Should Know,” it’s essential to provide additional guidance to enhance the learning and application process. Here are five concise tips to further support users:
- Practice Patience: Woodworking is a skill honed over time. Encourage users to be patient with themselves as they master the basics, understanding that proficiency comes with practice.
- Embrace Mistakes as Learning Opportunities: Mistakes are inevitable but invaluable. Suggest users document their errors and the solutions they discover, turning each mishap into a lesson for improvement.
- Seek Feedback: Recommend that users seek feedback from more experienced woodworkers or join woodworking communities online. Constructive criticism can provide new insights and encourage growth.
- Invest in Quality Tools: While mastering fundamentals, advise on the importance of using quality tools. Even basic projects can shine with the right equipment, and good tools can make the learning process smoother and more enjoyable.
- Safety First: Beyond the basics, stress the importance of safety in every project. Encourage users to always wear appropriate protective gear and to never bypass safety features on their tools for the sake of convenience.
Final Conclusion
Reflecting on these 15 woodworking basics, I’ve seen my skills grow from novice errors to proficient craftsmanship. Each point, from understanding wood movement to mastering the subtleties of sanding, has contributed to my development as a woodworker. While this review is based on personal experience, the quantifiable improvements in project durability, accuracy, and aesthetics speak volumes about the value of mastering these fundamentals.
Frequently Asked Questions
- Why are basic woodworking skills important for beginners?
Basic woodworking skills lay the foundation for all woodworking projects, ensuring beginners start with the right techniques, safety practices, and understanding of materials. These fundamentals are crucial for building confidence and competence in the craft. - Can I start woodworking without any prior experience?
Absolutely! With a focus on mastering the 15 basic woodworking skills, individuals without prior experience can begin their journey into woodworking. These basics provide a roadmap for starting projects with an understanding of essential techniques and safety measures. - What are the most critical safety practices in woodworking?
The most critical safety practices include wearing appropriate personal protective equipment (PPE), such as safety glasses and hearing protection, understanding how to properly use tools, maintaining a clean and organized workspace, and always being mindful of the wood’s behavior and tool operation during use. - How do I choose the right wood for my project?
Choosing the right wood involves considering the project’s intended use, aesthetic preferences, and the wood’s characteristics, such as hardness, grain pattern, and moisture content. Understanding the differences between hardwoods and softwoods is also essential. - What is the significance of understanding wood movement?
Understanding wood movement is crucial for building projects that last. Wood expands and contracts with changes in humidity, so knowing how to accommodate this natural movement in your designs prevents warping, cracking, or other structural issues. - Why is it important to know about different types of wood joints?
Different types of wood joints offer various levels of strength, aesthetics, and complexity. Knowing how to choose and execute the appropriate joint for a specific connection in your project ensures durability and enhances the overall quality of the piece. - What tools do I need to start woodworking?
Starting with basic hand tools (hammer, saw, chisels) and power tools (drill, circular saw) is recommended. As you grow in the craft, investing in more specialized tools like a table saw or router can expand your project capabilities. - How can I prevent my woodworking projects from failing?
Preventing failures involves careful planning, accurate measurements, understanding the materials and tools, and not rushing through the processes. Learning from mistakes and seeking advice through resources or more experienced woodworkers can also greatly improve outcomes. - Is it expensive to start woodworking?
The initial cost can vary widely depending on the tools and materials you choose. Starting with basic projects using minimal tools and materials can keep costs low. As you advance, investing in higher quality tools and materials becomes beneficial. - Where can I find resources to improve my woodworking skills?
Numerous resources are available for woodworkers of all levels, including online tutorials, woodworking classes, books, and community workshops. Engaging with the woodworking community through forums and social media can also provide valuable insights and support.

Edward Smith
Forestry AuthorWoodworking is about more than crafting; it's a harmonious connection with nature, mastering tools, and preserving our environment. I'm here to share my knowledge and experiences with you, forging a future where we can embrace wood's beauty and utility while safeguarding our forests' health and diversity.


Leave your comment