How to Plant Anthurium
- April 8, 2024
- 0 comment
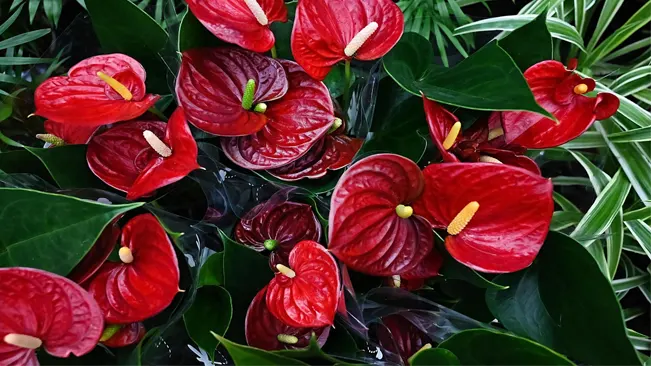
Anthurium, often known as the Flamingo Flower, is a popular tropical plant prized for its vibrant, long-lasting flowers. With their waxy, heart-shaped blooms and glossy green leaves, anthuriums can add a touch of exotic beauty to any indoor space. This guide will walk you through the steps to plant and care for your anthurium, ensuring it thrives in your home or garden.
List on How To Plant Anthurium
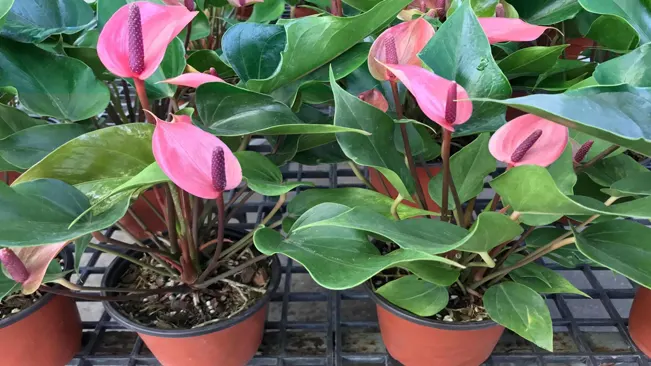
- Choosing Your Plant
- Selecting the Right Soil and Pot
- Planting the Anthurium
- Light and Temperature Requirements
- Watering and Humidity
- Feeding Your Plant
- Pruning and Maintenance
Choosing Your Plant
Visual Appearance of Flowers and Leaves
- Flower Quality: Look for anthuriums with bright, vivid flowers. These flowers, technically spathes, should be free from spots, blemishes, or fading. A healthy anthurium flower is usually vibrant and waxy in appearance.
- Leaf Quality: The leaves should be a rich green color and free from any significant damage, such as brown spots or holes. The leaves of a healthy anthurium are glossy and firm.
Signs of Healthy Roots
- If possible, examine the roots, which should be firm and white or light tan. If you can gently slip the plant out of its pot, check for a root system that looks healthy and not overly cramped. Overly tangled, dark, or mushy roots can be a sign of root rot.
Checking for Pests and Diseases
- Inspect the plant closely for signs of pests, like aphids or spider mites, often visible as small specks or webs on the underside of leaves. Also, look for any unusual markings or mildew, which could indicate disease.
Selecting the Right Soil and Pot
Anthuriums, being tropical plants, are accustomed to environments where water drains quickly and doesn’t linger around the roots. This natural setting prevents the roots from staying too wet, which can lead to root rot. Well-draining soil mimics this environment.
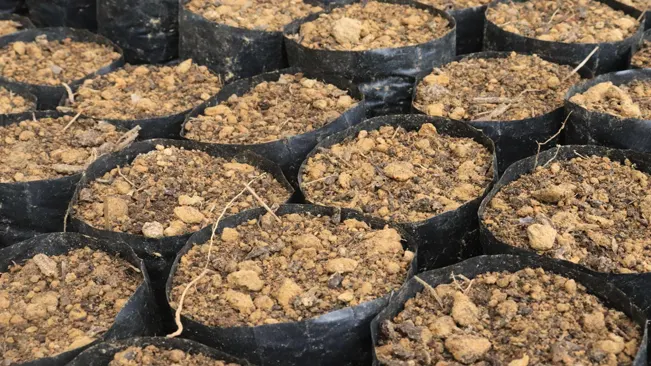
- Components of Well-Draining Soil
- Pine Bark: Provides excellent drainage and aeration. It helps in replicating the kind of organic matter Anthuriums would naturally grow in.
- Perlite: A volcanic glass that has been heated and expanded, perlite increases aeration and drainage, ensuring that water flows freely through the soil.
- Peat Moss: While peat moss retains moisture, it also helps in maintaining soil structure to prevent compaction, ensuring good aeration.
- Making Your Own Mix
- If you’re unable to find a pre-mixed soil for epiphytic plants, you can create your own mix. A common formula is to combine equal parts of pine bark, perlite, and peat moss. This blend provides a balance of drainage, aeration, and moisture retention suitable for Anthuriums.
Choosing the Right Pot
- Drainage Holes Are Essential
- Ensure your pot has adequate drainage holes. These holes are vital for letting excess water escape, preventing water from accumulating at the bottom of the pot, which can cause root rot.
- Material of the Pot
- Pots can be made of various materials like plastic, terracotta, or ceramic. Terracotta pots are porous, allowing soil to dry more evenly and quickly, which is beneficial for Anthuriums. Plastic pots retain moisture longer, which can be useful in drier environments but requires careful monitoring to avoid overwatering.
- Size of the Pot
- The pot size should be proportional to the plant. A pot too large for the plant can hold excess soil moisture, increasing the risk of root rot. Typically, a pot that is 1-2 inches larger in diameter than the current pot is suitable for repotting.
- Adding Drainage Layers
- Placing a layer of pebbles, gravel, or broken pot shards at the bottom of the pot can further improve drainage. This layer prevents the soil from blocking the drainage holes while allowing water to flow out more freely.
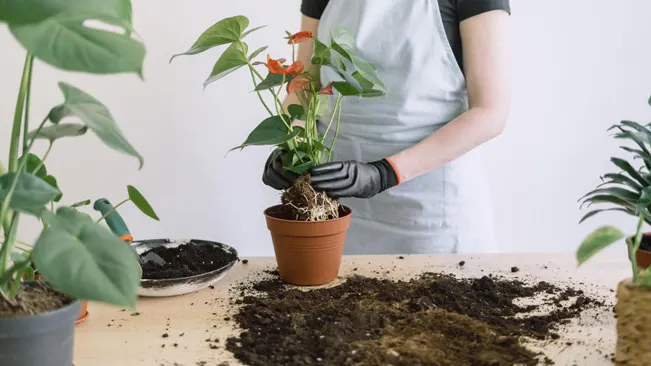
Planting the Anthurium
- Prepare the Pot
- Choosing the Right Pot: Select a pot that is slightly larger than the nursery pot. Ensure it has drainage holes at the bottom to prevent water accumulation.
- Adding Drainage Layer: Consider placing a layer of pebbles or broken pottery at the bottom of the pot. This enhances drainage and prevents soil from blocking the holes.
- Adding Soil: Pour in your well-draining soil mix, filling the pot about one-third to half full. The goal is to create a base where the plant’s roots will sit.
- Position the Plant
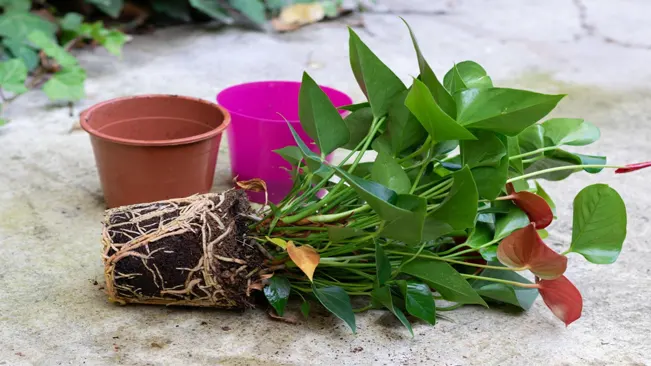
- Removing from Nursery Pot: Carefully take the anthurium out of its nursery pot. Sometimes, gently squeezing or tapping the pot helps in loosening the soil and roots.
- Root Inspection and Loosening: Check the roots for signs of disease or rot, which would appear as overly mushy or blackened roots. If the roots are densely packed or circling, gently tease them apart to encourage them to spread in the new soil.
- Centering the Plant: Place the anthurium in the new pot, centering it for even growth. The top of the root ball should sit slightly below the pot’s rim, allowing space for watering.
- Add Soil
- Filling the Pot: Add more of the soil mix around the sides of the root ball. Be gentle to avoid compacting the soil, which can impede water flow and root growth.
- Soil Level: Ensure the root ball is just below the rim of the pot. There should be a slight gap (about an inch) from the soil surface to the pot rim to help with watering.
- Water Thoroughly
- Initial Watering: Once planted, water the anthurium until you see water draining out of the bottom. This initial deep watering helps settle the soil around the roots.
- Checking Moisture Level: After watering, let the pot drain completely. You may want to check the moisture level after a few hours to ensure that the water is distributed evenly in the pot.
- Avoiding Water Logging: Ensure that your pot is not sitting in standing water. If using a saucer, empty it after the excess water has drained.
Light and Temperature Requirements
Light Requirements
- Bright, Indirect Light: The ideal lighting for an Anthurium is bright yet indirect. This can be achieved by placing the plant near a window that receives plenty of light but is shielded from the harsh rays of the sun. A sheer curtain can help diffuse direct sunlight.
- Avoiding Direct Sunlight: Direct exposure, especially during the hotter parts of the day, can cause the leaves of the Anthurium to burn. Symptoms of too much direct light include brown, crispy patches on the leaves.
- Adjusting to Light Levels: If your space does not have adequate natural light, you might consider using grow lights. These should be positioned to mimic indirect sunlight and not placed too close to the plant to avoid overheating.
- Rotating the Plant: Regularly rotating your Anthurium ensures that all sides of the plant receive equal light, promoting even growth and preventing the plant from leaning towards the light source.
Temperature Requirements
- Ideal Temperature Range: Anthuriums prefer a temperature range between 65-80°F (18-27°C). This range is typically easy to maintain in most indoor environments.
- Avoiding Cold Drafts: Being tropical plants, Anthuriums are sensitive to cold. It’s important to keep them away from drafty windows, air conditioning units, and exterior doors, especially during colder months.
- Consistent Temperature: Fluctuations in temperature can stress these plants. Try to avoid sudden changes in their environment, such as moving them from a very warm spot to a cooler one abruptly.
- Humidity Considerations: Along with temperature, humidity plays a crucial role. Anthuriums thrive in higher humidity levels, mirroring their tropical origins. If your home’s air is dry, consider using a humidifier or placing the plant on a tray with water and pebbles (making sure the pot is not sitting in water) to increase the humidity around the plant.
Watering and Humidity
Watering
- Check the Soil: Before watering, always check the top inch of soil. If it’s dry, it’s time to water. If it’s still moist, wait a day or two and check again.
- Watering Technique: When watering, do so thoroughly until water runs out of the drainage holes. This ensures the entire root system gets moisture.
- Frequency: The frequency of watering depends on factors like the humidity, temperature, and light in your home. Typically, Anthuriums need watering every 1-2 weeks, but this can vary.
- Seasonal Changes: Reduce watering in the cooler months when the plant’s growth slows down.
- Signs of Over/Under Watering: Yellow leaves often indicate overwatering, while brown, crispy leaf edges can be a sign of under-watering.
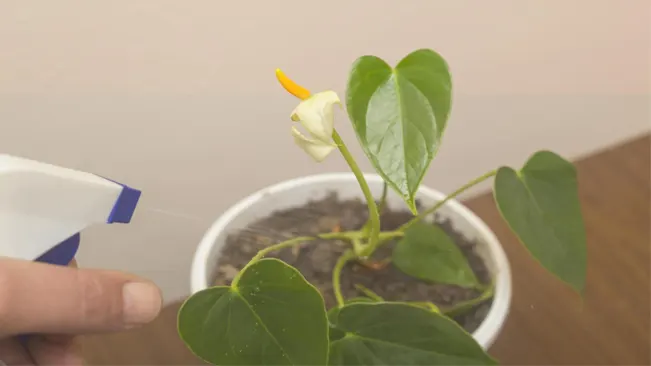
Humidity
- Humidifier: Using a room humidifier is an effective way to increase the moisture level around your plants.
- Misting: Regularly misting the leaves can also help, especially in drier climates or during winter when indoor air tends to be dry due to heating.
- Pebble Tray: Placing the pot on a tray filled with water and pebbles (making sure the pot is sitting on the pebbles, not in the water) can increase humidity around the plant as the water evaporates.
- Grouping Plants: Placing your Anthurium near other plants can create a microclimate with higher humidity, as plants naturally release moisture.
Feeding Your Plant
Anthuriums, like many houseplants, require additional nutrients to supplement what they can obtain from their potting soil. Fertilization is crucial for maintaining vibrant foliage and promoting the characteristic colorful blooms.
Choosing the Right Fertilizer
The ideal fertilizer for Anthuriums is a balanced, water-soluble type. “Balanced” means that the fertilizer has equal parts of the primary nutrients: nitrogen (N), phosphorus (P), and potassium (K). A common ratio found on fertilizer packages is 20-20-20.
- Nitrogen helps in the growth of lush, green leaves.
- Phosphorus is essential for healthy root development and aids in bloom production.
- Potassium contributes to the overall health of the plant, aiding in photosynthesis, nutrient uptake, and disease resistance.
Frequency and Quantity
- The general recommendation is to fertilize your Anthurium every other month. It’s important to follow the instructions on the fertilizer’s packaging regarding dilution and quantity. Over-fertilization can damage the plant, leading to leaf burn or even more severe health issues.
Seasonal Adjustments
- Anthuriums tend to grow more actively in spring and summer. During these months, regular feeding supports this growth. However, in the fall and winter, the plant’s growth usually slows down, and it requires fewer nutrients. Hence, it’s advisable to reduce the frequency of fertilization during these cooler months. Some gardeners recommend halving the strength of the fertilizer or extending the interval between feedings.
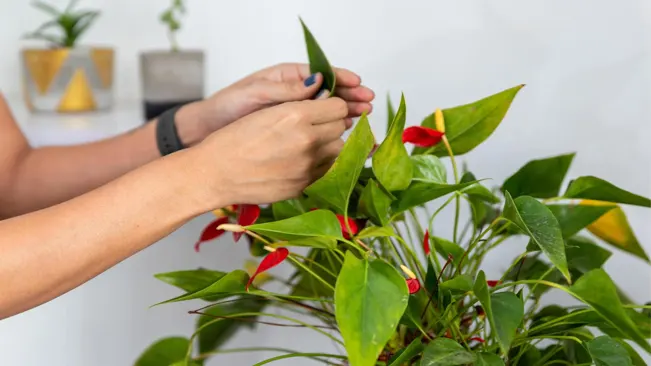
Pruning and Maintenance
Pruning is not just about keeping your Anthurium looking neat; it’s also crucial for its health and vitality. Removing dead or yellowing leaves and faded flowers helps the plant focus its energy on new growth and flowering.
When to Prune
- The best time to prune your Anthurium is when you notice dead or yellowing leaves, or after a flowering cycle when blooms begin to fade. Regular inspections of your plant will help you identify the right time to prune.
How to Prune
- Use the Right Tools: Clean, sharp scissors or pruning shears are ideal. Make sure they are sterilized before use to prevent the spread of disease.
- Identifying What to Prune: Look for leaves that are yellow, brown, or damaged, as well as any stems with spent flowers. Healthy leaves are glossy and green.
- Making the Cut: Cut the unwanted foliage or stems at the base, close to the main stem of the plant. Be careful not to cut the healthy parts.
- Disposal of Debris: Remove the cut leaves and flowers from the soil surface to prevent rot and fungal growth.
Conclusion
With proper care, anthuriums can be a delightful addition to your indoor garden. Their striking appearance and relative ease of care make them a perfect choice for both seasoned gardeners and beginners. By following these steps, you’ll be well on your way to enjoying the unique beauty of your anthurium for years to come.
FAQs (Frequently Asked Questions)
- What kind of soil is best for Anthuriums?
- Anthuriums need well-draining soil to prevent root rot. A mix designed for epiphytic plants, containing pine bark, perlite, and peat moss, is ideal.
- Anthuriums need well-draining soil to prevent root rot. A mix designed for epiphytic plants, containing pine bark, perlite, and peat moss, is ideal.
- How often should I water my Anthurium?
- Water the plant when the top inch of soil feels dry. It’s important to let the soil slightly dry out between waterings to prevent overwatering.
- Water the plant when the top inch of soil feels dry. It’s important to let the soil slightly dry out between waterings to prevent overwatering.
- Do Anthuriums need a lot of sunlight?
- They thrive in bright, indirect light. Direct sunlight can scorch their leaves, so avoid placing them in direct sun exposure.
- They thrive in bright, indirect light. Direct sunlight can scorch their leaves, so avoid placing them in direct sun exposure.
- What is the ideal temperature for Anthuriums?
- These plants prefer temperatures between 65-80°F (18-27°C). They should be kept away from cold drafts and drastic temperature changes.
- These plants prefer temperatures between 65-80°F (18-27°C). They should be kept away from cold drafts and drastic temperature changes.
- How do I know if my Anthurium needs repotting?
- If the roots are circling the bottom of the pot or coming out of the drainage holes, it’s time to repot. Generally, repotting every 2-3 years is sufficient.
- If the roots are circling the bottom of the pot or coming out of the drainage holes, it’s time to repot. Generally, repotting every 2-3 years is sufficient.
- Can I propagate my Anthurium?
- Yes, Anthuriums can be propagated by division. When repotting, you can gently separate the plant into smaller sections, ensuring each has roots attached, and pot them separately.
- Yes, Anthuriums can be propagated by division. When repotting, you can gently separate the plant into smaller sections, ensuring each has roots attached, and pot them separately.
- What type of fertilizer should I use for an Anthurium?
- Use a balanced, water-soluble fertilizer every other month during the growing season. Reduce feeding in the winter months.
- Use a balanced, water-soluble fertilizer every other month during the growing season. Reduce feeding in the winter months.
- Why are my Anthurium’s leaves turning yellow?
- Yellow leaves can be a sign of overwatering, under-watering, or lack of nutrients. Assess your watering routine and ensure you’re fertilizing regularly.
- Yellow leaves can be a sign of overwatering, under-watering, or lack of nutrients. Assess your watering routine and ensure you’re fertilizing regularly.
- How do I increase humidity for my Anthurium?
- Place a humidifier nearby, regularly mist the plant, or set the pot on a tray of wet pebbles to increase ambient humidity.
- Place a humidifier nearby, regularly mist the plant, or set the pot on a tray of wet pebbles to increase ambient humidity.
- My Anthurium isn’t blooming. What can I do?
- Ensure it’s getting enough indirect light, not too much or too little water, and regular feedings. Sometimes, reducing watering slightly can encourage blooming.

Emma Hudson
Forestry AuthorEmma's experience in farming shapes her detailed guides on gardening and farming tools, providing practical, actionable advice grounded in real-world experience. Her work targets both newcomers and experienced farmers, aiming to enhance their practices with a mix of traditional wisdom and modern techniques. By making complex agricultural concepts accessible, Emma's guides serve as valuable tools for those navigating the challenges of contemporary farming, offering strategies for sustainable success.


Leave your comment