How to Build a Shed: A Step-by-Step Guide
- July 7, 2023
- 0 comment
Building a shed can be a rewarding and functional DIY project. However, it does require careful planning, accurate measurements, and some knowledge of construction. Below is a detailed, step-by-step guide to building a shed from scratch.
Step 1: Planning and Preparation
A. Secure Necessary Permissions: The first step in planning your shed project is to check with your local building code office or homeowners’ association for any permits you may need to build a shed on your property. Regulations vary widely from place to place, and there may be specific restrictions regarding the size, placement, or style of outdoor structures. Securing the necessary permissions upfront will prevent any legal complications down the line and can also give you guidelines about safety standards and best practices for construction.
B. Choose a Suitable Location: Choosing the right location for your shed is critical. Not only should this spot be flat and easily accessible, but it should also suit the purpose of your shed. If your shed will primarily be used for storing garden tools, a location near your garden would be convenient. If it’s a workshop that requires electricity, it would be best to place it near a power source. Other factors to consider include sunlight exposure, potential water runoff, and distance from property lines or other structures.
Step 2: Gather Your Materials and Tools
After the planning and preparation phase, it’s time to gather the necessary materials and tools for your shed construction project.

Materials: The type and quantity of materials you need will depend on the size and design of your shed. Most sheds will require the following:
- Lumber: This is the basic building block for your shed. 2x4s are commonly used for framing the structure.
- Plywood: It’s typically used for the walls and roof of the shed.
- Screws and Nails: They will be used to secure the frame, walls, and roof together.
- Roofing Materials: This could range from shingles to metal roofing, depending on your design and budget.
- Doors and Windows: Your shed might require doors for access and windows for natural light.
- Paint or Stain: These are used for finishing the shed and protecting it from the elements.
Tools: The tools required for building a shed can vary based on the complexity of the design, but at a minimum, you will likely need the following:
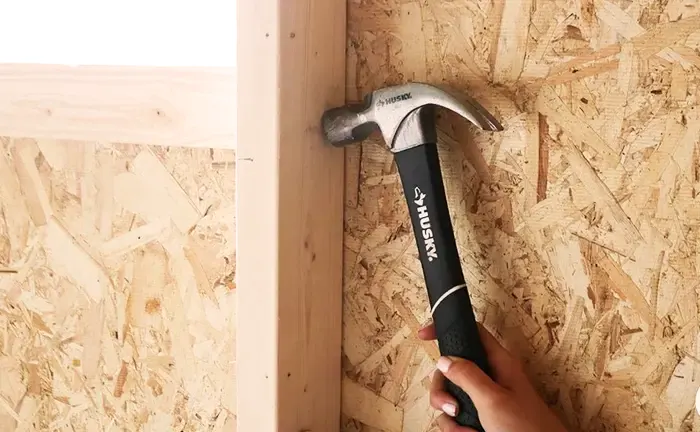
- Hammer: Essential for driving in nails.
- Saw: Needed for cutting lumber and plywood to the correct sizes.
- Level: Ensures your shed is straight and level.
- Square: Aids in keeping your construction angles correct.
- Drill: Used for drilling holes and driving screws.
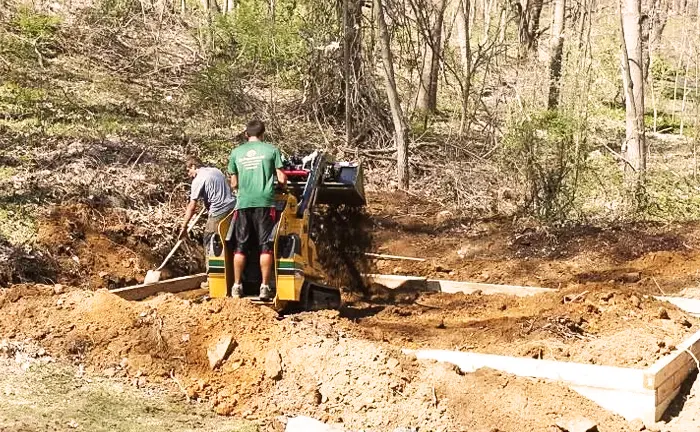
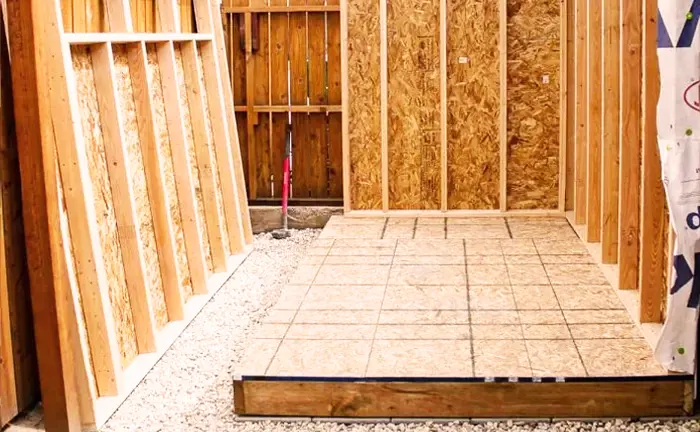
Step 3: Lay the Foundation
The first step towards building a robust and long-lasting shed is laying a solid foundation. This part of the building process is often overlooked, but its importance cannot be overstated. An adequately constructed foundation provides a level surface for your shed, which is essential for structural integrity. It also lifts the shed off the ground, keeping it away from moisture, which can lead to deterioration and decay.
A. Mark the Area
Start by defining the area where your shed will stand. Use stakes and a string to mark the exact perimeter of your shed on the ground. It’s crucial that you make accurate measurements to avoid complications later on. To ensure that your marked area is square, apply the 3-4-5 rule. This principle, based on the Pythagorean theorem, states that if one side of your layout measures 3 units, the adjacent side measures 4 units, and the diagonal between these two sides should measure 5 units if the layout is perfectly square. Make adjustments as necessary until your layout complies with the 3-4-5 rule.

B. Prepare the Ground
Once you’ve accurately marked your shed’s area, the next step is to prepare the ground. This involves removing any grass, stones, or other debris within the staked-out area. If the soil is not even, you’ll need to level it out. You can do this by either adding soil to low areas or removing soil from high areas. Leveling the ground ensures that your foundation lays flat, which is essential for the shed’s stability. Using a spirit level can help you achieve a perfect level base.

C. Lay the Foundation
With your area marked and ground prepared, you can now lay your foundation. The type of foundation you choose depends largely on the size and purpose of your shed. For small sheds, pressure-treated wood skids might be sufficient. These are easier to install and less expensive than other options but offer less stability. For medium-sized sheds, concrete piers or a bed of compacted gravel could be used. These options provide more support and are still relatively simple to install. For larger sheds, or sheds that will house heavy items, a full concrete slab foundation is often the best choice. While this option requires more work and expense, it provides the highest level of stability and support for your shed. Remember, whichever foundation type you choose, it must be level to ensure the stability and longevity of your shed.

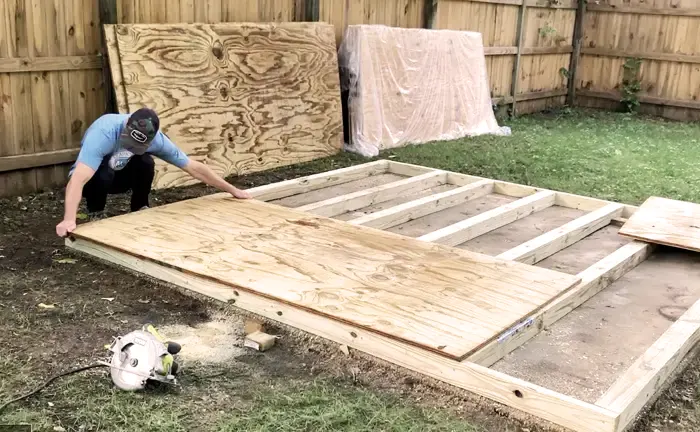
Step 4: Build the Floor Frame
Building the floor frame is the first construction step of your shed. It sets the layout of the shed and provides a base for the flooring.
A. Cut Your Joists
Start by measuring and cutting your joists. If you’re using 2x4s, cut them to the correct length based on the width of your shed. The length of these joists will determine the overall size of your shed, so make sure to follow your design plan precisely.
B. Assemble the Frame
Once the joists are cut, attach the rim joists to the ends of the floor joists. This creates a rectangular shape that forms the perimeter of your shed. To ensure stability, use appropriate nails or screws to secure the joints. Make sure all the corners are square and that the frame is laid out evenly.
C. Attach to Foundation
After the frame has been assembled, it’s time to attach it to the foundation. The method of securing the floor frame will depend on the type of foundation you have. If it’s a concrete slab, you can use concrete anchors. For wood skids or concrete piers, brackets can be used. During this step, it’s crucial to check that the frame is square and level on the foundation. This sets the stage for a stable and structurally sound shed.
Step 5: Adding the Floor
With the floor frame in place, the next step is to add the floor itself.
A. Cut Your Flooring
Measure the dimensions of your floor frame and cut your plywood to fit these measurements. Remember to account for any doorways or other cutouts that will need to be incorporated into the floor.
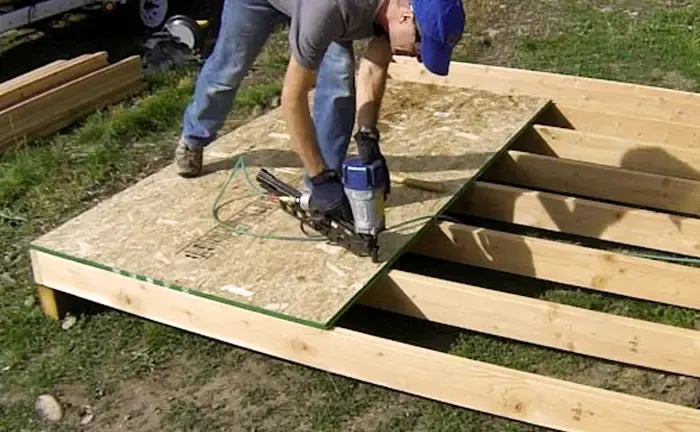
B. Attach Flooring
After the plywood has been cut to size, it’s time to attach it to the floor frame. Align the plywood sheet with the frame and attach it using nails or screws, ensuring all edges are secured to the joists. Make sure to evenly distribute the fasteners to prevent any areas of the floor from lifting or shifting. Check again to ensure that the floor is level and sits flush with the frame.
Step 6: Building and Installing the Walls
Erecting the walls of your shed involves careful crafting on the floor, followed by raising them into position.
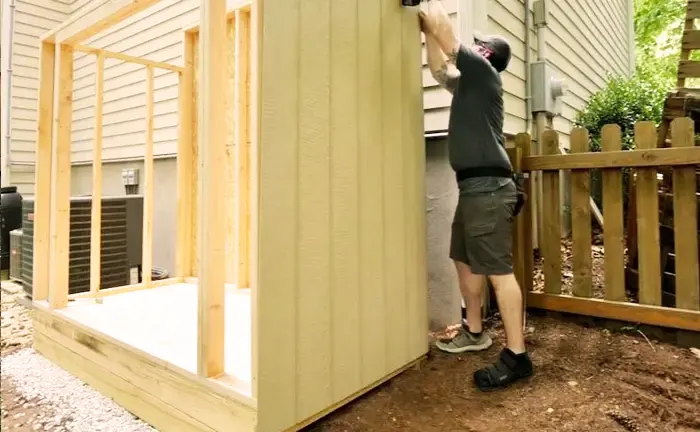
A. Cut Your Studs and Plates: To begin, cut your 2x4s to a suitable size for the height of your walls. For the wall plates (the horizontal members at the top and bottom of each wall), cut two pieces to an identical length for each wall. The height and width of your shed, as specified in your plan, should guide these measurements.
B. Assemble the Walls: On a flat and level surface, arrange your top and bottom plates and uniformly space your studs between them. Using either screws or nails, secure each stud to the plates. It’s important to verify each wall for squareness and ensure all studs are vertical.
C. Raise the Walls: With a helper, raise each wall and secure it to the floor frame. Double-check that each wall is perfectly vertical (plumb) and square to the floor.
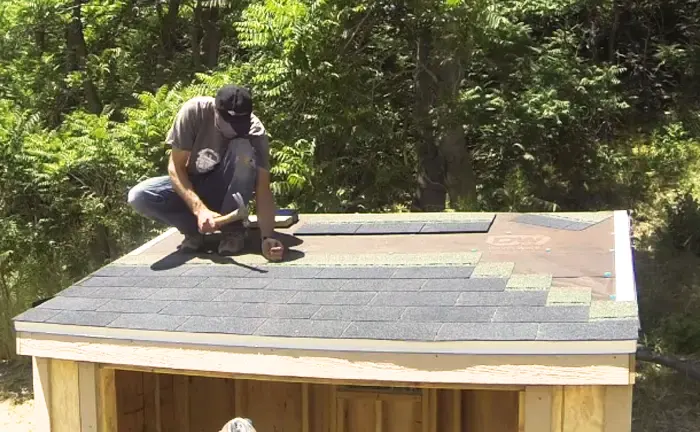
Step 7: Constructing and Installing the Roof
The roof of your shed not only provides a complete look but is essential for protecting your shed and its contents from weather damage.
A. Build the Roof Frame: Cut your rafters to the desired length and assemble them to create the roof frame. This could be a simple peaked frame for a gable roof or a single slope for a shed roof, depending on your design.
B. Install the Roof Frame: Secure your roof frame to the top of your wall frame, ensuring it is centered, stable, and correctly aligned with your walls.
C. Add the Roof Decking: Cut your plywood to fit the roof frame and attach it using nails or screws, making sure all edges are secured to the rafters.
D. Apply Roofing Material: Your choice of roofing material will be based on your local weather conditions and aesthetic preferences. Common options include asphalt shingles, metal roofing, or rubber membrane. Each material comes with specific installation instructions that should be followed closely.
Step 8: Installing the Door and Windows
Door and window installation adds functionality and ventilation to your shed.
A. Frame the Openings: Before installing your door and windows, make sure their openings are properly framed, providing them with the necessary support.
B. Install the Door: Hang your door using the hinges installed in the door opening. Ensure it swings smoothly, latches securely, and aligns with the frame.
C. Install the Windows: If you have planned for windows, install the glass panes now, ensuring they are secure and sealed to prevent drafts or water infiltration.
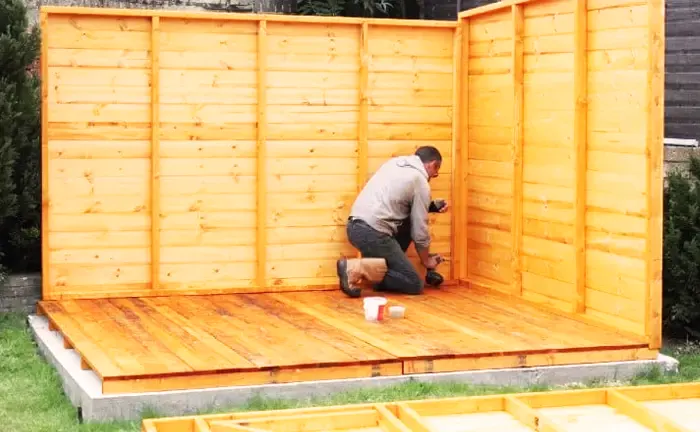
Step 9: Applying the Finishing Touches
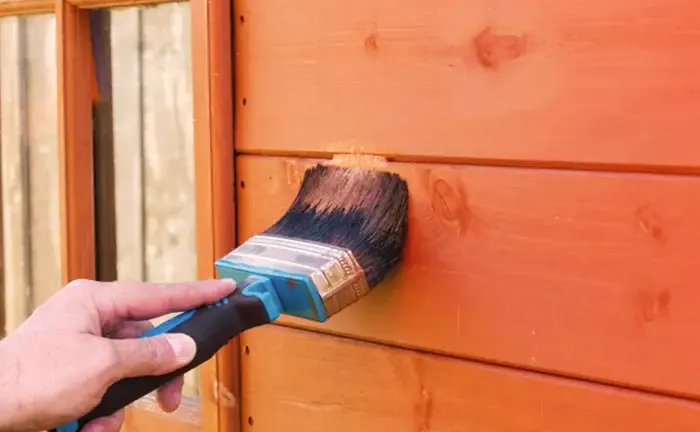
The final step in constructing your shed is to add the finishing touches. This might include painting or staining the exterior, adding interior storage options like shelving or hooks, or installing lighting or other electrical components if needed.
Building a shed is a multi-step process that requires careful planning, accurate measurements, and proper construction techniques. However, with this guide, you have a detailed road map for your project. It’s essential to prioritize safety when using tools and handling heavy materials. Most importantly, enjoy the process of creating something useful and durable with your own hands.
Conclusion
In conclusion, building a shed can be an exciting and rewarding do-it-yourself project. Not only does it provide much-needed storage space, but it also adds value to your property. The process requires careful planning, attention to detail, and a bit of hard work, but the end result is well worth it. The shed you build will serve as a testament to your DIY skills and can be customized to fit your unique needs and preferences.
As we wrap up this guide, remember that every step, from laying the foundation to adding the finishing touches, is crucial in building a sturdy and reliable shed. Don’t rush the process – the quality of your construction will directly affect the longevity and functionality of your shed. Also, consider the elements that will make your shed more than just a storage space. Windows can add natural light, while built-in shelves and hooks can increase organizational space.
Thank you for joining us on this DIY journey. We hope this guide has empowered you to take on the task of building your own shed. Enjoy the process, be proud of your accomplishment, and most of all, make the most out of your new shed! Happy building!
Frequently Asked Questions
- What type of foundation is best for a shed? The best type of foundation for your shed depends on the size of the shed, the type of soil, and the slope of your land. A small, light shed might be fine with a simple wood skid or gravel foundation, while a larger, heavier shed might require a concrete slab or concrete piers.
- Do I need a permit to build a shed? This varies greatly depending on your location and the size of the shed. Some municipalities require a permit for any structure, while others have size thresholds below which a permit isn’t necessary. Always check with your local building department before starting your project.
- What’s the best material for a shed? The best material for your shed depends on your budget, the shed’s intended use, and your climate. Wood sheds are sturdy and can be very attractive, but they are also expensive and require more maintenance than plastic or metal sheds. Consider all of these factors when deciding on materials.
- How can I make sure my shed is waterproof? To make your shed waterproof, ensure that all joints and seams are properly sealed during construction. Roofing materials like shingles or metal roofing can provide a weatherproof top layer. Also, consider adding gutters to divert water away from the base of your shed.
- How do I ensure good ventilation in my shed? Good ventilation in your shed can be achieved through the inclusion of vents, windows, or even a ridge vent in the roof. This can help prevent condensation and reduce the risk of mold and mildew.
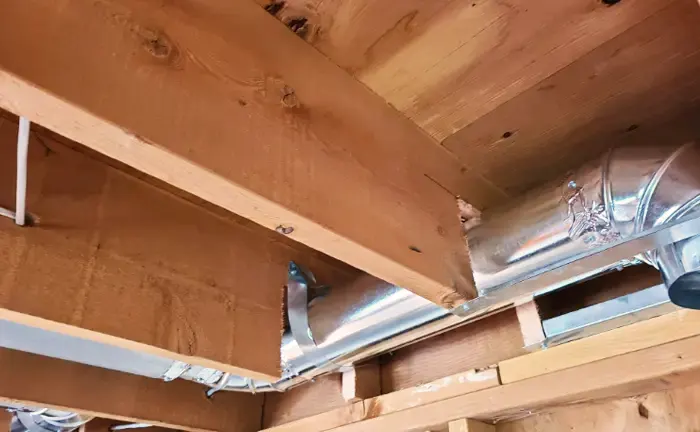
- Can I add electricity to my shed? Yes, electricity can be added to your shed, but it should be done by a qualified electrician to ensure it is safe and up to code. Having electricity can make your shed more versatile, allowing for lighting, heating or cooling, and the use of power tools.
- What is the best way to secure my shed? To secure your shed, consider a robust door lock and possibly even a window lock if your shed has windows. If you’re storing valuable items, you might also want to look into an alarm system or a motion-sensor light to deter potential thieves.


Leave your comment