How to Build a Simple Garden Path: Affordable DIY Ideas for Beginners
- December 27, 2024
- 0 comment
Creating a garden pathway might seem like a big project, but with the right plan and materials, it’s manageable and rewarding. A well-designed garden path enhances your outdoor space’s aesthetic appeal and improves functionality, making it a key element of landscaping. Whether you’re exploring DIY garden path ideas or looking for ways to build an affordable garden path, this guide walks you through every step.
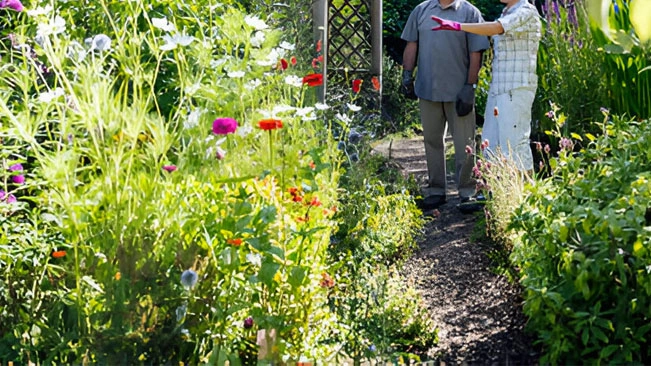
Step 1: Plan the Path
A well-thought-out plan is the foundation of any successful project. To design a path that fits your garden’s needs, consider the following:
- Purpose: What areas will the path connect? Common destinations include patios, greenhouses, ponds, or seating areas. Also, think about practical use, will the path need to handle wheelbarrows, carts, or heavy foot traffic?
- Style: Choose a design that complements your garden’s natural layout. Curved paths create a flowing, organic feel, while straight paths suit a more formal or modern aesthetic.
- Width: Ensure the path is wide enough for its intended use. A standard width of 42 inches accommodates both people and equipment like wheelbarrows comfortably.
- Future-Proofing: Consider how your garden might grow or change. Designing a flexible path layout makes it easier to extend or modify later.
Pro Tip:
Sketch your path on paper or use online garden design tools. This helps you visualize the layout before breaking ground. A beginner guide to garden path planning can be as simple as walking the intended route and marking it with stakes or string.
Step 2: Clear and Outline the Area
Once your plan is ready, the next step is preparing the site. Proper preparation ensures a solid base for your path and prevents future issues like shifting or uneven surfaces.
- Clear the Ground: Remove debris, mulch, and vegetation from the path area. A clear surface is crucial for accurate marking and excavation.
- Mark the Path: Use stakes, string, or spray paint to outline the path. For better visibility, wet the soil before applying spray paint.
- Define Borders: To add charm, plan for planters or edging along the path. This softens the look and creates a welcoming atmosphere.
Pro Tip:
When marking the path, allow for slight variations in width to accommodate natural curves. This makes the design more visually appealing and aligns with simple garden walkway principles.
Step 3: Select Materials
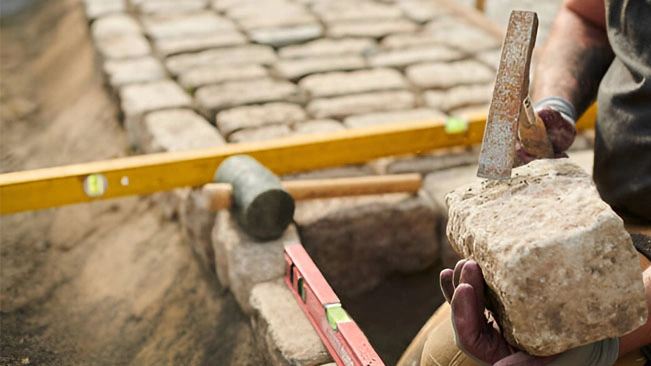
The materials you choose will define your path’s appearance, durability, and cost. To create an affordable garden path, focus on cost-effective yet reliable options.
- Infill Material:
- Decomposed Granite: A budget-friendly option with a natural look. It compacts well, making it ideal for casual pathways.
- Gravel: Easy to install and available in various colors, gravel adds texture and interest.
- Pavers or Bricks: Perfect for a polished finish, though they may be more expensive.
- Edging Material:
- Rocks or Stones: These create a timeless look that blends with the garden’s natural setting.
- Bricks or Metal Edging: Ideal for more formal paths, providing clean lines and stability.
- Wood: Affordable and easy to install but may require more maintenance.
Pro Tip:
Compare materials for affordability and durability using a simple chart. This ensures you’re selecting the best materials for garden path construction without overspending.
Step 4: Prepare the Foundation
A strong foundation is the backbone of any path, ensuring stability and longevity. Follow these steps to build a reliable base:
- Excavate the Area: Dig the path to a depth of six inches to accommodate the infill and base layers.
- Level the Ground: Use a tamper or similar tool to compact the soil. This prevents shifting and ensures an even surface.
- Add a Base Layer: Spread a two-inch layer of crushed stone or gravel. Compact it to create a solid foundation for your chosen infill material.
Pro Tip:
Be mindful of underground utilities like irrigation lines when digging. Mark these areas in advance to avoid accidental damage.
Step 5: Install Edging
Edging not only defines the path’s borders but also prevents the infill from spreading. Proper edging enhances the path’s durability and visual appeal.
- Align the Materials: Place rocks, bricks, or wood along the path’s edges. Adjust them until they form a stable, uniform border.
- Secure the Edging: Use stakes or landscaping adhesive for added stability, especially if using loose materials like rocks.
- Interlock Edging Materials: For a polished look, “puzzle” the pieces together to minimize gaps.
Pro Tip:
Edging can double as a decorative feature. For example, staggered bricks or colorful stones can elevate the overall aesthetic while keeping costs low perfect for a low-budget garden path.
Step 6: Add a Flagstone Transition
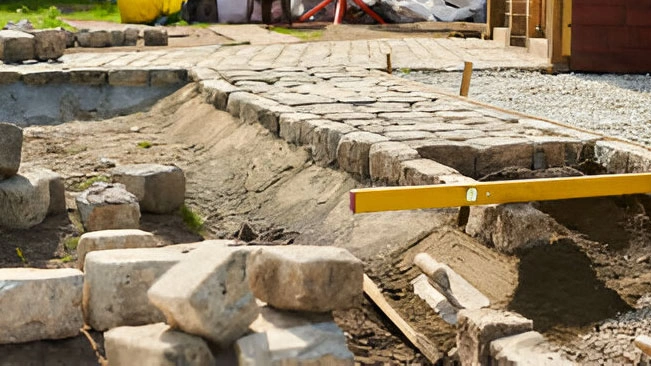
For areas where the path connects to patios, entrances, or other hardscapes, flagstones offer a seamless transition.
- Prepare the Base: Spread and compact decomposed granite to stabilize the stones.
- Arrange the Flagstones: Place the stones in a natural pattern, leaving small gaps between them.
- Fill the Gaps: Use decomposed granite or sand to fill gaps, creating a cohesive and stable surface.
Pro Tip:
Choose flagstones that match your garden’s color scheme for a harmonious look. They also add a touch of sophistication to any simple garden walkway.
Step 7: Spread and Compact Infill
The infill material forms the main surface of your path. Decomposed granite is a popular choice for its affordability and natural appeal.
- Spread Evenly: Use a shovel to distribute the material along the path, ensuring even coverage.
- Compact Thoroughly: A tamper or plate compactor binds the material, preventing it from shifting or eroding over time.
- Grade the Surface: Smooth the path with a rake, creating a slight slope for proper drainage.
Pro Tip:
For wetter climates, consider stabilized decomposed granite. It’s slightly more expensive but offers better resistance to moisture and wear.
Step 8: Add Plants Along the Edges
Planting along the path’s edges adds softness and integrates the walkway into your garden’s design.
- Low-Maintenance Plants: Choose hardy plants like lavender, succulents, or ornamental grasses that require minimal care.
- Seasonal Flowers: Add color and vibrancy with blooms that change throughout the year.
- Ground Cover Plants: Use creeping thyme or moss to fill small gaps along the path’s edge.
Pro Tip:
Position plants to define walking areas and prevent accidental trampling. This step personalizes your pathway and enhances its charm.
Step 9: Final Adjustments and Maintenance
Once your path is complete, a little maintenance ensures it stays beautiful and functional for years:
- Allow the Infill to Settle: Rain or light watering helps compact the material naturally.
- Inspect Regularly: Check for uneven spots or spreading infill and tamp them down as needed.
- Keep Extra Materials on Hand: Having spare decomposed granite or gravel simplifies small repairs.
Pro Tip:
Regularly clean the path to remove leaves and debris, preventing weeds from taking root.
Related Articles You Might Like.
- How to Start a Garden: 10 Easy Steps for Beginners
- How to Build a Raised Garden Beds Easily and Effectively: Step-by-Step Guide
- Best Gardening Tools
Conclusion
Building a garden path is a rewarding project that combines practicality with creativity. Whether you’re using this guide as a beginner guide to garden path construction or simply exploring DIY garden path ideas, the process is manageable and affordable. With careful planning, thoughtful materials, and personal touches like edging and plants, your garden path will transform your outdoor space into a functional and inviting retreat.
FAQs
- What are the best materials for a simple garden path?
The best materials for a simple garden path include pea gravel, stepping stones, bricks, wood chips, or concrete pavers. These materials are cost-effective, easy to install, and provide a durable surface for foot traffic while enhancing the overall aesthetic of your garden. - How do you build a garden path step by step?
To build a garden path, start by marking the area with stakes and string to outline the desired shape. Remove the sod and dig the path to a depth of 2 to 4 inches, depending on your materials. Lay down a weed barrier fabric to prevent unwanted growth. Add a base layer of sand or gravel, then place your chosen materials such as pavers, bricks, or stones. Fill any gaps with sand or gravel, and use a tamper to secure everything in place. - How much does it cost to build a simple garden path?
The cost of building a simple garden path can range from $2 to $10 per square foot, depending on the materials used. Pea gravel is one of the most affordable options, costing around $2 to $4 per square foot, while more durable options like pavers or bricks can range from $6 to $10 per square foot. DIY installation can significantly reduce overall costs. - What tools do you need to make a garden path?
To make a garden path, you’ll need a shovel, rake, tamper, wheelbarrow, scissors for cutting weed fabric, a rubber mallet, and a level. These tools are essential for digging, leveling, and securely placing your path materials to ensure a professional finish. - How can I make a garden path on a budget?
Creating a garden path on a budget is possible by using affordable materials like gravel, wood chips, or repurposed bricks. Keep the design simple and avoid hiring professionals by opting for a DIY approach. Using weed fabric can reduce maintenance costs over time, and sourcing materials locally can further lower expenses.

Kristine Moore
Forestry AuthorI'm Kristine Moore, a seasoned garden landscaping professional with over 30 years of experience. My extensive career has been dedicated to transforming outdoor spaces into stunning, sustainable landscapes. With a deep understanding of horticulture, design principles, and environmental stewardship, I have become a respected figure in the field, known for creating harmonious, visually appealing, and eco-friendly gardens. My commitment to excellence and continuous learning in landscaping trends and techniques has solidified my reputation as an expert in garden design and implementation.








Leave your comment