How to Grow Emerald Green Arborvitae: A Complete Care Guide for Thriving Trees
- March 11, 2024
- 2 comment
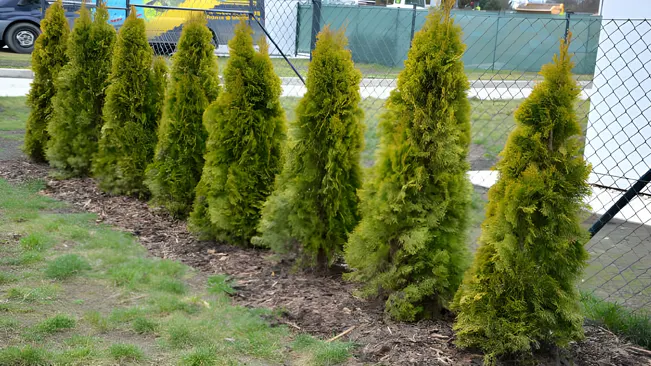
Emerald Green Arborvitae, scientifically known as Thuja occidentalis ‘Smaragd’, is a popular evergreen shrub noted for its vibrant green foliage and pyramidal shape. It is an ideal choice for creating privacy screens, hedges, or adding a structured element to your landscape. In this guide, we’ll walk you through the steps and tips to grow and care for your Emerald Green Arborvitae effectively.
List on How To Grow Emerald Green Arborvitae
- Choosing the Right Location
- Planting Steps
- Watering
- Fertilizing
- Pruning
- Pest and Disease Management
- Winter Care
Choosing the Right Location
Sunlight
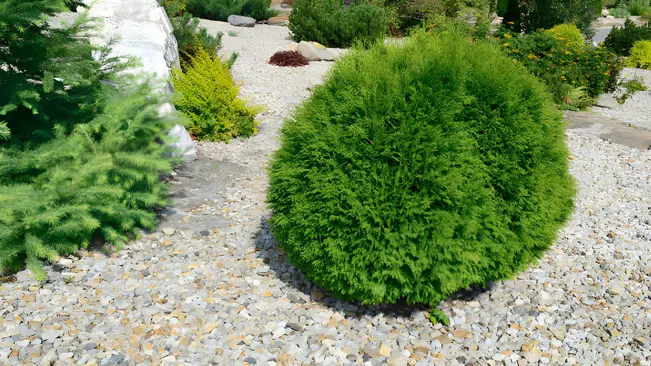
- Importance of Sunlight: Emerald Green Arborvitae needs adequate sunlight for healthy growth and to maintain its vibrant green color. Inadequate sunlight can lead to sparse foliage and a less robust plant.
- Sunlight Intensity: While these plants can tolerate partial shade, they perform best in full sun. The intensity of the sunlight they receive can affect their growth rate and overall health.
Soil Requirements
- Soil Drainage: Good drainage is crucial. Waterlogged conditions can lead to root rot, which is detrimental to the Arborvitae. Well-drained soil ensures that water does not accumulate around the roots.
- Soil Type Adaptability: They can adapt to a range of soil types, but the soil must be well-draining. Sandy soils drain well but may lack nutrients, while clay soils retain moisture and nutrients but can become too compact.
- Amending Soil: If the natural soil is not ideal, amending it with organic matter such as compost or peat moss can improve its structure, drainage, and nutrient content. This amendment is particularly beneficial in clay or sandy soils.
Spacing
- For Privacy Hedges: The recommended spacing of 2 to 3 feet allows the plants to grow together and form a dense screen, which is ideal for privacy hedges.
- Air Circulation: Proper spacing also ensures adequate air circulation around each plant, which is essential for preventing fungal diseases and promoting overall plant health.
- Growth Consideration: It’s important to consider the mature size of the Arborvitae when spacing. Overcrowding can lead to competition for resources and may hinder the growth and health of the plants.
Planting Steps
Dig a Hole
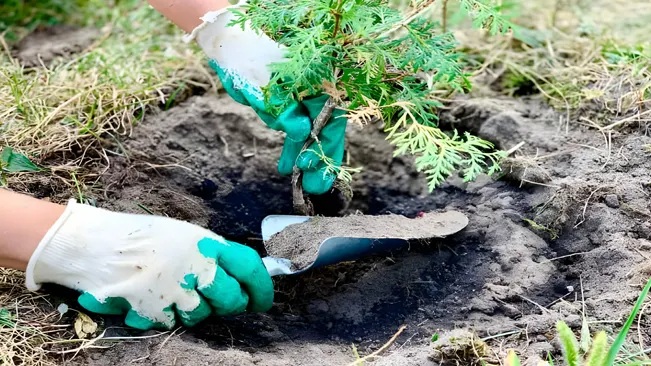
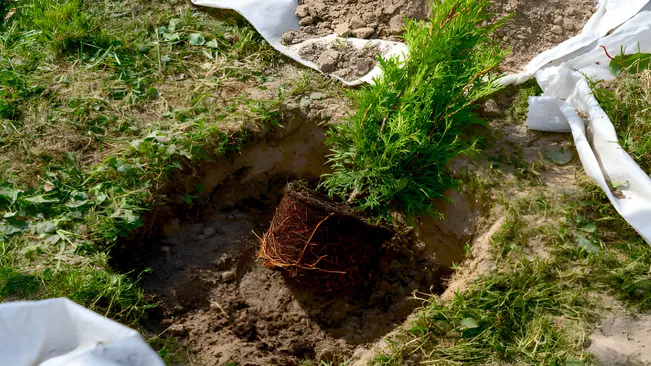
- Size Matters: The hole’s width is crucial because it needs to be spacious enough to accommodate the roots without crowding them. By making it twice as wide as the root ball, you give the roots ample room to spread out. This encourages a strong, healthy root system, which is key to the plant’s overall health.
- Depth Perception: The depth of the hole should be equal to the height of the root ball. This ensures that the plant is neither too deep, which can suffocate the roots and the lower trunk, nor too shallow, which can expose roots and destabilize the plant.
Position the Plant
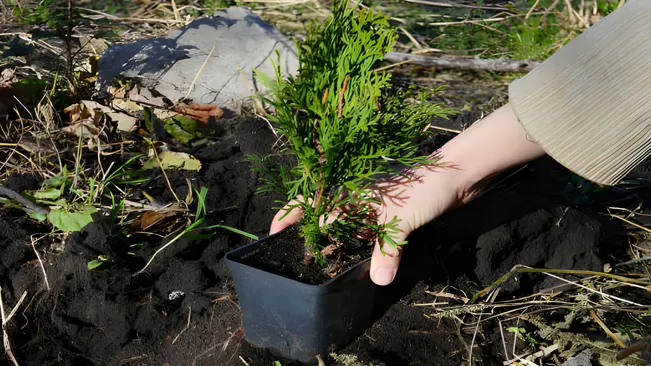
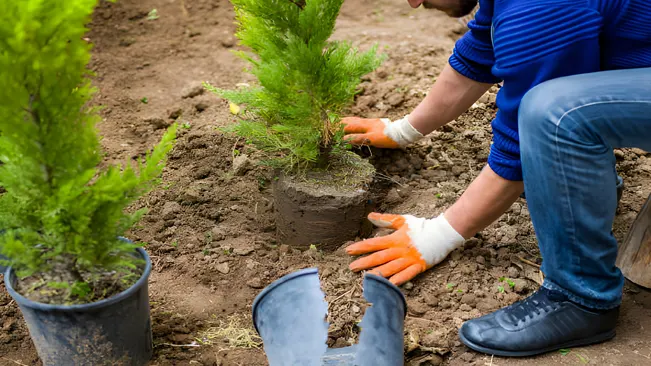
- Getting It Straight: When placing the Arborvitae in the hole, make sure it’s straight. This is not just for aesthetic reasons; a straight tree will grow stronger and be more resilient to wind and other elements.
- Consistent Depth: Ensure the top of the root ball is level with the surrounding ground. Planting the Arborvitae at the same depth as it was in the container prevents the risk of root rot or drying out that can occur if planted too deep or too shallow, respectively.
Backfill the Hole
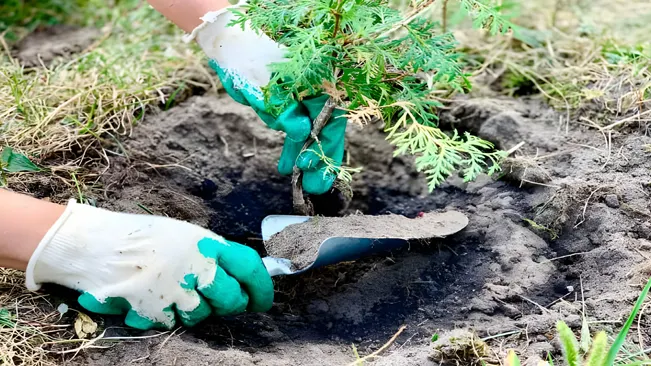
- Soil Composition: Backfilling the hole with a mixture of native soil and compost is beneficial for several reasons. The native soil helps the plant acclimate to its new environment, while the compost provides organic matter and nutrients, aiding in growth and root development.
- Eliminating Air Pockets: Watering the soil after backfilling helps to settle the soil and eliminate air pockets. Air pockets can cause roots to dry out and impede proper root establishment. Thorough watering ensures that the soil is in close contact with the roots, providing necessary moisture and support.
Watering
Watering
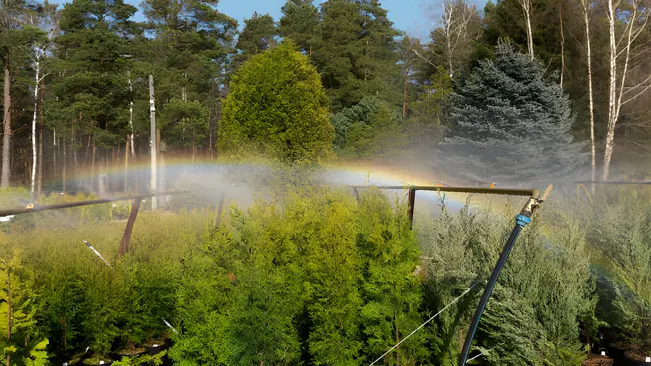
- Initial Watering: In the first year after planting, consistent and deep watering is crucial. This helps in establishing a strong root system. The key is to water deeply rather than frequently. Deep watering encourages the roots to grow downwards, promoting a more resilient and drought-tolerant plant.
- How to Water: To water deeply, use a slow-drip method like a soaker hose or drip irrigation, or water slowly at the base of the plant. This method ensures that the water penetrates the soil deeply rather than running off the surface.
- Frequency: In the beginning, water your Arborvitae about once a week, depending on the weather conditions and soil type. Sandy soils drain faster and may require more frequent watering, while clay soils hold moisture longer.
- Monitoring Soil Moisture: It’s important to check the soil moisture. The soil should be moist but not waterlogged. Overwatering can lead to root rot, which is detrimental to Arborvitae. A simple way to check is to stick your finger into the soil up to the second knuckle; if the soil feels dry at that depth, it’s time to water.
- Watering Established Plants: Once established (usually after the first year), Emerald Green Arborvitae becomes more drought-tolerant. However, during prolonged dry spells, supplemental watering helps maintain the health of the plant. During these periods, watering every couple of weeks may be necessary, especially in hot, dry climates.
Mulching
- Purpose of Mulching: Mulch serves multiple purposes for Emerald Green Arborvitae. It helps retain soil moisture, keeping the roots cool and moist. It also suppresses weed growth and gradually improves soil quality as it decomposes.
- Types of Mulch: Organic mulches like bark chips, shredded bark, or compost are ideal. These types not only retain moisture but also contribute to soil health as they break down.
- Applying Mulch: When applying mulch, spread a 2-3 inch layer around the base of the plant, but avoid piling it directly against the trunk. This “mulch volcano” can cause moisture to accumulate against the trunk, leading to decay and pest problems.
- Refresh Mulch Annually: Over time, mulch breaks down and becomes part of the soil. Annually check the mulch layer and add more as needed to maintain the appropriate depth.
Fertilizing
Choosing the Right Fertilizer
- Type: A balanced, slow-release fertilizer is recommended. “Balanced” means it has equal parts of the primary nutrients: nitrogen (N), phosphorus (P), and potassium (K). These are often represented by a ratio such as 10-10-10 or 20-20-20.
- Slow-Release: Slow-release fertilizers release nutrients gradually over time, ensuring a steady supply of nutrients and minimizing the risk of root burn or shock to the plant.
Timing
- The best time to fertilize Emerald Green Arborvitae is in early spring. This coincides with the start of their active growth period.
- A second application can be done in mid to late summer if needed, but avoid fertilizing late in the season as this can stimulate new growth that might not harden off before winter.
Application
- Method: Apply the fertilizer around the base of the plant, extending to the drip line (the area directly beneath the outer circumference of the tree canopy).
- Quantity: Follow the manufacturer’s instructions on the fertilizer packaging. Over-applying can be more harmful than under-applying.
- Watering: Water the area thoroughly after applying fertilizer. This helps in dissolving the fertilizer and distributing the nutrients into the soil.
Risks of Over-Fertilizing
- Excessive growth: Too much fertilizer can lead to lush, rapid growth that may not be as robust or hardy. This new growth can be more susceptible to disease and winter damage.
- Nutrient Imbalance: Over-fertilizing can disrupt the soil nutrient balance, affecting the plant’s ability to absorb other essential nutrients.
- Environmental Impact: Overuse of fertilizer can lead to runoff into water systems, causing pollution and harming aquatic ecosystems.
Pruning
Why Prune
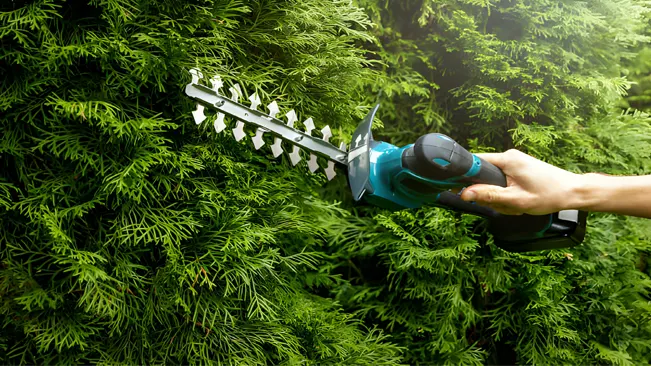
Pruning is essential for maintaining the health and aesthetics of your Arborvitae. While Emerald Green Arborvitae naturally maintains a neat, pyramidal shape, occasional pruning helps to:
- Remove dead, diseased, or damaged branches, preventing potential spread of disease or pests.
- Control or shape the plant, especially if it’s being used for a hedge or a specific landscape design.
- Encourage denser growth, particularly for hedges or screens.
When to Prune
- The best time to prune Emerald Green Arborvitae is in late winter or early spring, just before the new growth starts. This timing helps the plant to quickly recover and fill in any gaps.
- Avoid heavy pruning in late summer or early fall, as this can stimulate new growth that might not harden off before winter, making it susceptible to cold damage.
How to Prune
- Use sharp, clean pruning shears or loppers for smaller branches and a pruning saw for larger ones.
- Start by removing any dead, damaged, or diseased branches. Cut these branches back to a healthy stem or the main trunk.
- For shaping, trim back overgrown branches to maintain the pyramidal shape. Avoid cutting into old wood that has no green needles, as this part may not regrow.
- If you’re maintaining a hedge, trim the sides in a way that the base is slightly wider than the top. This shape allows sunlight to reach the lower branches and keeps the hedge full and healthy.
Considerations
- Emerald Green Arborvitae has a dense outer layer of foliage. Avoid cutting too far into this layer, as it might not regrow, leaving unsightly gaps.
- Regular, light pruning is better than occasional heavy pruning. It’s less stressful for the plant and easier to maintain the desired shape.
- If the top of the Arborvitae becomes too tall or heavy, you can trim it back. However, do this cautiously, as a drastic reduction in height might impact the plant’s appearance.
After Pruning Care
- Water the shrubs well after pruning to help them recover.
- Keep an eye out for pest infestations or diseases in the freshly cut areas and treat them as necessary.
Pest and Disease Management
Pest Management
- Spider Mites: These tiny pests can be hard to see with the naked eye, but their damage is noticeable. They cause the foliage to turn yellow or bronze. To check for spider mites, place a piece of white paper under a branch and tap it. If tiny, moving specks fall, spider mites are present. Control includes hosing down the trees with water to knock off the mites and using miticides if infestation is severe.
- Bagworms: Bagworms create spindle-shaped bags that hang from the branches. These bags contain the larvae that feed on the foliage, causing defoliation. To manage bagworms, physically remove and destroy the bags in winter or early spring before the larvae emerge. In case of heavy infestation, use appropriate insecticides.
Disease Management
- Root Rot: This is typically caused by overly wet soil conditions, often due to overwatering or poor drainage. Symptoms include yellowing or browning of the foliage, and the plant may become loose in the soil. To prevent root rot, ensure that the soil is well-draining. When planting, avoid setting the plant too deeply as this can encourage water to collect around the base.
- Preventive Measures: Regular monitoring is key. Examine your Arborvitae routinely for signs of stress, pest activity, or disease. Healthy plants are less susceptible to problems, so proper watering, fertilizing, and planting in suitable locations are crucial.
- Cultural Practices: Improving air circulation can help prevent many fungal diseases. This can be achieved by adequate spacing when planting and by pruning any nearby overgrown vegetation.
- Chemical Control: If diseases like root rot do occur and are caught early, fungicides can be applied as per the manufacturer’s instructions. However, the best approach is preventive through proper care and site selection.
Winter Care
Protecting from Heavy Snow
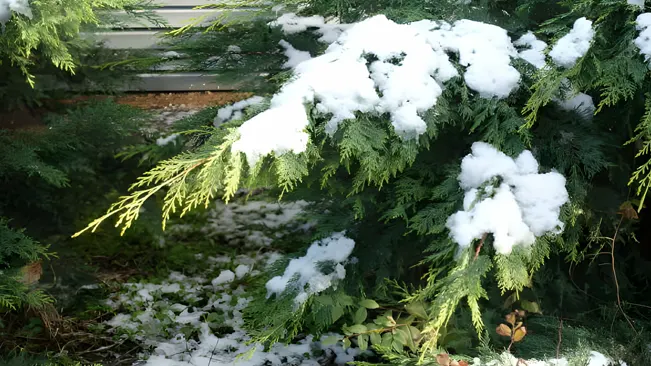
- Gentle Snow Removal: After a snowfall, it’s essential to remove the snow from the branches of your Arborvitae. However, this should be done gently to avoid damaging the branches. A soft broom or your hands can be used to lightly brush off the snow.
- Avoiding Branch Breakage: The weight of the snow can cause branches to break, especially in younger or weaker trees. Regularly removing snow helps prevent this.
- Natural Resilience: Arborvitae is naturally resilient to snow, and its conical shape helps in shedding snow. However, during particularly heavy snowfalls, assistance in removing snow can be beneficial.
Protection in Severe Winters
- Wrapping with Burlap: In areas with severe winters, particularly where windburn and salt damage are concerns (like near roads where salt is used for de-icing), wrapping your Arborvitae in burlap can offer significant protection.
- How to Wrap: To wrap your Arborvitae, use burlap fabric and gently wrap it around the tree. Secure the burlap with twine, but ensure it’s not too tight to allow for some air circulation.
- Benefits of Burlap: Burlap acts as a barrier against drying winds and salt spray, reducing the risk of desiccation and chemical damage to the foliage.
- Considerations for Wrapping: Ensure the top of the tree is also covered, but leave some room for air and light. The burlap should be removed in the spring to prevent overheating and to allow for new growth.
Additional Winter Care Tips
- Watering Before Freeze: Ensure your Arborvitae are well-watered in the fall before the ground freezes. This helps prevent winter desiccation.
- Mulching: Apply a thick layer of mulch around the base of the tree to insulate the roots and maintain moisture levels throughout the winter.
- Avoiding Salt Damage: When de-icing nearby paths or driveways, use alternatives to salt or use it sparingly to minimize damage from runoff.
Conclusion
Emerald Green Arborvitae is a stunning and low-maintenance addition to any garden. With proper planting, regular care, and attention to their specific needs, these evergreens will thrive and enhance your landscape for years to come. Remember, the key to a healthy Arborvitae is ensuring it has the right conditions from the start – well-drained soil, adequate sunlight, and enough space to grow.
FAQs (Frequently Asked Questions)
- What is the ideal planting location for Emerald Green Arborvitae?
Emerald Green Arborvitae thrives in full sun to partial shade. Choose a location that gets at least 6 hours of direct sunlight daily and has well-draining soil. - How often should I water my Arborvitae?
Water newly planted Arborvitae deeply and regularly, about once a week, until they are established. After the first year, they are relatively drought-tolerant but may need occasional watering during extended dry periods. - Do I need to fertilize my Emerald Green Arborvitae?
Yes, fertilize in early spring with a balanced, slow-release fertilizer. Avoid over-fertilizing, as this can lead to lush growth that is less hardy. - How far apart should I plant Emerald Green Arborvitae for a hedge?
For a dense hedge, plant them about 2 to 3 feet apart. This spacing allows the plants to grow together but also gives them enough room for air circulation and growth. - Can Emerald Green Arborvitae grow in pots?
Yes, they can grow in large pots or containers, but they need ample space for root growth and regular watering, as containers can dry out quickly. - How tall and wide does Emerald Green Arborvitae get?
Emerald Green Arborvitae typically grows to about 12-14 feet tall and 3-4 feet wide. Its growth can be influenced by environmental factors and care. - Is pruning necessary for Emerald Green Arborvitae?
Pruning is not essential since they naturally grow in a pyramidal shape. However, light pruning can be done in late winter or early spring for shaping or to remove dead branches. - Are Emerald Green Arborvitae deer resistant?
They are relatively deer resistant compared to many other plants, but in areas with high deer populations, some protection or repellents may be necessary. - What common pests affect Emerald Green Arborvitae?
Spider mites and bagworms are common pests. Regular inspection and timely treatment with appropriate insecticides can manage these pests. - How do I protect my Arborvitae in winter?
In areas with heavy snow, gently brush off the snow to prevent branch damage. In regions with severe winters, wrapping them in burlap can protect against windburn and salt damage.

Kristine Moore
Forestry AuthorI'm Kristine Moore, a seasoned garden landscaping professional with over 30 years of experience. My extensive career has been dedicated to transforming outdoor spaces into stunning, sustainable landscapes. With a deep understanding of horticulture, design principles, and environmental stewardship, I have become a respected figure in the field, known for creating harmonious, visually appealing, and eco-friendly gardens. My commitment to excellence and continuous learning in landscaping trends and techniques has solidified my reputation as an expert in garden design and implementation.




How can I trim my bushes to keep them small? Maybe four or five feet. As they will be planted next to my house.
bill mossholder
October 25, 2024 5:39 pmTo keep your Emerald Green Arborvitae at a cozy height of four to five feet, a little yearly pruning will do the trick! Late winter or early spring is the perfect time to trim, just before new growth kicks in. Grab some sharp shears and gently snip the top few inches and any side branches that go beyond the size you’d like. Be sure to focus on the green outer layer cutting too deep into the older wood can leave gaps that might not fill in. If you're looking for more tips, we’ve got some helpful reads like Expert Hedge Trimming Techniques, Tips for Trimming Weeds Along a Fence, and 11 Best Hedge Trimmers of 2024. These articles are packed with practical advice to keep your landscape looking its best!
Kristine Moore
October 28, 2024 12:25 am