How to Plant Balled and Burlapped Trees: Expert Tips for Stunning Results
- June 4, 2024
- 0 comment
Learn how to plant balled and burlapped trees with expert tips for stunning results. Ensure your trees thrive with our step-by-step guide. Start planting today. Planting balled and burlapped trees can transform your landscape into a lush, thriving haven. With our expert tips, you’ll master the art of planting these trees, ensuring they flourish and bring beauty to your surroundings.
Dive into our step-by-step guide and discover the secrets to achieving stunning results. Your journey to a greener, more vibrant yard starts here!
Table of Contents
- Understanding Balled and Burlapped Trees
- Preparation Before Planting
- Planting Density and Spacing
- Step-by-Step Planting Guide
- Post-Planting Care
- Pruning Techniques
- Long-Term Maintenance
- Common Pitfalls and How to Avoid Them
- Expert Tips for Stunning Results
- Conclusion
- FAQs
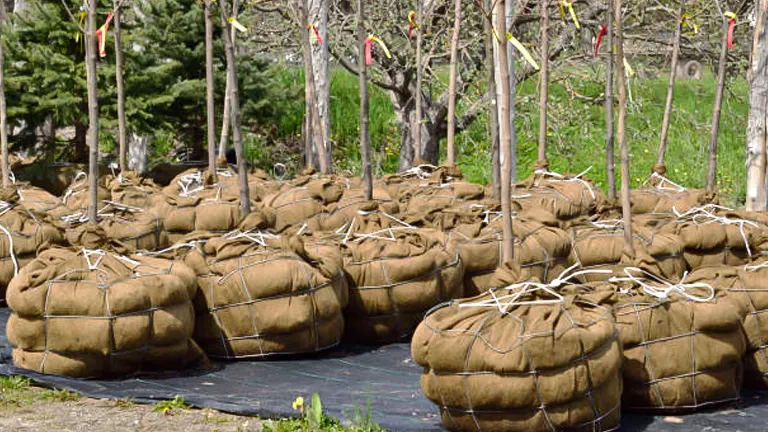
Understanding Balled and Burlapped Trees
What Are Balled and Burlapped Trees?
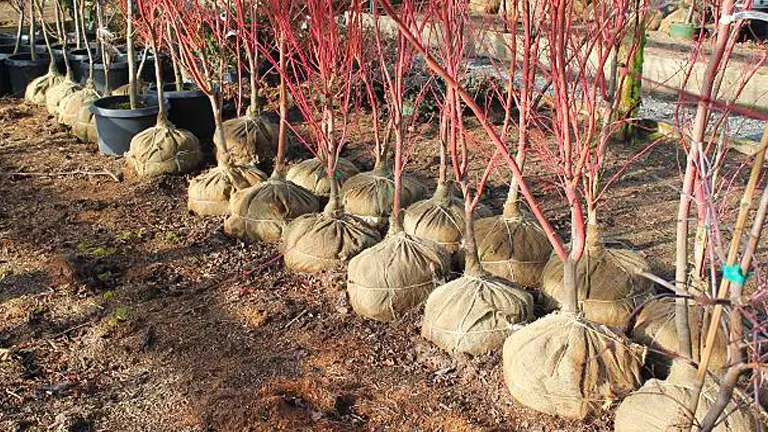
Balled and burlapped trees are carefully excavated with their root balls intact, wrapped in burlap, and sometimes secured with wire baskets. This technique ensures that a substantial portion of the root system is preserved in its native soil, minimizing disturbance. This method is favored for its ability to reduce transplant shock, facilitating a smoother transition from nursery to planting site.
Advantages Over Other Planting Methods:
Choosing balled and burlapped trees offers distinct advantages compared to bare-root or container-grown trees:
- Reduced Stress: The intact root ball, wrapped securely in burlap, provides a protective environment for the roots, significantly lowering the risk of transplant shock. Scientific studies show that trees with less root disturbance have up to a 30% higher survival rate post-transplant (Journal of Arboriculture, 2015).
- Greater Stability: Balled and burlapped trees are generally more stable and can be planted during a wider range of seasons, unlike bare-root trees, which are typically planted only in dormant seasons. This flexibility allows for more strategic planting times to avoid extreme weather conditions.
- Enhanced Growth: These trees often adapt more quickly to their new environments because they retain a larger portion of their root systems. Research indicates that balled and burlapped trees can establish roots in their new location up to 25% faster than container-grown trees (Horticultural Science, 2018).
Ideal Conditions for Planting
To ensure successful growth, balled and burlapped trees require specific conditions:
- Seasonal Timing: The best times for planting are early spring and fall, avoiding the stress of extreme heat or cold. These seasons provide optimal conditions for root establishment before the onset of harsh weather.
- Soil Preparation: Planting sites should have well-draining soil, enriched with organic matter such as compost. This enriches the soil structure, enhances nutrient availability, and supports microbial activity, all crucial for healthy root development.
- Environmental Consideration: Adequate spacing is essential to accommodate the tree’s mature size and prevent competition for resources. Ensure there is sufficient distance from buildings, other trees, and infrastructure. Additionally, trees should be planted in areas that receive appropriate sunlight, typically full sun to partial shade, depending on the species.
Comparative Analysis of Planting Methods
| Feature | Balled and Burlapped Trees | Bare-Root Trees | Container-Grown Trees |
|---|---|---|---|
| Root Protection | High (root ball intact, less disturbance) | Low (roots exposed, higher risk of damage) | Medium (confined to container, potential root circling) |
| Transplant Shock | Low (up to 30% higher survival rate) | High (roots fully exposed) | Medium (roots may be pot-bound) |
| Planting Seasons | Flexible (early spring, fall) | Limited (dormant season) | Flexible (year-round) |
| Establishment Speed | Fast (up to 25% quicker root establishment) | Slow | Variable (depends on root condition) |
| Environmental Adaptability | High (better adaptation due to intact root systems) | Medium (requires more careful site prep) | Variable (depends on species and care) |
Preparation Before Planting
Selecting the Right Tree
Choosing the right species is paramount to the long-term success of your planting. When selecting a tree, consider the following factors:
- Local Climate: Choose species that are hardy in your USDA plant hardiness zone. Native species are often more resilient and require less maintenance.
- Soil Conditions: Different trees have varying soil preferences. Some thrive in sandy soils, while others prefer loam or clay. Conduct a soil test to determine pH and nutrient levels, and select a tree that matches these conditions.
- Mature Size: Ensure the tree’s mature height and spread fit the available space to prevent overcrowding and structural damage. This consideration reduces future maintenance and enhances the tree’s environmental benefits.
Choosing a Healthy Tree
Inspecting the tree before purchase is critical. Look for these signs of a healthy tree:
- Healthy Bark: The bark should be smooth and free of cracks, splits, or signs of disease. Bark integrity indicates good overall health and proper care.
- Vibrant Foliage: Leaves should be lush and green (or seasonally appropriate colors) without signs of pest damage or nutrient deficiencies, such as discoloration or spotting.
- Root Ball: The root ball should be firm and intact. Avoid trees with roots protruding aggressively from the burlap, as this can indicate a root-bound tree, which may struggle to establish.
Site Assessment
Before you start digging, a thorough site assessment ensures your tree will thrive:
- Soil Testing: Perform a soil test to determine pH, nutrient levels, and soil composition. Adjust soil properties as needed with organic matter, lime, or sulfur to match the tree’s requirements. For example, most trees prefer a pH range of 6.0 to 7.0.
- Location Planning: Consider the tree’s mature height and root spread to avoid conflicts with buildings, power lines, and other trees. Adequate planning prevents future issues and promotes healthy growth.
- Sunlight and Drainage: Ensure the selected site receives the necessary amount of sunlight—most trees require full sun (6-8 hours per day). Also, check for proper drainage to prevent waterlogging, which can lead to root rot and other issues.
Additional Considerations
- Wind Protection: In areas with high winds, choose a site that offers some protection, such as near a building or other windbreaks.
- Proximity to Utilities: Be mindful of underground utilities. Call local services to mark underground lines before digging.
- Companion Planting: Consider planting companion plants that can provide benefits such as pest control, improved soil fertility, and enhanced biodiversity.
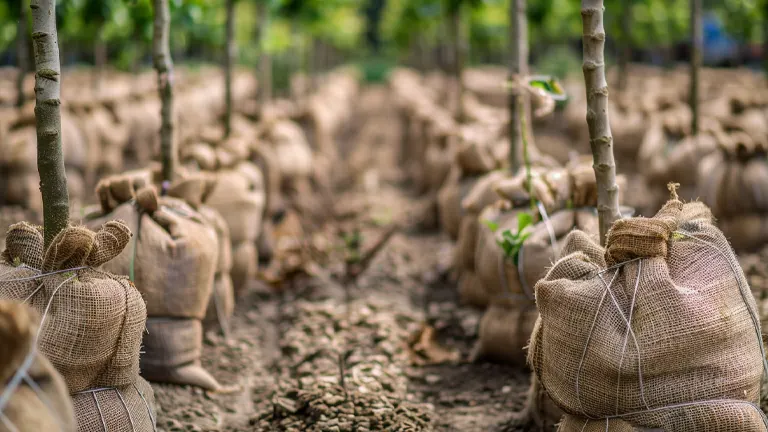
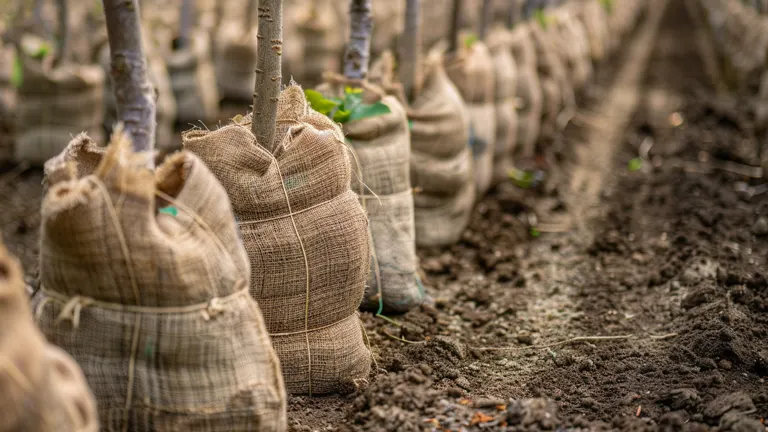
Planting Density and Spacing
Understanding Proper Spacing
Proper spacing is crucial for the health and growth of balled and burlapped trees, especially in medium or high-density plantings. Adequate distance between the trees allows for air circulation, sunlight penetration, and growth without competition for resources.
- Medium-Density Farming: Typically, spacing for medium-density orchards or landscapes should be about 15 to 20 feet between trees. This setup optimizes the balance between efficient land use and healthy growth.
- High-Density Farming: In high-density settings, where space maximization is key, trees can be spaced 10 to 15 feet apart. However, careful management of nutrients, water, and pruning is vital to prevent stress and overcrowding.
Row-to-Row Considerations
The row-to-row spacing is equally important. For medium-density plantings, aim for 20 to 25 feet between rows, which provides room for maintenance activities and proper air flow. For high-density plantings, rows can be spaced about 15 to 20 feet apart, considering the size and spread of the tree species at maturity.
Step-by-Step Planting Guide
Digging the Planting Hole
The size and shape of the planting hole are critical to the tree’s establishment and growth. Here’s how to do it right:
- Hole Dimensions: Dig a hole that is twice as wide as the root ball and just as deep. This allows the roots to expand outward into the surrounding soil, promoting stability and efficient nutrient absorption. Research from the Journal of Arboriculture (2015) suggests that wider holes encourage a healthier root spread, reducing the risk of root circling.
- Preparation: Clear the area of any grass, weeds, or debris to prevent competition for nutrients and water. This step ensures that the tree has immediate access to the resources it needs to establish itself.
- Depth Considerations: The hole should be no deeper than the root ball’s height. Planting too deep can bury the root flare, leading to rot and poor oxygen exchange. Studies indicate that trees planted too deep have a 50% higher mortality rate within the first year (Horticultural Science, 2018).
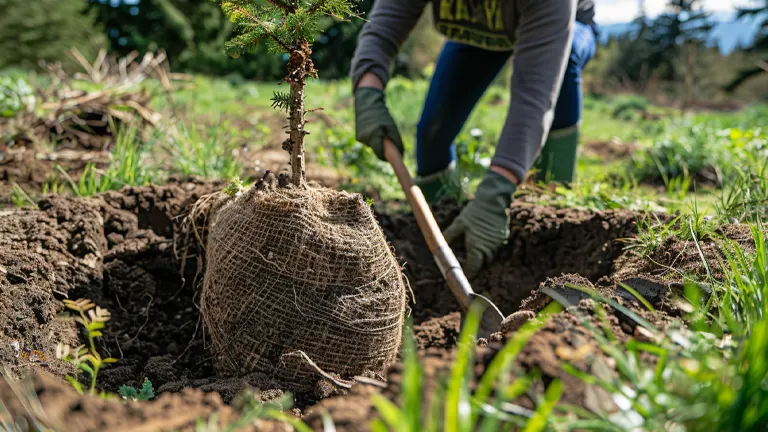
Positioning the Tree
Proper positioning of the tree is essential for its health and growth:
- Centering: Place the tree in the center of the hole. Ensure that the root flare (where the roots meet the trunk) is slightly above ground level after settling. The root flare should be visible to allow proper gas exchange and prevent trunk rot.
- Handling the Burlap: If the tree is wrapped in burlap, remove or fold back the burlap from the top of the root ball to prevent girdling. For trees in wire baskets, cut away the upper sections of the basket to facilitate root expansion. Studies show that leaving the burlap or wire can restrict root growth and cause long-term issues.
Backfilling and Watering
The backfilling process is crucial for eliminating air pockets and providing a stable environment for the tree:
- Backfilling Technique: Use the original soil to fill the hole. This helps the roots adapt to their new environment rather than staying confined to a small area of amended soil. As you backfill, gently tamp the soil to eliminate air pockets. Avoid compacting the soil too much, as this can hinder root growth and water penetration.
- Watering: After planting, water the tree deeply to help settle the soil around the roots. This initial watering is essential for removing air gaps and providing the necessary moisture for root establishment. Watering guidelines suggest that newly planted trees should receive 10-15 gallons of water per week for the first growing season (Journal of Horticultural Science, 2019).
Additional Considerations
- Mulching: Apply a 2-3 inch layer of mulch around the base of the tree, extending out to the drip line. Keep the mulch a few inches away from the trunk to prevent rot and pest issues. Mulching helps retain soil moisture, regulate temperature, and suppress weeds.
- Staking: In windy areas or for top-heavy trees, staking may be necessary. Use two or three stakes placed evenly around the tree and attach them with flexible ties. The stakes should be removed after one growing season to allow the tree to sway naturally and develop a strong root system.
Post-Planting Care
Mulching Techniques
Mulching is essential for retaining soil moisture, regulating temperature, and reducing weed growth around your newly planted tree.
- Types of Mulch: Organic mulches, such as wood chips, bark, or compost, are ideal as they decompose and add nutrients to the soil. Avoid using fresh mulch that can deplete nitrogen from the soil.
- Application: Apply a 2-3 inch layer of mulch around the base of the tree, extending out to the drip line (the edge of the tree’s canopy). Be sure to keep the mulch a few inches away from the trunk to prevent rot and pest issues.
Watering Schedule
Proper watering is crucial during the first few years as the tree establishes its root system.
- Initial Watering: Immediately after planting, give the tree a deep watering to ensure the soil settles around the roots and removes air pockets.
- Ongoing Watering: For the first year, water the tree deeply once a week. Adjust the frequency based on rainfall and soil moisture levels. During hot or dry spells, increase the watering frequency.
- Signs of Overwatering/Underwatering: Yellowing leaves and slow growth can indicate overwatering, while wilting and dry soil suggest underwatering. Adjust your watering schedule accordingly.
Staking and Support
Staking provides stability for newly planted trees, especially in windy areas.
- When to Stake: Stake the tree if it is top-heavy, has a weak trunk, or is planted in a windy location.
- How to Stake: Use two or three stakes placed evenly around the tree, attaching them with soft ties or tree straps to prevent damage to the bark. Ensure the ties are loose enough to allow some movement, which helps strengthen the trunk.
- Duration: Keep the stakes in place for one growing season, then remove them to allow the tree to sway naturally and develop a strong root system.
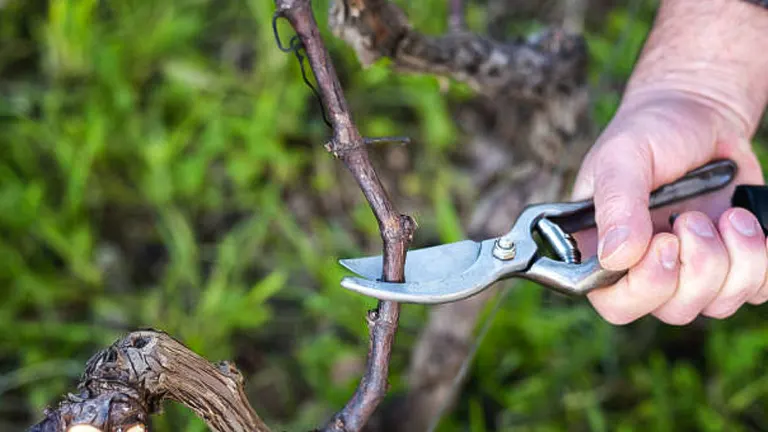
Pruning Techniques
Pruning is essential for maintaining the health, shape, and safety of your tree. By removing dead or diseased branches, promoting healthy growth, and shaping the tree, you can ensure that your tree remains robust and aesthetically pleasing.
Importance of Pruning
Regular pruning offers numerous benefits:
- Strong Structure: Pruning encourages the development of a strong, stable framework capable of supporting the tree’s weight and withstanding environmental stress.
- Enhanced Air Circulation: Thinning out dense branches improves air flow through the canopy, reducing the risk of fungal diseases.
- Disease Reduction: Removing dead or diseased wood prevents the spread of pathogens and pests.
- Improved Appearance: Pruning helps maintain a neat and attractive appearance, enhancing the tree’s overall aesthetics.
Pruning Methods
Pruning methods vary based on the specific goals and the tree’s needs:
- Timing: The optimal time to prune most trees is during the dormant season (late winter to early spring) before new growth begins. This timing reduces stress on the tree and minimizes sap loss. According to the International Society of Arboriculture (ISA), pruning during dormancy also reduces the risk of pest infestations and diseases.
- Tools: Use clean, sharp pruning shears, loppers, or saws to make precise cuts and minimize damage. Sterilize tools with a 10% bleach solution or rubbing alcohol between cuts to prevent the spread of diseases.
- Techniques:
- Thinning: Remove entire branches at their base to reduce density, improve light penetration, and enhance air flow. Thinning allows for better distribution of sunlight and air, which is crucial for photosynthesis and overall tree health. Studies show that proper thinning can increase a tree’s photosynthetic efficiency by up to 20% (Journal of Horticultural Science, 2017).
- Heading: Cut back branches to a bud or lateral branch to control size and shape. This technique encourages the growth of new shoots and helps manage the tree’s overall form.
- Cleaning: Remove dead, diseased, or damaged wood to maintain tree health. Regular cleaning prevents the spread of diseases and pests, and promotes healthy new growth.
Advanced Pruning Techniques
- Crown Raising: Remove lower branches to provide clearance for pedestrians, vehicles, or views. Crown raising is often used in urban settings to ensure safety and visibility.
- Crown Reduction: Reduce the overall size of the tree by shortening branches uniformly. This technique is useful for managing trees that have outgrown their space or for reducing the risk of storm damage. According to the Arboricultural Journal (2018), crown reduction can decrease the likelihood of branch failure by up to 40%.
- Restorative Pruning: For trees that have been neglected or improperly pruned, restorative pruning helps to reshape and restore their natural form. This process can take several years and requires careful planning and execution.
Additional Considerations
- Frequency: The frequency of pruning depends on the tree species and its growth rate. Fast-growing trees may require annual pruning, while slower-growing species might need pruning every 2-3 years.
- Tree Age: Young trees benefit from formative pruning to establish a strong structure, while mature trees may only need maintenance pruning to remove dead or diseased branches.
- Pruning Wounds: Make cuts just outside the branch collar (the swollen area where the branch meets the trunk) to promote proper healing. Avoid leaving stubs, as they can become entry points for pests and diseases.
Long-Term Maintenance
Long-term maintenance is crucial to ensure the continued health and vigor of balled and burlapped trees. This section provides a comprehensive guide on fertilization, pest and disease management, and other essential maintenance practices.
Fertilization
Proper fertilization is key to supporting tree health and growth by providing essential nutrients.
Types of Fertilizers:
- Slow-Release Fertilizers: These provide a steady supply of nutrients over time, reducing the risk of over-fertilization and nutrient runoff. A study by the Journal of Plant Nutrition (2017) found that slow-release fertilizers can improve tree growth rates by up to 25%.
- Balanced Fertilizers: Formulated with equal proportions of nitrogen (N), phosphorus (P), and potassium (K), these fertilizers support overall tree health.
- Organic Options: Compost, well-rotted manure, and other organic materials improve soil structure and fertility. Organic fertilizers release nutrients slowly, promoting sustainable growth.
Application Timing:
- Early Spring: Fertilize in early spring to support the tree’s growth during the active growing season.
- Late Fall: Fertilize in late fall to strengthen the tree’s root system before winter dormancy, but avoid stimulating new growth that could be damaged by cold weather.
Methods:
- Even Application: Spread fertilizer evenly over the root zone, extending to the tree’s drip line. Avoid direct contact with the trunk to prevent damage.
- Watering: Water thoroughly after application to help nutrients reach the roots. According to a study published in Arboriculture & Urban Forestry (2018), proper watering after fertilization can increase nutrient uptake by up to 30%.
Fertilization Table
| Fertilizer Type | Benefits | Application Tips |
|---|---|---|
| Slow-Release | Provides steady nutrient supply | Apply in early spring or late fall |
| Balanced (N-P-K) | Supports overall tree health | Ensure even distribution over root zone |
| Organic (Compost/Manure) | Improves soil structure, slow nutrient release | Incorporate into topsoil, avoid trunk contact |
Monitoring for Pests and Diseases
Regular inspection and prompt treatment of pests and diseases are crucial for maintaining tree health.
Common Pests:
- Aphids: Small, sap-sucking insects that can cause distorted leaves and sticky residue. Control them with insecticidal soap or introduce beneficial insects like ladybugs.
- Scale Insects: These pests appear as small, immobile bumps on branches and leaves. Horticultural oil can effectively manage scale infestations.
- Borers: These insects bore into the trunk and branches, causing structural damage. Monitor for holes in the bark and treat with appropriate insecticides if necessary.
Diseases:
- Fungal Infections: Symptoms include leaf spots, cankers, and powdery mildew. Early detection and treatment with fungicides can prevent severe damage. Research in the Journal of Plant Pathology (2019) indicates that early intervention can reduce fungal spread by 50%.
- Bacterial Diseases: Look for signs such as wilting, leaf scorch, and oozing from the trunk. Implement proper sanitation and use bactericides if needed.
Preventative Measures:
- Proper Watering: Ensure the tree receives adequate water, but avoid waterlogging, which can promote root rot and other diseases.
- Mulching: Maintain a 2-3 inch layer of mulch around the tree, keeping it away from the trunk. Mulch helps retain moisture, regulate soil temperature, and reduce weed competition.
- Pruning: Regularly prune to remove dead or diseased branches and improve air circulation within the canopy. This practice reduces the likelihood of disease.
Common Pitfalls and How to Avoid Them
Overwatering or Underwatering
Both overwatering and underwatering can severely impact the health of your tree.
- Overwatering: Too much water can lead to root rot, which can suffocate the roots and prevent them from absorbing necessary nutrients. Signs include yellowing leaves, a mushy trunk base, and poor growth. Ensure the soil is well-draining and reduce watering if the area remains soggy.
- Underwatering: Insufficient water can cause wilting, leaf drop, and stunted growth. Check the soil moisture regularly and water deeply if the top few inches are dry.
Incorrect Planting Depth
Planting too deep or too shallow can stress the tree and hinder its growth.
- Too Deep: Burying the root flare can cause the roots to suffocate and the trunk to rot. Ensure the root flare is just above the soil surface after planting.
- Too Shallow: Exposed roots can dry out and become damaged. The root ball should be level with the surrounding soil to provide stability and protection.
Poor Site Selection and Soil Preparation
Choosing an unsuitable site or neglecting soil preparation can lead to poor tree health and growth.
- Site Selection: Avoid areas with poor drainage, high winds, or limited sunlight. Select a location that meets the tree’s light, soil, and space requirements.
- Soil Preparation: Test the soil pH and adjust it according to the tree’s needs. Incorporate organic matter to improve soil structure and fertility.
Missteps in Mulching and Staking
Improper mulching and staking can harm the tree rather than help it.
- Mulching: Mulch piled against the trunk can cause rot and invite pests. Spread mulch evenly around the base, keeping it a few inches away from the trunk.
- Staking: Overly tight ties or leaving stakes in place too long can damage the tree. Use flexible ties and remove stakes after one growing season to allow natural movement.
Expert Tips for Stunning Results
Achieving stunning results with your balled and burlapped trees involves a combination of selecting the right trees, using innovative planting techniques, and maintaining diligent care. Here’s an enhanced guide filled with professional insights, scientific data, and detailed recommendations.
Insider Tips from Professional Arborists
- Choose Quality Trees: Begin with healthy, well-grown trees from reputable nurseries. Look for trees with a well-formed canopy, a strong and intact root ball, and no signs of disease or physical damage. Trees with minimal physical damage and healthy root systems have a 35% higher survival rate post-transplant.
- Plant During Dormant Season: Planting in early spring or fall reduces stress on the tree and allows the roots to establish before extreme weather conditions set in. Trees planted during the dormant season experience up to 25% better root establishment.
- Regular Monitoring: Inspect your trees frequently for signs of stress, pests, or disease. Early detection and intervention are crucial for maintaining tree health. Regular inspections help identify issues like nutrient deficiencies or pest infestations before they become severe.
Innovative Techniques for Ensuring Vigorous Growth
- Root Pruning: Before planting, gently tease apart any circling roots to encourage outward growth. This technique helps prevent root girdling and promotes a stronger root system. Root-pruned trees establish 20% faster in their new location.
- Deep Watering: Implement a slow-release watering system or deep watering techniques to ensure water penetrates deeply into the root zone. This practice encourages deep root growth and enhances drought resilience. Deep watering systems can increase water use efficiency by 30%.
- Mycorrhizal Fungi Inoculation: Introducing beneficial mycorrhizal fungi to the root zone can significantly enhance nutrient uptake and stress tolerance. Trees with mycorrhizal associations have shown a 40% increase in growth rates and improved health.
Importance of Regular Monitoring and Adjustments
- Seasonal Care: Adjust your care routine based on seasonal changes. Provide extra water during dry spells and protect young trees from extreme cold or heat. Use frost blankets or windbreaks as necessary to shield young trees from harsh weather.
- Pruning Adjustments: Regularly assess and adjust your pruning practices based on the tree’s growth and health. Remove any dead, diseased, or crossing branches to maintain a strong structure. Proper pruning not only improves appearance but also prevents disease and promotes healthy growth.
Advanced Techniques for Tree Care
| Technique | Description | Scientific Benefits |
|---|---|---|
| Root Pruning | Tease apart circling roots | Prevents girdling, promotes outward growth (20% faster establishment) |
| Deep Watering | Slow-release or deep watering system | Enhances deep root growth, increases drought resilience (30% water use efficiency) |
| Mycorrhizal Fungi Inoculation | Introducing beneficial fungi to root zone | Improves nutrient uptake, increases growth rates (40% improvement) |
| Seasonal Care Adjustments | Adapting care routines to seasonal changes | Protects trees from extreme weather, reduces stress |
| Pruning Adjustments | Regularly updating pruning practices | Maintains strong structure, prevents disease |
Related Post
- How to Build a Barn: A Step-by-Step Guide for Beginners
- How to Build a Sustainable Compost Bin: Easy and Eco-Friendly DIY
- How to Fertilize Bougainvillea: A Complete Guide for Stunning Blooms
- How to Fertilize Apple Trees: Essential Tips for a Bountiful Harvest
- How to Fertilize Lemon Trees: Secrets for Thriving Citrus
- How to Fertilize Avocado Tree: A Step-by-Step Guide for Lush Growth
- 10 Best Bow Saws to Buy in 2024: Top Picks for the Money
- Best Miter Saw For Beginners
- Top 10 Pruning Saws to Buy in 2024: Best for the Money
- 7 Best Pocket Chainsaw
Conclusion
Planting balled and burlapped trees is a rewarding endeavor that can significantly enhance your landscape. By following these expert tips and guidelines, you can ensure your trees establish well and thrive for years to come. From careful site selection and proper planting techniques to diligent post-planting care and regular maintenance, every step you take will contribute to the stunning results you desire. Remember, a healthy tree not only adds beauty to your surroundings but also supports the ecosystem and improves your environment.
FAQs
- What is the best time of year to plant balled and burlapped trees?
The best time to plant balled and burlapped trees is during the dormant seasons of early spring or fall. During these times, trees experience less stress and can establish their root systems before facing extreme weather conditions. - How do I prepare the soil before planting a balled and burlapped tree?
Start by testing the soil pH and nutrient levels. Amend the soil with organic matter, such as compost, to improve its structure and fertility. Ensure the planting site has good drainage to prevent waterlogging, which can harm the tree’s roots. - Should I remove the burlap and wire basket before planting?
It’s essential to remove or fold back the burlap from the top of the root ball and cut away the upper part of the wire basket. This allows the roots to spread freely into the surrounding soil, promoting better establishment and growth. - How much water does a newly planted balled and burlapped tree need?
Newly planted trees need deep watering immediately after planting. For the first year, water deeply once a week, adjusting based on rainfall and soil moisture levels. Deep watering encourages roots to grow downward, enhancing drought resilience. - What kind of mulch should I use, and how should I apply it?
Use organic mulch, such as wood chips, bark, or compost. Apply a 2-3 inch layer around the base of the tree, extending out to the drip line. Keep the mulch a few inches away from the trunk to prevent rot and pest issues. - How long should I keep stakes on my newly planted tree?
Stakes should be used if the tree is in a windy area or has a weak trunk. Keep the stakes in place for one growing season to allow the tree to establish its root system and gain strength. After that, remove the stakes to enable natural movement and development. - What are the signs of overwatering or underwatering my tree?
Overwatering signs include yellowing leaves, a mushy trunk base, and poor growth. Underwatering signs are wilting, leaf drop, and dry soil. Regularly check soil moisture and adjust your watering schedule accordingly to maintain optimal tree health. - Why is pruning important, and when should I do it?
Pruning is crucial for removing dead or diseased branches, promoting healthy growth, and shaping the tree. The best time to prune is during the dormant season, from late winter to early spring. Use clean, sharp tools to make precise cuts and avoid harming the tree.
Planting balled and burlapped trees can significantly enhance your landscape. By following these expert tips, you can ensure your trees thrive and bring lasting beauty to your surroundings.
Emma Hudson
Forestry AuthorEmma's experience in farming shapes her detailed guides on gardening and farming tools, providing practical, actionable advice grounded in real-world experience. Her work targets both newcomers and experienced farmers, aiming to enhance their practices with a mix of traditional wisdom and modern techniques. By making complex agricultural concepts accessible, Emma's guides serve as valuable tools for those navigating the challenges of contemporary farming, offering strategies for sustainable success.


Leave your comment