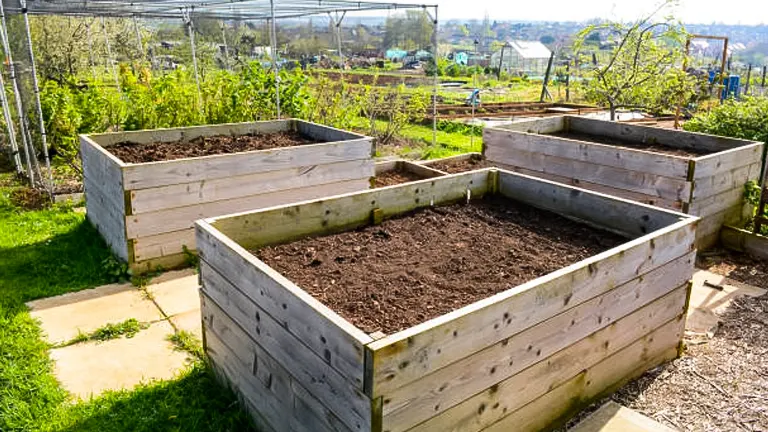
How to Build a Planter Box
- January 8, 2024
- 0 comment
Welcome to the world of DIY gardening! In this guide, we’ll take you on a step-by-step journey to create your planter box a simple and rewarding project that adds a touch of green to your outdoor space. Whether you’re a seasoned DIY enthusiast or a first-time crafter, building a planter box is a delightful way to express creativity and enhance your surroundings. Use this guide to find out the basics of building a planter box that fits your space. Let’s dive in and bring your garden dreams to life!
List of Guides on How to Build a Planter Box
1. Prepare Your Workspace
2. Choose Your Wood
3. Design and Cut
4. Build and Secure Your Planter
5. Smooth Surfaces and Enhance Drainage
6. Add Color or Finish to Your Planter
7. Handy Planter Tips
Step 1: Prepare Your Workspace
Tools and Materials:
- Saw
- Power drill
- Sander
- Paintbrush
- Non-rusting exterior screws
- Fine mesh screen or landscape fabric
- Treated or untreated wood
- Safety goggles and gloves
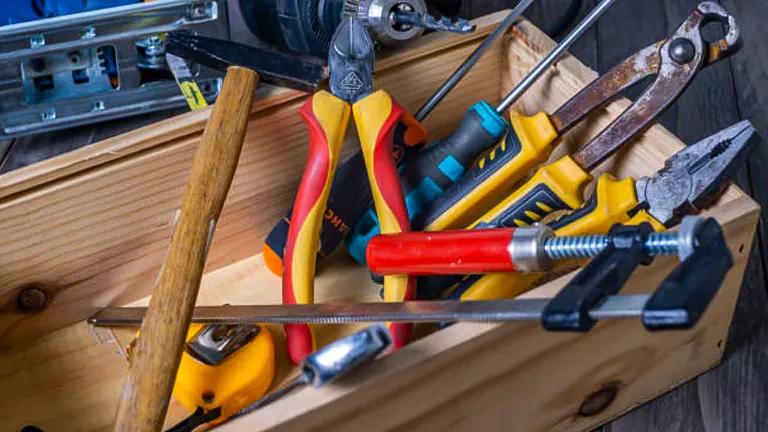
Before you dive into building your planter box, it’s crucial to gather the right tools and materials. A saw, power drill, and sander are essential for shaping the wood, while non-rusting exterior screws ensure durability. Employing fine mesh screens or landscape fabric aids in proper drainage, protecting your plants from waterlogged soil. Whether you choose treated or untreated wood depends on your preferences and the specific environmental conditions of your outdoor space. Prioritize safety with goggles and gloves throughout the project.
Guides:
1. Determine Planter Size:
- Assess the space where the planter will reside.
- Determine the ideal size, keeping in mind the available area for plants to thrive.
- Create a drawing or cut list to visualize and plan the construction process effectively.
2. Review Cutlist and Select Materials:
- Scrutinize the cutlist, ensuring it aligns with your design and size preferences.
- Select materials and supplies based on the reviewed cutlist.
3. Organize Tools and Materials:
- Arrange all necessary tools and materials in proximity to your workspace.
- Ensure easy access to facilitate a seamless building process.
- This organized setup streamlines the construction, making the process more efficient.
4. Choose Quality Screws:
- Choose for non-rusting screws explicitly rated for exterior use.
- These screws withstand outdoor conditions, preventing rust stains and streaks on your planter over time.
5. Integrate Mesh or Fabric for Drainage:
- Line the bottom of the planter with a fine mesh screen or landscape fabric.
- This aids in drainage, preventing waterlogging, and ensuring a healthier environment for your plants.
6. Decide on Wood Type:
- Choose between treated or untreated wood based on your preferences and the specific environmental conditions of your outdoor space.
- Consider the longevity, appearance, and maintenance requirements when making this decision.
Additional Tips:
- Arrange your tools and materials in a well-organized manner for easy access and a streamlined workflow.
- When selecting screws, go for those explicitly rated for exterior use to enhance durability and prevent potential rust issues.
Step 2: Choose Your Wood
Materials:
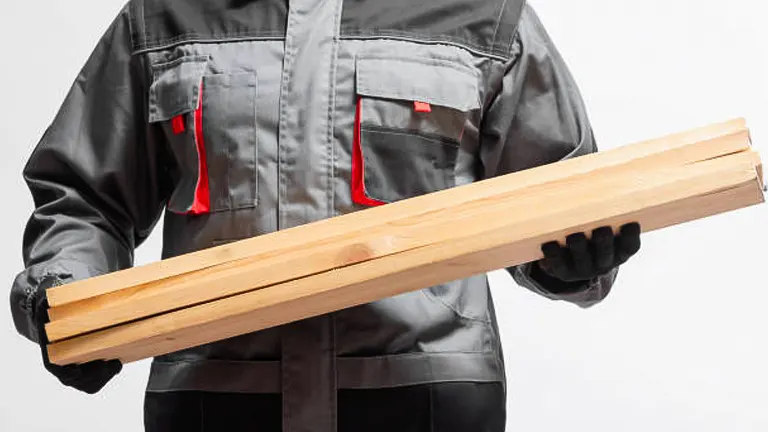
Selecting the right lumber is a critical step in ensuring the longevity of your planter box. Pressure-treated or composite boards are budget-friendly and durable, but they may not be suitable for growing food. Cedar, white oak, and redwood naturally resist insects and weathering, making them excellent choices for a longer-lasting planter. Consider the specific needs of your project and your budget when deciding on the type of lumber to use.
Guides:
1. Pressure-treated or Composite Boards:
- Chemically treated for enhanced resistance to termites, mold, and other damage.
- Ideal for projects with budget constraints, providing a cost-effective yet durable solution for non-edible planters.
Note: Not recommended for planters intended to grow food due to the chemicals used in the treatment process.
2. Cedar, White Oak, and Redwood:
- Natural resistance to termites and insects, withstanding outdoor elements effectively.
- Optimal for planters where aesthetics and long-term durability are prioritized, suitable for a variety of plant types.
Note: May require a higher upfront investment, balancing longevity and quality.
3. For Edible Planters:
- Avoid pressure-treated or composite boards due to the chemicals used in the treatment process.
- Prioritize the use of naturally resistant woods for edible planters, ensuring a safe and healthy environment for your plants.
Tips and Consideration:
- Project Specifics: Assess your project’s requirements, including budget constraints, aesthetic preferences, and the types of plants you plan to grow.
- Long-Term Vision: Consider the longevity and maintenance aspects, especially if the planter will be exposed to outdoor conditions.
- Environmental Impact: Reflect on the environmental impact of your choice, considering the sustainability of the selected wood.
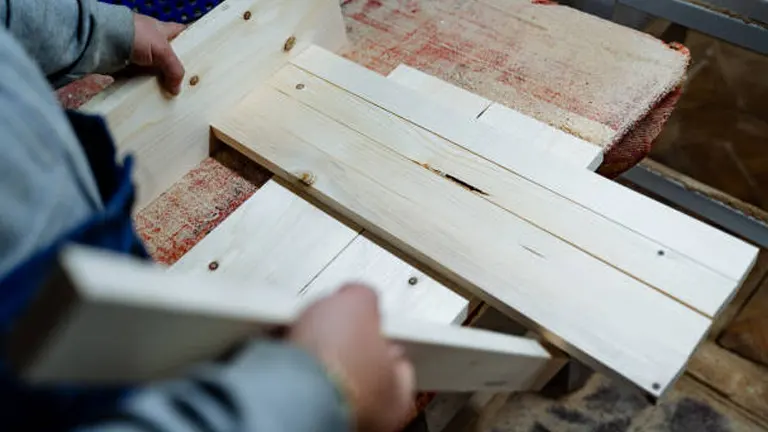
Step 3: Design and Cut
Materials:
- Wood boards (5 to 10 inches wide)
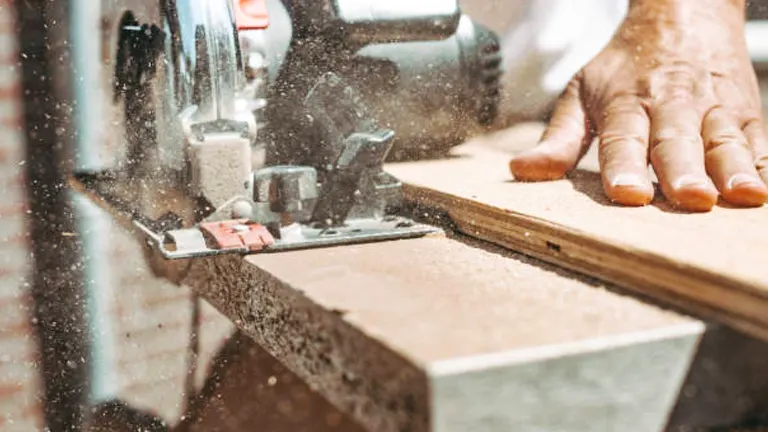
Designing and cutting your planter box is where your creative vision takes center stage. Precise planning and measurements are the keystones to achieving the perfect size and shape for your green haven. Before cutting into the wood, meticulously measure the available space and translate your ideas onto paper with a drawing or cut list. Choose wood boards ranging from 5 to 10 inches in width, ensuring ample depth for stable root growth and flourishing plants. To add an extra layer of stability, especially if your planter will grace a patio or other surfaces, consider incorporating a base into your design.
Guides:
1. Measure Space Effectively:
- Begin by measuring the available space where you intend to place the planter.
- Use these measurements to determine the length of the planter’s front, back, and two end pieces.
Note: Accurate measurements form the basis for a planter that fits seamlessly into its designated space.
2. Calculate Bottom Board Dimensions:
- For the bottom of the planter box, measure a board that matches the inner length and width of the finished planter.
- This board should fit snugly inside the planter, providing a stable foundation.
Note: Precision in measuring the bottom board ensures a secure and well-fitted base for your plants.
3. Choose for the Right Cutting Tool:
- Utilize a circular saw or hand saw for cutting all the boards to size.
- Choose the tool that aligns with your comfort and precision requirements.
Note: Consistent and accurate cuts contribute to the overall stability and visual appeal of the planter box.
Tips and Consideration:
- Get creative with the shape and size of your planter box by experimenting with different designs.
- If you’re placing the planter on a surface, adding a base provides stability and prevents damage.
Step 4: Build and Secure Your Planter
Materials:
- Screws
Assembling the planter box requires sturdy construction to support the weight of plants and moist soil. Drill pilot holes to prevent wood splitting and use screws to fasten the boards securely. Distribute drainage holes evenly on the bottom of the box to ensure proper water drainage. This step is crucial for the overall stability and functionality of your planter.
Guide:
1. Pilot Hole Precision:
- Mark and drill a pilot hole in the middle of the width of each end piece.
- Create an additional pilot hole on either side of the first hole, positioning them 3/4-inch from the end of the edge.
2. Strategic Board Alignment:
- Line up the boards so that those with pilot holes are on the outside corners.
- This strategic alignment sets the foundation for a stable and secure connection.
3. Screw with Precision:
- Fit a drill with a driving bit that matches the screw heads.
- Drive each screw through the adjoining boards, ensuring a strong bond.
- Line up the screws with the pilot holes made for added precision.
4. Secure the Bottom Board:
- Place the bottom board into the box, ensuring proper positioning.
- Screw the bottom to the planter box by drilling through the sides of the box, reinforcing the structure.
5. Strategic Drainage Holes:
- Turn the planter over to access the bottom.
- Drill at least five drainage holes, each no more than 3/4-inch wide.
- Space the holes evenly for effective water drainage.
Note: If constructing a very large planter, consider adding additional drainage holes for optimal moisture management.
Additional Tips:
- Test the stability of the planter box before proceeding to ensure a secure assembly.
- Use screws with caution, drilling pilot holes to prevent splitting and ensuring a strong bond.
Step 5: Smooth Surfaces and Enhance Drainage
Materials:
- Sandpaper
- Landscape fabric or screen
- Finish nails
Once the planter box is assembled, take the time to sand any rough edges to create a smooth, finished look. Sanding not only improves aesthetics but also helps prevent moisture from seeping into the wood. Adding a landscape fabric or screen to the interior protects the wood base and facilitates drainage, ensuring the longevity of your planter.
Guide:
1. Lining with Landscape Fabric or Screen:
- Cut a piece of landscape fabric or screen to match the dimensions of the bottom of the planter box.
- Use this material to line the interior of the box, creating a barrier that protects the wood base from moisture and potential damage.
- Tack the fabric or screen in place using small finish nails, ensuring a secure fit.
2. Adding Drainage Holes:
- Cut holes in the landscape fabric or screen precisely where they align with the drainage holes in the planter box.
- These holes serve a dual purpose – they allow excess water to drain efficiently, preventing waterlogged soil, and they maintain the integrity of the protective lining.
Additional Tips:
- Thoroughly sand the planter for an aesthetically pleasing and moisture-resistant finish.
- Securely attach the landscape fabric or screen to prevent shifting over time.
Step 6: Add Color or Finish to Your Planter
Materials:
- Penetrating oil
- Water-based acrylic finish
- Exterior paint sealer
- Varnish or polyurethane
- Paintbrush

Choosing the right finish is crucial for protecting your planter box from moisture, mildew, and UV damage. Each finish option has its unique advantages, whether it’s a natural look with penetrating oil, environmental friendliness with water-based acrylic, or long-lasting protection with an exterior paint sealer. Apply the chosen finish to the outside, inside, and bottom of the planter box.
Guides:
1. Penetrating Oil Finishes:
- Provides a natural look to the wood, ideal for those who appreciate a rustic appearance.
- Application is easy with a paintbrush, and these finishes effectively shed water.
- Suitable for maintaining the untreated, raw beauty of the wood.
2. Water-based Acrylic Finishes:
- Offers good protection and is considered environmentally friendly.
- Easy to apply and provides a clear, glossy finish.
- Ideal for those who prioritize eco-friendly options and desire a sleek appearance.
4. Exterior Paint Sealer:
- Highly recommended for long-lasting protection, especially against harsh weather conditions.
- Easy to apply, budget-friendly, and allows for frequent touch-ups.
- Ideal for those who want a colorful, painted finish with robust protection.
5. Varnishes and Polyurethanes:
- These finishes not only protect but also enhance the natural beauty of the wood.
- Form a hard, moisture-resistant seal, ensuring excellent durability.
- Multiple coats may be required for optimal performance and longevity.
Applying the Finish:
- Once you’ve chosen the appropriate finish, apply it to the outside, inside, and bottom of your DIY planter box.
- Follow the manufacturer’s instructions regarding the number of coats needed for optimal protection.
- Ensure thorough coverage to shield the wood from moisture and environmental elements.
Note: Remember, no coating lasts forever. Regularly inspect your planter annually, and refresh the finish as necessary. This simple maintenance routine preserves the beauty and functionality of your planter over the years.
Step 7: Handy Planter Tips
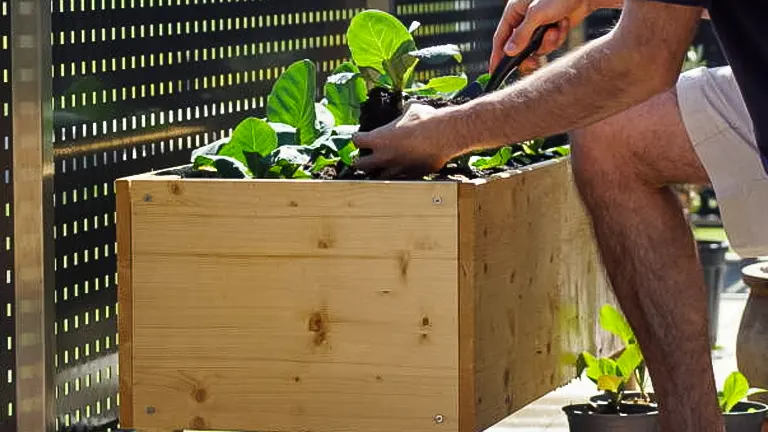
After completing the construction and finishing of your planter box, several tips can maximize its functionality. Placing the planter in an area with the right amount of sunlight ensures optimal plant growth. Lining the bottom with river rock or pebbles enhances drainage, preventing waterlogged roots. Following these tips guarantees a successful transition from construction to plant cultivation.
Tips:
1. Adjust the Planter’s Angle for Sunlight Optimization:
- Consider the sunlight requirements of your plants.
- Position the planter to receive the correct amount of sunlight, ensuring optimal growth conditions.
- Regularly assess the sunlight exposure and adjust the planter’s angle accordingly.
2. Enhance Drainage with River Rock or Pebbles:
- Line the bottom of your planter with river rocks or pebbles.
- This simple addition facilitates excess water drainage, preventing waterlogged roots and promoting a healthier environment for your plants.
- The layer of rock or pebbles acts as a natural drainage solution, maintaining an ideal moisture balance in the soil.
4. Use High-Quality Potting Soil:
- Fill the planter box about 3/4 full with high-quality potting soil.
- Choose a soil mix that suits the specific needs of your plants, providing essential nutrients and aeration.
- The right soil composition sets the foundation for robust plant growth and a thriving ecosystem within your planter.
5. Monitor and Adjust Drainage:
- Regularly assess the drainage performance of your planter.
- If you observe any issues with water retention or drainage, consider drilling additional holes along the sides of the planter.
- Adequate drainage is crucial to prevent waterlogging and maintain a healthy root system.
6. Consider Drip Irrigation for Convenient Watering:
- Simplify the watering process by installing a drip irrigation system.
- Drip irrigation ensures consistent and controlled watering, preventing overhydration or drought stress.
- This convenient system saves time and effort while providing optimal hydration for your plants.
Building a planter box is a rewarding DIY project that adds vibrancy to your outdoor space. Adjust the size and quantity according to your preferences and available space.
Factors to Consider When Building a Planter Box
- Location and Sun Exposure: Before constructing your planter box, assess the intended location. Different plants thrive in varying sunlight conditions. Consider whether the area receives full sun, partial shade, or is in constant shade. This information will guide your choice of plants and the design of your planter.
- Material Selection: The material you choose for your planter box is crucial for its longevity and appearance. Pressure-treated or composite boards are durable and budget-friendly, while cedar, redwood, or white oak offer natural resistance to insects and weathering. Consider both functionality and aesthetics when making your selection.
- Drainage Needs: Proper drainage is essential for plant health. When designing your planter, ensure it includes sufficient drainage holes to prevent waterlogging. This factor is particularly critical if you plan to grow plants that are sensitive to excessive moisture.
- Size and Shape: Tailor the size and shape of your planter to fit the available space and complement the surrounding environment. Consider the root depth requirements of your chosen plants and aim for a size that allows for healthy growth while harmonizing with the overall landscape.
- Environmental Impact: Be mindful of the environmental impact of your planter box. If you’re growing edible plants, avoid using pressure-treated wood, as it contains chemicals that may leach into the soil. Choose eco-friendly finishes and materials whenever possible to minimize your ecological footprint.
- Maintenance Considerations: Evaluate how much time and effort you’re willing to invest in maintenance. Different finishes and materials require varying levels of care. For example, natural wood finishes may need more frequent upkeep than exterior paint sealers. Factor in your maintenance preferences when deciding on the final touches for your planter.
- Plant Selection: The type of plants you intend to grow should influence the design and construction of your planter box. Consider the space each plant requires, their sunlight and water needs, and any potential growth constraints. This ensures your planter provides an optimal environment for your chosen greenery.
- Climate Considerations: Take into account the local climate conditions when building your planter. Certain materials and finishes may respond differently to extreme temperatures, humidity, or precipitation. Choose materials and finishes that can withstand the specific climatic challenges in your area.
- Budget Constraints: Set a budget for your planter box project, considering both material costs and any additional tools or accessories required. Balancing your vision with practicality ensures that you create a planter that aligns with your financial resources.
- Aesthetic Appeal: Your planter box is not just a functional piece but also a visual focal point. Consider the aesthetic appeal of your design, including the finish, color, and overall style. Harmonize the planter with the existing aesthetics of your outdoor space for a cohesive and pleasing look.
By carefully considering these factors, you can tailor your planter box to meet the specific needs of your space, the plants you want to grow, and your personal preferences, resulting in a successful and harmonious addition to your outdoor environment.
Safety Tips When Building a Planter Box
- Wear Appropriate Protective Gear: Prioritize safety by wearing safety goggles to protect your eyes from debris and gloves to shield your hands from splinters and sharp edges. This simple precaution significantly reduces the risk of injuries.
- Choose the Right Tools: Select tools that are suitable for the task at hand. Ensure they are in good working condition, follow manufacturer guidelines, and use the appropriate safety features. This minimizes the risk of accidents during construction.
- Organize Your Workspace: Maintain a clutter-free workspace to avoid tripping hazards. Organize tools and materials to enhance efficiency and reduce the likelihood of accidents caused by disarray.
- Secure Workpieces Properly: When cutting or assembling, securely clamp or hold workpieces to prevent unexpected movements. This stability is crucial for accurate cuts and reduces the risk of injuries.
- Follow Proper Cutting Techniques: Adhere to proper cutting techniques when using saws or power drills. Keep hands away from the cutting path, maintain a stable stance, and use safety guards. This ensures a safer working environment.
- Use Non-Rusting Screws: Choose for non-rusting screws specifically rated for exterior use. This choice enhances the stability of the planter box and prevents rust-related issues, ensuring long-lasting durability.
- Be Mindful of Electrical Safety: If power tools are involved, be cautious of electrical outlets and cords. Keep cords organized and out of the way to prevent tripping or accidental disconnection, ensuring a safer working environment.
- Work in a Well-Ventilated Area: When using finishes or sealers, ensure proper ventilation in your workspace. This minimizes exposure to potentially harmful fumes, promoting a healthier working environment.
- Secure the Planter During Assembly: If the planter is elevated during assembly, ensure it is stable and securely positioned. This prevents accidental toppling and potential injuries during the construction process.
- Stay Informed About Wood Types: If working with treated wood, be aware of the specific chemicals used. Avoid direct skin contact and consider wearing a mask when sanding treated wood to minimize inhalation of potentially harmful particles.
- Take Breaks and Stay Hydrated: Building a planter box is physically demanding. Take regular breaks to prevent fatigue and dehydration. Staying alert and well-hydrated contributes to a safer work environment.
- Keep a First Aid Kit Handy: Accidents can happen, so have a basic first aid kit nearby. Familiarize yourself with its contents and know how to use them in case of minor injuries, ensuring quick and effective response.
Implementing these safety tips during the planter box construction process not only protects against potential hazards but also contributes to a more secure and enjoyable DIY experience.
Tutorial on How to Build A Planter Box
Conclusion
Building a planter box is a rewarding DIY venture that adds a touch of greenery to your outdoor space. From preparing your tools to selecting the right wood and crafting a unique design, each step contributes to your personalized green haven. With safety in mind and a creative touch, you’ve created more than just a planter box – you’ve brought nature closer to home. As you place your favorite plants inside, take pride in the fact that your hands-on effort has added a vibrant and functional element to your outdoor area. Your DIY planter box is not just a project; it’s a simple and fulfilling way to enhance your surroundings.
FAQs
- How do I choose the right wood for my planter box?
Consider the specific needs of your project and budget. Pressure-treated or composite boards are durable, while cedar, redwood, and white oak naturally resist insects and weathering. Choose based on aesthetics, longevity, and suitability for your intended plants. - Can I build a planter box without a base?
Yes, a base is optional, especially if you plan to place the planter directly on soil or grass. However, if it will sit on a patio or another surface, adding a base provides stability and prevents potential damage. - How deep should a planter box be for proper plant growth?
Aim for a depth of 5 to 10 inches using wood boards. This ensures a stable root network for your plants. Tailor the depth based on the specific requirements of the plants you intend to grow. - What safety precautions should I take when building a planter box?
Prioritize safety by wearing safety goggles and gloves. Use the right tools for the job, organize your workspace to avoid clutter, and secure workpieces properly. Follow proper cutting techniques and be mindful of electrical safety when using power tools. - Can I paint or stain my planter box, and what’s the best finish to use?
Yes, you can paint or stain your planter box for a personalized touch. Choose a finish based on your preferences and environmental exposure. Exterior paint sealer is recommended for long-lasting protection, while penetrating oil finishes give a natural look. - How do I ensure proper drainage in my planter box?
Drill at least five drainage holes in the bottom of the box, spaced evenly. Use a fine mesh screen or landscape fabric to line the bottom to prevent soil from escaping. This ensures adequate drainage and a healthier environment for your plants. - What are some creative design ideas for a planter box?
Experiment with different shapes and sizes. Consider tiered designs, asymmetrical arrangements, or unique geometries. Let your planter box reflect your personal style and complement the aesthetic of your outdoor space. - Can I move my planter box after assembling it?
Yes, you can move your planter box after assembling it. If mobility is a concern, consider using lightweight materials or incorporating built-in casters. Ensure the stability of the planter to prevent any accidents during relocation.
With your new planter box complete, you’re ready to fill it with soil and start planting. Enjoy crafting your green space!

Benjamin Brooks
Forestry AuthorGreetings! I'm Benjamin Brooks, and my journey over the past 15 years has revolved around the fascinating realms of content creation, expertise in snow clearing, and the intricate world of lumberjacking and landscaping. What began as a simple curiosity about the natural world and heavy machinery has evolved into a passionate profession where my love for crafting words intertwines seamlessly with my lumberjacking and garden skills.


Leave your comment