How to Fertilize Marigolds: Secrets to Explosive Blooms and Growth
- April 29, 2024
- 0 comment
Discover the secrets to fertilize marigolds for explosive blooms and growth. Boost your garden’s beauty with these expert tips. Are you dreaming of a garden filled with vibrant and lush marigolds? Mastering the art of fertilization is key to achieving those explosive blooms and robust growth that make marigolds a standout feature in any landscape. In this guide, we will unveil proven strategies and expert tips to ensure your marigolds are not only thriving but truly flourishing.
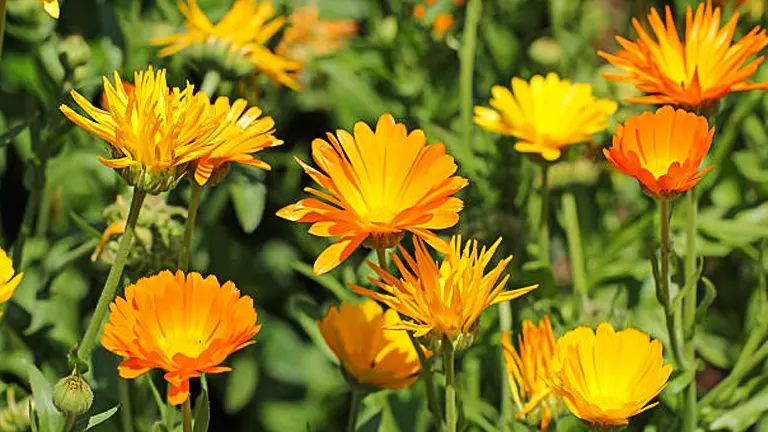
Whether you’re a seasoned gardener or a beginner, these insights will help you nurture your marigolds to their fullest potential. Let’s dive into the world of optimal marigold care and make your garden the envy of the neighborhood.
Table of Contents
- Understanding Marigolds
- The Basics of Fertilizing Marigolds
- Choosing the Right Fertilizer
- Step-by-Step Guide to Fertilizing Marigolds
- Navigating Fertilization Mistakes with Marigolds
- Advanced Tips for Maximizing Marigold Blooms
- Troubleshooting Common Issues
- Seasonal Care for Marigolds
- Making the Most of Your Marigolds
- Conclusion
- FAQs
Understanding Marigolds

Marigolds, scientifically known as Tagetes, are celebrated not only for their vibrant beauty but also for their versatile gardening applications. They come in several varieties, each with distinct characteristics that influence their cultivation and fertilization needs. Here’s a more detailed look into the common types of marigolds and some specialized insights for gardening enthusiasts:
- French Marigolds (Tagetes patula)
- Smaller and bushier, these marigolds feature detailed, double-flowered blooms that are often bi-colored.
- Height: Typically grows between 6 to 12 inches.
- Flower Diameter: Approximately 2 inches.
- Preferred Soil pH: 6.0 to 7.5.
- African Marigolds (Tagetes erecta)
- Known for their large, globe-shaped flowers, these marigolds can dominate a garden space with their size and vivid colors.
- Height: Can grow up to 18 to 36 inches.
- Flower Diameter: Ranges from 3 to 5 inches, making them the largest blooms among the marigold varieties.
- Preferred Soil pH: 6.0 to 7.5.
- Signet Marigolds (Tagetes tenuifolia)
- These marigolds are distinguished by their delicate, fern-like foliage and smaller, single flowers that are often edible, offering a citrusy tinge to salads.
- Height: Generally between 8 to 12 inches.
- Flower Diameter: Around 1 inch.
- Preferred Soil pH: 5.5 to 6.5, slightly more acidic than other types.
Scientific Analysis and Nutritional Requirements
To facilitate optimal growth and blooming, here’s a detailed table that outlines the nutritional needs based on scientific analysis tailored to each marigold type:
| Marigold Type | Nitrogen (N) | Phosphorus (P) | Potassium (K) | Remarks on Fertilization Strategy |
|---|---|---|---|---|
| French Marigolds | Medium | High | Medium | Requires frequent light feedings due to dense floral display. |
| African Marigolds | High | High | High | Benefits from a robust feeding schedule to support large blooms. |
| Signet Marigolds | Low | Medium | Low | Light feeding suffices, focusing on enhancing flavor of edible parts. |
Additional Insights
- Flowering Period: French and African marigolds generally bloom from early summer until the first frost, while Signet marigolds can start a bit earlier in the spring.
- Pest Resistance: Marigolds are known for their ability to repel garden pests naturally, including nematodes and aphids, making them excellent companion plants.
- Cultivation Tips: Marigolds thrive in full sun and well-draining soil. They are tolerant of many soil types but perform best with moderate moisture and good aeration.
The Basics of Fertilizing Marigolds

Marigolds are not only a popular choice for their vibrant colors but also for their relatively easy maintenance, particularly when it comes to soil and nutrient management. To ensure your marigolds flourish, a foundational understanding of their basic soil and nutritional needs is crucial.
Soil Requirements and Preparation
Marigolds require well-draining soil that is rich in organic matter to thrive. Here are some detailed aspects of soil preparation for optimal growth:
- Soil pH: The ideal pH for marigolds ranges from 6.0 to 7.5. This slightly acidic to neutral range helps in the optimal uptake of nutrients.
- Testing and Adjusting Soil pH: It is advisable to test the soil pH annually, especially before planting season, using a home test kit or by seeking professional lab testing. If the soil is too acidic, applying garden lime can help raise the pH, while sulfur compounds are useful for lowering pH if the soil is too alkaline.
- Improving Soil Structure: Incorporating organic matter such as compost, peat moss, or aged manure enhances the soil’s structure, aeration, and water retention capabilities, providing a nurturing environment for roots.
Detailed Nutritional Needs
Marigolds have specific nutrient requirements that are vital for their growth and the vibrancy of their blooms. Here is a breakdown of their primary nutritional needs:
- Nitrogen (N): Essential for the production of lush, green foliage. Nitrogen supports vigorous vegetative growth.
- Phosphorus (P): Crucial for robust root development and for producing bright, abundant flowers.
- Potassium (K): Increases overall plant health by enhancing disease resistance and supporting the functions of other nutrients.
Fertilization Strategies and Recommendations
To meet these nutritional needs, marigolds benefit from a balanced approach to fertilization:
| Nutrient | Function | Recommended Concentration |
|---|---|---|
| Nitrogen | Foliage growth | Medium-High |
| Phosphorus | Root and bloom development | Medium-High |
| Potassium | Disease resistance and plant health | Medium |
- Type of Fertilizer: A granular fertilizer with a balanced NPK ratio such as 10-10-10 or 20-20-20 is generally recommended. These numbers represent the percentage of nitrogen, phosphorus, and potassium, respectively.
- Application Timing: Fertilizer should be applied at the time of planting to provide initial nutrients and then every 4 to 6 weeks during the growing season to maintain nutrient availability. Avoid fertilizing late in the growing season to prevent new growth that could be damaged by early frosts.
Scientific Considerations
For those interested in a more scientific approach:
- Nutrient Uptake Efficiency: Marigolds absorb nutrients most efficiently in slightly acidic to neutral soil conditions due to optimal soil microbial activity that helps in nutrient solubilization.
- Leaf Tissue Analysis: Advanced gardeners might consider periodic leaf tissue analysis to monitor nutrient uptake and adjust fertilization practices accordingly. This can be particularly useful for ensuring that the marigolds are not accumulating excessive nitrogen, which can lead to lush foliage at the expense of flower production.
Choosing the Right Fertilizer
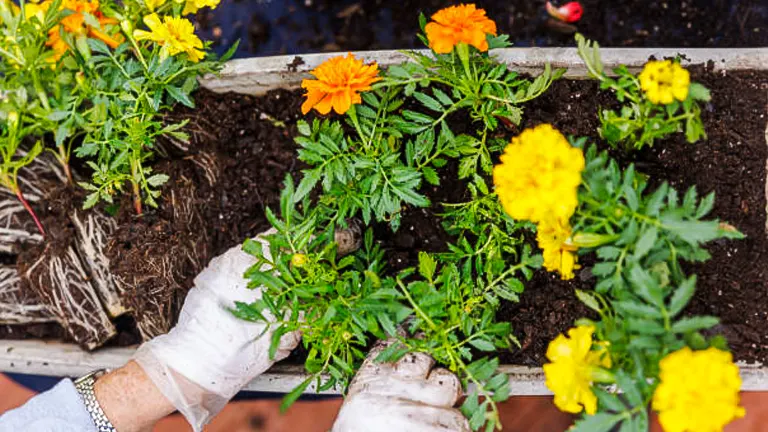
Choosing the right fertilizer for your marigolds is crucial for ensuring their health, vigor, and the vibrancy of their blooms. Here we explore the differences between organic and synthetic fertilizers and their impacts on plant health and the environment, helping you make an informed choice.
Understanding Fertilizer Types
- Organic Fertilizers:
- Origins: Derived from natural sources like bone meal, compost, manure, and fish emulsion.
- Benefits: These fertilizers release nutrients at a slower, more natural rate, which reduces the risk of overwhelming the plants. This gradual nutrient release fosters stronger, healthier plant growth and enhances soil texture and fertility over time.
- Environmental Impact: Organic fertilizers are environmentally friendly, improving soil health without the risk of chemical runoff.
- Synthetic Fertilizers:
- Composition: Made from chemical compounds that are engineered to release nutrients quickly.
- Immediate Benefits: They provide a quick boost to plant growth and are particularly useful when a rapid nutrient uptake is necessary.
- Handling Care: It’s important to apply these fertilizers precisely as overuse can lead to nutrient imbalances and potential environmental hazards such as runoff.
Fertilizer Composition and Usage
| Fertilizer Type | Advantages | Disadvantages | Recommended Use |
|---|---|---|---|
| Organic | Slow nutrient release, soil structure improvement | Higher cost, slower initial results | Sustainable gardening, regular upkeep |
| Synthetic | Immediate nutrient availability, precise nutrient control | Potential for environmental harm, over-fertilization risks | Quick supplementation, acute deficiencies |
Ideal NPK Ratios for Marigolds
Choosing a fertilizer with the right NPK ratio is pivotal for marigold care:
- Balanced Formulations: A 10-10-10 ratio is typically suitable for marigolds, ensuring they receive balanced nutrition.
- Specific Needs:
- Nitrogen: Vital for leaf and stem growth.
- Phosphorus: Essential for robust roots and abundant blooms.
- Potassium: Crucial for overall plant health and stress resistance.
Scientific Considerations
- Efficiency of Nutrient Uptake: The efficacy of nutrient absorption in marigolds can vary based on soil pH, with phosphorus uptake being optimal in slightly acidic to neutral soil.
- Eco-Impact: Synthetic fertilizers, while effective, can contribute to nitrogen and phosphorus runoff, affecting local waterways and wildlife. Organic options, in contrast, contribute positively to soil carbon storage and help reduce the carbon footprint.
Step-by-Step Guide on How to Fertilize Marigolds
Proper application is crucial to maximize the benefits of fertilizer while minimizing potential harm. Here’s a simple, step-by-step guide to fertilizing marigolds effectively:
Step 1: Soil Preparation
- Assess Soil Condition: Start by checking the soil for proper drainage and texture. Marigolds prefer well-draining, fertile soil.
- Test Soil pH: Use a soil test kit to determine the pH level; marigolds thrive in soil with a pH between 6.0 and 7.5.
- Amend the Soil: Based on the soil test results, amend the soil as needed. If the soil is too dense, incorporate organic matter like compost or peat moss to improve drainage and nutrient content.
Step 2: Choosing the Right Fertilizer
- Select an Appropriate Fertilizer: Choose a balanced, slow-release fertilizer with an NPK ratio of 10-10-10 or similar to ensure even nutrient distribution.
- Consider Organic Options: Organic fertilizers such as bone meal, fish emulsion, or compost can enrich the soil and support healthy growth over time.
Step 3: Initial Fertilization
- Apply Fertilizer at Planting: Mix the chosen fertilizer into the soil at planting time or apply a starter solution if using water-soluble fertilizer. This helps the marigolds establish with a strong nutrient base.
- Water Thoroughly: After applying the fertilizer and planting the marigolds, water the area well to help integrate the fertilizer into the soil and activate slow-release granules.
Step 4: Regular Fertilization Schedule
- Frequency of Application: Fertilize the marigolds every 4 to 6 weeks during the growing season. Consistent feeding supports continued growth and blooming.
- Application Method: For granular fertilizers, sprinkle around the base of the plants and water in. For liquid fertilizers, apply directly to the soil around the plants to avoid foliage contact and potential burn.
Step 5: Monitoring and Adjustments
- Observe Plant Health: Regularly check your marigolds for signs of nutrient deficiency or excess. Symptoms like yellowing leaves or stunted growth indicate a need for adjustment in fertilization.
- Adjust Fertilization as Needed: If signs of over or under-fertilization are present, adjust the amount, type, or frequency of fertilizer applied. Reducing the concentration or switching to a different nutrient ratio may be necessary.
Step 6: End-of-Season Care
- Reduce Fertilization: As the growing season winds down and temperatures drop, reduce the frequency of fertilization to prevent new growth that could be damaged by frost.
- Prepare for Dormancy: In areas where marigolds are perennial, prepare the plants for dormancy by applying a light layer of organic mulch to help retain soil moisture and temperature.
Step 7: Annual Review and Soil Testing
- Conduct Annual Soil Tests: Performing a soil test annually before the new growing season can help you adjust your fertilization plan based on the current nutrient status and pH of the soil.
- Update Fertilization Plan: Adjust your fertilization strategy each year based on soil test results and the previous year’s growth performance to continuously optimize conditions for your marigolds.
Navigating Fertilization Mistakes
Dealing with Over-Fertilization
Marigolds are robust, but like all plants, they have their limits when it comes to nutrient intake. Over-fertilizing is a common mistake that can lead to nutrient burn, where the tips of the leaves become brown and dry. This often occurs when the fertilizer is applied too liberally, causing the salts to build up and harm the plant. If you notice these symptoms, it’s crucial to intervene quickly. Watering the affected marigolds thoroughly and frequently can help flush out the excess nutrients and salts. For future care, it’s wise to reduce both the frequency and concentration of fertilizer applications to prevent recurrence.
Addressing Nutrient Deficiency
In contrast, a marigold with insufficient nutrients will not reach its full potential. The signs of under-fertilization are subtle but become more apparent over time. Plants may exhibit stunted growth, and the once vibrant blooms may appear faded and small. The foliage can also show signs of nutrient deficiency, typically displaying a pale green color due to a lack of nitrogen. To correct this, adjusting your fertilization routine is necessary. Introducing a balanced fertilizer that provides a good mix of nitrogen, phosphorus, and potassium can make a significant difference. It’s important to monitor the plants after adjusting the fertilizer to ensure they are responding well and that you’re not overcompensating for the previous deficiency.
Advanced Tips for Maximizing Marigold Blooms
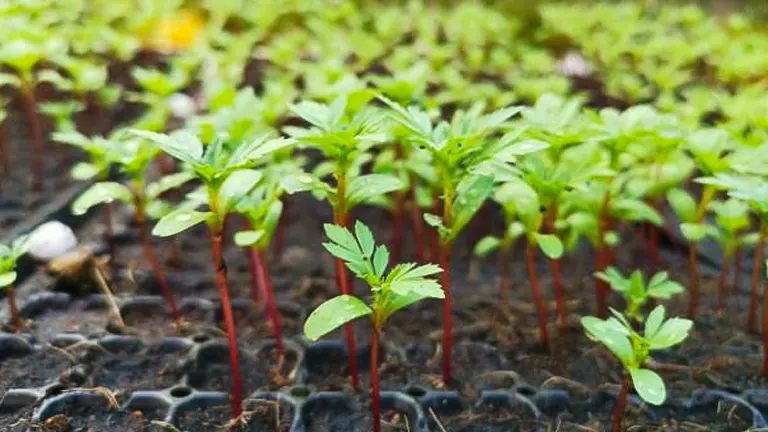
Enhancing Marigold Health and Bloom To get the most out of your marigolds, beyond just meeting their basic nutrient needs, consider implementing a few advanced gardening techniques. These methods focus on optimizing conditions to encourage richer, more abundant blooms.
Deadheading and Pruning Regularly removing spent blooms, a process known as deadheading, encourages marigolds to produce more flowers. It prevents the plants from wasting energy on seed production. Pruning is also beneficial; trimming back growth not only helps maintain a tidy appearance but also promotes healthier, bushier plants. These practices are simple yet effective and can significantly impact the vibrancy and duration of your marigold displays.
Optimal Watering and Sunlight While proper fertilization is crucial, watering and sunlight are equally important. Marigolds require a balance of moisture and warmth to thrive. Ensure they receive at least 6 to 8 hours of sunlight per day. Water them regularly, especially during dry spells, but be careful not to overwater, as marigolds do not like soggy soil. The right amount of water helps nutrients dissolve and become available to the plant roots, enhancing overall growth and bloom production.
Soil Amendments and Supplements Sometimes, despite best efforts, soils can lack certain elements that marigolds find beneficial. Adding soil amendments such as bone meal for phosphorus or greensand for potassium can improve soil fertility and structure. Additionally, using a foliar spray with a seaweed extract or fish emulsion can provide a quick nutrient boost during peak growing times. These supplements are particularly useful when marigolds appear lackluster despite regular maintenance.
Troubleshooting Common Issues
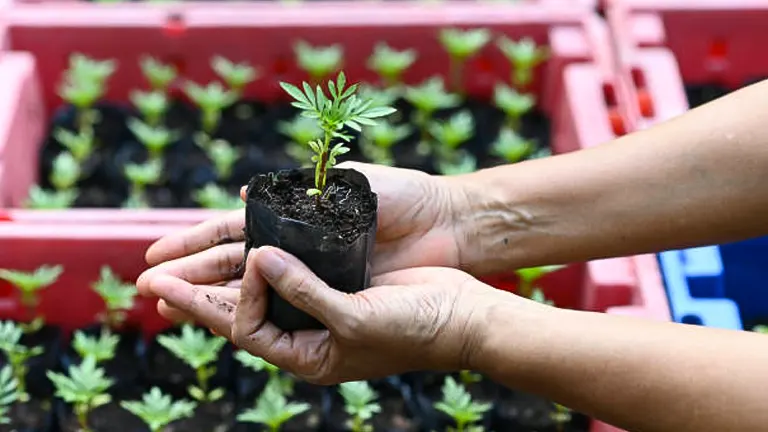
Marigolds are celebrated for their robustness and vibrant colors but can still face a range of issues that may impede their growth and aesthetic appeal. Understanding how to promptly address these challenges can ensure your marigolds thrive in various conditions.
Dealing with Pests and Diseases
Despite their natural pest-resistant properties, marigolds are susceptible to certain pests and diseases that require careful management:
- Common Pests: Aphids and spider mites are frequent culprits. To combat these pests:
- Natural Remedies: Use a mild solution of insecticidal soap or neem oil, which are effective and safe for the environment. Applying these treatments in the early morning or late evening can prevent leaf burn during sunny days.
- Preventative Measures: Regularly inspecting plants and removing any visibly infested parts can prevent the spread of pests.
- Disease Management: Marigolds can suffer from fungal infections such as powdery mildew and root rot.
- Air Circulation: Ensure plants are spaced well to promote airflow, which minimizes moisture accumulation and reduces the risk of fungal diseases.
- Fungicidal Treatments: For severe cases, applying a fungicide can be necessary. Opt for eco-friendly options to protect both your plants and the environment.
Environmental Stressors and Adaptation Strategies
Marigolds can be sensitive to environmental changes, which may require specific interventions:
- Temperature Fluctuations:
- Heat Stress: During hot spells, use shade cloths to protect marigolds during peak sun hours. This can prevent the scorching of leaves and reduce evapotranspiration.
- Cold Protection: In anticipation of frost, cover your marigolds with frost cloths or straw to insulate them during cold nights.
- Water Management:
- Mulching: Apply a layer of organic mulch around the base of the plants. This not only helps maintain soil moisture and temperature but also suppresses weed growth and gradually improves soil quality.
- Irrigation Techniques: Implementing drip irrigation or soaker hoses can ensure deep watering that reaches the roots without saturating the foliage, thereby reducing disease risk.
Additional Insights for Marigold Care
- Nutrient Imbalance: Yellowing leaves may indicate a deficiency in nitrogen or iron. A soil test can help determine the specific nutrient deficiencies, guiding targeted supplementation.
- Physical Damage: Sometimes, physical damage from wind or animals can mimic disease symptoms. Installing protective barriers or plant supports can mitigate this issue.
Seasonal Care for Marigolds
Adapting to Changing Seasons
As the gardening year progresses, adjusting your care approach to suit seasonal changes can greatly benefit your marigolds.
- Spring Preparation: As the last frosts end, prepare your garden beds. Clear any debris, loosen the soil, and mix in fresh compost. This is also the ideal time to start applying a balanced, slow-release fertilizer as you plant new marigolds.
- Summer Maintenance: This is the peak growing time for marigolds. Keep up with regular watering, especially in dry periods, to ensure consistent moisture. Deadheading should be performed regularly to encourage continuous blooming.
- Autumn Care: As temperatures begin to drop, reduce the frequency of fertilization to prevent new growth that won’t survive the winter. Begin to cut back spent marigold plants and clear the garden of fallen leaves to prevent fungal diseases.
- Winterizing: In regions where marigolds are treated as annuals, remove old plants after the first frost. In milder climates where marigolds may survive the winter, apply a thick layer of mulch to protect the roots from freezing temperatures.
Making the Most of Your Marigolds
Enhancing Your Garden’s Aesthetic with Marigolds
Marigolds are not only functional as bloom producers but also serve as excellent companion plants in the garden. Here’s how to integrate them effectively:
- Companion Planting: Marigolds can deter pests from more sensitive plants in the garden, such as tomatoes and peppers. Planting them around your vegetable beds can reduce the need for chemical insecticides.
- Landscape Design: Use marigolds to add splashes of color in borders, flower beds, or along pathways. Their bright, cheerful flowers can be used to create stunning visual impacts in various garden settings.
- Container Gardening: Marigolds thrive in containers, making them perfect for balconies and patios. This allows for flexibility in managing sunlight exposure and watering, and they can be easily moved to enhance different parts of your home or garden throughout the season.
Related Post
- How to Fertilize Bougainvillea: A Complete Guide for Stunning Blooms
- How to Fertilize Apple Trees: Essential Tips for a Bountiful Harvest
- How to Fertilize Lemon Trees: Secrets for Thriving Citrus
- How to Fertilize Avocado Tree: A Step-by-Step Guide for Lush Growth
Conclusion
In conclusion, the success of growing vibrant marigolds largely depends on meticulous fertilization and care. By mastering nutrient balance, adapting to seasonal shifts, and engaging with the gardening community, you can significantly enhance the health and aesthetics of your marigolds. Remember, effective gardening involves precision, timing, and continual learning from both personal observations and exchanges with fellow gardeners. Whether you are just starting out or are an experienced gardener, nurturing marigolds offers a fulfilling path to a more beautiful and lively garden. Embrace these practices, and watch your marigolds—and your gardening prowess—flourish.
FAQs
- What is the best type of fertilizer for marigolds?
Marigolds thrive on balanced fertilizers, typically with an NPK ratio of 10-10-10. Slow-release granular fertilizers are ideal as they provide consistent nutrient delivery. - How often should I fertilize my marigolds during the growing season?
Marigolds should be fertilized every 4 to 6 weeks during the growing season to support continuous growth and blooming. - Can over-fertilizing harm my marigolds?
Yes, over-fertilizing can lead to nutrient burn, where the tips of leaves turn brown and dry out. It’s important to follow recommended application rates and schedules. - What signs indicate that my marigolds are under-fertilized?
Signs of under-fertilization include stunted growth and pale, lackluster blooms. Leaves may also appear lighter green due to nitrogen deficiency. - Is organic fertilizer better for marigolds than synthetic?
Organic fertilizers, which release nutrients slowly, are often preferred for enhancing soil health over time and reducing the risk of over-fertilization. However, both types can be effective if used properly. - What should I do if I accidentally over-fertilize my marigolds?
If over-fertilization occurs, flush the soil around the marigolds with plenty of water to help wash away excess fertilizer. Monitor the plants for recovery and adjust future fertilizer applications accordingly. - Can mulching affect how I fertilize my marigolds?
Mulching can help maintain soil moisture and temperature, reducing the frequency of watering and potentially affecting fertilizer uptake. It’s advisable to monitor soil moisture and adjust fertilizing practices to accommodate mulch use. - How do environmental conditions like sunlight and watering impact fertilization?
Sunlight and watering greatly influence how marigolds utilize fertilizer. Ensure marigolds receive 6-8 hours of sunlight daily and water them regularly, allowing the soil to dry slightly between waterings. Proper watering helps dissolve and distribute nutrients from fertilizers effectively.
With these tips and techniques in hand, you’re well on your way to nurturing marigolds that not only survive but truly thrive. Stick to the basics, watch for signs, and adjust as you grow. Happy gardening, and may your marigolds bloom brilliantly!

Benjamin Brooks
Forestry AuthorGreetings! I'm Benjamin Brooks, and my journey over the past 15 years has revolved around the fascinating realms of content creation, expertise in snow clearing, and the intricate world of lumberjacking and landscaping. What began as a simple curiosity about the natural world and heavy machinery has evolved into a passionate profession where my love for crafting words intertwines seamlessly with my lumberjacking and garden skills.


Leave your comment