How to Graft a Mango Tree: A Step-by-Step Guide
- February 18, 2025
- 0 comment
Mango grafting is a simple and rewarding way to grow mango trees that produce fruit faster while keeping the best traits of the parent tree. Whether you’re new to gardening or have years of experience, this guide will take you through the process step by step.
Why Graft Mango Trees?
Grafting mango trees offers several benefits. Unlike mangoes grown from seeds, grafted trees produce fruit more quickly and are easier to manage. Grafted trees keep the good qualities of the parent tree, such as fruit size, taste, and yield, ensuring a consistently great harvest. If you want high-quality mangoes year after year, grafting is the way to go.
Tools and Materials You Need
Before starting, gather these items to make the process smoother:
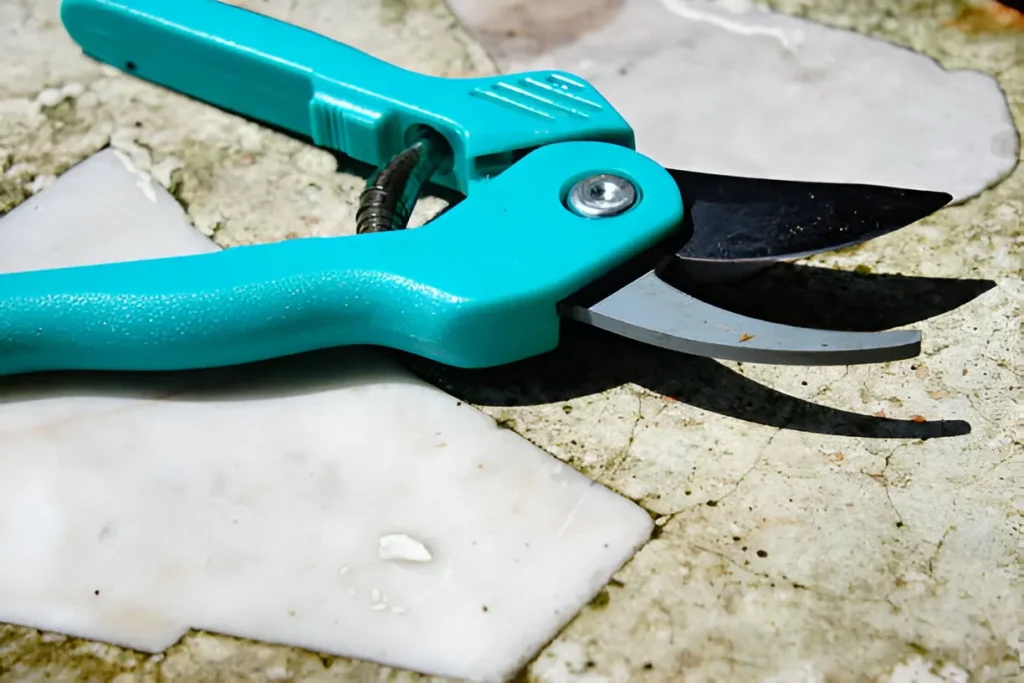
- Pruning scissors or a sharp knife – Make sure they are clean and sterilized.
- Grafting tape or clear plastic strips – These are used to secure the graft.
- Sterilizer (like rubbing alcohol or diluted bleach) – Essential for cleaning your tools.
- Plastic bags or wet newspaper – Useful for temporarily storing scions.
Step-by-Step Process
Step 1: Get Your Tools Ready
The first step to successful grafting is preparation. Clean and sterilize your tools to avoid spreading diseases to your plants. Skipping this step can greatly reduce your chances of success, so don’t overlook it.
Step 2: Pick a Healthy Rootstock
Choose a strong and healthy rootstock for your graft. The rootstock should be about six months old, 25 cm tall, and as thick as a pencil. Popular rootstock varieties like ‘Peach’ and ‘Sabre’ are ideal, but you can also use vigorous local seedlings. Ensure the rootstock is pest-free and growing well.
Step 3: Collect Scions
Scions are pieces of the parent tree that will be grafted onto the rootstock. Follow these steps:
- Identify a healthy mango tree that consistently produces good fruit.
- Select branches that are as thick as a pencil, with buds that are swollen but not yet opened.
- Cut scions to about 10 cm in length. Remove all leaves and wrap the scions in wet newspaper. Use them as soon as possible.
Tip: Collect scions right before the tree starts growing new leaves for the best results.
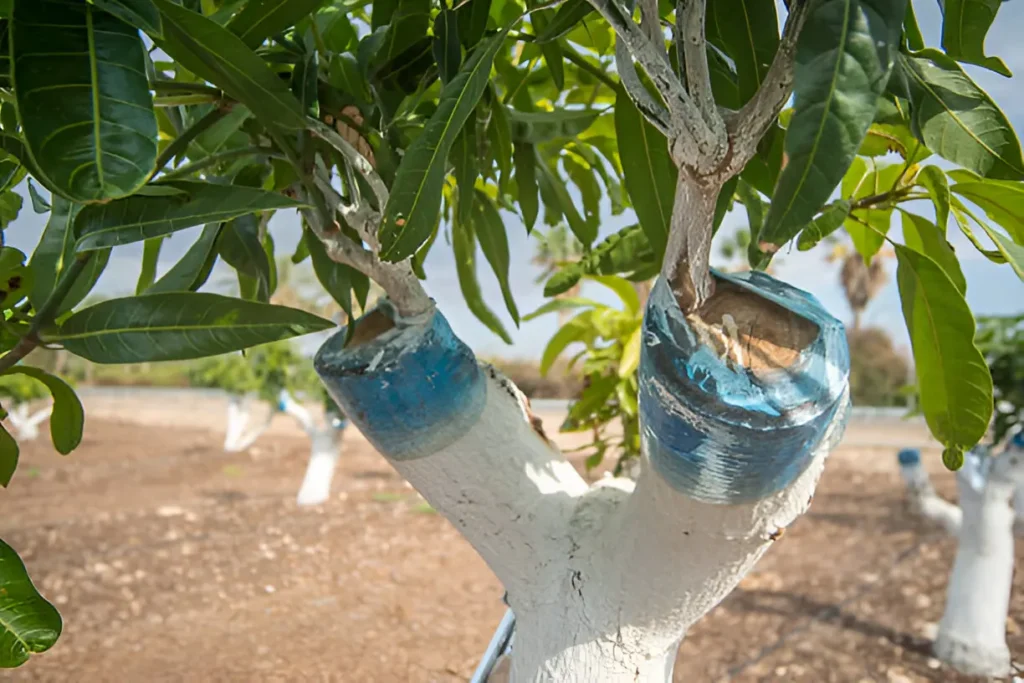
Step 4: Prepare the Rootstock
To prepare the rootstock, cut it straight across about 6-8 cm above the soil. Use a sharp knife to make a vertical slit about 3 cm deep at the cut end. This slit will hold the scion in place.
Step 5: Shape the Scion
Shape the lower end of the scion into a V-shape using a grafting knife. The V should be about 2-3 cm long to fit snugly into the slit on the rootstock. A clean and precise cut increases the chances of a successful graft.
Step 6: Join the Scion and Rootstock
Carefully insert the V-shaped scion into the slit on the rootstock. Align the green layers beneath the bark (called the cambium) of both the scion and rootstock. These layers must touch for the graft to take. If they don’t align properly, trim the scion or cut the rootstock again.
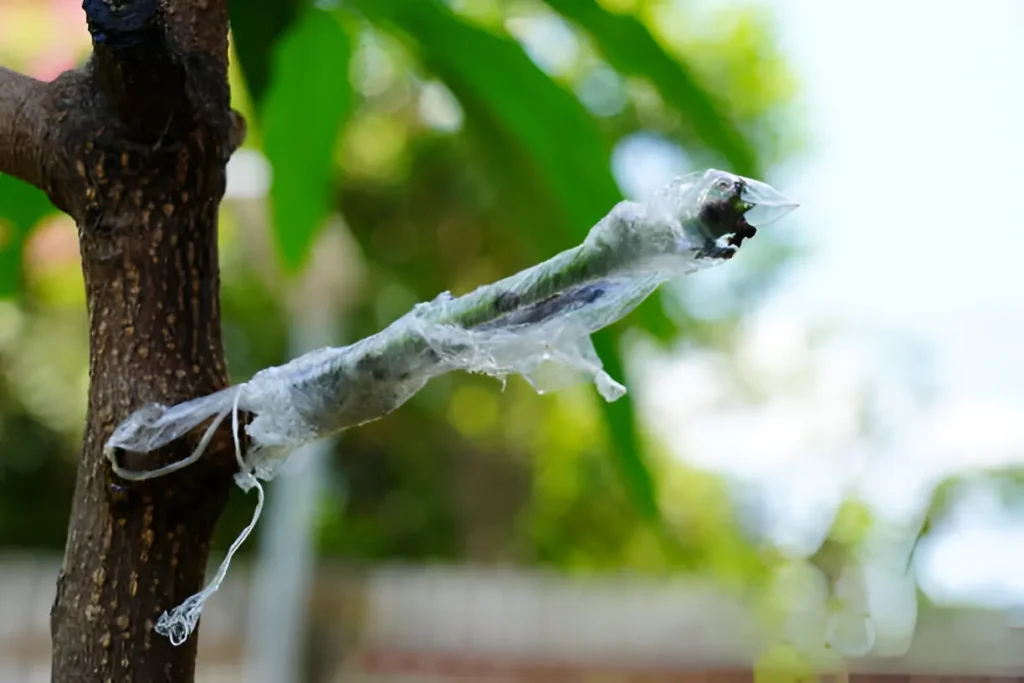
Step 7: Secure the Graft
Wrap the graft tightly with grafting tape or plastic strips. This helps hold the scion in place while it heals. The wrapping should be snug but not so tight that it damages the plant tissue.
Step 8: Protect the Scion
After securing the graft, loosely wrap the scion with tape to create a humid environment. However, leave the top bud of the scion uncovered so it can sprout and grow. This step is essential for promoting healthy growth.
Post-Grafting Care
Step 9: Let the Graft Heal
Place the grafted plant in a shaded area to protect it from direct sunlight. Water it lightly but avoid overwatering, as grafted plants lose minimal moisture through their leaves. Within 14-21 days, you should see new leaves forming, a sign that the graft is successful. Once the wound has healed, carefully remove the grafting tape to avoid damaging the plant.
Step 10: Transplant and Harden the Plant
After about six weeks, transplant the grafted tree to a prepared planting spot. Gradually expose the tree to more sunlight to harden it for outdoor conditions. After six months, pinch off the top bud to encourage branching and create a well-structured mango tree.
Tips for Success
- Always use clean tools and healthy plant materials to reduce the risk of infections.
- Perform the grafting process on the same day you collect the scions for the highest success rate.
- Avoid overwatering. Newly grafted plants need minimal water until their leaves develop.
- Protect the graft from direct sunlight to prevent water loss and damage.
Common Mistakes to Avoid
While grafting mango trees is straightforward, some common mistakes can reduce your success rate. Here’s what to watch out for:
- Using diseased or weak plants: Always select healthy rootstocks and scions.
- Improper alignment of cambium layers: Ensure the green layers of the scion and rootstock match for effective nutrient transfer.
- Over-tightening the tape: Wrapping the graft too tightly can damage the plant tissue.
- Delaying the process: Graft the scions immediately after collecting them to keep them fresh.
Why Grafting Works
From my experience, grafting is one of the best ways to grow mango trees. Unlike other methods, grafting is faster, more reliable, and guarantees high-quality fruit. By replicating the traits of a productive parent tree, you can enjoy a consistent harvest for years to come.
Conclusion
Grafting mango trees is a simple yet effective technique that every gardener should try. With a bit of patience and practice, you can grow trees that not only bear fruit faster but also produce mangoes with consistent quality. By following the steps outlined here, you’ll be well on your way to enjoying a bountiful mango harvest in your own backyard.
Frequently Asked Questions
- What is the best time to graft a mango tree?
The ideal time is during warm months, typically spring to early summer, when the tree is actively growing, ensuring successful grafting. - What are the best grafting methods for mango trees?
Common methods include veneer grafting, cleft grafting, and approach grafting, with veneer being the most successful for mango trees. - How long does it take for a grafted mango tree to bear fruit?
Grafted mango trees bear fruit faster, typically within 3–4 years, compared to seed-grown trees which may take 6–8 years. - What rootstock should be used for grafting mangoes?
Use a healthy, disease-resistant mango seedling that is 6-12 months old, ensuring it has a strong root system for better graft success. - Why do grafted mango trees produce better fruit?
Grafted mango trees inherit superior traits from the parent tree, ensuring consistent fruit quality, faster growth, and better disease resistance. - What is the success rate of mango grafting?
With proper technique, success rates range from 70-90%. Factors like temperature, humidity, and correct scion selection affect graft viability. - How do you care for a newly grafted mango tree?
Keep it shaded, water regularly but avoid overwatering, and ensure humidity is maintained to prevent the graft from drying out. - Can you graft different mango varieties onto one tree?
Yes, poly-varietal grafting is possible. Different mango varieties can be grafted onto a single rootstock for multiple fruit types on one tree. - Why did my mango graft fail?
Failure may be due to poor scion selection, incorrect cut alignment, excessive moisture loss, or fungal infections at the graft site. - How do you know if a mango graft has taken?
If new shoots emerge 3–6 weeks after grafting and the scion remains green, the graft is successful. Brown or shriveled scions indicate failure.

Joel Cunningham
Forestry AuthorI'm Joel Cunningham, an expert in pruning and weed management with over a decade of experience. My skills are rooted in formal training and extensive practice, focusing on advanced pruning techniques and efficient weed control. I'm known for my quality work, precision, and deep understanding of plant health and soil dynamics. My contributions extend to educational initiatives where I share sustainable practices and advice, establishing myself as a reliable and authoritative figure in the gardening community.


Leave your comment