How to Propagate Plants From Cuttings
- February 7, 2024
- 0 comment
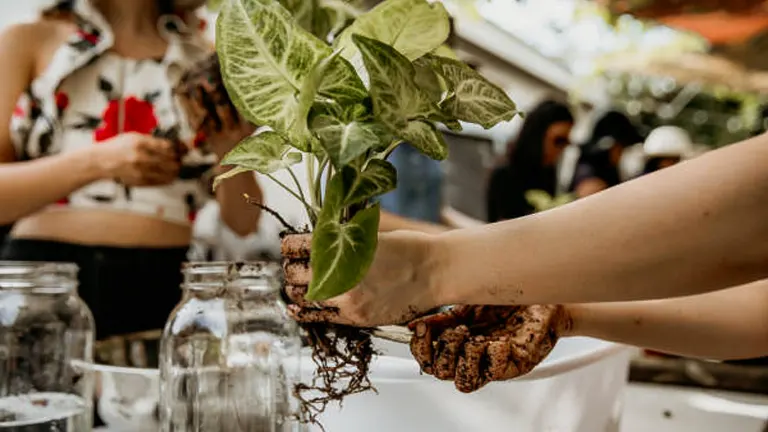
Propagating plants from cuttings is a simple, cost-effective way to expand your garden. This method not only saves money but also allows gardeners of all skill levels to clone their favorite plants. By understanding and applying the right techniques, you can preserve the beauty and heritage of unique or cherished plants. This article serves as a comprehensive guide, designed to demystify the process and ensure your propagation efforts are successful.
List on How to Propagate Plants From Cuttings
- Step-by-Step Guide for Stem Cuttings
- Step-by-Step Guide for Leaf Cuttings
- Step-by-Step Guide for Root Cuttings
- Care During Rooting
- Signs of Success
Understanding Plant Propagation from Cuttings
What is Plant Propagation?
Plant propagation is the process of creating new plants from a variety of sources, including seeds, cuttings, bulbs, and other plant parts. This technique allows gardeners and horticulturists to reproduce a desired plant species or cultivar under controlled conditions, ensuring the genetic continuity of specific plants. Propagation from cuttings, for example, involves taking a segment of a stem, leaf, or root from a parent plant and encouraging it to grow into a new plant with identical characteristics to the original. This method is particularly valuable for multiplying plants that do not breed true from seeds or for replicating heirloom plants, rare species, or cultivars with desirable traits. Plant propagation not only facilitates the spread of plants for decorative, agricultural, or research purposes but also plays a crucial role in plant conservation, allowing the preservation and restoration of endangered plant species.
Types of Cuttings
1. Stem Cuttings: This is the most common type of cutting, involving a piece of the plant’s stem. It is used for many herbaceous plants, shrubs, and trees. Stem cuttings can be further classified into:
- Softwood Cuttings: Taken from new, soft growth of woody plants, usually in spring to early summer.
- Semi-hardwood Cuttings: Taken from partially matured growth of the current season, typically in late summer.
- Hardwood Cuttings: Taken from mature, dormant stems in late fall or winter.
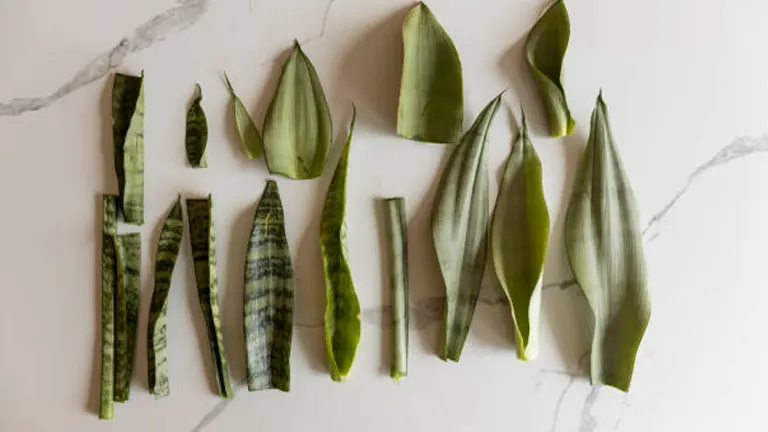
2. Leaf Cuttings: Used primarily for plants that can generate a new plant from a leaf or a piece of a leaf. This method is common with some houseplants and succulents. Types include:
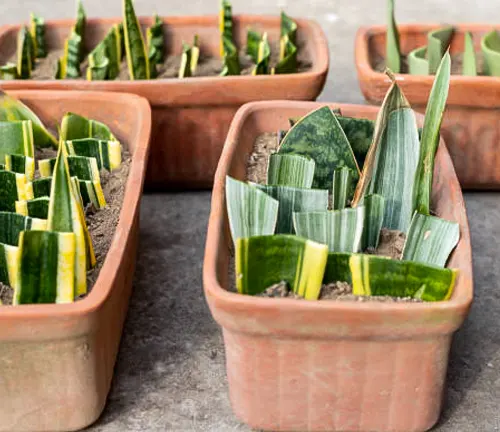
- Whole Leaf with Petiole: The entire leaf, including the stalk (petiole), is used.
- Leaf Blade Cuttings: The leaf blade is cut into sections, each capable of growing a new plant.
- Leaf Vein Cuttings: Sections of a leaf are cut and placed on moist soil; veins are cut and can sprout new plants.
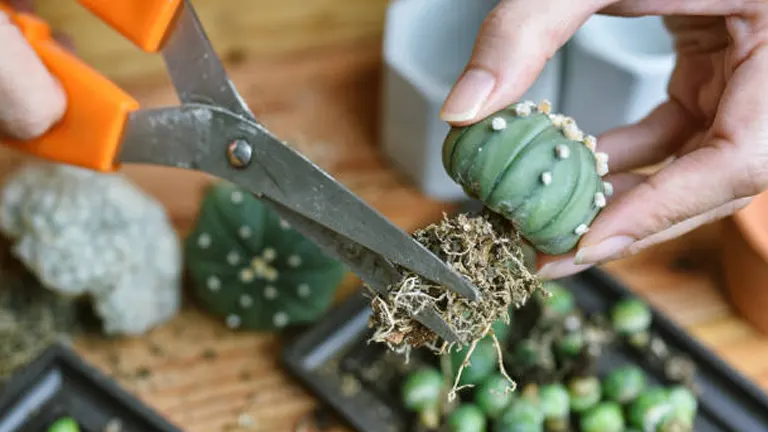
3. Root Cuttings: This method involves taking pieces of roots to grow new plants. It is often used for herbaceous perennials and some woody plants during dormancy. The cut root piece is planted horizontally or vertically in soil to regenerate into a new plant.
4. Tip Cuttings: A form of stem cutting that includes the very tip of a stem, often with a few leaves attached. It’s a highly effective method for fast-growing plants.
5. Heel Cuttings: A small section of older wood is attached to the base of a stem cutting, usually taken from woody plants. The “heel” is a part of the branch from which the new cutting is taken.
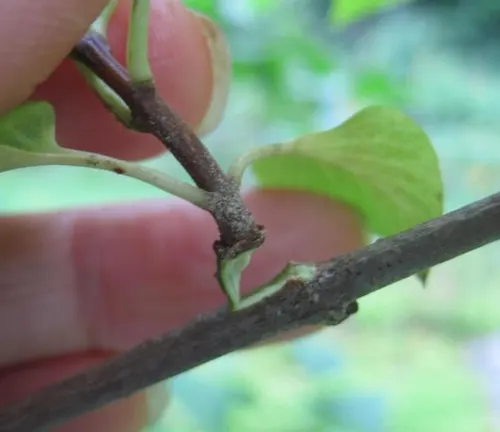
6. Node Cuttings: This involves a piece of stem that includes at least one node (where leaves attach). Nodes are where roots are most likely to form.
Suitable Plants for Propagation
While many plants can be propagated from cuttings, some are more conducive to this method than others. Herbs, succulents, and houseplants often yield the best results. It’s important to research specific plants for their suitability and the best type of cutting for propagation. Below is a detailed table outlining various types of plants that are suitable for propagation from cuttings:
| Plant Type | Cutting Type | Best Time to Take Cuttings | Tips for Success |
|---|---|---|---|
| Herbaceous Perennials | Stem | Spring to early summer | Use softwood cuttings; keep soil moist and provide indirect light. |
| Woody Shrubs | Stem (softwood, semi-hardwood) | Late spring to early summer | Semi-hardwood cuttings work best; use a rooting hormone and ensure high humidity. |
| Deciduous Trees | Stem (hardwood) | Late fall to winter | Hardwood cuttings require patience; winter dormancy is ideal for taking cuttings. |
| Evergreen Trees | Stem (semi-hardwood) | Summer to early fall | Maintain consistent moisture and use rooting hormone; provide shade to prevent drying out. |
| Succulents | Leaf, stem | Spring to summer | Allow the cut surface to callous over before planting; use well-draining soil and avoid overwatering. |
| Houseplants | Stem, leaf | Year-round | High humidity and warm temperatures are crucial; some may root in water before transferring to soil. |
| Fruit Bushes | Stem (softwood, hardwood) | Early summer, late winter | Softwood for quick results, hardwood in dormancy; use well-draining soil and a sheltered propagation area. |
| Herbs | Stem | Spring to summer | Many herbs root easily in water or moist soil; provide bright, indirect light and fresh air. |
The table detailing suitable plants for propagation serves as an invaluable resource for gardeners of all levels, offering insights into a wide array of plants that can be reproduced through cuttings. From the simplicity of propagating succulents and houseplants to the more nuanced approaches required for woody shrubs, deciduous trees, and fruit bushes, the guide underscores the versatility and adaptability of propagation techniques. Key takeaways include the significance of selecting the appropriate cutting type and timing for each plant species, alongside practical tips that enhance the likelihood of success. This distilled knowledge not only empowers gardeners to expand their collections and preserve favored specimens but also enriches the gardening experience with a deeper understanding of plant growth and reproduction, all presented in a clear, concise, and accessible manner.
Tools and Materials Needed
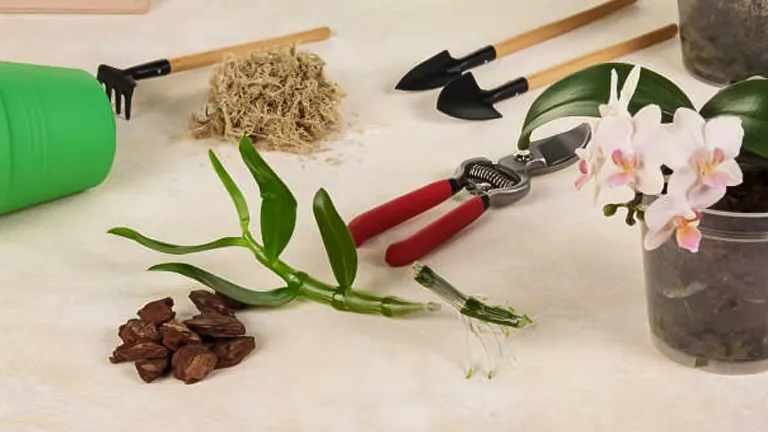
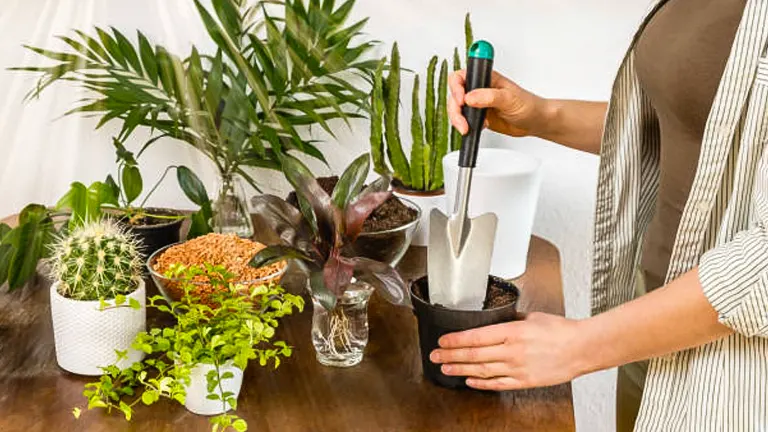
Before you begin, gathering the right tools and materials is crucial for success. Here’s what you’ll need:
- Sharp Scissors or Pruning Shears: Ensure they are clean and sharp to make precise cuts without damaging plant tissues.
- Pots or Trays: Suitable containers filled with a suitable planting medium.
- Rooting Hormone: This helps stimulate root growth, although it’s optional.
- Planting Medium: A sterile, well-draining medium like peat moss, vermiculite, or sand is ideal.
- Labeling Materials: Labels or markers to identify cuttings and planting dates. Keeping track of the plant species and date of propagation is essential for monitoring growth and development.
- Watering Can or Spray Bottle: For gently watering the cuttings without disturbing the soil or planting medium.
With your tools and materials ready, you’re set to begin the exciting journey of plant propagation.
Preparing for Propagation
Selecting a Healthy Parent Plant
The success of propagation heavily depends on the health and vigor of the parent plant. Choose a plant that is disease-free, has a robust growth pattern, and is well-hydrated. Healthy parent plants are more likely to produce cuttings that will successfully root and grow.
Best Time for Taking Cuttings
The ideal time to take cuttings varies among plant species but generally falls during the plant’s active growth phase. For many plants, this means spring or early summer. However, some plants may root better with autumn cuttings. Researching your specific plant’s growth cycle will guide you to the best timing.
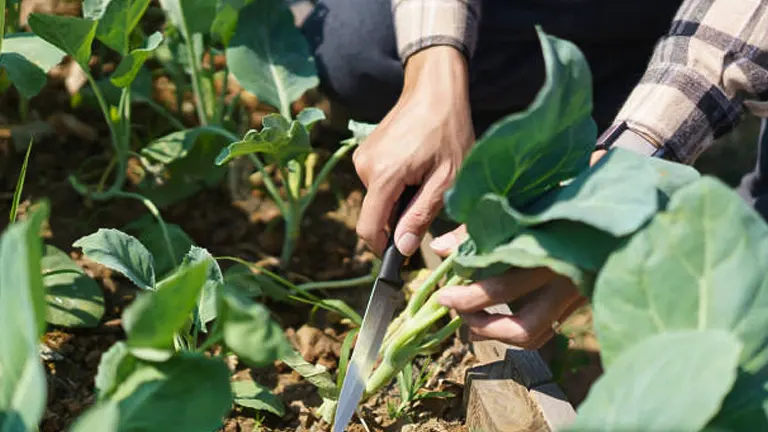
Preparing the Cutting
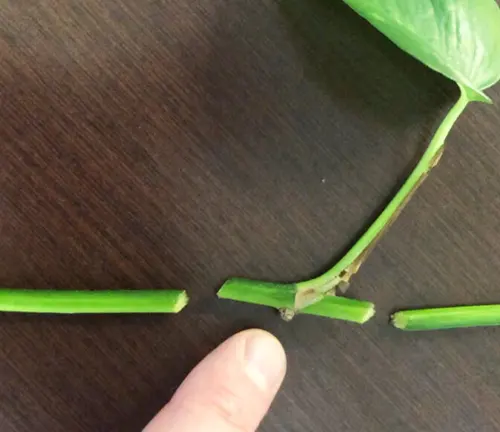
When taking a cutting, aim for a length of 4 to 6 inches. Use your sharp scissors or pruning shears to make a clean cut just below a leaf node (the point where leaves attach to the stem). Remove the leaves from the lower half of the cutting to prevent moisture loss and reduce the risk of fungal infections.
The Propagation Process
Step-by-Step Guide for Stem Cuttings

- Prepare Your Container: Fill your pot or tray with the chosen planting medium, moistening it slightly before planting.
- Apply Rooting Hormone: Dip the cut end of your stem cutting into rooting hormone powder or liquid to encourage root growth. This step is optional but can significantly increase your success rate.
- Plant the Cutting: Make a hole in the planting medium with a pencil or stick. Insert the cutting about 1-2 inches deep, ensuring at least one node (where you removed the leaves) is below the surface. Gently press the medium around the cutting to secure it.
- Create the Right Environment: Cover the container with a plastic bag or place it in a mini greenhouse to maintain high humidity around the cutting. Ensure the setup is in a warm location with bright, indirect light. Avoid direct sunlight, which can overheat and dehydrate the cuttings.
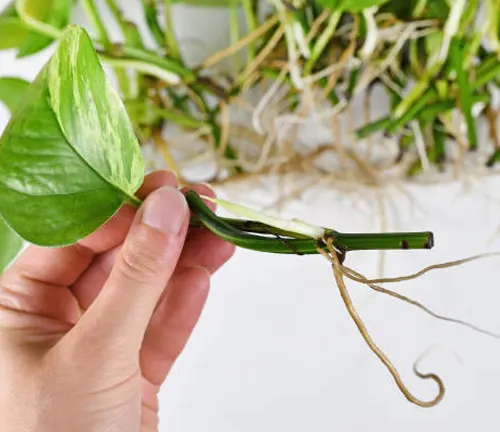
Step-by-Step Guide for Leaf Cuttings
Some plants, such as African violets and succulents, can be propagated from leaf cuttings. Here’s how:
- Select and Prepare the Leaf: Choose a healthy, mature leaf from the parent plant. Cut the leaf, including a portion of the petiole (the leaf stalk), with a clean, sharp knife.
- Plant the Leaf: Dip the cut end of the petiole into rooting hormone, then plant it in a moistened propagation medium. For some succulents, you can lay the leaf on top of the soil.
- Care Conditions: Place the container in a warm, bright area with indirect sunlight. Cover with a plastic bag or dome to maintain humidity.
- Wait for Roots and New Growth: It can take several weeks to a few months for new plants to form at the base of the leaf or along the cut edges. Once they’re large enough, they can be separated and repotted.
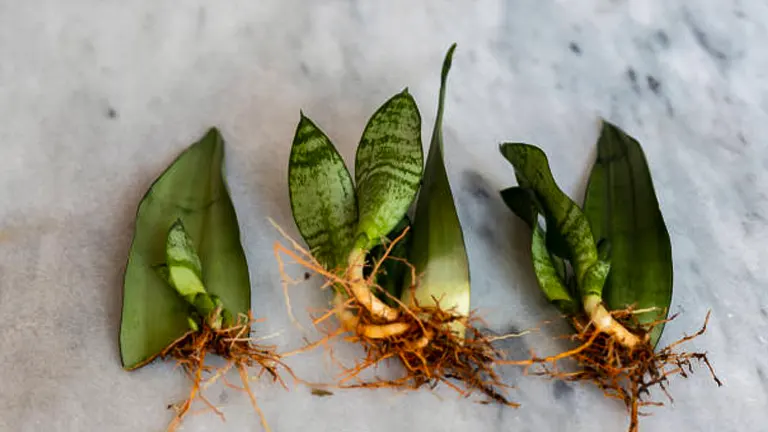
Step-by-Step Guide for Root Cuttings
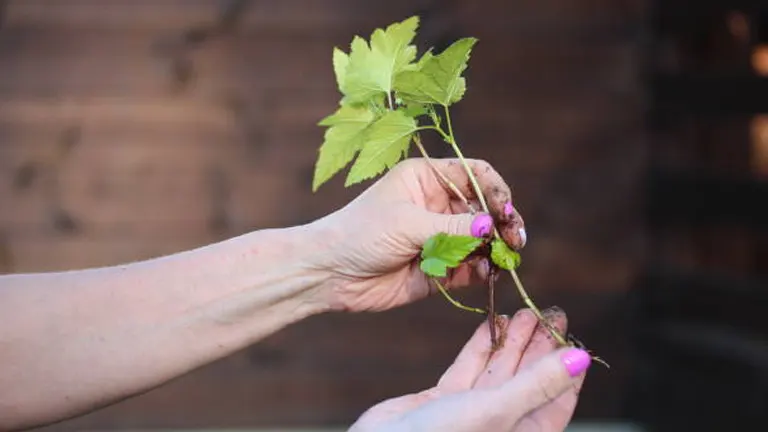
Root cuttings are effective for propagating plants that have thick, fleshy roots. Here’s what to do:
- Select and Prepare the Root Cutting: In late winter, before new growth starts, dig up a small portion of the parent plant’s root. Choose a healthy root segment about 2-4 inches long.
- Plant the Root Cutting: Lay the root horizontally or vertically in a container filled with moist propagation medium, covering it with about an inch of soil. If planting vertically, ensure the end that was closest to the plant’s stem is facing upwards.
- Care Conditions: Place the container in a warm spot with indirect light. Covering it with plastic can help retain moisture.
- Monitoring Growth: Roots and shoots will start to emerge after a few weeks. Once the shoots have developed several sets of leaves, the new plants can be carefully transplanted into individual pots.
Care During Rooting
- Watering: Keep the medium consistently moist but not waterlogged. Use a spray bottle to mist the surface gently if it starts to dry out.
- Ventilation: If you’re using a plastic cover or mini greenhouse, open it daily to allow fresh air to circulate and prevent mold growth.
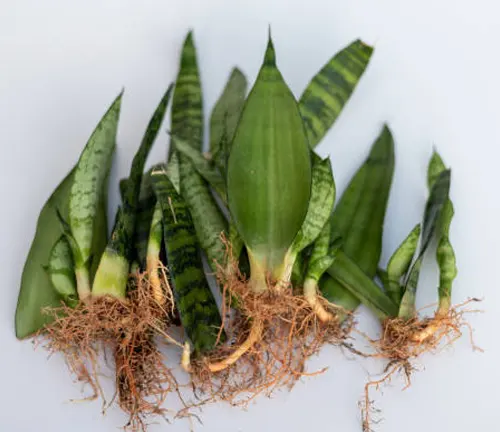
Signs of Success
New growth at the top of the cutting and resistance when you gently tug on the plant are signs that roots have formed. This process can take a few weeks to a few months, depending on the plant species and conditions.
Here is a list of indicators that suggest your propagation efforts are on the right track:
- Root Development: The most definitive sign of success is the presence of new roots. Depending on the medium, you may be able to see roots growing through transparent containers or feel resistance when slightly tugging on the cutting.
- New Growth: The emergence of new leaves or stems indicates that the cutting has successfully transitioned from survival mode to growth mode, a clear sign of successful rooting and plant health.
- Callus Formation: Before root development, many cuttings form a callus at the cut end—a hard, white tissue. This callus formation is a positive sign that the cutting is healing and preparing to produce roots.
- Increased Resistance: When you gently tug on the cutting and feel slight resistance, it often means roots have started to form and anchor the cutting into the medium, even if you can’t see them yet.
- Color Changes: A healthy cutting will maintain its vibrant green color or show new green growth. Any positive change in color, including the darkening of the cut end without rotting, can indicate successful callusing or initial root formation.
- Vigor and Stability: As roots develop, the cutting will become more stable and upright in its medium, showing an overall increase in vigor and resilience to minor stresses, such as light handling or adjustments in its environment.
- Recovery from Transplant Shock: If you’ve already transplanted your rooted cutting into a new pot or garden location, successful adaptation without significant wilting or leaf drop is a good sign that the plant is establishing well.
Understanding and recognizing these signs can greatly enhance the educational and practical aspects of plant propagation, providing gardeners with the feedback needed to refine their techniques and care for their new plants effectively. Each plant species may exhibit these signs differently, so observing closely and learning from experience are key components of successful plant propagation.
Aftercare for Propagated Cuttings
Once your cuttings have established roots, they’ll require some additional care before they can become independent plants.
Transplanting
- When to Transplant: Wait until the roots are a few inches long or when the container starts to feel crowded. This typically takes a few weeks to a few months after rooting has occurred.
- How to Transplant: Gently remove the cutting from its current container, being careful not to damage the delicate roots. Transplant it into a larger pot filled with a suitable potting mix, then water thoroughly. Keep the plant in a location with similar light conditions to avoid shocking it.
Ongoing Care
- Gradually acclimate your new plant to less humid conditions by opening the plastic cover or greenhouse more each day.
- Continue to keep the soil moist but not waterlogged and provide the plant with bright, indirect light until it’s strong enough to handle more direct sunlight.
Troubleshooting Common Issues
Despite the best efforts, gardeners might encounter some problems while propagating plants from cuttings. Here are solutions to common issues:
Rotting
- Cause: Too much moisture around the cutting, leading to fungal infections.
- Solution: Ensure the propagation medium is well-draining. Avoid overwatering, and consider using a fungicide if infections are frequent.
Drying Out
- Cause: Insufficient humidity or water, causing the cutting to lose more moisture than it can absorb.
- Solution: Maintain a consistent moisture level in the medium. Use a plastic cover to increase humidity, and mist the cuttings regularly.
Lack of Rooting
- Cause: Various, including poor cutting quality, incorrect temperature, or inadequate light.
- Solution: Use healthy and appropriate cuttings, apply rooting hormone, and ensure cuttings are kept at the right temperature and lighting conditions.
Advanced Tips and Techniques
To increase the success rate of propagating plants from cuttings, consider these expert tips:
Use a Heating Mat
- Benefit: Promotes root development by providing consistent warmth, especially important in cooler climates or seasons.
- How to Use: Place the propagation tray on the heating mat and set it to the recommended temperature for the plant species.
Experiment with Different Propagation Mediums
- Tip: Some plants may root better in perlite, vermiculite, or water than in soil. Experimenting can help find the best medium for your specific plants.
- Method: Try propagating similar cuttings in different mediums under the same conditions to see which yields the best results.
Maintain Optimal Conditions
- Light: Provide bright, indirect light. Direct sunlight can overheat and dehydrate cuttings.
- Temperature: Keep at a consistent temperature suitable for the plant species, usually between 65-75°F (18-24°C).
- Humidity: Use a plastic cover or humidity dome to retain moisture around the cuttings, and ventilate regularly to prevent mold.
Be Patient and Keep Trying
- Propagation can be a trial and error process. If a cutting doesn’t take, don’t be discouraged. Analyze what might have gone wrong and try again with adjustments.
Conclusion
Propagating plants from cuttings is a rewarding and efficient way to expand your garden or preserve favorite plants. While it requires patience and attention to detail, the joy of watching a new plant grow from a cutting is unmatched. Remember, each plant and cutting type may require slightly different care, so research and experimentation are key to finding what works best for you.
FAQs
- What types of plants are best suited for propagation from cuttings?
Many plants can be propagated from cuttings, including herbaceous perennials, woody shrubs, houseplants, succulents, and certain trees. The key is to choose a healthy parent plant and the correct type of cutting (stem, leaf, or root) for the species. - Do I need any special tools to start propagating plants from cuttings?
Basic tools include sharp pruning shears or scissors, pots or trays filled with a suitable planting medium, rooting hormone (optional but beneficial), and a plastic cover or bag to create a humid environment. Cleanliness is crucial, so ensure your tools are disinfected to prevent disease spread. - How do I know when to take cuttings for propagation?
The best time varies by plant species but generally, stem cuttings are taken during the plant’s active growth phase, which is usually spring or early summer for many species. However, some plants may be propagated from hardwood cuttings taken during dormancy in late fall or winter. - How do I prepare a cutting for planting?
Cut a 4-6 inch section of the plant, making sure to include at least one or two nodes (where leaves attach). For stem cuttings, cut just below a node. Remove leaves from the lower half to reduce moisture loss and, if using, dip the cut end in rooting hormone before planting. - What is the best medium for rooting cuttings?
A light, well-draining mixture such as a blend of peat moss and perlite or vermiculite provides an ideal environment. The medium should retain moisture but not become waterlogged, to encourage root growth while preventing rot. - How do I care for cuttings after planting?
Keep the planting medium moist but not soggy, and cover the cuttings with a plastic bag or place them in a mini-greenhouse to maintain high humidity. Provide bright, indirect light and avoid extreme temperatures. Ventilate occasionally to prevent mold growth. - What are signs that my cutting has successfully rooted?
New growth at the top of the cutting, resistance when you gently tug on the plant, and visible roots (in transparent containers or when slightly lifting the cutting from the medium) are clear indicators of successful rooting. - Can all plant cuttings be rooted in water?
While many cuttings, especially those from houseplants, can root in water, not all plants are suited to this method. Some cuttings may rot in water before rooting, so it’s important to research your specific plant’s preferences. Transitioning water-rooted cuttings to soil can sometimes be challenging and requires careful handling to avoid shock.
Propagating plants from cuttings is a rewarding adventure that can fill your garden with beloved varieties. It’s a straightforward process that celebrates growth. With a little patience and practice, you can master this gardening skill. Happy propagating!

Benjamin Brooks
Forestry AuthorGreetings! I'm Benjamin Brooks, and my journey over the past 15 years has revolved around the fascinating realms of content creation, expertise in snow clearing, and the intricate world of lumberjacking and landscaping. What began as a simple curiosity about the natural world and heavy machinery has evolved into a passionate profession where my love for crafting words intertwines seamlessly with my lumberjacking and garden skills.


Leave your comment