How to Grow Aloe Vera in Summer: Thriving Tips for Warm Weather
- April 3, 2024
- 0 comment
Get tips on growing Aloe Vera in summer, a plant known for its soothing properties. This easy guide is for all, offering simple steps to keep your Aloe Vera flourishing in warm weather, whether you’re a seasoned gardener or just starting out.
| Benefit | Description |
|---|---|
| Skin Health | Aloe Vera is known for its ability to soothe sunburns, moisturize the skin, and help with wound healing. |
| Digestive Benefits | It may aid in digestion and help alleviate symptoms of irritable bowel syndrome (IBS) and constipation. |
| Antioxidant Properties | Contains antioxidants which help fight free radicals in the body, contributing to overall health. |
| Oral Health | Helpful in reducing dental plaque and treating gum diseases due to its antibacterial and anti-inflammatory properties. |
| Blood Sugar Regulation | Some studies suggest Aloe Vera can help lower blood sugar levels in people with type 2 diabetes. |
| Anti-Inflammatory | Aloe Vera has anti-inflammatory properties that can help in the treatment of inflammatory skin conditions. |
| Nutrient-Rich | Rich in vitamins (A, C, E, and B12), minerals, enzymes, and amino acids. |
| Immune System Boost | May enhance the body’s immunity, though more research is needed in this area. |
| Skin Aging | Can improve skin elasticity and help reduce the appearance of fine lines and wrinkles. |
| Scalp and Hair Health | Helps in nourishing the scalp, reducing dandruff, and promoting healthy hair growth. |
List on How To Grow Aloe Vera
- Choosing Your Plant
- Right Pot and Soil
- Ideal Lighting
- Watering Wisely
- Temperature and Humidity
- Feeding Your Plant
- Dealing with Pests and Problems
- Pruning and Harvesting
- Propagation
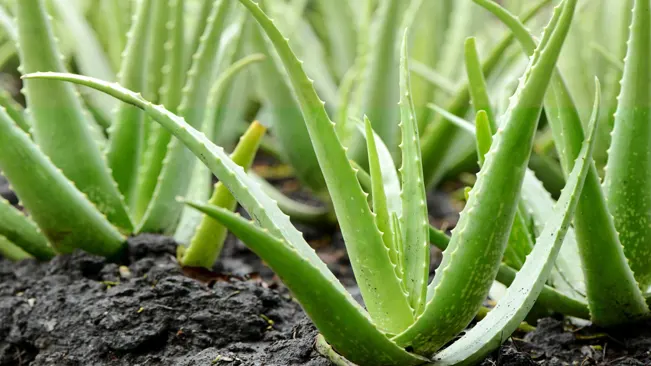
Choosing Your Plant
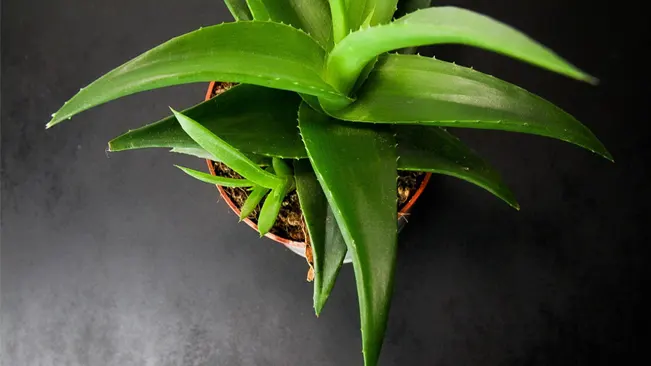
Start by selecting a healthy Aloe Vera plant from your local nursery or garden center. Look for a plant with plump, green leaves and no signs of damage or disease.
- Leaf Quality: The leaves of the plant should be thick, fleshy, and filled with gel, indicative of a well-hydrated Aloe. They should be a vibrant green color, possibly with some white spots or stripes, which are natural. Avoid plants with thin, wrinkled, or discolored leaves as these are signs of neglect or poor health.
- No Damage or Disease: Check for any signs of pests or diseases. Common issues in Aloe Vera include soft, mushy spots on the leaves (signs of rot or overwatering), or the presence of pests like tiny insects or webbing (indicating spider mites or aphids).
- Firm Root System: While you might not always be able to check the roots, if possible, ensure the plant is firmly rooted in the soil. A loose plant may indicate a weak or damaged root system.
- Growth Pattern: Aloe Vera should have a symmetrical growth pattern with leaves radiating out from the center. Asymmetrical or lopsided growth could indicate uneven light exposure or other issues.
- Pups or Offsets: Healthy Aloe plants often produce offsets, or “pups,” which grow from the base of the parent plant. These can be a sign of a healthy plant and also offer an opportunity for propagation.
- Size and Maturity: Depending on your needs, you can choose between a mature plant or a younger one. Mature plants are closer to blooming and may already have pups, while younger plants can be a more affordable option that you can watch grow.
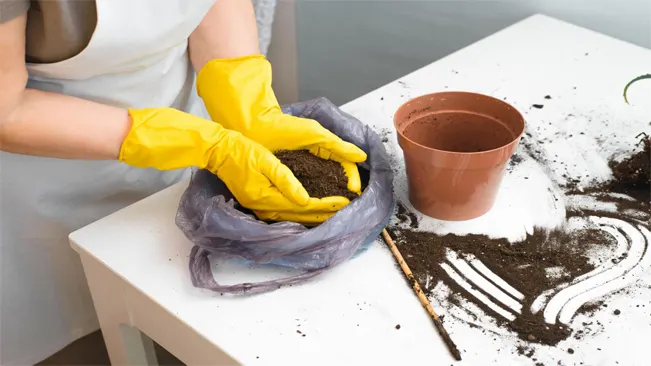
Right Pot and Soil
Aloe Vera plants thrive in a cactus potting mix, which ensures proper drainage. Choose a pot with drainage holes to prevent waterlogging. Terracotta pots are ideal as they allow the soil to dry out more evenly.
Soil Composition
- Aloe Vera plants require a soil mix that provides excellent drainage. A cactus potting mix is ideal because it typically contains a blend of coarse sand, perlite, and organic matter. This combination prevents water from lingering around the roots, which could lead to root rot. If a cactus mix isn’t available, you can create your own by mixing regular potting soil with sand and perlite or pumice in equal parts.
Importance of Drainage
- Drainage is crucial for Aloe Vera. These plants are prone to root rot if they sit in waterlogged soil. Ensure that the chosen soil allows water to pass through quickly and does not retain excessive moisture.
Choosing the Right Pot
- Drainage Holes: The pot must have drainage holes. These holes allow excess water to escape, preventing overwatering.
- Material: Terracotta or clay pots are highly recommended for Aloe Vera. These materials are porous, allowing air and water to move through the walls of the pot. This feature helps the soil dry out more evenly and prevents water from accumulating at the bottom.
- Size: The size of the pot should be appropriate for the size of your plant. A pot that’s too large can hold excess soil, which retains unnecessary moisture. On the other hand, a too-small pot may restrict growth. A good rule of thumb is to choose a pot that is about 1/3 wider than the plant.
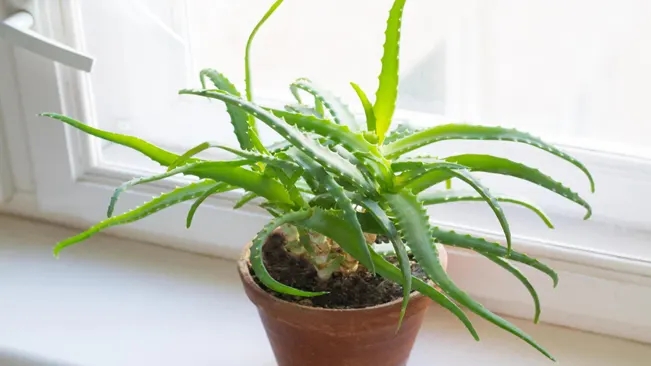
Ideal Lighting
Aloe Vera plants love bright, indirect sunlight. A south or west-facing window is usually a good spot. However, be cautious of too much direct sunlight, which can scorch the leaves.
Why Bright, Indirect Light is Important
- Mimics Natural Habitat: In their natural environment, Aloe Vera plants are often shaded by other plants or rocks. Bright, indirect light indoors mimics this condition, providing the light they need without the harsh direct sun of the desert.
- Prevents Scorching: Direct sunlight, especially through a window, can be too intense for an indoor Aloe Vera. This can lead to scorched, discolored leaves, which are a sign of stress in the plant.
Choosing the Right Spot
- South or West-Facing Windows: These windows typically provide the brightest light. Placing your Aloe Vera near these windows allows it to receive a good amount of light without the harsh direct midday sun.
- Diffusing Light: If you only have spots that receive direct sunlight, consider using a sheer curtain or blind to diffuse the light. This approach reduces the intensity of the light while still providing the brightness the plant needs.
Adjusting for Seasons
- Winter Months: During shorter days in the winter, you may need to move your plant closer to the window to ensure it gets enough light.
- Summer Months: Conversely, in the summer, when the sun is more intense, you might need to pull it back from the window or provide some shading during the hottest part of the day.
Artificial Lighting
- If you can’t provide enough natural light, consider using grow lights. These are designed to offer a spectrum of light that supports plant growth. Position them a few inches above the top of the plant and keep them on for about 8-10 hours a day.
Watering Wisely
Overwatering is a common mistake. Allow the soil to dry out completely between waterings. When you do water, do it thoroughly, ensuring excess water drains out. Reduce watering in the winter months.
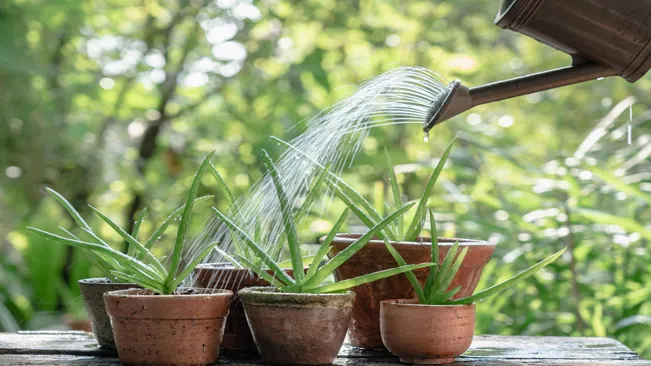
- Understanding Overwatering Risks: Aloe Vera plants store water in their leaves, making them particularly susceptible to root rot if the soil remains wet for too long. Overwatering can lead to a host of problems, including fungal infections and a weakened root system.
- Checking Soil Moisture: Before watering your Aloe Vera, it’s crucial to check the soil moisture. The soil should feel completely dry to the touch. A simple way to test this is to insert a finger about an inch into the soil. If it feels dry at that depth, it’s time to water.
- Watering Technique: When you water, do so thoroughly. This means watering the soil until excess water starts to drain out of the bottom of the pot. This ensures that the water reaches the entire root system. After watering, empty the saucer beneath the pot to avoid letting the plant sit in standing water.
- Seasonal Adjustments: Aloe Vera plants require less water during the winter months when they are in a dormant phase. The lower light and cooler temperatures mean the soil stays wet for longer. During this period, reduce the frequency of watering to prevent root rot.
- Signs of Poor Watering Practices: Overwatered Aloe Vera plants often have soft, mushy leaves, while underwatered plants have shriveled, dry leaves. Observing your plant’s leaves is a good way to gauge if your watering schedule needs adjustment.
Temperature and Humidity
Temperature Needs
- Ideal Range: Aloe Vera plants thrive in temperatures between 60 and 75°F (15 – 24°C). This range is typical of normal indoor environments, making them suitable for indoor gardening.
- Heat Tolerance: They can tolerate higher temperatures, particularly if they’re acclimated gradually and provided with adequate watering.
- Cold Sensitivity: Aloe Vera plants are not cold-hardy. Temperatures below 50°F (10°C) can stress the plant, leading to damage or even death.
Humidity Preferences
- Moderate Humidity: While they can handle some humidity, they do best in environments that are not overly humid. Excessive humidity can promote fungal diseases.
- Ventilation: Good air circulation helps in maintaining healthy humidity levels around the plant.
Protection from Temperature Fluctuations
- Avoid Drafts: Keep your Aloe Vera away from drafty windows or vents. Cold drafts, as well as hot air from heating sources, can stress the plant.
- Gradual Transition: When moving your Aloe Vera to a different environment (for example, outdoors in the summer), do it gradually to avoid shock from sudden temperature changes.
Adapting to Indoor Conditions
- Indoor Placement: In a typical home setting, placing your Aloe Vera near a sunny window, but out of direct sunlight, can provide it with the right balance of light and temperature.
- Monitoring: Keep an eye on your plant for signs of stress, like wilting or discoloration, which might indicate unsuitable temperature or humidity conditions.
Feeding Your Plant
Fertilize sparingly. Aloe Vera doesn’t require much feeding, but you can give it a phosphorus-heavy, water-based fertilizer at half-strength once in the spring and maybe again in late summer.
- Feeding Frequency: Aloe Vera plants are low-maintenance when it comes to feeding. They don’t need frequent fertilization like some other plants. Over-fertilizing can harm the plant more than it helps. Generally, feeding it once in the spring and again in late summer is sufficient.
- Type of Fertilizer: When choosing a fertilizer, look for one that’s phosphorus-heavy. Phosphorus promotes healthy root development and bloom growth, which is beneficial for Aloe Vera. A water-soluble or liquid fertilizer is often easier to control and distribute evenly.
- Dilution Is Key: It’s important to dilute the fertilizer to half its recommended strength. Aloe Vera plants are sensitive to strong fertilizers, and using a full-strength solution could lead to fertilizer burn, damaging the plant. Diluting the fertilizer ensures that your Aloe Vera gets the nutrients it needs without the risk of overfeeding.
- Application Method: Apply the diluted fertilizer to the soil, not directly onto the plant itself. Ensure the soil is already moist before applying the fertilizer to prevent root burn. Avoid pouring the fertilizer solution directly on the base of the plant; instead, apply it to the soil surrounding it.
- Observing the Plant’s Response: After fertilizing, keep an eye on your plant’s response. If you notice any negative changes, like browning of the tips or leaves falling off, it might indicate that the plant is stressed, possibly due to over-fertilization.
Dealing with Pests and Problems
Aloe Vera is susceptible to pests like mealybugs and scale. Treat infestations with a gentle insecticide or a homemade solution of water and mild soap. Also, watch out for root rot, often caused by overwatering.
Pests in Aloe Vera
- Mealybugs: These pests are small, white, cottony insects that typically gather in the nooks and crannies of the Aloe Vera. They feed on the sap, weakening the plant.
- Scale: These appear as tiny, brown, dome-shaped bumps on the leaves or stems. Like mealybugs, they feed on the plant’s juices.
Treating Pest Infestations
- Insecticidal Soap: A mild solution of water and insecticidal soap can be sprayed directly on the pests. It’s safe for the plant but lethal for the insects.
- Homemade Solutions: Mix a teaspoon of mild liquid soap with a liter of water. Spray this mixture on the affected areas. The soap helps break down the pests’ protective layer, causing them to dehydrate.
- Rubbing Alcohol: Applying rubbing alcohol with a cotton swab directly on mealybugs and scale can be effective in removing them.
- Neem Oil: A natural, effective option for controlling pests. It works as both a repellent and a pest suppressant.
Prevention Tips
- Regular Inspection: Check your Aloe Vera regularly for early signs of pest infestation.
- Quarantine New Plants: New plants should be kept separate from your other plants until you’re sure they’re pest-free.
- Proper Watering: Overwatering can attract pests and cause other issues like root rot.
Root Rot in Aloe Vera
- Cause: Usually a result of overwatering, where the excess water leads to a lack of oxygen in the soil, causing the roots to decay.
- Signs: The base of the plant may feel soft or mushy, and the leaves may become discolored.
- Treatment: Remove the plant from its pot, trim away the rotten roots, and repot in fresh, dry cactus mix soil. Ensure you water sparingly going forward.
Pruning and Harvesting
Pruning and harvesting Aloe Vera is a straightforward process, but it’s important to do it correctly to ensure the health of your plant and the quality of the Aloe gel.
Pruning Aloe Vera
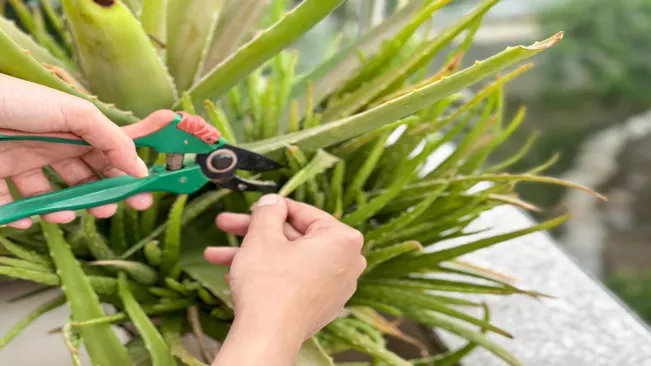
- Purpose: Pruning is essential for removing dead or damaged leaves, which helps in preventing disease and pest infestations. It also encourages more vigorous growth.
- Method: Use clean, sharp scissors or pruning shears. Carefully cut away the leaf close to the base without damaging the main stem or other healthy leaves.
- Frequency: Regular inspection of the plant is recommended. Prune as needed when you notice leaves that are dried out, discolored, or damaged.
- Disposal of Waste: Dispose of the removed leaves properly. If they are healthy, you can extract the gel for use.
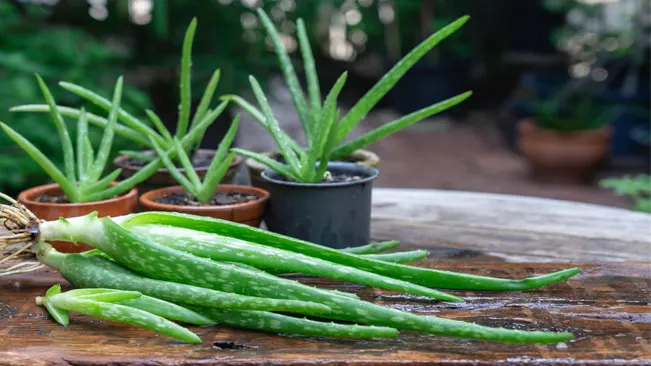
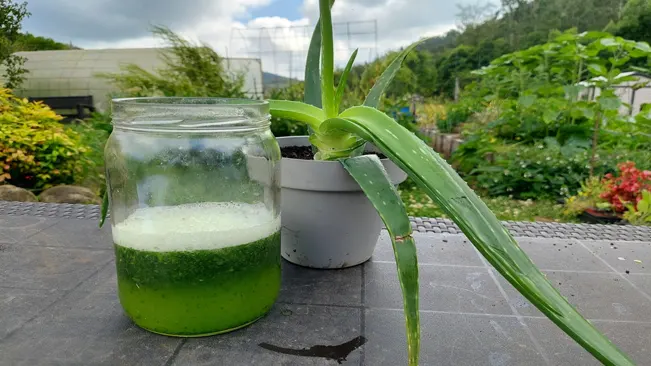
Harvesting Aloe Vera Gel
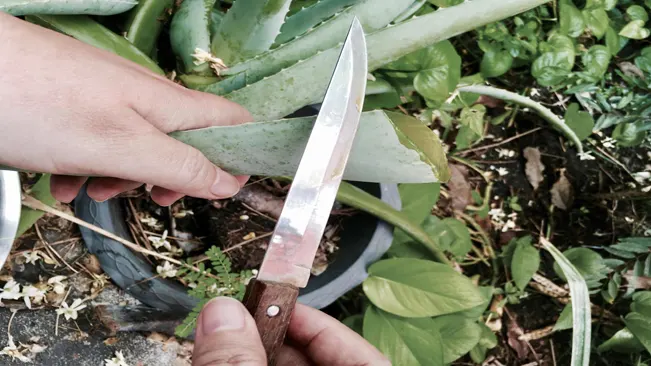
Choosing the Right Leaf
- Select a thick, juicy leaf from the outer sections of the plant. These are typically older and contain more gel.
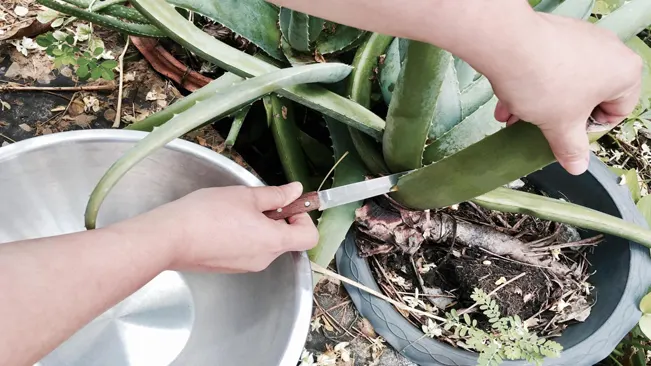
Cutting the Leaf
- With a clean knife, cut the leaf as close to the base as possible. This promotes healing and prevents damage to the rest of the plant.

Extracting the Gel
- Stand the leaf upright for a few minutes to allow the aloin (a yellowish latex) to drain out. This substance can be irritating to the skin. After that, you can slice the leaf open lengthwise to access the clear gel inside.
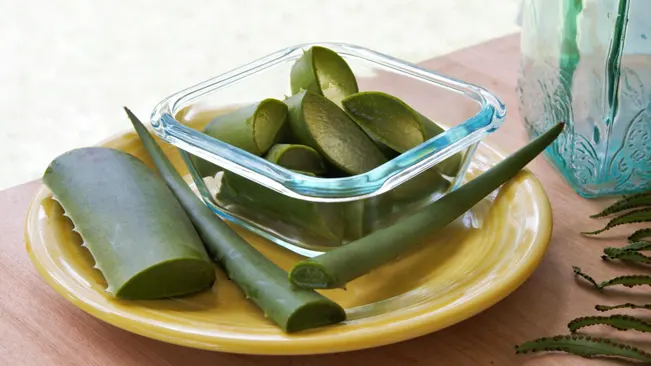
Storage
- Fresh Aloe gel can be used immediately or stored in the refrigerator for a short period. For longer storage, freeze the gel in ice cube trays.

Uses
- Aloe gel is widely used for skin care, minor burns, and as a moisturizing agent. It’s also used in homemade beauty treatments.
Propagation
Aloe Vera plants produce offsets, also known as “pups.” You can gently remove these and pot them separately once they’re about a quarter the size of the parent plant.
What are Aloe Vera Pups?
- Pups are small clones of the parent Aloe Vera plant that sprout from its base. These offshoots have their own roots and are genetically identical to the parent plant.
When to Propagate
- The ideal time to propagate Aloe Vera pups is when they are about one-quarter the size of the parent plant. This size ensures that they have developed enough of their own root system to survive independently.
How to Propagate Aloe Vera Pups
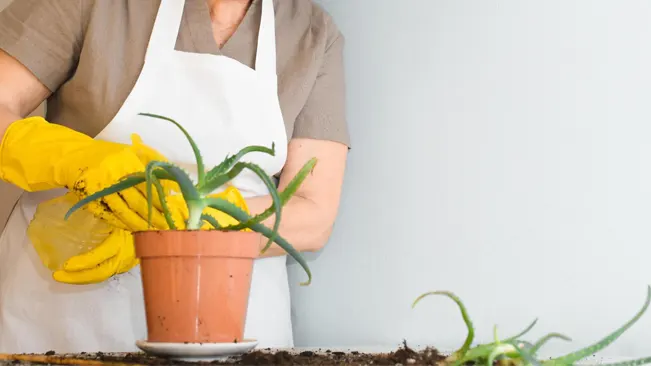
- Prepare the Tools: You’ll need a clean, sharp knife or scissors, a pot with drainage holes, and cactus potting soil.
- Remove the Pups: Carefully remove the soil around the base of the pup to expose its roots and connection to the parent plant. Gently cut or twist the pup away from the main plant, making sure to keep as many roots intact as possible.
- Allow to Heal: Before potting, let the pup sit out for a day or two to allow the cut area to form a callus. This step is crucial as it helps prevent rot.
- Potting the Pup: Fill the new pot with cactus potting soil and plant the pup. The soil should be lightly firmed down and the pup positioned so that its base is at the same level it was growing at before.
- Aftercare: Initially, place the newly potted pup in indirect light and avoid watering for about a week to prevent root rot. After this period, you can water the soil, allowing it to dry out between waterings.
Conclusion
Growing Aloe Vera at home is a rewarding experience. Not only do these plants add a touch of greenery to your space, but they also offer the added benefit of having fresh Aloe gel at your fingertips. With minimal care and attention, your Aloe Vera plant can thrive and multiply, giving you a constant supply of this versatile plant.
FAQs (Frequently Asked Questions)
- What kind of soil is best for Aloe Vera?
Aloe Vera prefers well-draining, sandy or gritty soil, similar to that used for cacti. - How often should I water my Aloe Vera plant?
Water your Aloe Vera only when the soil is completely dry, typically every 2-3 weeks, and less often in the winter. - Does Aloe Vera need direct sunlight?
Aloe Vera thrives in bright, indirect sunlight. Direct sunlight can be too harsh and may burn the leaves. - How big can an Aloe Vera plant grow?
Indoors, an Aloe Vera plant can grow up to 2-3 feet tall and wide, depending on the pot size and care. - When should I repot my Aloe Vera plant?
Repot your Aloe Vera when it becomes root-bound or the pot is too small, usually every 2-3 years. - Can I grow Aloe Vera from a leaf?
Aloe Vera is typically propagated from offsets, not leaves. Growing from a leaf is challenging and less likely to be successful. - What temperature is ideal for Aloe Vera?
Aloe Vera prefers temperatures between 55 and 80°F (13-27°C). It is not frost-tolerant and should be protected from extreme cold. - How do I know if I’m overwatering my Aloe Vera?
Signs of overwatering include yellowing or mushy leaves. Always let the soil dry out completely before watering again. - Can I use any fertilizer for my Aloe Vera plant?
Use a balanced, water-soluble fertilizer at half strength, no more than once in spring and summer. - What common pests affect Aloe Vera plants?
Common pests include aphids, mealybugs, and spider mites. Treat infestations promptly with appropriate measures.

Kristine Moore
Forestry AuthorI'm Kristine Moore, a seasoned garden landscaping professional with over 30 years of experience. My extensive career has been dedicated to transforming outdoor spaces into stunning, sustainable landscapes. With a deep understanding of horticulture, design principles, and environmental stewardship, I have become a respected figure in the field, known for creating harmonious, visually appealing, and eco-friendly gardens. My commitment to excellence and continuous learning in landscaping trends and techniques has solidified my reputation as an expert in garden design and implementation.


Leave your comment