How to Grow English Lavander: Essential Tips for a Thriving Fragrant Garden
- March 7, 2024
- 0 comment
English Lavender, scientifically known as Lavandula angustifolia, is a fragrant and versatile plant, celebrated for its soothing aroma and charming purple blooms. This perennial herb, native to the Mediterranean, is a favorite among gardeners for its beauty and ease of care. In this guide, we’ll explore the essentials of growing English Lavender, ensuring a healthy and vibrant growth in your garden.
List on How To Grow English Lavander
- Choosing the Right Location
- Planting Your Lavender
- Watering Wisely
- Fertilizing Lavender
- Pruning and Maintenance
- Winter Care
- Propagation
- Common Pests and Problems
- Harvesting Lavender
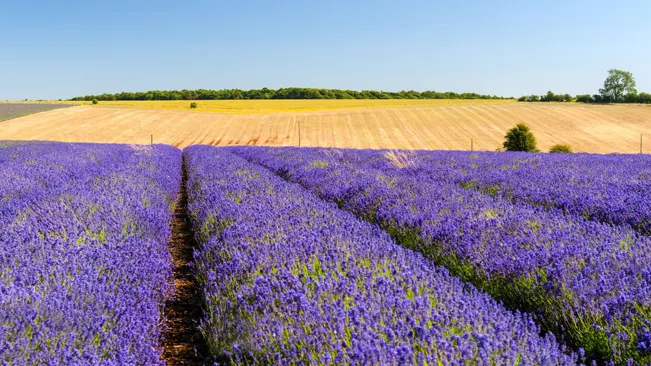
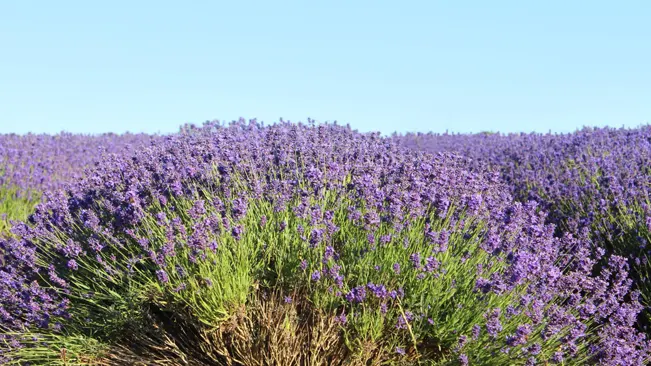
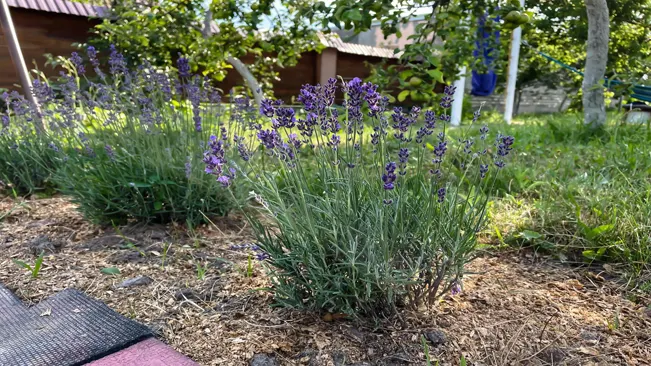
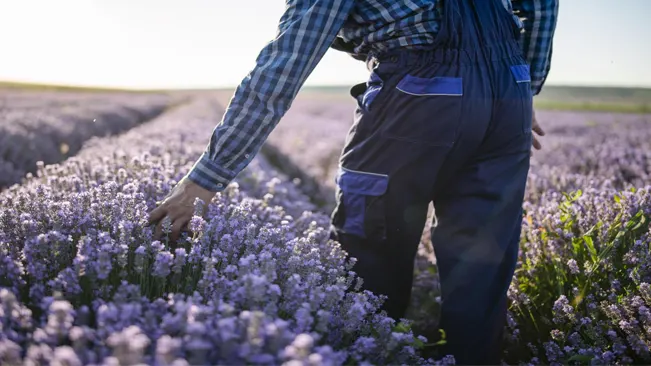
Choosing the Right Location
English Lavender thrives in full sunlight and well-drained soil. Select a spot in your garden that receives at least 6 to 8 hours of direct sunlight daily. Lavender prefers alkaline soil; you can add lime to acidic soils to achieve the desired pH level. Good air circulation is also crucial to prevent moisture-related diseases.
Sunlight
- Importance of Full Sunlight: English Lavender, as a native of the sunny Mediterranean region, has evolved to thrive in environments with abundant sunlight. The requirement of 6 to 8 hours of direct sunlight is not just for growth, but also for the plant to produce its characteristic fragrance and vibrant flowers.
- Effect on Oil Production: The amount of sunlight directly impacts the production of essential oils in the lavender, which are responsible for its aroma. Plants that receive adequate sunlight tend to have a stronger fragrance and more potent oils.
Soil Conditions
- Well-Drained Soil: Lavender does not fare well in stagnant water or overly moist conditions. Well-drained soil ensures that water does not accumulate around the roots, which can lead to root rot, a common problem with lavender.
- Soil Texture: Ideal soil for English Lavender is light and sandy. If your garden soil is heavy or clay-like, consider amending it with sand or organic material to improve drainage.
- pH Levels and Alkaline Preference: Lavender prefers a slightly alkaline soil with a pH between 6.5 and 7.5. Testing your soil’s pH can be helpful. If your soil is too acidic, adding lime can raise the pH to a more suitable level for lavender.
Air Circulation
- Preventing Diseases: Good air circulation is essential in preventing fungal diseases, which can occur in damp, stagnant conditions. Proper spacing between plants helps promote air flow.
- Spacing Plants: When planting lavender, leave enough space between plants (typically 18 to 24 inches) to ensure that air can circulate freely. This spacing not only reduces the risk of disease but also allows each plant to receive adequate sunlight and grow to its full potential.
Planting Your Lavender
The best time to plant English Lavender is in the spring or early fall. This allows the plant to establish its roots before the extreme temperatures of summer or winter. Plant your lavender in a hole that’s slightly larger than the root ball, spacing plants about 18 to 24 inches apart. This spacing provides ample air circulation.
- Understanding the Importance of Timing Planting at the right time is crucial for English Lavender. Spring or early fall are ideal because these seasons offer moderate temperatures, which are conducive to root development. In spring, the warming soil encourages root growth, while in early fall, the still-warm soil supports root establishment before the winter cold sets in.
- Site Preparation and Soil Requirements Before planting, choose a site that receives ample sunlight as lavender thrives in full sun. Prepare the soil by ensuring it is well-drained. Lavender does not like ‘wet feet’ and can suffer from root rot in waterlogged conditions. If your soil is heavy or clay-like, consider amending it with organic matter or sand to improve drainage. Additionally, lavender prefers slightly alkaline soil, so you might need to adjust the soil pH by adding lime if your soil is too acidic.
- Planting Procedure When you’re ready to plant, dig a hole that is slightly larger than the size of the root ball of your lavender plant. This extra space is important to give the roots room to expand and access nutrients in the soil. When placing the plant in the hole, ensure that the top of the root ball is level with the soil surface. Filling the hole, gently firm the soil around the roots to eliminate air pockets.
- Spacing for Growth and Health Spacing your lavender plants 18 to 24 inches apart is essential for several reasons. This spacing allows each plant enough room to grow and reach its full size without competing for nutrients, light, or water. It also ensures good air circulation around each plant, which is vital in preventing fungal diseases. Good air circulation helps the foliage to dry quickly after rain or dew, reducing the likelihood of mold or mildew.
- Post-Planting Care After planting, water the lavender plants gently to settle the soil around the roots and remove any remaining air pockets. In the initial weeks after planting, keep the soil lightly moist but not saturated, as the plants establish their root system. Once established, lavender is quite drought-tolerant, and overwatering should be avoided.
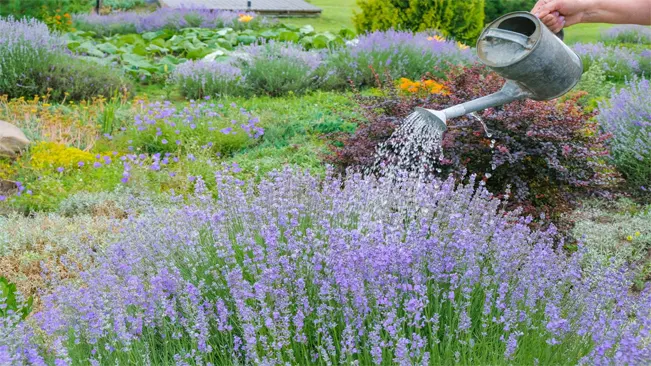
Watering Wisely
While establishing, lavender plants need regular watering. However, once established, they are drought-tolerant. Overwatering can lead to root rot, so ensure the soil dries out between waterings. A good rule of thumb is to water once or twice a week, depending on the weather conditions.
Understanding the Water Needs of English Lavender
- Initial Watering After Planting: When you first plant your English Lavender, the roots are still developing and acclimatizing to their new environment. During this establishment period, which typically lasts a few weeks to a couple of months, regular watering is important. The goal is to keep the soil consistently moist but not waterlogged.
- Transition to Less Frequent Watering: As the lavender plant establishes, it begins to develop a deeper root system. This makes the plant more resilient and drought-tolerant. At this stage, you should gradually reduce the frequency of watering, allowing the soil to dry out somewhat between waterings.
- Monitoring Soil Moisture: It’s important to check the soil moisture level before watering. You can do this by simply sticking your finger into the soil near the base of the plant. If the top inch of soil feels dry, it’s time to water. If it’s still moist, you can wait.
- Weather Considerations: Your watering schedule will also depend on the weather conditions in your area. In hot, dry climates, you may need to water more frequently, while in cooler or cloudier conditions, less frequent watering is required. Always adjust your watering based on rainfall and temperature changes.
- Overwatering Risks: Overwatering is one of the most common mistakes with lavender. This plant does not like ‘wet feet,’ meaning its roots should not be constantly wet. Overwatered lavender is prone to root rot, a condition that can be fatal. Root rot often manifests as yellowing leaves and a general lack of vigor.
- Watering Technique: When you water your lavender, do so at the base of the plant. Avoid getting water on the foliage, as this can promote fungal diseases, especially in humid climates. Drip irrigation or a soaker hose is ideal as it delivers water directly to the soil, minimizing evaporation and water waste.
- Seasonal Adjustments: In most climates, lavender requires less water in the winter, especially if it’s planted in the ground. If you’re growing lavender in containers, be aware that potted plants may dry out more quickly and might need more frequent watering.
- Mulching: Mulching can help conserve soil moisture and reduce the frequency of watering. Use a light-colored mulch, like straw or small stones, which reflects sunlight and helps keep the soil around the lavender roots cool and moist.
Fertilizing Lavender
English Lavender generally does not require a lot of fertilizers. Over-fertilizing can encourage excess foliage growth at the expense of blooms. If necessary, use a slow-release, low-nitrogen fertilizer in the spring as new growth appears.
The Risks of Over-Fertilizing
Over-fertilizing can be detrimental to the health and blooming of English Lavender. Excess nutrients, especially nitrogen, can lead to the following issues:
- Excessive Leaf Growth: Too much nitrogen can cause the plant to produce lush foliage at the expense of flowers. Since the flowers are the most desirable part of the lavender plant, this can be counterproductive.
- Reduced Fragrance: Lavender is cherished for its aromatic oils. High levels of nitrogen can dilute the concentration of these oils, reducing the plant’s fragrance.
- Increased Disease Susceptibility: Overly lush growth can make the plant more susceptible to diseases, especially in humid conditions where increased foliage can reduce air circulation.
Choosing the Right Fertilizer
If you decide to fertilize your lavender, here are some guidelines:
- Type of Fertilizer: Choose a slow-release, low-nitrogen fertilizer. A balanced 10-10-10 fertilizer is often recommended, but use it sparingly.
- Application Time: The best time to apply fertilizer is in the early spring as new growth appears. This helps give the plant a little boost as it exits its winter dormancy.
- Frequency: Fertilizing once a year in the spring is typically sufficient. Lavender does not need frequent feeding, and overdoing it can cause more harm than good.
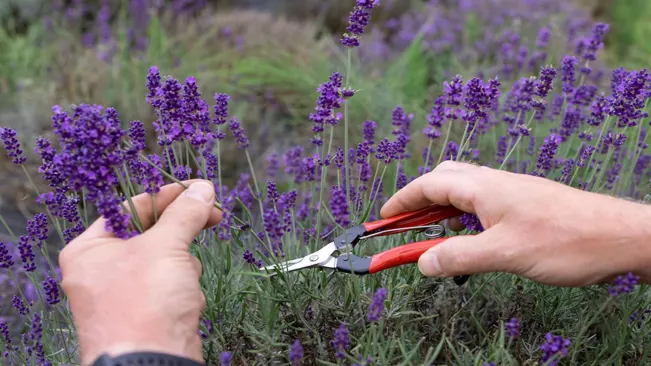
Pruning and Maintenance
Pruning is essential for maintaining a compact shape and encouraging robust growth. Prune in the early spring by removing old, woody stems and cutting back one-third of the plant’s height. After flowering, trim off spent flower stalks to keep the plant tidy and encourage a second bloom.
Pruning English Lavender
- Timing: The ideal time to prune English Lavender is in the early spring, just as the new growth starts appearing. This is typically after the last frost when the weather begins to warm up. Pruning at this time helps the plant to focus its energy on the new growth that will produce this season’s blooms.
- Technique: Use sharp, clean pruning shears for a clean cut. Start by removing any dead or damaged wood, which is usually darker and woodier in appearance. This helps prevent disease and pest infestations.
- Shaping the Plant: After removing the dead wood, focus on shaping the plant. English Lavender should be pruned into a rounded, mound-like shape. This not only enhances its appearance but also promotes even growth and blooming. Cut back about one-third of the plant’s height, ensuring that you do not cut into the old wood. Lavender can have difficulty regenerating from old wood.
- Promoting Vigorous Growth: Pruning encourages the plant to become fuller and bushier. By cutting back the plant, you stimulate new growth closer to the base, which helps prevent the lavender from becoming too leggy or woody.
Post-Flowering Maintenance
- Deadheading: After the lavender blooms, you should deadhead, or trim off, the spent flower stalks. This process not only keeps the plant looking neat but also can encourage a second, albeit smaller, bloom in late summer or early fall.
- Monitoring Growth: Continuously monitor your lavender for any signs of disease or pests. Regular maintenance helps in early detection and management of any issues.
- Winter Preparation: If you live in a region with harsh winters, you might need to prepare your lavender for the cold. While some varieties of English Lavender are cold-hardy, others may benefit from a light layer of mulch to protect the roots from freezing.
Winter Care
In colder climates, English Lavender needs some protection during winter. Mulching with gravel or sandy soil can help drain excess moisture and protect the roots. In extremely cold areas, consider growing lavender in containers that can be moved indoors during winter.
Mulching for Protection
- Purpose of Mulching: Mulching helps to regulate soil temperature and moisture levels. For lavender, it’s essential to use materials that promote drainage rather than retain moisture.
- Materials: Gravel, sand, or small stones are ideal for mulching lavender. These materials allow water to drain away from the plant’s roots, reducing the risk of root rot.
- Application: Spread the mulching material around the base of the plant, covering the root zone but not touching the plant’s stem. A layer of 2-3 inches should be sufficient.
Container Growing
- Benefits: Growing lavender in containers offers the advantage of mobility. You can easily move the plants to a sheltered location, like a garage or indoors, during extreme cold.
- Container Selection: Choose a container with ample drainage holes. It should be large enough to accommodate the plant’s root system but not so large that the soil remains wet for long periods.
- Indoor Placement: If moving lavender indoors, place it in a location that receives plenty of light and is away from direct heat sources. The goal is to mimic the plant’s natural dormant state as much as possible.
Other Winter Care Tips
- Watering: Reduce watering in the winter, as lavender’s water needs decrease significantly. The soil should be allowed to dry out between waterings.
- Pruning: Avoid heavy pruning in the fall, as this can stimulate new growth that is susceptible to winter damage. Light pruning is acceptable to shape the plant and remove any dead foliage.
- Shelter from Wind: In particularly windy areas, consider providing a windbreak to protect the lavender. This can be a physical barrier like a burlap screen or strategically placed evergreen shrubs.
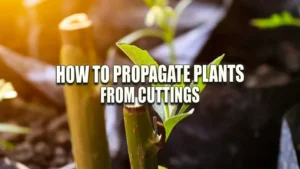
Propagation
English Lavender can be propagated through cuttings or seed. For cuttings, snip a few inches of new growth and plant them in a well-draining soil mix. Seeds require patience, as lavender can be slow to germinate and grow.
Propagation by Cuttings
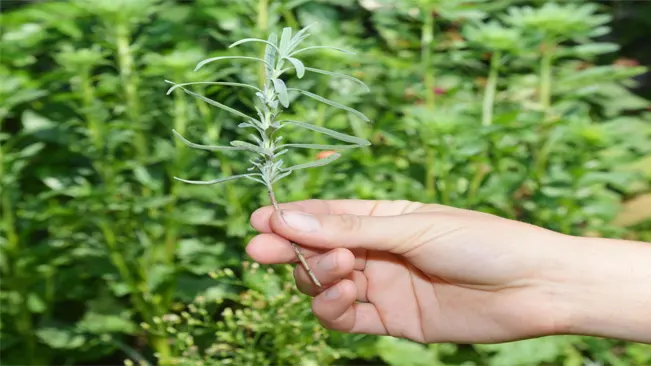
- Choosing the Right Cuttings: For the best results, choose healthy, non-flowering stems. Early morning is the best time to take cuttings when the plant is fully hydrated.
- Preparing the Cuttings: Cut a 3-4 inch piece of new growth, just above a node (where leaves emerge). Remove the leaves from the bottom half of the cutting to expose the stem.
- Rooting Hormone (Optional): Though not always necessary, dipping the cut end into rooting hormone can increase the chances of successful rooting.
- Planting the Cuttings: Use a well-draining soil mix, such as a blend of peat and perlite or sand. Insert the cuttings into the soil, ensuring that the leafless part of the stem is buried.
- Creating Humidity: Cover the cuttings with a plastic bag or place them in a greenhouse to maintain humidity. Be sure to ventilate regularly to prevent mold growth.
- Watering: Keep the soil slightly moist but not waterlogged. Overwatering can cause the cuttings to rot.
- Root Development: Roots usually develop within 4-8 weeks. Once the cuttings have established a good root system, they can be transplanted into individual pots or into the garden.
Propagation by Seeds
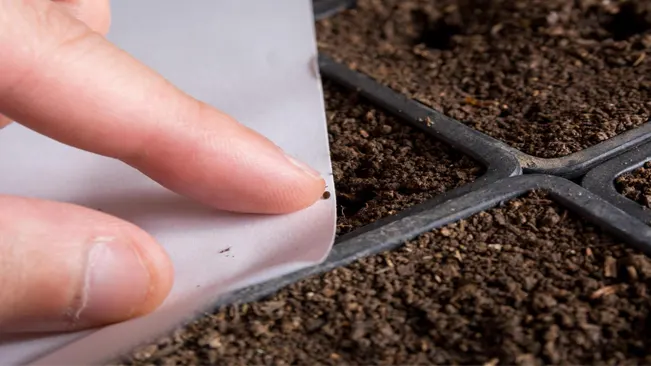
- Seed Selection: Make sure to use fresh seeds as their viability decreases with age.
- Sowing the Seeds: Sow seeds in well-draining soil, either in a seed tray or pots. Lightly cover the seeds with a thin layer of soil. Lavender seeds require light for germination, so avoid burying them too deeply.
- Temperature and Light: Maintain a consistent temperature of about 70°F (21°C) and provide ample light. A sunny windowsill or a grow light can be ideal.
- Watering: Keep the soil moist but not overly wet. A spray bottle can be useful for gently watering without disturbing the seeds.
- Germination Time: Patience is key as lavender seeds can take anywhere from two weeks to a month or more to germinate.
- Transplanting Seedlings: Once the seedlings have several sets of leaves and are large enough to handle, they can be transplanted into individual pots. Harden off the plants gradually before transplanting them outdoors.
Common Pests and Problems
Lavender is generally resistant to pests and diseases. However, it can be susceptible to root rot due to overwatering. Ensure good drainage to prevent this issue. Occasionally, aphids and spittlebugs might appear, which can be controlled with insecticidal soap.
Root Rot
Root rot is arguably the most significant problem faced by lavender growers, predominantly caused by overwatering and poor drainage. Lavender, being a Mediterranean plant, is adapted to growing in dry, well-drained soil. When the soil retains too much moisture, the roots of the plant can become waterlogged, leading to rot. This condition is exacerbated in clay soils or in regions with heavy rainfall. To prevent root rot:
- Ensure your lavender is planted in well-draining soil.
- Amend the soil with sand or gravel if it’s too compact or clayey.
- Water the plant sparingly, allowing the soil to dry out between waterings.
- Consider raised beds or containers for better drainage, especially in areas with heavy soil.
Aphids
Aphids are small, sap-sucking insects that can infest lavender plants, often clustering on the new growth and undersides of leaves. They can cause distorted growth and leave behind a sticky residue known as honeydew, which can lead to sooty mold. To manage aphids:
- Introduce beneficial insects like ladybugs or lacewings, which are natural predators of aphids.
- Spray the plants with a strong jet of water to dislodge the aphids.
- Use insecticidal soaps or neem oil as a more organic solution.
- In severe cases, chemical aphid treatments can be used, but they should be a last resort.
Spittlebugs
Spittlebugs are known for the frothy spittle masses they produce as nymphs. These masses are often found on plant stems in spring and early summer. While spittlebugs rarely cause serious harm to lavender, they can be unsightly. Managing spittlebugs involves:
- Manually removing the nymphs and their spittle.
- Spraying the plants with water to disrupt the spittle masses.
- Maintaining good air circulation around the plants to discourage spittlebugs.
Other Potential Issues
- Fungal Diseases: Lavender can sometimes suffer from fungal diseases like leaf spot and rust, especially in humid conditions. Good air circulation, proper spacing of plants, and avoiding overhead watering can help prevent these issues.
- Winter Damage: In cold climates, lavender can suffer from winter burn or dieback due to freezing temperatures and winds. Protecting the plants with mulch or covering them during extreme weather can help.
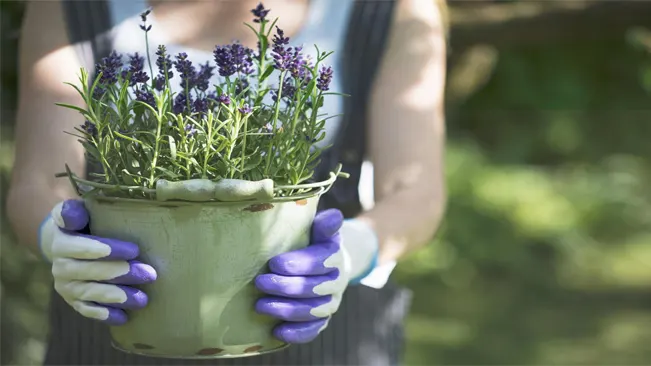
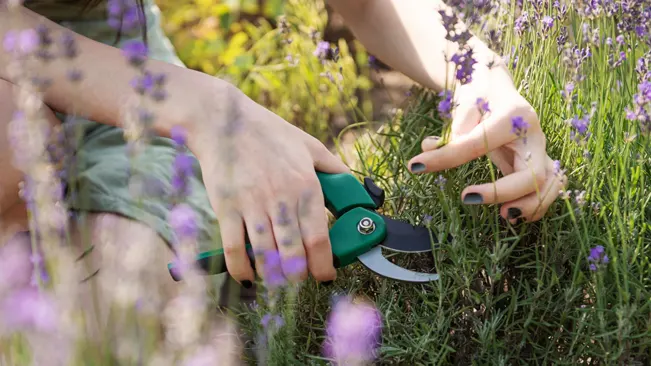
Harvesting Lavender
The best time to harvest lavender is when the buds have formed but the flowers have not fully opened. This is when the essential oils are most concentrated. Cut the stems and hang them in a dry, dark place for drying.
Timing of Harvest
- The optimal time for harvesting lavender is critical for maximizing the quality of the essential oils and fragrance. As mentioned, this is usually when the buds are fully formed but before the flowers have fully opened. The oils are most concentrated at this stage, giving you the best fragrance and potency.
Frequency of Harvest
- Depending on your climate and the lavender’s growth rate, you may be able to harvest lavender twice in a season. The first harvest typically occurs in late spring or early summer, with a possible second harvest in late summer or early fall.
How to Harvest
- Cut the lavender stems as long as possible if you plan to use them for bouquets or decorations. However, leave at least two sets of leaves on the plant to promote healthy regrowth.
- If you’re harvesting for essential oil production, the length of the stem is less critical, and you can focus more on the flower heads.
Drying Lavender
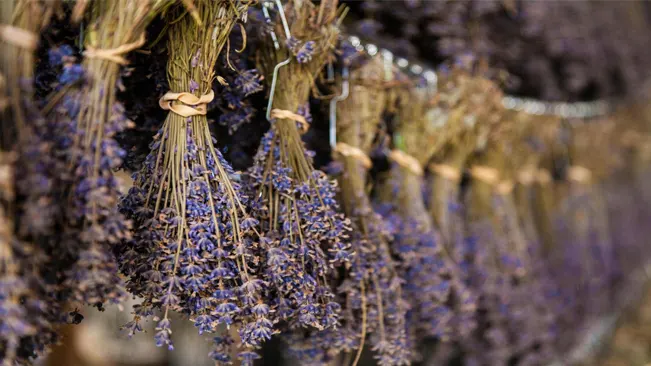
- After harvesting, shake off any excess soil or bugs.
- Tie the lavender stems in small bundles with rubber bands or string. Keeping the bundles small ensures good air circulation and effective drying.
- Hang the bundles upside down in a dry, warm, and dark place. Darkness helps retain the color and aroma. A well-ventilated shed, garage, or attic works well.
- Depending on the humidity and temperature, drying can take anywhere from a week to several weeks.
Storing Dried Lavender
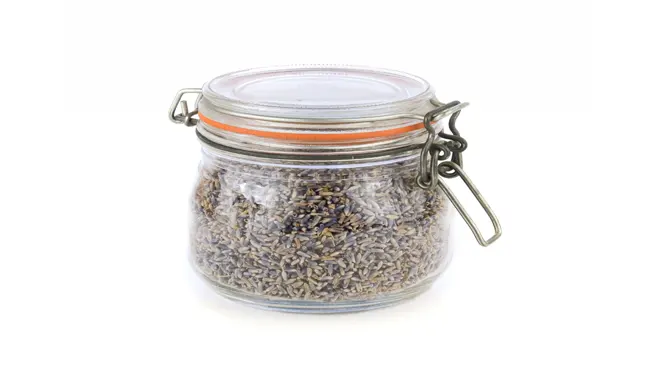
- Once the lavender is completely dry, you can store it in airtight containers. Dried lavender can be used for a variety of purposes, from culinary to aromatherapy.
- Keep the containers in a cool, dark place to preserve the lavender’s color and aroma.
Uses of Harvested Lavender
- Culinary: Dried lavender can be used in baking and cooking, imparting a unique floral flavor.
- Aromatherapy: Lavender is known for its calming properties. Use the dried flowers in sachets, potpourris, or homemade scented candles.
- Decorative: Dried lavender bundles or wreaths add a rustic charm to home decor.
- Medicinal: Lavender has been used in herbal remedies for its anti-inflammatory and soothing properties.
Conclusion
Growing English Lavender can be a rewarding experience for any gardener. With its delightful fragrance and attractive appearance, it’s a wonderful addition to any garden or landscape. By following these simple guidelines, you can enjoy the beauty and aroma of English Lavender for years to come.
FAQs (Frequently Asked Questions)
- What is the best time to plant English Lavender?
English Lavender is best planted in the spring or early fall. This timing allows the plant to establish its roots before the extreme temperatures of summer or winter. - How much sunlight does English Lavender need?
English Lavender requires full sunlight for optimal growth. It should receive at least 6 to 8 hours of direct sunlight daily. - What type of soil is suitable for English Lavender?
Lavender prefers well-drained, slightly alkaline soil. If your soil is acidic, you can add some lime to adjust the pH level. - How often should I water English Lavender?
Initially, water regularly to help the plant establish. Once established, lavender is drought-tolerant and should only be watered when the soil is dry to the touch. Overwatering can lead to root rot. - Does English Lavender require fertilization?
English Lavender generally does not need much fertilizer. Over-fertilizing can lead to excess foliage at the expense of blooms. If you do fertilize, choose a low-nitrogen, slow-release fertilizer. - How do I prune English Lavender?
Prune in early spring by removing any old, woody stems and cutting back about one-third of the plant’s height. Also, trim off spent flower stalks after blooming to encourage a second bloom and maintain plant shape. - Can English Lavender survive winter?
English Lavender is fairly hardy, but in colder climates, it may need some protection, such as mulching with gravel or sand. In very cold areas, consider growing lavender in containers that can be brought indoors. - How can I propagate English Lavender?
Lavender can be propagated from cuttings or seeds. For cuttings, take a few inches of new growth and plant in well-draining soil. Seeds can be slower and require patience. - What are common pests and diseases that affect English Lavender?
Lavender is generally pest-resistant. However, it can be susceptible to root rot from overwatering. Occasionally, aphids and spittlebugs can be a problem, which are treatable with insecticidal soap. - When is the best time to harvest English Lavender?
Harvest lavender when the buds are formed but before the flowers fully open, usually in the late morning after dew has evaporated. This is when the essential oils are most concentrated.

Kristine Moore
Forestry AuthorI'm Kristine Moore, a seasoned garden landscaping professional with over 30 years of experience. My extensive career has been dedicated to transforming outdoor spaces into stunning, sustainable landscapes. With a deep understanding of horticulture, design principles, and environmental stewardship, I have become a respected figure in the field, known for creating harmonious, visually appealing, and eco-friendly gardens. My commitment to excellence and continuous learning in landscaping trends and techniques has solidified my reputation as an expert in garden design and implementation.


Leave your comment