How to Grow Fire Lily: Insider Secrets for Successful Gardening
- March 25, 2024
- 0 comment
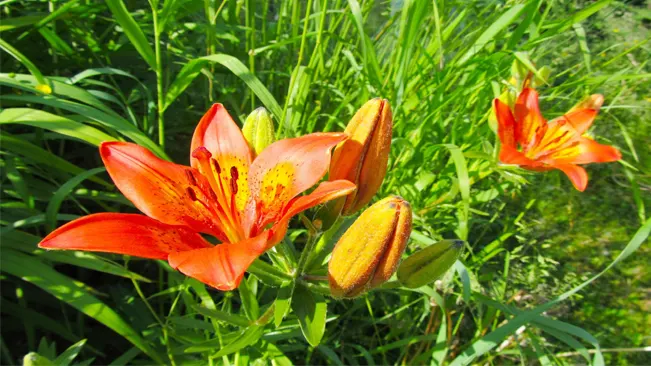
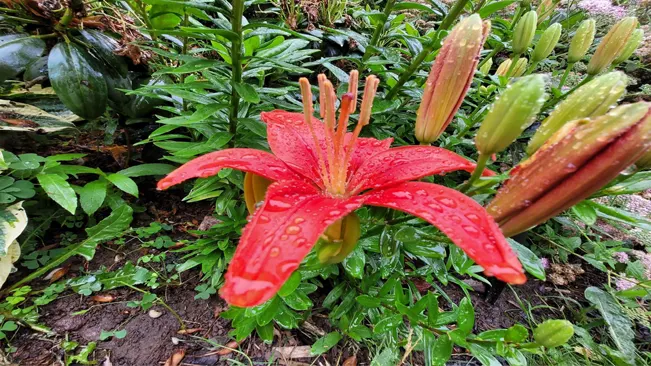
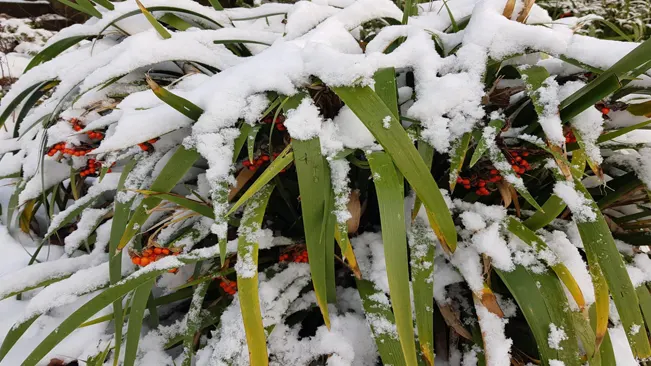
How to Grow Fire Lily: Discover the essential steps to cultivating a vibrant Clivia miniata, the Fire Lily, in your garden or indoors. This guide covers the key aspects of care for this stunning perennial, known for its fiery red, orange, or yellow blooms, making it a striking addition to any space. Learn the secrets to maintaining a healthy and flourishing Fire Lily, from optimal planting conditions to essential maintenance tips, and enjoy the beauty and color it brings to your environment.
List on How To Grow Fire Lily
- Choosing the Right Location
- Planting
- Watering and Feeding
- Pruning and Maintenance
- Pest and Disease Management
- Propagation
- Common Challenges
Choosing the Right Location
Indirect Sunlight
- Importance of Light Balance: Fire Lily requires a careful balance of light. It is a shade-loving plant that naturally grows under tree canopies in its native environment. The bright, indirect sunlight mimics this natural habitat.
- Avoiding Direct Sunlight: Direct sunlight, especially during the hot midday hours, can harm the Fire Lily. It can cause the leaves to burn, leading to a loss of vibrancy and potentially damaging the plant’s health.
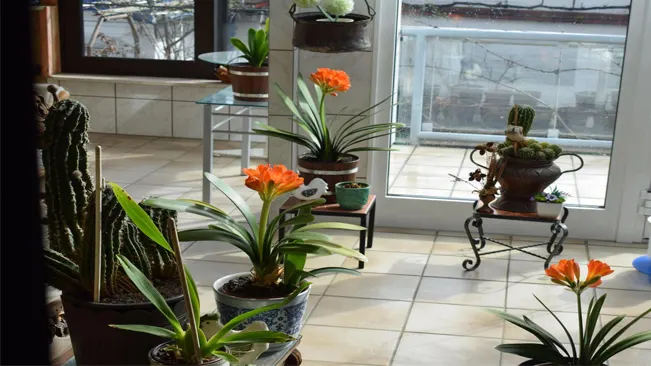
- Best Locations Indoors: Near a north or east-facing window where the light is bright but diffused is ideal. Using sheer curtains can also help to filter the light.
Temperature
- Ideal Temperature Range: Fire Lilies are comfortable in typical indoor temperatures, thriving in a range of 60-75°F (15-24°C). This range promotes healthy growth and blooming.
- Avoiding Temperature Extremes: Extreme temperatures or rapid temperature fluctuations can stress the plant. In particular, temperatures below 50°F (10°C) can be harmful.
- Outdoor Considerations: If you’re growing Fire Lily outdoors, it’s best in USDA hardiness zones 9-11. In cooler climates, it should be brought indoors during colder months.
Humidity
- Moderate Humidity Preference: While Fire Lilies don’t require tropical levels of humidity, they do prefer a moderately humid environment. This simulates their natural rainforest floor habitat.
- Humidity Solutions: In dry indoor environments, using a humidifier can help. Alternatively, placing a water tray with pebbles (to hold the pot above the water) near the plant can increase the surrounding humidity.
- Avoiding Dry Air: Keep the plant away from air vents or drafts that can dry out the air. This is particularly important in winter when indoor heating can reduce indoor humidity significantly.
Planting
Soil Requirements
- Well-Draining Soil: Fire Lilies don’t like to sit in waterlogged conditions. Good drainage is key to preventing root rot.
- Organic Matter: Rich soil supports robust growth. Organic matter, like compost, can improve soil fertility and structure.
- Soil Mix Recipe: A recommended mix is to combine equal parts of potting soil, peat (or coir as a more sustainable alternative), and perlite. This mix ensures adequate drainage while retaining enough moisture and nutrients.
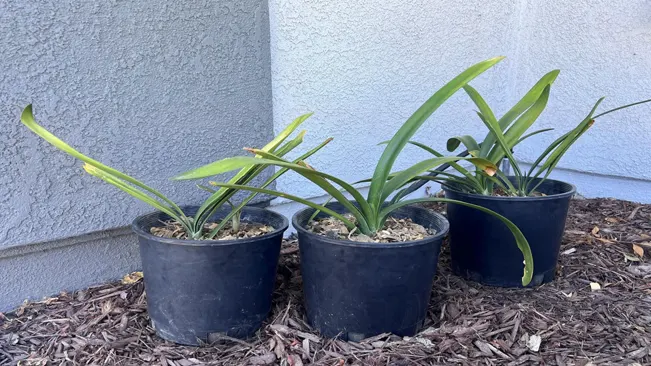
Potting
- Drainage Holes: The pot must have drainage holes to allow excess water to escape. This prevents water from accumulating at the bottom and causing root problems.
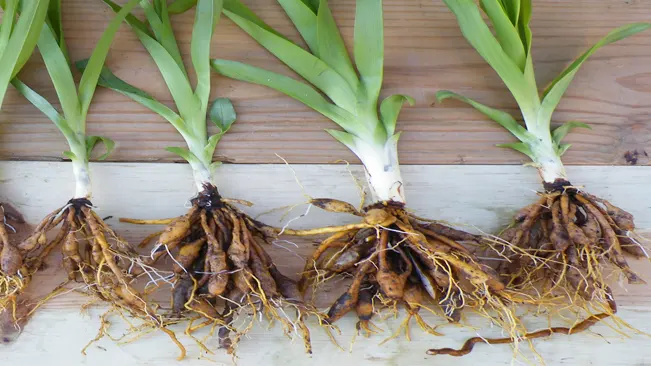
- Planting the Bulb: Fire Lily bulbs should be planted with care. The top third of the bulb should remain above the soil surface. This exposure helps stimulate growth and flowering.
- Pot Size: Choose a pot that’s slightly larger than the bulb. A pot that’s too large can hold excessive moisture, while a too-small pot may restrict growth.
Spacing
- Adequate Spacing: Fire Lilies should be spaced about 12-18 inches apart. This spacing gives each plant enough room to grow without competing for nutrients and water.
- Air Circulation: Proper spacing also ensures good air circulation around each plant, reducing the risk of fungal diseases.
- Aesthetic Consideration: Besides practical reasons, spacing also plays a role in garden aesthetics. Properly spaced Fire Lilies create a visually pleasing display, allowing each plant to stand out.
Watering and Feeding
Watering
- Check Soil Moisture: Before watering, check if the top inch of soil is dry. The best way to test this is by simply inserting your finger into the soil.
- Water Thoroughly: When you water, do so thoroughly until water drains out of the bottom of the pot. This ensures the roots are adequately moistened.
- Frequency: The frequency of watering will vary based on environmental conditions. In general, watering once a week is a good starting point, but always check the soil moisture before watering.
- Avoid Waterlogging: Ensure the pot has good drainage to avoid water accumulating at the bottom. This is crucial as stagnant water can cause root rot, a common problem in over-watered plants.
Fertilizing
- Type of Fertilizer: Use a balanced, water-soluble fertilizer. A balanced fertilizer typically has equal proportions of nitrogen, phosphorus, and potassium (e.g., 10-10-10).
- Frequency: Apply the fertilizer every 2-3 weeks during the active growing season, usually from spring to late summer.
- Application Method: Dilute the fertilizer according to the instructions on the package. Apply it when you water the plant to avoid fertilizer burn and ensure even distribution.
- Winter Fertilizing: As the plant enters dormancy in the winter, it’s advisable to stop fertilizing. Excess nutrients can accumulate in the soil during this period of reduced growth.
Winter Care
- Reduced Watering: As the plant is not actively growing, it requires less water. Allow the soil to dry out more than you would in the growing season before watering again.
- Temperature: If possible, move the plant to a cooler spot during the winter, ideally where temperatures are around 50-60°F (10-15°C). This mimics the natural cooler temperatures the plant would experience in its native habitat, encouraging it to rest and subsequently bloom.
- Light: Continue to provide bright, indirect light even in winter. This helps maintain the health of the plant during its dormant phase.
- Avoid Repotting: It’s best not to repot or divide the plant during its dormant period. Wait until early spring when the plant starts to show signs of new growth.
Pruning and Maintenance
Pruning
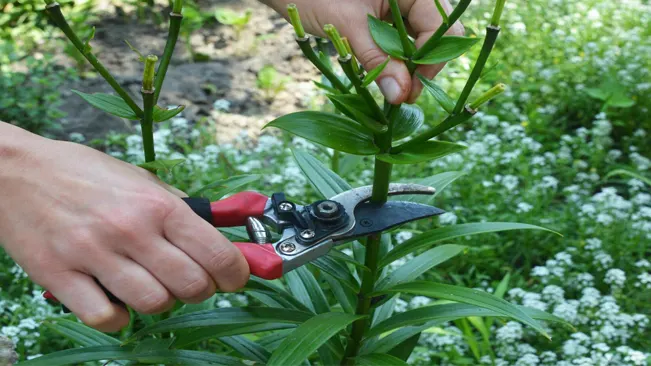
- Purpose: The main objective of pruning is to maintain the plant’s health and appearance. By removing dead or yellowing leaves, you’re not only tidying up the plant but also allowing it to direct its energy towards new growth and flowering.
- Technique: Use a clean, sharp pair of scissors or pruning shears. Make cuts close to the base of the leaf, but be careful not to damage the main stem. It’s important to remove only the unhealthy parts of the plant to prevent stress.
- After Flowering: Once the Fire Lily has finished blooming, you’ll notice the flower stalks begin to wilt and dry. Cutting these stalks back to the base of the plant helps prevent energy wastage on seed production (unless you are interested in collecting seeds) and encourages the plant to focus on root and leaf growth.
- Regular Checks: Regularly inspecting your plant is key. Pruning should be seen as a part of ongoing maintenance rather than a seasonal or occasional task.
Repotting
- When to Repot: Fire Lilies generally need to be repotted every 2-3 years, but this can vary depending on the growth rate. Signs that your plant needs repotting include roots growing out of the drainage holes, slow growth, or when the soil dries out too quickly after watering, indicating that the plant is root-bound.
- Choosing a Pot: Select a pot that’s slightly larger than the current one, with good drainage. Fire Lilies prefer being snug in their pots, so avoid choosing a pot that’s too large, as this can lead to excess soil moisture and potential root rot.
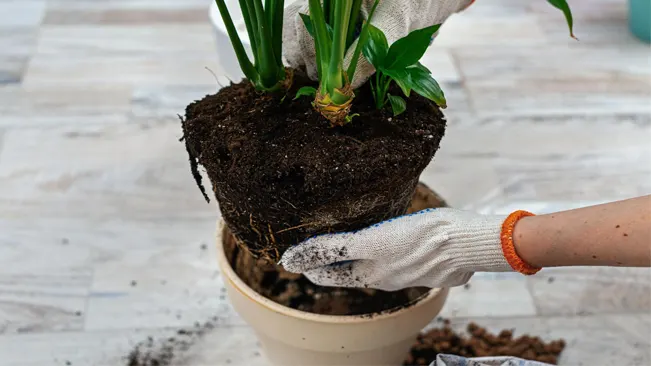
- Repotting Process: Carefully remove the plant from its current pot and gently shake off excess soil from the roots. Inspect the root ball and trim any dead or overly long roots. Place the plant in the new pot and fill in around it with fresh, well-draining potting mix.
- Post-Repotting Care: After repotting, water the plant thoroughly and place it in a location with indirect light. Avoid fertilizing immediately after repotting to prevent burning the roots. Allow the plant to acclimate to its new pot for a few weeks before resuming its normal care routine.
Pest and Disease Management
Pests
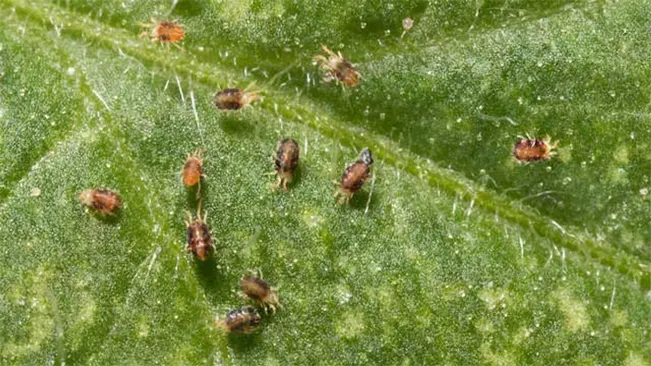
- Spider Mites: These tiny pests, often too small to see with the naked eye, can cause significant damage. They suck sap from the leaves, leading to yellowing and drooping. You might notice fine webbing on the plant. To combat spider mites, regularly mist the leaves to increase humidity, as mites thrive in dry conditions. Insecticidal soap or neem oil sprays are effective treatments. Apply these treatments every 7-10 days until the infestation is under control.
- Aphids: Aphids are small, soft-bodied insects that can be green, black, brown, or red. They typically cluster on new growth and the undersides of leaves, sucking plant sap and causing distorted growth and a sticky residue known as honeydew, which can lead to sooty mold. Treat aphids by spraying the plant with a strong jet of water to knock them off. If this doesn’t suffice, use insecticidal soap or neem oil, ensuring to cover all parts of the plant, especially the undersides of leaves.
Diseases
- Root Rot: This is a common problem caused by over-watering. Fire Lilies don’t like to sit in waterlogged soil, as it leads to decay in the roots. Signs of root rot include yellowing leaves and a soft, black base. Prevent this by ensuring your pot has good drainage and by letting the soil partially dry out between waterings. If root rot has set in, you may need to remove the affected parts of the root system and repot the plant in fresh soil.
- Fungal Diseases: These include leaf spot and rust, which appear as discolored spots on the leaves. Good air circulation, proper watering, and avoiding wetting the leaves when you water can prevent these issues. If your plant does contract a fungal disease, remove affected leaves and treat with a fungicide.
Propagation
Seed Propagation
- Harvesting Seeds: After the Fire Lily flowers, it produces berries that contain seeds. These berries typically turn red when ripe, indicating that the seeds are ready to be harvested.
- Preparing Seeds: Remove the seeds from the berries and wash off the pulp. It’s important to plant them soon after cleaning, as they don’t store well.
- Sowing Seeds: Plant the seeds in a well-draining seed starting mix, covering them lightly with soil. Keep the soil moist but not soggy.
- Germination: Seed germination can be slow and may take a few weeks to several months. The seeds need a warm, humid environment to germinate effectively.
- Growth: Once the seedlings have emerged and grown a few leaves, they can be transplanted into individual pots. Patience is key, as it can take a few years for seed-grown plants to flower.
Division of Offsets
- Timing: The best time to divide Fire Lily is in the spring, just as the plant starts its active growth cycle.
- Identifying Offsets: Offsets are small, baby plants that grow at the base of the mother plant. They develop their own roots and leaves.
- Separation: Carefully remove the mother plant from its pot and gently separate the offsets from the main plant. Be sure to keep a good amount of roots attached to each offset.
- Potting Offsets: Plant the offsets in their own pots using a similar soil mix as used for the adult plants. Water them well after potting.
- Care After Division: Keep the newly potted offsets in indirect light and maintain consistent moisture in the soil. It’s normal for the offsets to take some time to adjust and start new growth.
Common Challenges
Leaf Burn
- Direct Sunlight: Fire Lilies are not accustomed to prolonged direct sunlight. The intense exposure can scorch their leaves, leading to leaf burn.
- Signs: Look for yellowing or browning on the leaves, especially around the edges.
- Solution: Relocate your Fire Lily to a spot where it receives bright but indirect light. East-facing windows are often ideal for indoor plants, as they provide gentle morning sunlight.
Root Rot
- Over-Watering: The most common cause of root rot is excess water in the soil, which deprives the roots of necessary oxygen.
- Signs: The plant may wilt, leaves turn yellow, and the roots will look brown and mushy instead of firm and white.
- Solution: Ensure your Fire Lily is planted in well-draining soil and a pot with drainage holes. Water only when the top inch of soil is dry to the touch. If you suspect root rot, you may need to remove the plant from its pot, trim away any rotten roots, and repot in fresh soil.
Failure to Bloom
- Insufficient Light: While direct sunlight can harm the plant, too little light can prevent blooming.
- Lack of Dormancy: Fire Lilies need a period of rest, typically in winter, with cooler temperatures and reduced watering to initiate blooming.
- Signs: The plant remains healthy but doesn’t produce flowers.
- Solution:
- Light: Place the plant in a location with bright, indirect light. If indoors, consider using grow lights.
- Dormancy: During winter, reduce watering and keep the plant in a cooler (but not cold) room, ideally around 50-55°F (10-13°C). After this dormant period, resume regular care to encourage blooming.
Related Articles:
- How to Grow Star Magnolia
- How to Grow Robellini Palms
- How to Grow Dahoon Holly
- How to Grow Cinnamon Plant
- How to Grow Lemon Cypress Tree
- How to Grow Wintergreen Plant
- How to Grow Cherimoya Tree
- How to Grow Leyland Cypress: Everything You Need to Know
- How to Grow a Nutmeg Tree: Essential Tips for a Thriving Spice Plant
- How to Grow Bay Laurel: A Step-by-Step Guide to Planting, Care, and Harvesting
Conclusion
Growing Fire Lily successfully requires a balance of proper light, water, and care. Position the plant in bright, indirect sunlight and water only when the top inch of soil is dry, avoiding the common pitfalls of leaf burn and root rot. Remember to provide a dormant period in winter to encourage vibrant blooms. With these simple yet effective practices, your Fire Lily will thrive, bringing a burst of color and life to your garden or indoor space.
FAQs (Frequently Asked Questions)
- What kind of light do Fire Lilies need?
Fire Lilies thrive in bright, indirect sunlight. Direct sun can cause leaf burn, so it’s best to place them in a location where they’ll receive filtered or dappled light. - How often should I water my Fire Lily?
Water when the top inch of the soil feels dry. Over-watering can lead to root rot, so ensure the soil is well-draining. - Do Fire Lilies need a special type of soil?
They prefer well-draining soil rich in organic matter. A mix of potting soil, peat, and perlite is ideal. - How do I encourage my Fire Lily to bloom?
Provide a dormant period in winter with reduced watering and cooler temperatures. This rest period is crucial for stimulating flowering. - Can I grow Fire Lilies outdoors?
Yes, in warmer climates, Fire Lilies can be grown outdoors. They should be planted in a shaded area that mimics their natural under-canopy habitat. - When is the best time to repot a Fire Lily?
Repot every 2-3 years, preferably in the spring. Choose a pot that’s slightly larger than the current one. - Are Fire Lilies susceptible to any pests?
They can attract pests like spider mites and aphids. Regular inspections and treatments with insecticidal soap or neem oil can help keep these pests at bay. - How do I propagate Fire Lilies?
Propagate by division. Separate offsets (baby plants) from the mother plant during repotting. - What should I do with the leaves turning yellow?
Yellow leaves can be a sign of over-watering or insufficient light. Adjust your watering schedule and ensure the plant is in a well-lit spot. - Are Fire Lilies toxic to pets?
Yes, they are toxic if ingested. Keep them out of reach of pets and children.

Kristine Moore
Forestry AuthorI'm Kristine Moore, a seasoned garden landscaping professional with over 30 years of experience. My extensive career has been dedicated to transforming outdoor spaces into stunning, sustainable landscapes. With a deep understanding of horticulture, design principles, and environmental stewardship, I have become a respected figure in the field, known for creating harmonious, visually appealing, and eco-friendly gardens. My commitment to excellence and continuous learning in landscaping trends and techniques has solidified my reputation as an expert in garden design and implementation.


Leave your comment