How to Grow Malabar Spinach: Tips for a Thriving Vine
- March 14, 2024
- 0 comment
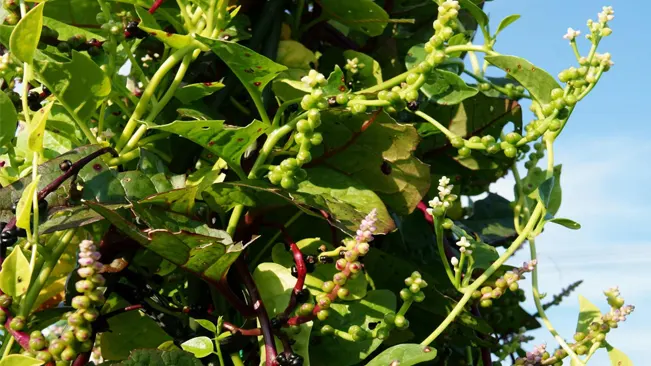
Malabar Spinach, also known as Basella alba, is a fast-growing, tropical vine that is popular for its edible leaves. Often used as a substitute for traditional spinach in warmer climates, this plant offers both nutritional benefits and a unique flavor. Whether you’re a seasoned gardener or a beginner, growing Malabar Spinach is an enjoyable and rewarding endeavor.
Health Benefits of Malabar Spinach
| Benefit | Description |
|---|---|
| Nutrient-Rich | High in vitamins A, C, iron, and calcium, offering significant nutritional benefits. |
| Low in Calories | An excellent choice for weight management due to its low-calorie content. |
| High in Fiber | Aids in digestion and promotes a healthy gut due to its high fiber content. |
| Antioxidant Properties | Contains antioxidants like beta-carotene and lutein, which help combat free radicals and support overall health. |
| Hydration | High water content helps in keeping the body hydrated. |
| Heart Health | The high potassium content helps in regulating blood pressure, beneficial for heart health. |
| Blood Sugar Regulation | The fiber in Malabar Spinach can aid in stabilizing blood sugar levels, making it suitable for diabetics. |
| Skin Health | Vitamins A and C are crucial for skin health, aiding in skin repair and regeneration. |
| Easy to Digest | Gentle on the stomach and easy to digest, making it a suitable green for people with digestive issues. |
| Versatile in Cooking | Can be used in various culinary preparations, adding nutritional value and flavor to meals. |
List on How To Grow Malabar Spinach
- Choosing the Right Spot
- Soil Preparation
- Planting
- Watering and Fertilizing
- Support and Training
- Pest and Disease Management
- Harvesting
Choosing the Right Spot
Malabar Spinach thrives in warm temperatures and needs plenty of sunlight. Choose a spot in your garden that receives at least 6 hours of sunlight daily. Although it tolerates partial shade, full sunlight is ideal for optimal growth.
Importance of Sunlight and Warmth
- Sunlight Requirement: Malabar Spinach is a sun-loving plant. It requires a minimum of 6 hours of sunlight daily. This requirement is pivotal because sunlight directly influences the plant’s growth rate, leaf production, and overall health. The more sunlight the plant receives, the more vigorously it will grow.
- Warmth Preference: This plant thrives in warm temperatures, ideally between 70°F and 90°F (21°C to 32°C). Malabar Spinach originates from tropical regions and thus prefers a warm climate. It’s sensitive to cold and will not grow well in temperatures that consistently fall below 50°F (10°C).
Choosing the Ideal Location
- Garden Orientation: Identify an area in your garden that gets ample sunlight. This could be a south-facing or west-facing part of your garden, depending on your location. These areas typically receive the most sunlight throughout the day.
- Avoiding Shady Areas: While Malabar Spinach can tolerate partial shade, too much shade can lead to leggy plants, fewer leaves, and a decreased rate of growth. It’s best to avoid planting it in heavily shaded areas where tall trees or structures block sunlight for most of the day.
- Reflective Surfaces: If your garden has limited sunlight, you can maximize light exposure by planting near reflective surfaces like white walls or fences. These surfaces can help bounce additional light onto your plants.
Microclimate Considerations
- Wind Protection: Malabar Spinach, being a climbing plant, can be affected by strong winds. Choose a spot that is somewhat protected from strong gusts which could damage the plant or its support structure.
- Soil Drainage: Even though Malabar Spinach loves moisture, it’s important to plant it in a spot where the soil drains well. Overly soggy conditions can lead to root rot and other issues.
- Companion Planting: Consider what you plant around Malabar Spinach. Companion plants should have similar sunlight and water needs. Plants like tomatoes or beans can be good neighbors.
Soil Preparation

Moisture Content
- Balanced Moisture: Malabar Spinach needs moist soil but not waterlogged. Consistent moisture is key, especially during dry spells and in the seedling stage.
- Mulching: Applying mulch can help retain soil moisture and regulate temperature. Organic mulches, like straw or wood chips, are preferred.
Soil Fertility
- Organic Matter: Adding organic matter such as compost or well-rotted manure significantly enhances soil fertility. This provides the plant with essential nutrients for growth.
- Nutrient-Rich Soil: Enriching the soil ensures that it has adequate levels of nitrogen, phosphorus, and potassium, which are vital for the vigorous growth of Malabar Spinach.
Drainage
- Well-Draining Soil: Good drainage is crucial to prevent root rot, a common problem in waterlogged soils. If you have clay-heavy soil, consider amending it with sand or organic matter to improve drainage.
- Raised Beds or Containers: If drainage is a concern in your garden, growing Malabar Spinach in raised beds or containers can be an effective solution. This allows better control over soil quality and drainage.
pH Level
- Slightly Acidic to Neutral pH: Malabar Spinach prefers a soil pH between 6.5 and 6.8. You can test your soil’s pH with a kit available at garden centers. If necessary, adjust the pH using lime (to raise pH) or sulfur (to lower pH).
Preparing the Soil
- Testing and Amending: Before planting, it’s a good practice to test your soil to understand its current state in terms of pH and nutrient levels. Based on the results, amend the soil accordingly.
- Tilling: Till the soil to a good depth, ideally 8-10 inches, to ensure it’s loose and aerated. This helps the roots penetrate the soil easily.
- Incorporating Organic Matter: Mix in compost or well-rotted manure thoroughly with the native soil. This not only improves fertility but also enhances soil structure and water retention capabilities.
Planting
Planting Malabar Spinach from Seeds
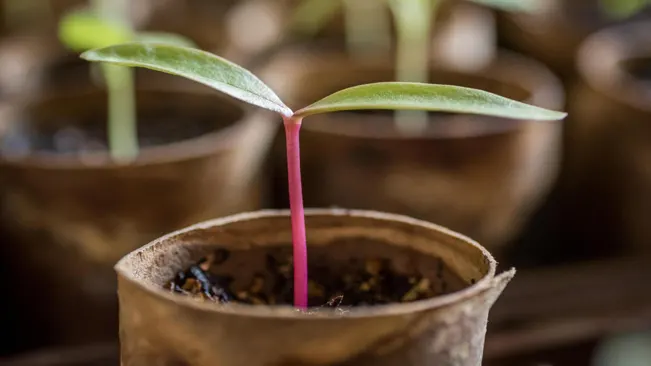
- Seed Selection: Choose high-quality seeds from a reputable source. There are two main varieties of Malabar Spinach: green and red-stemmed. Both are similar in taste and cultivation.
- Starting Indoors: Begin by sowing seeds indoors, ideally 6-8 weeks before the last expected frost date in your area. This head start is crucial because Malabar Spinach loves warm temperatures and cannot tolerate frost.
- Soil Preparation for Seedlings: Use a well-draining seed starting mix in small pots or a seed tray. The soil should be kept moist but not waterlogged.
- Seed Sowing: Plant the seeds about 1/4 inch deep in the soil. Cover lightly with soil and gently water.
- Germination: Place the seed pots in a warm, sunny spot or under grow lights. The seeds usually germinate within 10-20 days, depending on the temperature and conditions.
- Care of Seedlings: Keep the soil consistently moist and provide adequate light. If you’re using grow lights, ensure the young plants get about 12-16 hours of light per day.
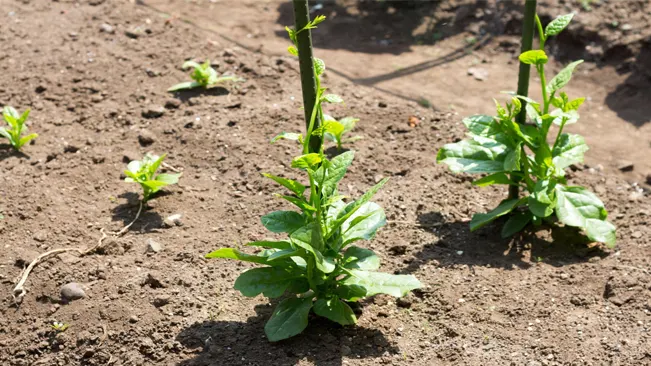
- Transplanting: Once the seedlings are a few inches tall and the outside temperatures are consistently above 70°F, it’s safe to transplant them outdoors. Harden off the seedlings by gradually exposing them to outdoor conditions over a week to reduce transplant shock.
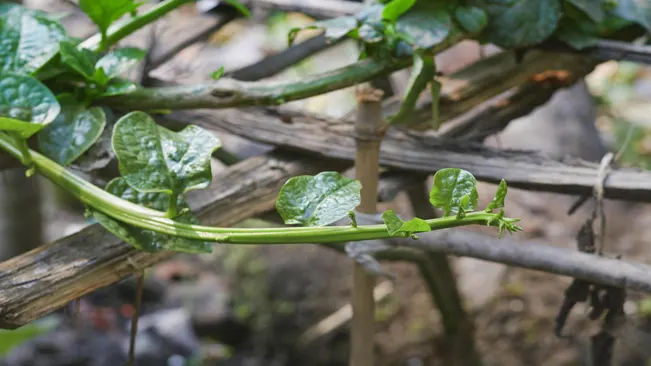
Planting Malabar Spinach from Stem Cuttings
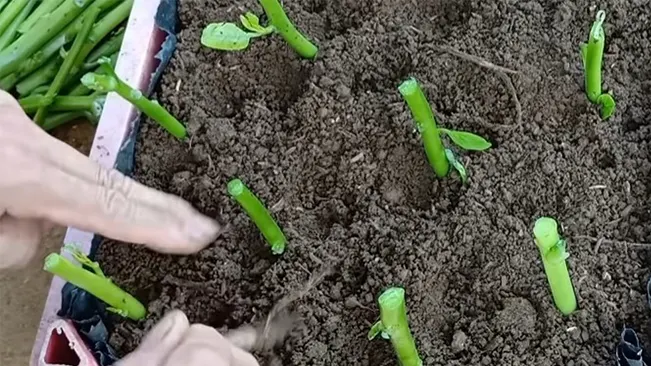
- Cutting Selection: Choose healthy, mature stems from an existing plant. The cuttings should be about 6-8 inches long.
- Preparing Cuttings: Remove the lower leaves, leaving a few at the top. This ensures the plant focuses its energy on root development.
- Planting Cuttings: Plant the cuttings directly in prepared garden soil or in pots. Ensure the soil is rich, moist, and well-draining. Insert the cutting deep enough so that it stands upright.
- Watering: Water the cuttings well after planting. The soil should be kept consistently moist but not soggy to encourage root growth.
- Root Development: In ideal conditions, roots will develop within a few weeks. You can check for root growth by gently tugging on the cutting. If there’s resistance, roots have likely formed.
Watering and Fertilizing
Watering Malabar Spinach
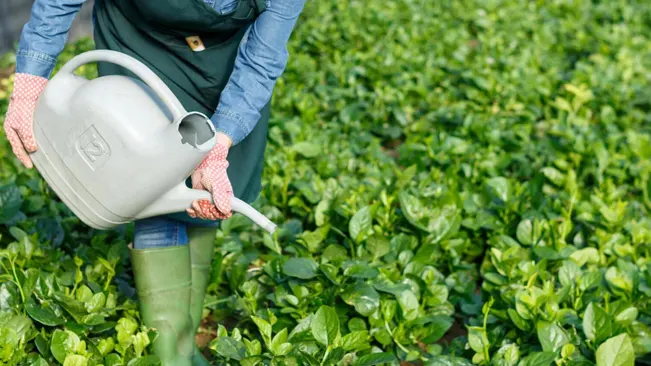
- Consistency is Key: Regular watering is crucial for Malabar Spinach. This plant prefers a consistent level of soil moisture.
- Amount of Water: Ensure the plant receives enough water to keep the soil moist, but not so much that the soil becomes soggy. Over-watering can lead to root rot and other fungal diseases.
- Monitoring Soil Moisture: Check the soil moisture regularly, especially during hot, dry periods. The top inch of the soil should feel moist. If it’s dry, it’s time to water.
- Watering Technique: When watering, do so at the base of the plant to avoid wetting the foliage, which can lead to fungal diseases. Drip irrigation or a soaker hose is ideal for this.
- Adjusting to Weather Conditions: In hot, dry weather, you may need to water more frequently. Conversely, reduce watering during rainy periods or cooler weather.
Fertilizing Malabar Spinach
- Type of Fertilizer: A balanced, water-soluble fertilizer is ideal for Malabar Spinach. Look for a fertilizer with equal parts nitrogen, phosphorus, and potassium (e.g., 10-10-10).
- Frequency of Application: Fertilize every 4-6 weeks during the growing season. This regular feeding supports the rapid growth and leaf production of the plant.
- How to Apply: Dilute the fertilizer according to the instructions on the label. Apply it to the soil around the plant, rather than directly on the plant itself.
- Avoid Over-fertilizing: While regular feeding is important, avoid over-fertilizing as it can harm the plant. Excessive growth prompted by too much fertilizer can lead to weaker plants more susceptible to pests and diseases.
- Organic Alternatives: If you prefer organic gardening, you can use compost or well-rotted manure as a fertilizer. These organic materials not only feed the plant but also improve soil health.
- Observing Plant Responses: Observe your Malabar Spinach as you fertilize. If the leaves are dark green and the plant is growing well, your fertilization routine is working. Yellowing leaves or slow growth may indicate the need for more frequent fertilization or a different fertilizer balance.
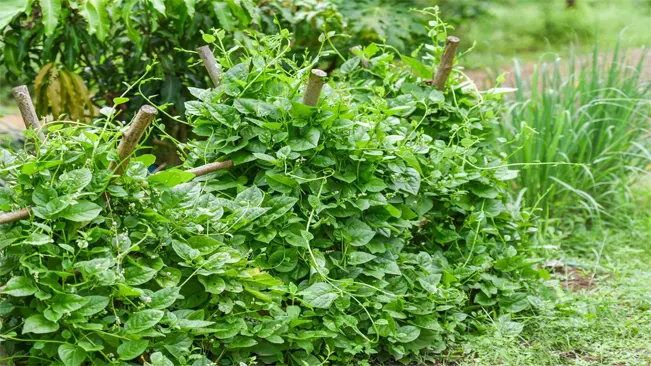
Support and Training
Choosing the Right Support
- Trellises: A popular choice for Malabar Spinach. Trellises can be made of wood, metal, or plastic and come in various designs. They should be sturdy enough to support the weight of the plant as it grows.
- Fences: If you have an existing fence, it can serve as an excellent support system. The vine will naturally start climbing the fence, making it an easy and convenient option.
- Poles and Stakes: These can be used, especially in pots or small garden spaces. Bamboo poles or sturdy stakes can be driven into the ground or a pot for the vine to climb.
- Arches and Pergolas: For a more decorative approach, using arches and pergolas not only supports the plant but also adds an aesthetic element to your garden.
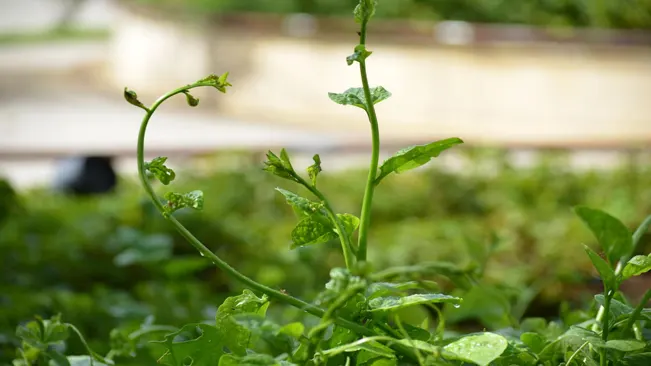
Training the Plant
- Initial Training: When your Malabar Spinach starts to climb, you may need to gently guide it towards the support structure. This can be done by loosely tying the vine to the support with soft plant ties or string.
- Encouraging Vertical Growth: As the plant grows, continue to train it upwards. This maximizes garden space and ensures the plant gets enough air circulation, reducing the risk of fungal diseases.
- Pruning: Occasionally, you might need to prune the plant to encourage more branching and fuller growth. This also helps in keeping the vine within the desired space and shape.
Benefits of Proper Support and Training
- Improved Air Circulation: Vertical growth enhances air circulation around the plant, which is crucial in preventing fungal diseases like mildew.
- Better Sunlight Exposure: Climbing vines receive more uniform sunlight exposure, which is vital for the plant’s growth and leaf production.
- Ease of Harvesting: It’s easier to harvest leaves from a vertically trained plant than from one sprawling on the ground.
- Aesthetic Appeal: A well-trained Malabar Spinach vine can be a beautiful addition to your garden, adding greenery and sometimes even acting as a natural privacy screen.
Pest and Disease Management
Malabar Spinach is relatively resistant to pests and diseases. However, watch out for common problems like aphids and leaf miners. Practice good hygiene and remove any affected leaves to control the spread.
Pest Management
- Aphids: These small, sap-sucking pests can be found on the undersides of leaves. They can cause leaf curling and stunted growth. You can often manage them by spraying a strong jet of water to dislodge the aphids or using insecticidal soap.
- Leaf Miners: These pests lay eggs inside the leaves, and their larvae create tunnel-like patterns inside the leaf tissue, harming the plant. Removing and destroying infected leaves can help control their spread. For severe infestations, you might need to use appropriate pesticides.
- Snails and Slugs: These pests are attracted to the moisture and tender leaves of Malabar Spinach. Hand-picking them off in the evening or using organic bait can help manage their population.
Disease Management
- Fungal Diseases: Conditions like powdery mildew or leaf spot can occur, especially in humid climates. Ensuring good air circulation by not overcrowding plants and using a fungicide can help manage these issues.
- Root Rot: This can happen if the soil is too waterlogged. Ensure proper drainage in your soil and be careful not to overwater.
Harvesting
Timing
- Growth Period: As mentioned, Malabar Spinach typically reaches a harvestable size about 55-70 days after planting. The exact timing can vary depending on the growing conditions like climate, sunlight, and soil quality.
- Continuous Harvest: One of the great aspects of Malabar Spinach is its ability to regrow leaves, allowing for a continuous harvest. Once the plant is established, you can regularly pick leaves as needed.
Method
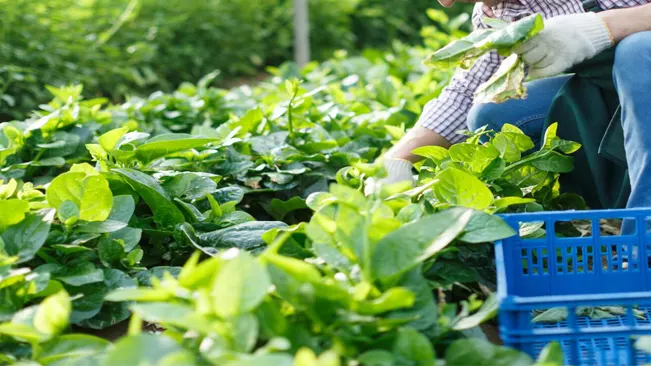
- Leaf Picking: Gently pick or snip off the leaves and tender stems using your fingers or a pair of scissors. Target the larger, outer leaves and allow the smaller, inner leaves to continue growing.
- Stem Cutting: You can also harvest stem cuttings. These cuttings, if planted, can root and grow into new plants, offering a way to propagate Malabar Spinach.
Tips for Best Harvest
- Regular Harvesting: Regular picking encourages the plant to produce more foliage. It’s a balance between harvesting enough to stimulate growth but not so much that the plant becomes stressed or overharvested.
- Morning Harvest: Collecting leaves in the morning when they are most hydrated can often result in crisper, fresher greens.
- Check for Pests: While harvesting, it’s a good opportunity to check for pests or diseases, as early detection can prevent larger issues.
Post-Harvest
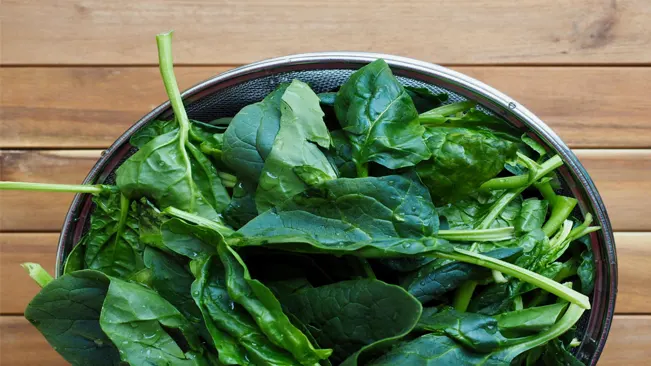
- Washing: Rinse the leaves and stems under cool water to remove any dirt or small insects.
- Storage: If you’re not using the leaves immediately, store them in a plastic bag in the refrigerator. They should stay fresh for a few days.
Culinary Use

- Fresh Malabar Spinach leaves can be a great addition to salads, sandwiches, or as a garnish.
- For cooked dishes, it works well in stir-fries, soups, and curries. It’s a versatile leaf that holds up well to heat, unlike regular spinach, which can wilt and lose texture.
Conclusion
Growing Malabar Spinach is a delightful experience for any gardener. It’s not only easy to grow but also provides a continual harvest throughout the growing season. With these tips in mind, you’re well on your way to enjoying fresh, homegrown Malabar Spinach in your meals.
FAQs (Frequently Asked Questions)
- What is Malabar Spinach?
Malabar Spinach (Basella alba) is a fast-growing, vining plant known for its edible, spinach-like leaves. It’s not true spinach, but offers similar uses in cooking. - What Climate is Best for Malabar Spinach?
It thrives in warm, tropical and subtropical climates. Malabar Spinach prefers temperatures above 70°F (21°C) and doesn’t tolerate frost. - How Do I Plant Malabar Spinach?
You can start it from seeds or stem cuttings. Plant seeds indoors and transplant them outside after the last frost, or plant stem cuttings directly into the soil. - How Much Sunlight Does Malabar Spinach Need?
It needs full sunlight (at least 6 hours a day). However, in very hot climates, partial shade can prevent leaf scorch. - What Type of Soil is Best?
Malabar Spinach prefers fertile, well-draining soil with a slightly acidic to neutral pH (6.5-7.0). Enrich the soil with compost before planting. - How Often Should I Water Malabar Spinach?
Water regularly to keep the soil consistently moist. Avoid over-watering, as it doesn’t like waterlogged soil. - Does Malabar Spinach Need Fertilizer?
Feed it every 4-6 weeks with a balanced, water-soluble fertilizer. Over-fertilizing can reduce leaf quality, so follow recommended doses. - How Do I Support Malabar Spinach Plants?
Provide a trellis, stakes, or a fence for the vine to climb on. This helps in maintaining airflow and reduces pest and disease issues. - When Can I Harvest Malabar Spinach?
You can start harvesting leaves about 55-70 days after planting. Pick leaves regularly to encourage new growth. - How Do I Store Harvested Malabar Spinach?
Wash the leaves and dry them gently. Store them in a plastic bag in the refrigerator, where they can stay fresh for a few days.

Kristine Moore
Forestry AuthorI'm Kristine Moore, a seasoned garden landscaping professional with over 30 years of experience. My extensive career has been dedicated to transforming outdoor spaces into stunning, sustainable landscapes. With a deep understanding of horticulture, design principles, and environmental stewardship, I have become a respected figure in the field, known for creating harmonious, visually appealing, and eco-friendly gardens. My commitment to excellence and continuous learning in landscaping trends and techniques has solidified my reputation as an expert in garden design and implementation.


Leave your comment