How to Grow Jicama: Your Easy Guide to Cultivating the Mexican Yam Bean
- March 15, 2024
- 0 comment
Discover how to grow Jicama, a versatile root vegetable known for its crunch and health benefits, with this guide covering the key steps for successful cultivation in your garden. Originating in Mexico, it’s also referred to as Mexican yam bean or Mexican turnip. Growing jicama can be a rewarding experience, as this plant is not only delicious but also boasts several health benefits. This guide will provide you with the essential steps to cultivate jicama in your own garden.
Benefits of Jicama
| Benefit | Description |
|---|---|
| High in Nutrients | Jicama is rich in important vitamins and minerals, including Vitamin C, potassium, and iron. |
| Low in Calories | It is a low-calorie food, making it a great choice for weight management and healthy eating. |
| High in Fiber | Jicama is an excellent source of dietary fiber, which is beneficial for digestive health. |
| Promotes Hydration | With a high water content, jicama helps in keeping the body hydrated. |
| Good for Heart Health | The fiber and potassium in jicama are good for heart health, as they can help lower blood pressure. |
| Boosts Immune System | The Vitamin C in jicama plays a role in boosting the immune system. |
| Improves Skin Health | Vitamin C is also important for collagen synthesis, which helps maintain healthy skin. |
| Antioxidant Properties | It contains antioxidants that help fight free radicals, reducing oxidative stress. |
| Supports Weight Loss | The low calorie and high fiber content can help in feeling full, aiding in weight loss. |
| Blood Sugar Control | The fiber in jicama helps regulate blood sugar levels, beneficial for those with diabetes. |
List on How To Grow Jicama
- Understanding Jicama
- Choosing the Right Location
- Planting the Seeds
- Caring for Your Jicama Plants
- Managing Pests and Diseases
- Harvesting Jicama
- Storing and Enjoying Your Harvest
Understanding Jicama
Before diving into the cultivation process, it’s essential to understand jicama’s growing conditions. Jicama is a tropical vine that requires a long growing season (about 5 to 9 months of frost-free weather), warm temperatures, and plenty of sunlight. It’s typically grown from the seeds of the jicama bean.
Plant Characteristics
- Growth Habit: Jicama is a perennial vine that can grow up to 4-6 meters in length in its native tropical environment. However, in non-tropical regions, it’s often grown as an annual.
- Leaves and Flowers: The plant features large, lobed leaves and produces blue or white flowers. However, these flowers rarely develop into fruit outside of its native region.
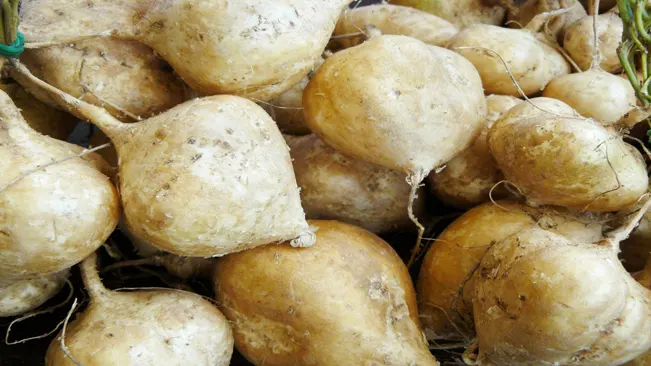
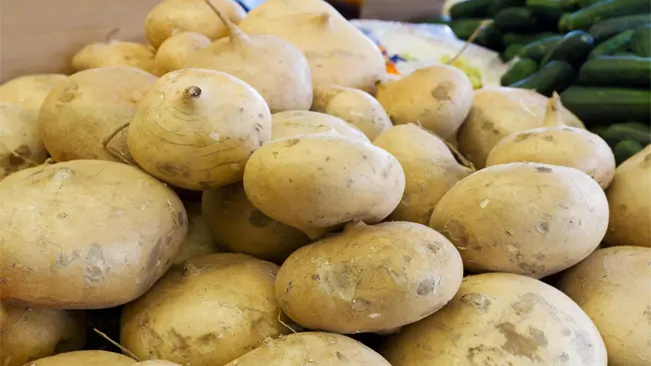
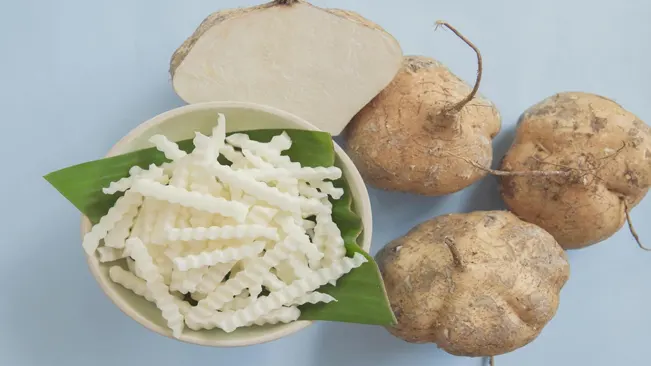
- Root System: The edible part of the plant is the tuberous root, which resembles a large turnip or a brown-skinned bulb. The skin is fibrous and typically peeled off before consumption.
Choosing the Right Location
Sunlight Requirements
- Jicama plants require full sun, which means the location should provide at least 6-8 hours of direct sunlight daily. Adequate sunlight is essential for the plant to grow vigorously and produce a good yield.
- Areas that receive partial shade might not be suitable, as the lack of sun can lead to poor growth and smaller tubers.
Temperature Range
- Jicama prefers warm climates, thriving best in temperatures ranging from 70°F to 90°F (21°C to 32°C). This range is crucial, especially during its growth period.
- In regions with cooler climates, it’s important to plant jicama after the risk of frost has passed. In some cases, using a greenhouse or row covers might be necessary to maintain the required temperature range.
Soil Conditions
- The soil should be well-drained, as jicama doesn’t tolerate waterlogged conditions well. Good drainage ensures that the roots get enough moisture without the risk of rot.
- Fertility is key. Enriching the soil with organic matter like compost can provide the necessary nutrients for the plant’s growth.
- A neutral to slightly acidic soil pH, between 6.0 and 7.0, is ideal for jicama. If the soil is too acidic or alkaline, it can be amended using lime or sulfur, respectively, to achieve the desired pH level.
Planting the Seeds
Starting Seeds Indoors
- Timing: Begin about 8 to 10 weeks before the last expected frost date in your area. This timing is crucial because jicama requires a long growing season, and starting indoors helps get a head start.
- Seed-Starting Mix and Pots: Choose small pots or seed trays and fill them with a high-quality seed-starting mix. This mix is designed to promote better germination and provides the right balance of drainage and water retention.
- Planting Depth: Plant the jicama seeds about an inch deep into the soil. This depth is ideal for ensuring the seeds have enough soil coverage to maintain moisture, but are not so deep that they struggle to germinate.
- Watering: Keep the soil consistently moist, but be careful to avoid waterlogging. Overly wet conditions can lead to seed rot. A good rule of thumb is to water just enough so that the soil is moist to the touch but not drenched.
- Temperature and Light: Jicama seeds need warm conditions to germinate. Maintain a temperature around 70°F to 80°F (21°C to 27°C). After germination, ensure the seedlings receive plenty of light, either from a natural source or grow lights, to prevent them from becoming leggy.
Transplanting Seedlings Outdoors
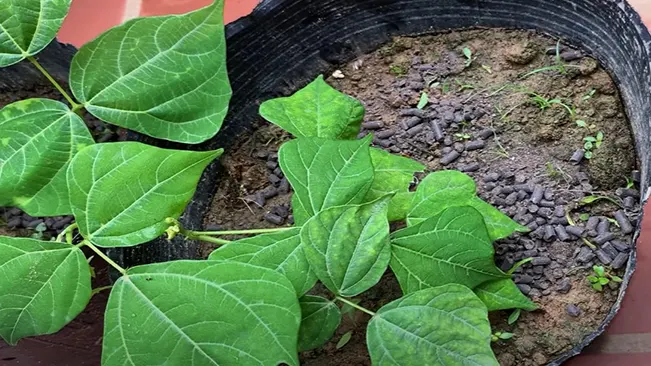
- Size for Transplanting: Once the seedlings reach about 4 inches in height and have a few sets of true leaves, they are ready to be moved outdoors.
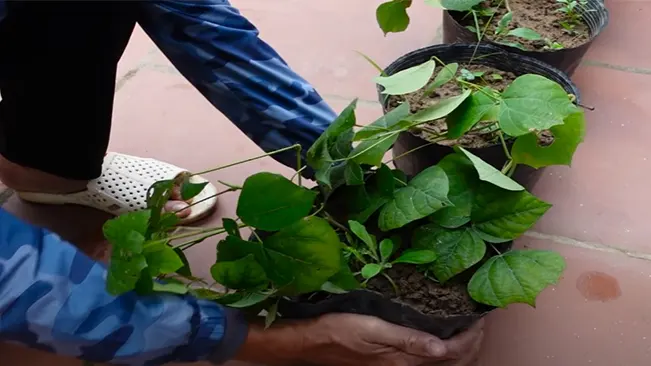
- Acclimation: Before transplanting, it’s important to acclimate the seedlings to outdoor conditions. This process, known as hardening off, involves gradually exposing the plants to outdoor conditions over a week. Begin by placing them outside in a shaded area for a few hours each day, gradually increasing their exposure to sunlight and outdoor temperatures.
- Transplanting Time: Transplant after all danger of frost has passed and the soil has warmed up.
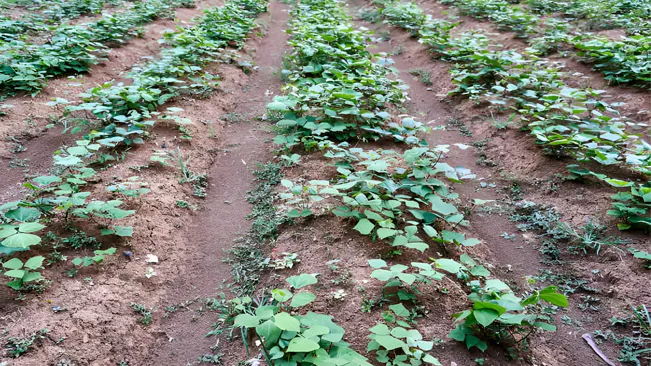
- Spacing: Space the plants about 8 inches apart in rows. This spacing gives each plant enough room to grow and ensures adequate air circulation, which helps prevent fungal diseases.
- Soil and Location: Choose a sunny location with well-drained soil. Jicama prefers a slightly acidic to neutral soil pH (around 6.0 to 7.0).
Caring for Your Jicama Plants
Watering Practices
- Consistency: It’s vital to maintain a consistent watering schedule. Jicama plants require a steady supply of moisture, especially during the growing phase. The goal is to keep the soil moist but not soggy.
- Monitoring Soil Moisture: Check the soil moisture regularly. A simple method is to feel the soil a few inches below the surface; if it’s dry, it’s time to water.
- Watering Depth: When watering, do so deeply. This encourages the roots to grow deeper into the soil, which can improve the plant’s drought resistance and overall health.
- Avoiding Over-watering: Over-watering can be detrimental, leading to root rot and other fungal diseases. Ensure good drainage in the soil to prevent water from pooling around the roots.
Mulching
- Purpose: Mulching serves multiple purposes. It helps in retaining soil moisture, reducing the frequency of watering. It also suppresses weed growth, which can compete with jicama plants for nutrients and water.
- Types of Mulch: Organic mulches like straw, bark, or compost are beneficial. They not only maintain moisture but also gradually break down, adding nutrients to the soil.
- Application: Apply a layer of mulch around the base of the plants, taking care not to pile it directly against the stems to avoid rot.
Fertilization
- Fertilizer Choice: A balanced, organic fertilizer is recommended. Look for one that has equal parts nitrogen, phosphorus, and potassium (e.g., 10-10-10 NPK ratio).
- Frequency: Fertilizing every four to six weeks is generally sufficient. This helps in providing the necessary nutrients throughout the growth period.
- Application Method: Apply the fertilizer according to the instructions on the package. It’s usually applied at the base of the plant and gently mixed into the soil, followed by watering to help it seep into the soil.
Managing Pests and Diseases
Jicama can be susceptible to pests like aphids and diseases such as root rot. Regularly check your plants and use organic pest control methods if necessary. Good air circulation and proper watering practices can minimize disease risks.
Managing Pests
- Aphids: These small, sap-sucking pests can cause damage by weakening the plant and promoting the growth of sooty mold.
- Prevention: Encourage beneficial insects like ladybugs and lacewings that prey on aphids.
- Control: Use a strong water spray to dislodge aphids or apply organic insecticidal soap.
- Other Insects: Keep an eye out for other pests such as beetles or caterpillars that might damage the plant.
- Prevention: Regular inspections and maintaining general garden cleanliness can prevent infestations.
- Control: Physically remove pests or use organic pesticides.
Managing Diseases
- Root Rot: Over-watering can lead to root rot, a condition where the roots start to decay.
- Prevention: Ensure well-drained soil and water the plant only when the top inch of soil feels dry.
- Control: If root rot is detected early, reducing watering and improving drainage can help. In severe cases, the affected plant should be removed to prevent the spread.
- Fungal Diseases: These can affect the foliage, especially in humid conditions.
- Prevention: Space the plants properly to ensure good air circulation. Avoid overhead watering to keep the foliage dry.
- Control: Use organic fungicides and remove affected parts of the plant.
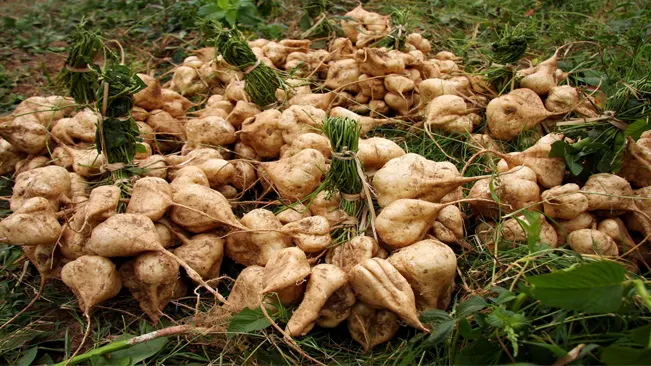
Harvesting Jicama
Jicama is ready to harvest when the vines begin to wither, usually about 5 to 9 months after planting. Gently dig around the plant to unearth the tuber. Jicama can be quite large, so be careful not to damage it during harvesting.
Timing the Harvest
- The most crucial aspect of harvesting jicama is timing. As mentioned, the typical indicator that jicama is ready for harvest is the withering of its vines. This usually occurs around 5 to 9 months after planting. It’s important to note that harvesting too early may result in underdeveloped tubers, while waiting too long can lead to overly large and woody tubers.
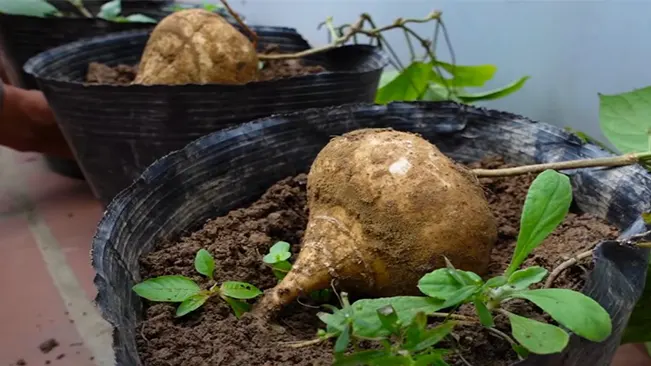
Checking for Maturity
- To check if a jicama tuber is ready for harvest, you can gently unearth a small part of one tuber and check its size. Mature jicama tubers are typically the size of a large turnip or a small potato. They should feel firm and be free of blemishes or cracks.
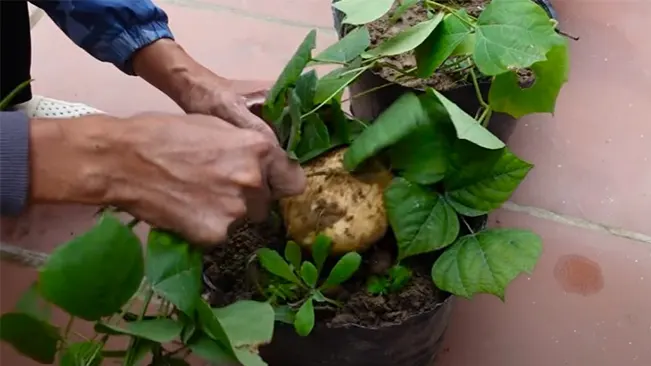
Harvesting Technique
- Use a garden fork or a spade to gently loosen the soil around the plant. Start digging a few inches away from the main stem to avoid accidentally slicing through the tuber. Carefully lift the tuber out of the soil. Jicama tubers can grow quite large and deep, so take your time to dig around and underneath the tuber.
Handling the Tubers
- Handle the harvested tubers gently to prevent bruising. Even minor damages can lead to quicker spoilage. Shake off any excess soil but avoid washing the tubers until you are ready to use them, as moisture can promote decay.
Curing and Storing
- While jicama doesn’t require curing like some other root vegetables, it’s recommended to let them dry for a few hours in a shaded, well-ventilated area to remove excess soil and moisture. Store them in a cool, dry place. Properly stored jicama can last for several weeks.
Usage Tips
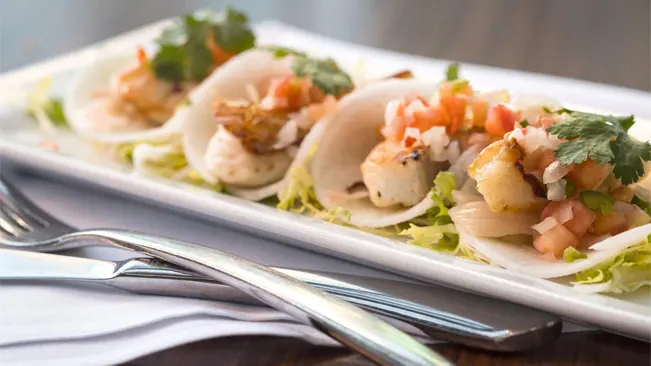
- Once harvested, jicama can be eaten raw or cooked. Its crunchy texture and mildly sweet flavor make it versatile in various culinary applications, from salads to stir-fries.
Disposal of Plant Parts
- Remember, only the root part of the jicama plant is edible. The seeds, leaves, and vines of the plant are toxic and should be disposed of safely.
Storing and Enjoying Your Harvest
After harvesting, let the jicama dry in a cool, dark place for a few days. Once dried, it can be stored in a cool, dry place for several weeks. Jicama can be eaten raw, sliced into salads, or cooked in various dishes.
Storing Jicama
After you’ve harvested your jicama, it’s essential to store it properly to maintain its freshness and flavor. Here are some tips for storing jicama:
- Drying: Once you harvest the jicama, clean off any soil gently without damaging the skin. Let them dry in a cool, dark, and well-ventilated place for a few days. This process helps to cure the skin, making it better for storage.
- Choosing the Right Environment: After drying, store the jicama in a cool, dry place. An ideal storage location would be a cellar, basement, or a cool pantry. Avoid storing it in the refrigerator as the cold temperature can affect its texture and taste.
- Shelf Life: Properly stored jicama can last for several weeks. However, it’s best used within a couple of weeks for optimal taste and texture.
Enjoying Your Jicama Harvest
Jicama is a versatile vegetable that can be enjoyed in numerous ways. Here are some ideas:
Raw in Salads
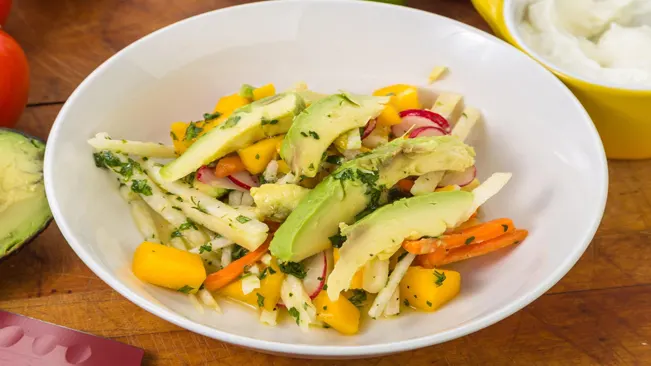
- Jicama has a crunchy texture and a slightly sweet, nutty flavor. It’s great raw in salads, adding a refreshing crunch. Slice or julienne it and mix with other salad ingredients.
Cooked Dishes
- You can also cook jicama. It can be baked, boiled, or stir-fried. It maintains its crunchy texture even when cooked, which makes it a great addition to stir-fries, soups, and stews.
Snack Option
- Simply cut jicama into sticks and enjoy them as a snack. They can be dipped in hummus or dressed with lime juice and chili powder for a zesty snack.
Jicama Slaw
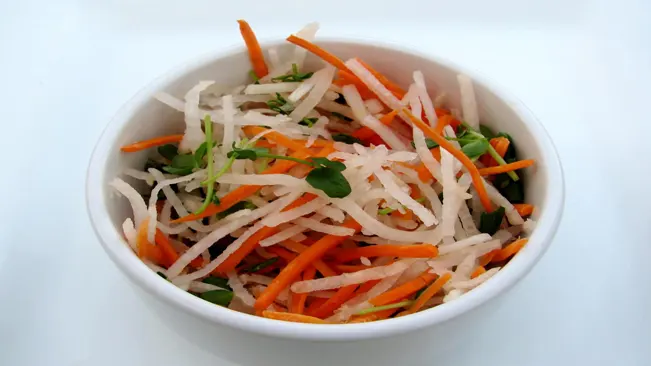
- A popular way to use jicama is in a slaw. Combine it with cabbage, carrot, and a tangy dressing for a delicious side dish.
Smoothies and Juices
- For a refreshing twist, you can add jicama to your smoothies or juices. It adds fiber and a mild sweet flavor.
Health Benefits: Don’t forget that jicama is not only tasty but also packed with nutrients. It’s low in calories and high in fiber, vitamin C, and potassium, making it a healthy addition to your diet.
Related Post
- How to Grow Cinnamon Basil: A Beginner’s Guide to Aromatic Gardening
- How to Grow Roma Tomatoes: Expert Tips for a Lush Homegrown Harvest
- How to Grow Blackberries: Easy Steps to Grow and Nurture Your Own
Conclusion
Growing jicama can be a fun and rewarding process. With the right conditions and care, you can enjoy this crisp, sweet-tasting vegetable from your own garden. Whether you’re a seasoned gardener or a beginner, the unique flavor and health benefits of jicama make it a worthy addition to any garden.
FAQs (Frequently Asked Questions)
- What is the best time to plant jicama?
Jicama should be planted about 8 to 10 weeks before the last expected frost. It requires a long, frost-free growing season of about 5 to 9 months. - Can I grow jicama in a cooler climate?
Jicama prefers warm temperatures, so it’s challenging to grow in cooler climates. However, you can start seeds indoors and use a greenhouse or similar protection to extend the growing season. - How much sun does jicama need?
Jicama plants need full sun, which means at least 6 to 8 hours of direct sunlight each day. - What type of soil is best for growing jicama?
Well-drained, fertile soil rich in organic matter is ideal. The soil pH should be between 6.0 and 7.0. - How do I water jicama plants?
Water regularly to keep the soil consistently moist but not waterlogged. Over-watering can lead to root rot, so it’s important to balance moisture levels. - Do jicama plants need fertilization?
Yes, feeding the plants with a balanced, organic fertilizer every four to six weeks helps promote healthy growth. - How do I protect jicama from pests and diseases?
Regularly inspect your plants for pests like aphids and diseases such as root rot. Employ organic pest control methods and ensure good air circulation and proper watering practices. - When is jicama ready to harvest?
Jicama is typically ready for harvest when the vines begin to wither, which is usually about 5 to 9 months after planting. - How do I store harvested jicama?
After harvesting, allow the jicama to dry for a few days in a cool, dark place. Once dried, store in a cool, dry place for several weeks. - Can I eat the leaves or seeds of the jicama plant?
No, only the root part of the jicama plant is edible. The seeds, leaves, and vines of the plant are toxic and should not be consumed.

Kristine Moore
Forestry AuthorI'm Kristine Moore, a seasoned garden landscaping professional with over 30 years of experience. My extensive career has been dedicated to transforming outdoor spaces into stunning, sustainable landscapes. With a deep understanding of horticulture, design principles, and environmental stewardship, I have become a respected figure in the field, known for creating harmonious, visually appealing, and eco-friendly gardens. My commitment to excellence and continuous learning in landscaping trends and techniques has solidified my reputation as an expert in garden design and implementation.


Leave your comment